
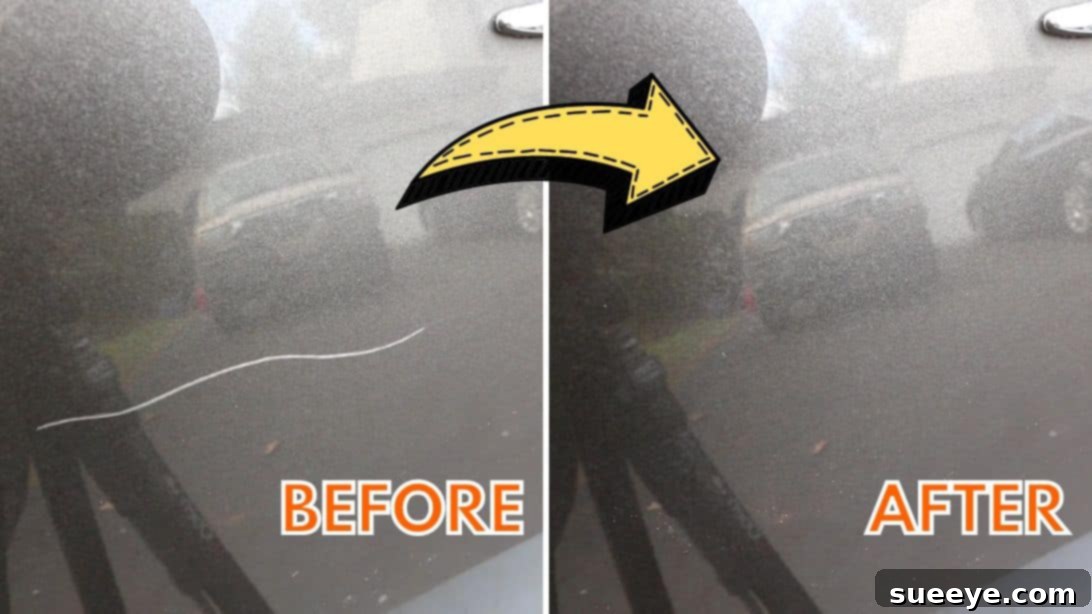
Car ownership often comes with the inevitable headache of unsightly scratches. Whether it’s a rogue shopping cart, an accidental scrape against a bush, or simply the wear and tear of daily driving, these minor imperfections can diminish your vehicle’s appearance and even its resale value. The good news? For many common light scratches, a permanent and cost-effective repair is entirely within your reach. You don’t always need to spend a fortune at a professional body shop. With the right materials and a few simple steps, you can restore your car’s smooth, pristine finish right in your own garage. This comprehensive guide will walk you through the process, drawing inspiration from expert techniques demonstrated by ChrisFix on YouTube, ensuring you achieve professional-looking results.
Before diving into the repair process, it’s helpful to understand the anatomy of your car’s paint finish. Most modern vehicles feature a multi-layer paint system: a primer layer, followed by the base coat (which gives the car its color), and finally, a clear coat. The clear coat is a transparent, protective layer that provides gloss and shields the underlying paint from UV rays, minor abrasions, and environmental contaminants. Most light scratches are confined to this clear coat, making them ideal candidates for DIY repair. Deeper scratches that penetrate the base coat or even the primer will require more advanced techniques or professional attention, but don’t fret – the majority of common scratches can be fixed effectively at home.
This guide empowers you to tackle those annoying blemishes with confidence. We’ll cover everything from assessing the scratch depth to selecting the right abrasives, polishing, and protecting your newly restored paint. By following these detailed instructions, you’ll not only save money but also gain a satisfying sense of accomplishment in revitalizing your vehicle’s aesthetic appeal. Let’s gather our tools and get ready to transform your car’s appearance, erasing those imperfections as if they were never there.
Essential Materials for Permanent Scratch Removal
To ensure a successful and lasting repair, gathering all your materials beforehand is crucial. Each item plays a specific role in the process, from gentle cleaning to final protection. Using high-quality products will always yield better results and make the job easier. Here’s what you’ll need:
- Automotive Soap: Essential for thoroughly cleaning the work area, removing dirt, grime, and old waxes that could interfere with the repair process. A dedicated car wash soap is formulated to be gentle on paint.
- Clean Water: For diluting soap, rinsing, and lubricating during sanding. Always use clean water to prevent introducing new contaminants.
- High-Quality Microfiber Cloths: Several are needed for washing, wiping, applying polish, and buffing. Ensure they are clean, soft, and lint-free to avoid creating new scratches. Designate specific cloths for washing, polishing, and waxing.
- 3000-Grit Wet/Dry Sandpaper: This fine-grit sandpaper is used for initially leveling scratches that are slightly deeper but still within the clear coat. It’s crucial for carefully abrading the clear coat to remove the scratch.
- 5000-Grit Wet/Dry Sandpaper: An even finer grit sandpaper, used after 3000-grit to refine the sanding marks and smooth the clear coat, preparing it for polishing. This step is vital for removing the haziness caused by coarser grits.
- Sanding Sponge or Foam Block: Wrapping your sandpaper around a soft sponge or foam block ensures even pressure distribution across the surface. This prevents uneven sanding and potential damage to the paint contour.
- Automotive Polish (Compound or Finishing Polish): An abrasive liquid that removes very fine scratches and swirl marks, restoring clarity and gloss to the clear coat. The type of polish (compound for more aggressive removal, finishing polish for fine refinement) depends on the clarity needed.
- Automotive Wax (Paste or Sealant): The final protective layer. Wax or a paint sealant creates a barrier against environmental elements, enhances shine, and makes future cleaning easier.
Step-by-Step Guide to Permanently Removing Car Scratches
Achieving a flawless, scratch-free finish requires patience and precision. Follow these steps meticulously, and you’ll be amazed at the results. Remember to work in a well-lit area, preferably out of direct sunlight, to properly see your progress.
Step 1: Assessing the Scratch Depth and Initial Sanding
The first crucial step is to accurately assess the depth of the scratch, as this dictates the repair approach. Begin by preparing a soapy water mixture using your automotive soap and clean water. Generously spray the scratch with this mixture and immediately wipe it clean with a fresh microfiber cloth. Observe carefully: if the scratch temporarily disappears while wet but reappears once the area dries, it signifies a light clear coat scratch—an ideal candidate for this method. However, if the scratch remains visible even when wet, it likely extends deeper into the base coat or primer, and this DIY method may not be sufficient, requiring professional intervention.
Before proceeding, inspect your microfiber cloths. It’s a common oversight, but the small tags or labels on towels can be surprisingly abrasive and may inadvertently cause new scratches. Always tear off any tags from your microfiber cloths before they come into contact with your car’s paint. This simple precaution ensures a smooth, scratch-free repair process.
Next, meticulously tape off the area surrounding the scratch. Apply painter’s tape about half an inch away from the scratch on all sides. This masking tape acts as a protective barrier for the healthy paint around the imperfection and provides a clear boundary for your work. Carefully tear or cut the ends of the tape so they align precisely with the beginning and end points of the scratch. This targeted approach ensures you only work on the damaged area, minimizing the risk of affecting the surrounding clear coat.
Now, determine which sandpaper grit to start with. A good test is to gently run your fingernail across the scratch. If your fingernail catches in the scratch, indicating a slightly deeper clear coat imperfection, begin with 3000-grit wet/dry sandpaper. If your fingernail does not catch, suggesting a very shallow clear coat mark, you can skip directly to 5000-grit sandpaper. For those starting with 3000-grit, remember that proper lubrication is key to preventing further damage. Spray the masked area generously with your soapy water mixture, ensuring the surface remains wet throughout the sanding process. Gently wipe off any excess, leaving a thin film of water.
Wrap the 3000-grit sandpaper around a soft sanding sponge or foam block. This helps to distribute pressure evenly and conforms better to the curves of your car’s body panels. Begin sanding the scratch with medium, even pressure, using a motion that is perpendicular or “against the grain” of the scratch. The goal here is to carefully abrade the clear coat down to the bottom of the scratch, effectively removing the imperfection. Work in short, controlled strokes. Periodically stop, re-spray the area with soapy water, and wipe it clean to check your progress. You’ll notice the clear coat becoming hazy – this is normal and indicates the abrasive action of the sandpaper. Continue sanding until the scratch is no longer visible, taking care not to over-sand, which could lead to burning through the clear coat. Patience is paramount in this step.
Step 2: Refining the Surface and Restoring Shine
Once the initial scratch is removed and the area appears uniformly hazy, it’s time to refine the surface. Carefully reposition your masking tape outward by another half an inch. This expands your working area slightly, ensuring a seamless blend between the repaired spot and the surrounding original paint. Now, switch to the 5000-grit wet/dry sandpaper, again wrapped around your sanding sponge for even pressure. Apply a generous amount of soapy water to the area, keeping it lubricated. This finer grit sandpaper is crucial for removing the more aggressive sanding marks left by the 3000-grit, creating a much smoother foundation for polishing. Instead of perpendicular motions, use a circular motion with light to medium pressure. Work the 5000-grit sandpaper over the entire taped area, ensuring you blend it smoothly with the surrounding paint. This step progressively refines the clear coat, making the hazy appearance more uniform and less noticeable.
After completing the 5000-grit sanding, thoroughly clean the entire area with fresh soapy water and a clean microfiber cloth. Wipe it down completely, ensuring all sanding residue, dust, and soap film are removed. The surface should be clean and dry before moving to the next stage. This meticulous cleaning prevents any remaining debris from scratching the paint during the polishing phase.
Now, it’s time to bring back the shine with automotive polish. Apply a small amount of polish onto a clean, dedicated microfiber towel. Using medium to high pressure, rub the polish into the sanded area with a circular motion. The polish contains microscopic abrasives that will remove the ultra-fine sanding marks left by the 5000-grit sandpaper, restoring the clear coat’s transparency and gloss. Work in small sections if necessary, ensuring thorough coverage. You’ll notice the haze gradually disappearing, replaced by a deep, reflective shine. Continue polishing until the area matches the surrounding paint’s clarity and gloss. Once satisfied, use a clean, dry part of the microfiber towel to buff the area to a brilliant, streak-free finish.
The final step in the restoration process is to protect your newly repaired and polished surface with automotive wax. Wax or a synthetic paint sealant adds a crucial layer of protection, shielding the clear coat from UV rays, environmental contaminants, and minor abrasions, while also enhancing the depth and luster of your car’s paint. Apply a thin, even layer of your chosen paste wax or sealant along the repaired area, extending slightly beyond the polished zone to ensure full coverage. Allow the wax to cure for the time recommended by the product manufacturer (typically a minute or two, or until it hazes over). Once cured, use another clean, soft microfiber towel to gently wipe off the wax, buffing the area to a deep, protective shine. This final step not only locks in the beautiful finish but also makes future cleaning and maintenance easier, ensuring your car looks its best for longer.
Advanced Tips for Flawless Results
- Work in Good Lighting: Natural daylight or bright, uniform artificial lighting is essential to accurately see scratches and monitor your progress, preventing missed spots or over-sanding.
- Patience is Key: Rushing any step, especially sanding or polishing, can lead to uneven results or damage. Take your time, check your work frequently, and don’t be afraid to re-do a step if needed.
- Keep it Wet: During sanding, always ensure the surface is thoroughly lubricated with soapy water. Dry sanding can generate excessive heat and cause irreversible damage to your clear coat.
- Cleanliness is Paramount: Use fresh, clean microfiber towels for each step (washing, polishing, waxing). Any trapped dirt or debris can act as an abrasive and create new scratches.
- Use Proper Pressure: Start with medium pressure during initial sanding, reducing it as the scratch diminishes. For polishing and waxing, consistent, even pressure yields the best results.
- Feather the Edges: When polishing and waxing, extend your application slightly beyond the repaired area to blend seamlessly with the original paint, preventing any harsh lines or noticeable transitions.
When to Consider Professional Assistance
While this DIY method is incredibly effective for light to medium clear coat scratches, it’s important to recognize its limitations. If a scratch is deep enough to have visibly penetrated the base coat (revealing a different color underneath, or the bare metal/primer), or if the damaged area is very large, extensive, or on a critical body line, professional repair is highly recommended. Automotive paint experts have access to specialized tools, paint matching systems, and techniques that can restore severely damaged areas to factory specifications, often without requiring a full panel repaint. Knowing when to call in the professionals can save you time, effort, and potentially prevent further damage.
Maintaining Your Vehicle’s Finish
Once you’ve successfully removed those pesky scratches and restored your car’s shine, ongoing maintenance is key to preserving your hard work and preventing future imperfections. Regular washing with pH-neutral car soap and soft microfiber mitts will help prevent dirt and grime buildup that can cause swirl marks. Applying a fresh coat of wax or sealant every few months will provide an extra layer of protection against environmental damage and minor abrasions. Parking in shaded areas or using a car cover can also protect your paint from harsh UV rays and accidental contact. By adopting these simple habits, you can keep your car looking showroom-ready and minimize the chances of new scratches appearing.
You’ve now mastered the art of permanent car scratch removal for minor imperfections. This detailed guide, inspired by the expertise of ChrisFix on YouTube, equips you with the knowledge and steps to tackle those unsightly blemishes with confidence. Remember, practice makes perfect, and with each successful repair, you’ll gain more proficiency. Enjoy your beautifully restored vehicle, gleaming and free from those annoying scratches! For more invaluable automotive tips and DIY tutorials, be sure to follow and subscribe to ChrisFix’s channel.