
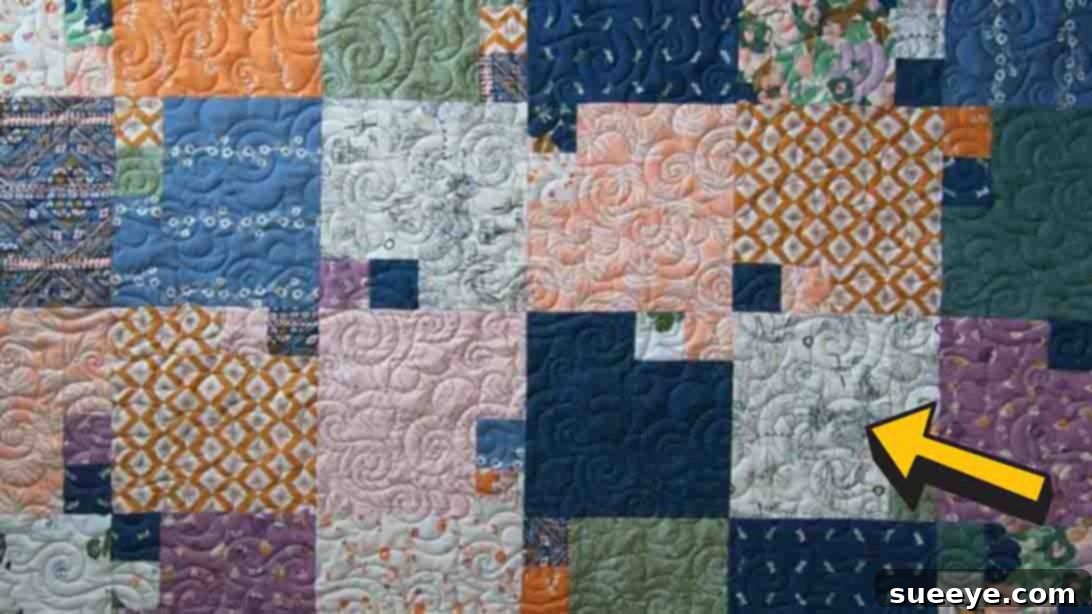
Are you searching for the perfect quilt project to bring your beautiful layer cake stash to life? Look no further! The enchanting Prince’s Pond quilt pattern, brilliantly showcased by Moonkin Stitchery on YouTube, is an absolute gem. This pattern is not just a project; it’s an invitation to a delightful quilting journey that promises stunning results with surprising ease. Whether you’re a complete novice picking up a rotary cutter for the very first time or a seasoned quilter seeking a satisfyingly quick make, this design will capture your heart and imagination.
What makes the Prince’s Pond quilt truly special is its clever design and its incredible efficiency. It transforms a simple collection of pre-cut 10-inch fabric squares – commonly known as layer cakes – into a visually captivating masterpiece. Imagine creating a gorgeous, finished quilt in what feels like no time at all, all while utilizing those irresistible fabric bundles you’ve been saving. This tutorial breaks down every step, ensuring a smooth and enjoyable process from start to finish. Get ready to turn your fabric dreams into a tangible, cozy reality!
RELATED: Whispering Winds Layer Cake Quilt Pattern
Why Choose the Prince’s Pond Layer Cake Quilt?
The Prince’s Pond pattern stands out for several compelling reasons, making it a favorite among the quilting community. Firstly, its reliance on layer cakes streamlines the fabric selection and cutting process dramatically. Layer cakes come with 42 perfectly coordinating 10-inch squares, eliminating the daunting task of choosing individual fabrics and cutting numerous pieces from yardage. This pre-coordinated aspect ensures a harmonious color palette and design, taking the guesswork out of fabric pairing.
Secondly, the simplicity of the block construction is a huge advantage, particularly for beginners. The design utilizes straightforward cuts and seams, building each block from just a few basic shapes. This not only minimizes potential errors but also allows quilters to quickly gain confidence in their cutting and sewing skills. The repetitive nature of creating identical blocks also lends itself perfectly to chain piecing, a technique that significantly speeds up the assembly process.
Beyond its ease, the Prince’s Pond quilt yields an incredibly elegant and dynamic visual effect. The strategic rotation of the blocks creates an intriguing interplay of lines and patterns, reminiscent of light dancing on water – hence the charming name. It’s a design that looks far more intricate than it actually is, making it an excellent choice for handmade gifts that are sure to impress, or as a quick addition to your home decor. From baby quilts to lap throws, this versatile pattern adapts beautifully to various sizes and occasions.
Essential Materials for Your Prince’s Pond Quilt
Before diving into the fun of cutting and sewing, ensure you have all your tools and materials ready. Having everything organized will make your quilting experience much more efficient and enjoyable.
Materials You’ll Need:
- One Layer Cake: Typically a pack of 42 pre-cut 10-inch x 10-inch fabric squares. Choose a collection with colors and patterns you love, as these will form the foundation of your quilt’s aesthetic.
- Rotary Cutter: A sharp rotary cutter is paramount for precise, clean cuts. Consider having extra blades on hand, as dull blades can lead to frayed edges and inaccurate sizing.
- Quilting Ruler: A clear acrylic quilting ruler, at least 12-1/2 inches long, will be essential for making accurate cuts from your layer cake squares.
- Self-Healing Cutting Mat: Protect your work surface and prolong the life of your rotary blade with a good quality self-healing cutting mat. A large mat (e.g., 24×36 inches) offers ample space for cutting.
- Sewing Machine: Any standard sewing machine capable of a straight stitch will work perfectly. Ensure it’s in good working order and you have fresh needles.
- Thread: A good quality polyester or cotton thread that matches or subtly blends with your fabrics.
- Fabric Scissors: For snipping threads and other small cuts.
- Iron and Ironing Board: Crucial for pressing seams accurately, which is key to a flat, professional-looking quilt.
- Pins or Fabric Clips: To hold fabric pieces together securely before sewing.
- Optional: Seam ripper (every quilter needs one!), fabric marker, design wall or open floor space for layout.
Step-by-Step Directions: Crafting Your Prince’s Pond Quilt
Follow these detailed instructions from Moonkin Stitchery’s excellent video tutorial to construct your beautiful Prince’s Pond quilt. Remember, precision in cutting and a consistent 1/4-inch seam allowance are your best friends here!
Step 1: Preparing Your Fabric & Assembling Individual Blocks
This initial phase focuses on transforming your layer cake squares into the unique components that form each quilt block. Accuracy here will ensure your blocks fit together perfectly later on.
- Cutting Your Layer Cake Squares: For each of your 42 pre-cut 10-inch layer cake squares, you will make specific cuts. Take your time with each cut, ensuring your ruler is firmly in place and your rotary cutter blade is sharp.
- Cut one 7-inch x 9-inch rectangle.
- Cut one 2 1/2-inch x 5-inch rectangle.
- Cut two 2 1/2-inch x 2 1/2-inch squares.
Carefully repeat these precise cuts for all 42 of your 10-inch squares. Once all pieces are cut, organize them. Keep the larger 7×9-inch and 2.5×5-inch rectangles grouped by their original print. However, the smaller 2.5-inch squares should be mixed up thoroughly. This intentional mixing of the small squares is what creates the charming “scrappy” effect and adds visual interest to the finished quilt.
- Sewing the Block Components: Now, you’ll reassemble these pieces to form 42 individual quilt blocks. A consistent 1/4-inch seam allowance is critical for accurate block sizing.
- Begin by taking two of your mixed 2 1/2-inch squares. Place them right sides together and sew them along one edge with a 1/4-inch seam allowance. Press this seam open or to one side, whichever you prefer, though pressing open often helps reduce bulk. You now have a small pieced unit.
- Next, take this newly sewn 2 1/2-inch square unit and, with right sides together, sew it to one of your 2 1/2-inch x 5-inch rectangles (keeping this rectangle from the original print). Align the edges carefully and sew with a 1/4-inch seam. Press the seam. You will now have a longer pieced unit.
- Finally, take this longer pieced unit and, again with right sides together, sew it to the larger 7-inch x 9-inch rectangle (from the original print). Match the edges, sew with your consistent 1/4-inch seam allowance, and press the final seam. You have now completed one 9-inch square quilt block!
Repeat these precise steps for all 42 sets of cut pieces until you have 42 beautifully constructed 9-inch square quilt blocks. Chain piecing can significantly speed up this process: sew all your 2.5″ squares together in a chain, then snip and press, then attach all the 2.5″x5″ rectangles in a chain, and so on.
Step 2: Assembling Your Quilt Top
With all 42 blocks pieced and pressed, the magic of the Prince’s Pond design truly begins to emerge as you arrange them into the final quilt top.
- Laying Out Your Blocks: Find a large, flat surface – a design wall, the floor, or a large table – to lay out your completed quilt blocks. This pattern uses a 6 blocks wide by 7 blocks long layout, creating a total of 42 blocks (6×7=42). This is where the “Prince’s Pond” effect becomes visible. As you place each block, rotate it 90 degrees from the previous block in the row, or according to your desired visual flow. Experiment with the rotation to achieve the beautiful, shifting pattern that gives this quilt its unique character. Step back often to observe the overall design and make any adjustments to color placement or rotation until you are pleased with the arrangement.
- Sewing Blocks into Rows: Once your layout is finalized, begin sewing your blocks together into rows. Take the first two blocks of your first row, place them right sides together, aligning the edges carefully, and sew them with a 1/4-inch seam allowance. Continue adding blocks to form a complete row. When sewing blocks within a row, it’s highly recommended to “nest” your seams, especially if you pressed seams open in the previous step, to ensure your points meet up perfectly. Press the seams of each row in alternating directions (e.g., press the seams of row 1 to the left, row 2 to the right, row 3 to the left, and so on). This technique helps reduce bulk when joining the rows.
- Joining Your Rows: After all 7 rows are assembled and pressed, it’s time to sew them together to complete your quilt top. Place Row 1 and Row 2 right sides together, carefully matching up the seams and using pins to secure them, especially at the intersections where your seams are nested. Sew along the edge with a 1/4-inch seam. Continue adding the remaining rows in sequence. Take your time, aligning seams and pressing carefully after each row is joined. The final result will be a beautifully pieced quilt top, ready for the next stages of quilting.
Finishing Your Prince’s Pond Quilt
Once your stunning quilt top is complete, you’re on the home stretch! The remaining steps involve preparing your quilt for use and adding those crucial finishing touches.
- Basting the Quilt Layers: The next step is to create your “quilt sandwich.” This involves layering your quilt backing fabric (right side down), a layer of batting, and then your finished Prince’s Pond quilt top (right side up). Ensure all layers are smooth and free of wrinkles. You can baste these layers together using spray basting adhesive, safety pins, or by hand-stitching large basting stitches. The goal is to secure all three layers so they don’t shift during the quilting process.
- Quilting Your Project: This is where you add the decorative stitching that holds all three layers together and gives your quilt its texture and drape. For beginners, simple straight-line quilting or “stitch in the ditch” (quilting directly along the seam lines) are excellent choices. More experienced quilters might opt for free-motion quilting or elaborate custom designs. Choose a quilting pattern that complements the dynamic design of the Prince’s Pond pattern without overpowering it.
- Adding the Binding: The final step is to bind the edges of your quilt. This protects the raw edges and provides a neat, professional finish. You’ll typically create binding strips from fabric (often a coordinating solid or a subtle print) cut into 2.5-inch wide strips, joined together to form one long strip. This strip is then sewn to the front of the quilt, wrapped around to the back, and hand-stitched or machine-stitched in place.
Embrace the Joy of Quilting with Layer Cakes
The Prince’s Pond quilt pattern is more than just a project; it’s a testament to the beauty of thoughtful design and the satisfaction of creating something wonderful with your own hands. Utilizing layer cakes not only simplifies the fabric selection process but also ensures a cohesive and visually appealing result every time. From its beginner-friendly steps to its elegant finished appearance, this pattern offers an incredibly rewarding quilting experience.
We encourage you to dive into this fantastic project, follow Moonkin Stitchery’s comprehensive video tutorial, and unleash your creativity. Imagine the joy of snuggling under your handmade Prince’s Pond quilt or gifting it to a loved one. Share your finished projects with the quilting community – you might just inspire another quilter to embark on their own Prince’s Pond adventure! Happy quilting!
Prince’s Pond Layer Cake Quilt Pattern