
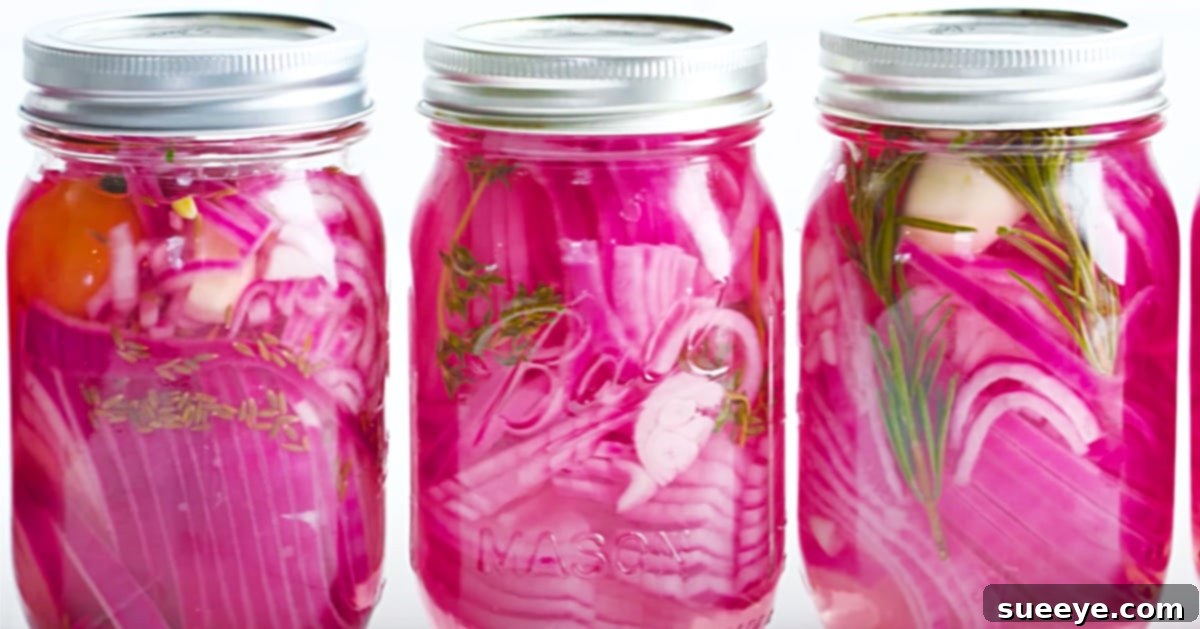
How to Make and Can Perfect Pickled Red Onions: A Comprehensive Guide
Thinly sliced pickled red onions are a culinary chameleon, transforming ordinary dishes into extraordinary experiences. With their vibrant color, tangy crunch, and irresistible flavor, they are the perfect accompaniment to virtually any barbecue dish, sandwich, salad, taco, or even a simple plate of eggs. Once you discover how incredibly easy they are to make at home, you’ll wonder how you ever lived without them.
This comprehensive guide, inspired by the fantastic insights from The Stay At Home Chef on YouTube, will walk you through the process of creating your own batches of delectable pickled red onions. We’ll cover the basic recipe, explore exciting flavor variations, detail both quick pickling and proper water bath canning methods for long-term storage, and offer a wealth of tips and serving suggestions. Get ready to add this versatile, flavor-packed condiment to your kitchen arsenal!
Why You Need Pickled Red Onions in Your Kitchen
Beyond their delightful taste, pickled red onions offer numerous benefits that make them a must-have ingredient:
- Unmatched Flavor Boost: They cut through richness, add a bright acidity, and offer a savory-sweet tang that elevates everything from fatty meats to creamy cheeses.
- Vibrant Visual Appeal: The beautiful fuchsia color instantly brightens any plate, making your meals look as good as they taste.
- Crisp Texture: Unlike raw onions, pickling gives them a pleasant crunch without the harsh bite, providing a delightful textural contrast.
- Easy Preservation: Pickling is a simple and effective way to extend the shelf life of onions, allowing you to enjoy them for weeks or even months.
- Nutritional Benefits: Red onions are packed with antioxidants, and while pickling adds sugar and salt, it’s still a flavorful way to incorporate more vegetables into your diet. The fermentation process can also introduce beneficial probiotics if done naturally, though this recipe focuses on quick pickling and canning.
- Versatility: As you’ll see, these pickled gems pair with an endless array of dishes.
The Essential Ingredients for Flavorful Pickled Red Onions
Making pickled red onions requires only a handful of basic ingredients. The real magic happens when you start experimenting with various spices and herbs to create unique flavor profiles tailored to your palate.
Ingredients For The Basic Pickled Red Onion Recipe:
- 1 Large Red Onion: Choose a firm, fresh onion. Its natural sweetness and vibrant color are perfect for pickling.
- 1 ½ Cups of White Vinegar: This is the classic choice for its clean, sharp acidity, which is essential for both flavor and preservation. Apple cider vinegar can also be used for a milder, fruitier tang.
- 2 Tablespoons of Granulated Sugar: Sugar balances the vinegar’s acidity, rounds out the flavors, and helps create that irresistible sweet-tart profile. You can adjust this to taste.
- 1 Tablespoon of Salt: Kosher salt or pickling salt is recommended. Salt is crucial for flavor, drawing out moisture, and contributing to the pickling process. Avoid iodized salt as it can sometimes cloud the brine.
Exciting Variations for Your Pickled Red Onion Recipe:
Once you’ve mastered the basic recipe, unleash your creativity! These additions can transform your pickled onions to suit different cuisines and preferences:
- ½ Teaspoon of Whole Black Peppercorns: For a classic, subtle warmth and a gentle peppery finish.
- 1 Teaspoon of Allspice Berries: Offers a complex flavor profile reminiscent of cloves, cinnamon, and nutmeg – fantastic for a more autumnal or festive touch.
- 2 Sprigs of Fresh Rosemary: Imparts an earthy, piney aroma and flavor, excellent with roasted meats or hearty sandwiches.
- 2 Sprigs of Fresh Thyme: Provides a delicate, herbaceous note, wonderful with poultry or lighter dishes.
- 1 Small Hot Red Pepper (e.g., Bird’s Eye, Serrano, or Habanero): Sliced thinly, it adds a pleasant kick of heat. Adjust quantity based on desired spice level.
- 3 Whole Peeled Garlic Cloves: For a pungent, savory depth that infuses beautifully into the onions.
- 1 Teaspoon of Cumin Seeds: Offers an earthy, slightly smoky flavor, perfect for Mexican or Middle Eastern-inspired dishes.
- Optional additions: A bay leaf, a pinch of red pepper flakes, mustard seeds, or even a slice of fresh ginger can also be wonderful.
Step-by-Step Guide: Crafting Your Perfect Pickled Red Onions
Making pickled red onions is a straightforward process, whether you opt for a quick refrigerator pickle or a more robust water bath canning method. Follow these easy steps to create your own batches of this delightful condiment.
1. Preparation is Key: Sterilization and Slicing
- Sterilize Your Jars: This is a crucial step for food safety, especially if you plan to can the onions. Wash your Mason jars and lids in hot soapy water, rinse thoroughly, and then sterilize them. You can do this by boiling them for 10 minutes, running them through a dishwasher’s sanitize cycle, or heating them in an oven at 275°F (135°C) for 15 minutes. Keep them warm until ready to fill.
- Slice the Red Onion: Peel your red onion and slice it as thinly as possible. A mandoline slicer is ideal for achieving uniform, paper-thin slices, but a sharp knife and a steady hand will also work beautifully. The thinner the slices, the quicker they will pickle and the more delicate their texture will be.
2. Assembling Your Flavor Foundation
- Pack the Jars: Carefully place the thinly sliced red onions into your sterilized jars. Don’t be afraid to pack them in tightly – they will soften and compress as they pickle.
- Add Your Chosen Spices and Herbs: If using any of the variation ingredients like peppercorns, garlic, thyme, or a hot pepper, add them directly into the jars with the onions. Distribute them evenly among your jars.
3. The Brine: Heart of the Pickle
- Prepare the Brine: In a non-reactive saucepan (like stainless steel or enamel), combine the white vinegar, sugar, and salt for the basic pickle recipe.
- Heat the Brine: Bring the mixture to a boil over medium-high heat, stirring occasionally to ensure the sugar and salt completely dissolve. Once boiling, reduce the heat and simmer for 1-2 minutes to fully meld the flavors. This hot brine is essential for quickly softening the onions and initiating the pickling process.
4. Filling and Sealing Your Pickled Onions
- Pour the Hot Brine: Carefully pour the hot brine over the onions in the jars, ensuring they are fully submerged. Leave about ¼ to ½ inch of headspace from the rim of the jar.
- Remove Air Bubbles: Use a non-metallic utensil (like a chopstick or plastic knife) to gently dislodge any trapped air bubbles from the sides of the jar. This ensures proper pickling and prevents spoilage.
- Wipe Rims and Seal: Wipe the rims of the jars clean with a damp cloth to ensure a good seal. Place the lids and screw bands on, tightening them until they are fingertip tight (snug, but not overly tight).
5. Quick Pickling vs. Water Bath Canning
Quick Pickling (Refrigerator Method)
For immediate gratification and shorter-term storage, the refrigerator method is perfect. Simply allow the jars to cool to room temperature on your countertop. Once cool, transfer them to the refrigerator. The pickled red onions will be ready to eat in as little as an hour, but their flavor will deepen and mellow after 24 hours. They will keep well in the refrigerator for several weeks, typically 2-3 months, provided they remain submerged in the brine.
Water Bath Canning for Extended Preservation
If you wish for your pickled red onions to be shelf-stable for longer periods (up to a year), proper water bath canning is the way to go. This method creates a vacuum seal that safely preserves the food outside of refrigeration.
Steps for Water Bath Canning:
- Prepare the Canner: Fill a large stockpot or canning pot with enough water to cover the jars by at least an inch. Place a canning rack at the bottom of the pot. Bring the water to a rolling boil.
- Process the Jars: Carefully lower the filled, sealed jars into the boiling water using a jar lifter. Ensure the water level is adequate.
- Process Time: Once the water returns to a rolling boil, process pint-sized jars for 10 minutes (adjust for altitude if necessary). For larger quart-sized jars, increase processing time slightly according to canning guidelines.
- Cool and Check Seals: After processing, turn off the heat and let the jars sit in the hot water for 5 minutes before carefully removing them. Place the hot jars on a clean towel or cooling rack, ensuring they are not touching each other, and allow them to cool completely for 12-24 hours. You will hear satisfying “ping” sounds as the lids seal.
- Verify Seals: After cooling, check the seals. The center of each lid should be concave and not flex when pressed. If any jar did not seal, place it in the refrigerator and consume it within a few weeks, or re-process it with a new lid.
- Store: Once sealed, remove the screw bands, wipe down the jars, and store them in a cool, dark place away from direct sunlight. Properly canned pickled red onions can last for up to one year.
Expert Tips for the Best Pickled Red Onions
- Choose the Freshest Onions: Always start with firm, blemish-free red onions. Freshness impacts both flavor and texture.
- Slice Uniformly: Consistent slicing ensures even pickling. A mandoline is a great investment if you plan to make these often.
- Don’t Rush the Brine: Ensure sugar and salt are fully dissolved before pouring over the onions.
- Experiment with Vinegars: While white vinegar is standard, try apple cider vinegar for a milder, slightly sweet flavor, or even rice vinegar for an Asian twist.
- Let Them Mellow: While you can eat them quickly, the flavor of pickled onions improves significantly after at least 24 hours in the brine, allowing the flavors to fully meld.
- Adjust Sweetness/Saltiness: Feel free to tweak the sugar and salt quantities in the brine to match your personal preference. Some prefer a sweeter pickle, others a more tart one.
- Sterilization is Non-Negotiable: Especially for water bath canning, proper sterilization is paramount for food safety and preventing spoilage.
Creative Ways to Enjoy Your Pickled Red Onions
The beauty of pickled red onions lies in their incredible versatility. Here are just a few ideas to get you started:
- Taco Topping: They are a quintessential topping for any taco, from savory carne asada to fresh fish tacos, adding a much-needed zing.
- Burger & Sandwich Enhancement: Replace plain raw onions with these tangy delights on your burgers, hot dogs, or deli sandwiches for an instant upgrade.
- Salad Booster: Toss them into green salads, potato salads, or grain bowls for a burst of color and flavor.
- Charcuterie Boards: A small bowl of pickled red onions adds a gourmet touch and cuts through the richness of cheeses and cured meats.
- Grilled Meats & Fish: Serve them alongside grilled chicken, steak, or salmon to brighten the dish.
- Egg Dishes: A spoonful on scrambled eggs, omelets, or avocado toast transforms a simple breakfast or brunch into something special.
- Pizza Topping: A scattering of pickled red onions on your homemade pizza adds a sophisticated tang.
Storage and Shelf Life
Proper storage is essential to enjoy your pickled red onions safely and for as long as possible.
- Refrigerator Pickles: Once opened or if not water bath canned, store your pickled red onions in the refrigerator. They typically maintain excellent quality for 2-3 months. Always ensure the onions remain submerged in the brine to prevent spoilage.
- Water Bath Canned Pickles: Properly water bath canned and sealed jars can be stored in a cool, dark pantry for up to 1 year. Once opened, they should be refrigerated and consumed within 2-3 months.
- Signs of Spoilage: Always check for any signs of spoilage before consuming, such as mold, off-smells, or a cloudy brine (unless deliberately using a specific vinegar that naturally clouds). Discard if in doubt.
Making your own pickled red onions is an incredibly rewarding experience. It’s a simple, cost-effective way to elevate your home cooking and impress your guests. With the detailed instructions and creative variations provided in this guide, you’re now equipped to create batches of this delightful condiment to enjoy throughout the year. So, grab your red onions, fire up that brine, and get pickling!