
Transforming Childhood Memories: Unleash Your Creativity with Lego Concrete Molds for Unique DIY Projects
Do you ever find yourself scrolling through endless DIY project ideas, only to stumble upon something that makes you exclaim, “Whoa, what is *that*?” We’ve all been there, initially skeptical, then increasingly intrigued. Today, we’re diving into a project that perfectly encapsulates this feeling: using those beloved childhood Lego bricks as molds for stunning concrete creations. What might seem like a whimsical, perhaps even “hair-brained” idea at first glance, quickly reveals itself to be an incredibly innovative and deeply satisfying way to craft truly unique home decor and furniture.
For many of us, dusty boxes of Lego bricks lie forgotten in attics or basements, remnants of a bygone era when our children were younger. Deciding what to do with these cherished toys can be a dilemma. They occupy valuable space, yet the thought of discarding or donating something once adored by your child can sting. Before you relegate those colorful plastic treasures to the purgatory of Goodwill or the “island of misfit toys,” prepare to be amazed by the ingenious craft projects you can transform them into. This isn’t just about repurposing; it’s about reinventing, giving new life and purpose to pieces that hold significant sentimental value.
Why Legos and Concrete? An Unlikely Yet Perfect Pairing
The synergy between Lego bricks and concrete might seem unconventional, but it’s precisely this unexpected combination that yields such spectacular results. Legos, renowned for their precise interlocking mechanism and durable plastic, offer an unparalleled versatility for mold making. Their ability to connect securely in countless configurations means you can design virtually any shape or size, from simple geometric forms to intricate, multi-faceted structures. This inherent modularity provides a level of customization that traditional molds simply cannot match, making Legos an ideal medium for experimental and personalized concrete projects.
Moreover, the distinct texture of Lego bricks – those iconic studs and anti-studs – imprints beautifully onto the concrete surface. This leaves behind a fascinating, tactile pattern that is both modern and reminiscent of the toy’s origin, adding an immediate touch of character and conversation-starting appeal to any finished piece. Beyond aesthetics, using Legos is a fantastic example of sustainable DIY, breathing new life into old toys and reducing waste. It’s a testament to the power of creativity and resourceful thinking, turning potential clutter into captivating decor.
The Project That Sparked an Obsession: DIY Concrete Nesting Tables
My own journey into the world of Lego concrete began with a desire for neat, unique tables for my patio. The idea of crafting nesting tables using Legos as molds immediately captivated me. It was a perfect blend of practicality and artistic expression. With a treasure trove of Legos rediscovered in the attic, the project truly began to take shape. My son, the original “Lego guy,” even joined in, lending his expertise and making the process significantly faster and smoother. There’s something incredibly gratifying about collaborating on a creative endeavor, especially when it involves giving new purpose to shared childhood memories.
The outcome was nothing short of remarkable. My new nesting tables are truly one-of-a-kind. The concrete beautifully showcases the subtle, yet unmistakable, texture imparted by the Lego molds. What started as a skeptical venture quickly transformed into a genuine obsession. The smooth flow of the process, the surprising ease with which the Legos formed the concrete, and the stunning final product solidified Lego-formed concrete as my new favorite DIY medium. It’s genuinely impressive how simple plastic bricks can facilitate the creation of such elegant and durable concrete furniture.
Beyond Tables: Unleashing the Full Potential of Lego Concrete
While nesting tables are a fantastic starting point, the possibilities for Lego concrete projects are virtually limitless. Once you grasp the fundamental principles, you’ll discover a world of creative opportunities. Consider these inspiring ideas to further fuel your DIY spirit:
- Planters and Vases: Design custom planters of any size and shape to complement your indoor or outdoor greenery. The Lego texture adds a modern, architectural feel.
- Coasters and Trays: Craft personalized coasters or small decorative trays. These make excellent gifts and allow for intricate designs on a smaller scale.
- Bookends: Create sturdy, unique bookends that reflect your personal style, offering both functionality and aesthetic appeal.
- Desk Organizers: Segmented Lego molds can be used to create custom desk organizers for pens, clips, and other office essentials.
- Decorative Blocks & Sculptures: Experiment with abstract shapes to create standalone decorative pieces or stackable blocks for artistic displays.
- Candle Holders: Design unique candle holders that cast interesting shadows and add ambiance to any room.
- Garden Path Stones: For outdoor enthusiasts, custom-shaped Lego molds can create unique stepping stones for your garden path.
Each of these projects leverages the modularity and distinct texture of Legos, allowing for endless customization and truly personal results.
Gathering Your Essential Materials for a Successful Project
Before you jump “with both feet” (figuratively, not into the concrete!), it’s crucial to gather all your materials. A well-prepared workspace and the right tools make all the difference for a smooth and enjoyable crafting experience. Here’s what you’ll typically need for a concrete table project:
- Plenty of Legos: Raid your attic, borrow from friends, or even buy bulk second-hand Legos. The more you have, the larger and more intricate your molds can be.
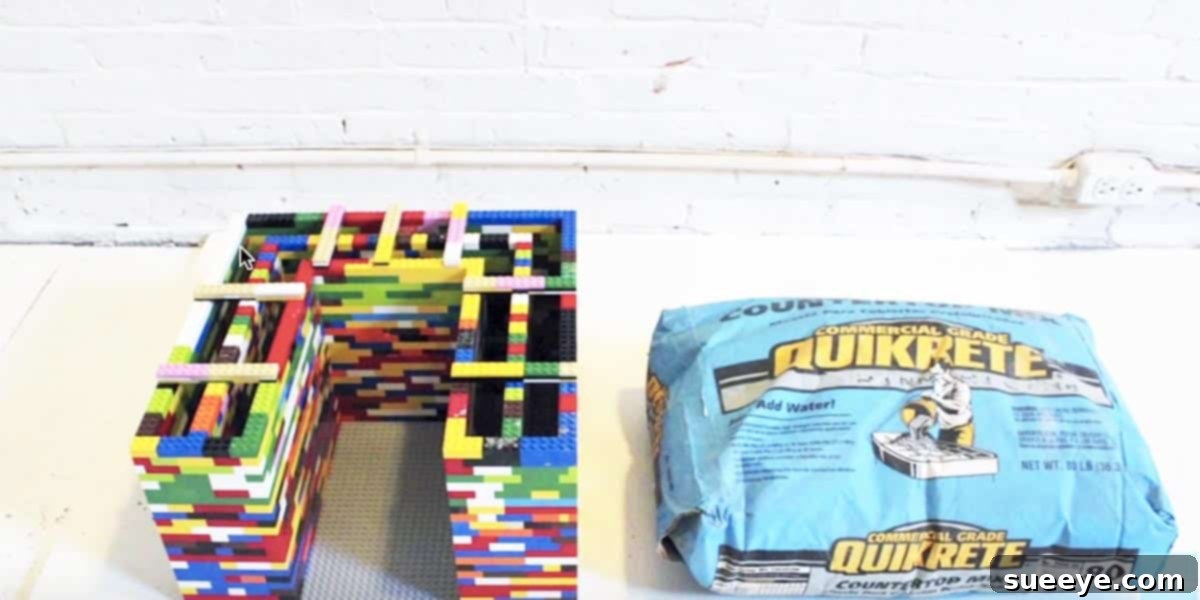
- Concrete Mix: A high-strength, fine-aggregate concrete mix is ideal for furniture and decorative items. Quikrete Countertop Mix or similar formulas work well.
- Water: For mixing the concrete.
- Mixing Trough or Bucket: A large, sturdy container for mixing concrete.
- Trowel or Hoe: For thorough mixing.
- Safety Gear: Essential! Includes gloves (heavy-duty work gloves), eye protection, and a dust mask (when handling dry concrete mix).
- Mold Release Agent: A petroleum jelly, cooking spray, or commercial mold release agent is crucial to ensure easy demolding without damaging your Lego bricks or concrete.
- Reinforcement (Optional but Recommended): For larger pieces, consider adding fiberglass mesh or steel rebar to increase strength and prevent cracking.
- Vibrator (Optional): A small orbital sander or rubber mallet can be used to vibrate the mold, releasing air bubbles for a smoother finish.
- Tarp or Plastic Sheeting: To protect your work surface.
- Sanding Paper/Pads: Various grits for finishing and smoothing edges.
- Concrete Sealer: To protect the finished concrete from stains and moisture, and enhance its appearance.
A Step-by-Step Guide to Crafting Your Lego Concrete Masterpiece
Now, let’s walk through the process, ensuring every step is clear and actionable. This detailed guide will help you create your own stunning Lego concrete pieces.
1. Designing and Assembling Your Lego Mold
This is where the fun begins! Plan your design carefully. For nesting tables, you might create a square or rectangular base, then build up the sides to your desired height. Ensure the walls are sturdy and well-connected to prevent leaks. The internal dimensions of your Lego mold will be the external dimensions of your concrete piece. For stability, build a solid base layer and reinforce corners and seams with additional interlocking bricks. Remember, the outer surface of your Lego mold will become the inner surface of your concrete item, and vice versa. Consider the desired texture – placing studs facing inward will leave impressions on the concrete.
2. Applying the Mold Release Agent
This is a critical step that cannot be skipped. Thoroughly coat the *inside* surfaces of your Lego mold with your chosen release agent. For intricate designs, a spray is easiest. For simpler molds, petroleum jelly or cooking oil can be applied with a brush or cloth. Ensure complete coverage to prevent the concrete from sticking to the Lego bricks, making demolding significantly easier and preventing damage to both the concrete and your Legos.
3. Mixing the Concrete
Follow the manufacturer’s instructions for your specific concrete mix. Typically, you’ll add water gradually to the dry mix, stirring continuously until you achieve a consistency similar to thick oatmeal or peanut butter. The mixture should be workable but not too runny. Too much water weakens the concrete, while too little makes it difficult to pour and compact. Wear your safety gear throughout this process to protect against concrete dust and splashes.
4. Pouring the Concrete and Vibrating
Carefully pour the concrete mixture into your prepared Lego mold. Fill it in layers, gently tapping the sides of the mold with a rubber mallet or vibrating it with a small orbital sander (without the sanding pad) after each layer. This helps to release trapped air bubbles, ensuring a dense, smooth, and void-free surface on your finished piece. Continue filling until the mold is slightly overfilled, then use a straight edge (like a piece of wood or a trowel) to scrape off the excess, leveling the top surface.
5. Curing Your Concrete Creation
Curing is essential for concrete to achieve its maximum strength and durability. Cover your mold with plastic sheeting or a damp cloth to retain moisture. Concrete cures best when kept moist and at a consistent temperature. Allow your concrete piece to cure for at least 24-48 hours before demolding, and ideally for several days or even a week before subjecting it to significant stress. The longer and more effectively it cures, the stronger it will be. Keep it out of direct sunlight during the initial curing phase.
6. Demolding Your Masterpiece
Once sufficiently cured, it’s time for the exciting reveal! Carefully begin to disassemble your Lego mold, brick by brick. Start from the top edges and work your way down. Take your time and be gentle to avoid chipping or damaging your newly formed concrete piece. The mold release agent should make this process relatively easy. Once the Legos are removed, you’ll see the distinct textured surface of your concrete creation.
7. Finishing Touches: Sanding and Sealing
After demolding, your concrete piece might have some rough edges or minor imperfections. Use sandpaper (starting with a coarser grit like 100-150, then moving to finer grits like 220-400) to smooth any sharp edges or unwanted bumps. Once you’re satisfied with the smoothness, clean the concrete thoroughly to remove any dust. Finally, apply a concrete sealer according to the product instructions. Sealing protects the concrete from stains, moisture, and enhances its color and longevity, making it suitable for both indoor and outdoor use.
Tips for Success and Creative Exploration
- Experiment with Color: Add concrete dyes or pigments to your mix for colored creations.
- Inclusions: Embed small decorative items like glass beads, polished stones, or metal pieces into the wet concrete for unique effects (ensure they won’t react negatively with the concrete).
- Layering: Try pouring different colored concrete in layers for a striped effect.
- Safety First: Always prioritize safety when working with concrete. Wear gloves, eye protection, and a dust mask.
- Patience is Key: Concrete work requires patience, especially during curing. Rushing the process can lead to weaker, less durable results.
- Clean Your Legos: After demolding, clean any concrete residue off your Legos immediately for easy reuse.
The Joy of Repurposing and Unleashing Your Inner Creator
This journey from old toys to elegant home decor isn’t just about creating a functional item; it’s about the profound satisfaction of transforming, repurposing, and breathing new life into forgotten objects. It embodies a sustainable approach to creativity, showcasing how everyday items can be reimagined with a bit of ingenuity. The act of turning a box of childhood Legos into bespoke furniture or decorative accents is a powerful testament to the creative spirit within us all. It’s an opportunity to create something truly personal, something that tells a story, and something that perfectly reflects your unique style and resourcefulness.
So, what are you waiting for? Dust off those old Lego bricks, gather your materials, and prepare to embark on an incredibly rewarding DIY adventure. Watch that step-by-step tutorial, roll up your sleeves, and dive headfirst into the fascinating world of Lego concrete. You’ll be amazed at what you can create, and like me, you might just find your new favorite obsession. Share your creations and inspire others to transform their forgotten treasures into modern masterpieces!