
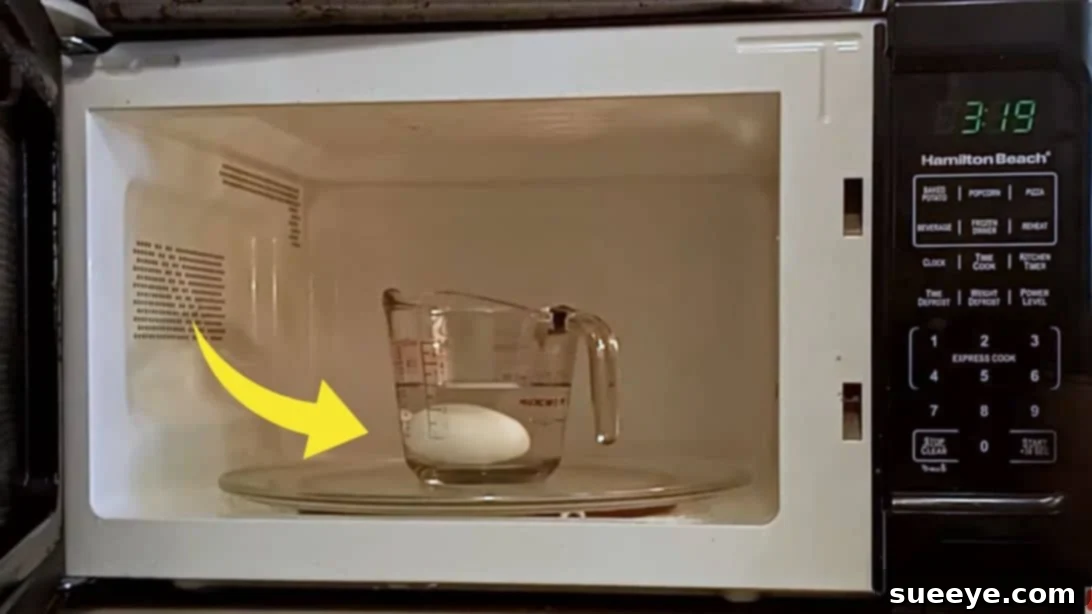
For years, the idea of making hard-boiled or soft-boiled eggs in a microwave has been met with skepticism, and often, with a messy explosion. Many home cooks, myself included, have experienced the frustration of an egg bursting dramatically inside the microwave, leading to the common belief that it’s simply impossible or too risky. However, what if I told you there’s a simple, game-changing trick to achieve perfectly cooked eggs, exactly to your desired doneness, using only your microwave? The secret, it turns out, lies in one often-overlooked ingredient: salt.
My own journey from microwave egg explosions to perfectly prepared eggs began after stumbling upon an insightful video by Randy’s Family Kitchen on YouTube. This revelation completely transformed my approach, proving that with the right technique and a crucial ingredient, microwave-cooked eggs are not only possible but incredibly convenient. The missing piece of the puzzle, preventing those unfortunate culinary fireworks, was quite simply a generous pinch of salt.
RELATED: Unlock the Secret to Restaurant-Quality Scrambled Eggs with This Simple Hack
When you embark on this microwave egg-cooking adventure at home, the importance of salt cannot be overstated. It is the crucial element that ensures safety and success, preventing the water from superheating and the egg from exploding. The beauty of this method also lies in its versatility: you can effortlessly create anything from runny, jammy soft-boiled eggs to firm, creamy hard-boiled eggs. While the cooking time may require a little experimentation to perfectly match your microwave’s wattage and your preferred doneness, the learning curve is quick, and the results are consistently rewarding. Factors like your microwave’s power, the starting temperature of your egg, and even the size of the egg can subtly affect the outcome, so a little initial trial and error will help you dial in your perfect cooking time.
Here’s another fantastic egg-related recipe you might want to try: Craft the Best Egg Salad Sandwich with This Irresistible Recipe
How to Master Hard-Boiled and Soft-Boiled Eggs in Your Microwave
Say goodbye to boiling pots and lengthy waits. This method offers unparalleled convenience for busy mornings, quick snacks, or meal prep. Follow these detailed steps to achieve perfectly cooked eggs every time.
Step 1: Selecting Your Microwave-Safe Container and Measuring
The foundation of successful microwave egg cooking starts with the right vessel. Choose a tall, microwave-safe container, such as a liquid measuring cup, a mug, or a small bowl with high sides. The height is essential to ensure the egg remains fully submerged throughout the cooking process. Carefully place your egg inside the chosen container to gauge its height when laid flat. This initial measurement helps determine the minimum water level required. For instance, if your egg reaches approximately the 1-cup mark in a measuring cup, you’ll know exactly how much water you need to add in the next step to achieve proper submersion.
Step 2: Adding the Perfect Amount of Water for Optimal Submersion
Once your egg is comfortably in the container, it’s time to add water. Fill the cup with enough water to cover the egg completely, ensuring there’s at least a half-inch of water above the egg. For a standard large egg, this usually means around 1 1/2 cups of water if using a 2-cup measuring cup. Full submersion is critical not only for even cooking but also for preventing the egg from exploding. An exposed portion of an egg can heat unevenly and build up steam too rapidly, leading to undesirable outcomes. The water acts as a buffer, distributing heat evenly around the egg and facilitating a safe cooking environment.
Step 3: The Secret Ingredient: Add a Generous Pinch of Salt
This is the most critical step, the secret weapon against microwave egg explosions. Add a generous, heaping teaspoon of salt to the water. Any type of salt – table salt, kosher salt, or sea salt – will work perfectly. The salt performs two crucial functions: firstly, it slightly raises the boiling point of the water, which helps regulate the cooking process. More importantly, salt provides nucleation sites. These are microscopic points where steam bubbles can form gradually and safely, preventing the water from superheating to extreme temperatures where sudden, explosive vaporization might occur. Without salt, water can reach temperatures well above its normal boiling point without bubbling, only to violently flash into steam when disturbed, causing the egg to explode. Don’t skip this step!
Step 4: Microwave Cooking Times for Your Perfect Egg
With the egg submerged in salted water, it’s ready for the microwave. Place the container carefully inside. Microwave wattages vary significantly, so these times are starting points, and you might need to adjust them slightly for your specific appliance. A standard microwave (around 1000-1200 watts) will typically yield these results:
- For a firm, creamy Hard-Boiled Egg: Cook for approximately 5 to 6 minutes. Some microwaves may require up to 7 minutes for a fully firm yolk.
- For a perfectly jammy or runny Soft-Boiled Egg: Cook for only 3.5 to 4.5 minutes. If you prefer a yolk that is still quite liquid and runny, reduce the cooking time to the lower end of this range. For a slightly firmer, jammy yolk, opt for 4 to 4.5 minutes.
It’s always better to undercook slightly on your first attempt and increase the time if needed. Make a note of the exact time that produces your ideal egg doneness for future reference.
Step 5: Preparing the Essential Ice Bath
While your egg is cooking in the microwave, prepare an immediate ice bath. Fill a medium-sized bowl with cold water and add a generous amount of ice cubes. The colder, the better. This ice bath is crucial for two reasons: for soft-boiled eggs, it immediately stops the cooking process, preventing them from becoming overcooked. For hard-boiled eggs, it helps to cool them rapidly, which not only stops cooking but also makes the peeling process significantly easier by causing the egg to contract slightly away from the shell.
Step 6: Careful Removal and the Ice Bath Transfer
Once the microwave beeps, exercise extreme caution. The water in the measuring cup will be incredibly hot, and steam can escape when opening the microwave door. Use kitchen mittens or oven mitts to safely remove the hot container from the microwave. Handle it slowly and steadily to prevent splashing or scalding.
- For Hard-Boiled Eggs: After removing the container, allow the egg to rest in the hot water for an additional 5 to 10 minutes. This residual heat ensures the yolk sets perfectly without overcooking the whites. After this resting period, carefully transfer the egg using a slotted spoon into the prepared ice bath. Leave it in the ice bath for 10 to 15 minutes to cool completely and facilitate easy peeling.
- For Soft-Boiled Eggs: Speed is key here. As soon as you remove the container from the microwave, immediately use a spoon to carefully scoop the egg out of the hot water and transfer it directly into the ice water bath. This immediate shock of cold water will instantly halt the cooking process, preserving that desirable runny or jammy yolk. Leave it in the ice bath for 2-3 minutes, just long enough to cool the exterior and stop cooking, before peeling and serving.
Tips for Microwave Egg Perfection
- Know Your Microwave: Every microwave is different. Start with the lower end of the suggested cooking times and adjust in 30-second increments until you find your ideal setting.
- One Egg at a Time: For consistent results and to prevent overcrowding, it’s best to cook one egg at a time using this method.
- Room Temperature Eggs: While not strictly necessary, using eggs that have been brought to room temperature can sometimes lead to more even cooking and potentially reduce cooking time slightly.
- Peeling Hard-Boiled Eggs: Once cooled in the ice bath, gently tap the wide end of the egg on a hard surface, then roll it to crack the shell all over. Peel under cold running water for the easiest removal.
- Troubleshooting Explosions: If an egg still explodes, double-check that you’ve used enough salt, the egg was fully submerged, and your container was appropriate. Sometimes, microwaves with uneven heating can be a factor, but proper salt and water levels usually mitigate this.
Enjoying Your Perfectly Cooked Microwave Eggs
Now that you’ve mastered the art of microwave-boiled eggs, the culinary possibilities are endless! Soft-boiled eggs are fantastic simply seasoned with salt and pepper, served on toast, or as a topping for ramen and noodle bowls. Hard-boiled eggs are incredibly versatile for quick, healthy snacks, adding protein to salads, crafting classic egg salad sandwiches, or making delicious deviled eggs for gatherings. This quick and reliable method ensures you’ll always have perfectly cooked eggs on hand, simplifying your meal prep and expanding your kitchen capabilities.
The Science Behind the Salt: A Deeper Dive
To further understand why salt is so pivotal, consider the phenomenon of superheating. Pure water in a very smooth container (like glass) can be heated beyond its boiling point (212°F or 100°C) without actually boiling or forming bubbles. This superheated water is unstable. Any disturbance – a slight bump, or even the egg itself – can cause it to violently and instantaneously convert into steam, leading to an explosion. Adding salt to the water introduces countless tiny impurities and dissolved ions. These act as “nucleation sites,” providing microscopic surfaces where steam bubbles can form safely and gradually as the water heats up, preventing the dangerous superheating phenomenon. This controlled bubble formation allows for a gentle and predictable cooking process for your eggs.
So, next time you crave a perfectly cooked egg but are short on time or stovetop space, remember the simple secret: salt. With these detailed instructions and a bit of practice, you’ll be whipping up delicious, safely cooked microwave eggs in no time. Enjoy your newfound culinary superpower!