
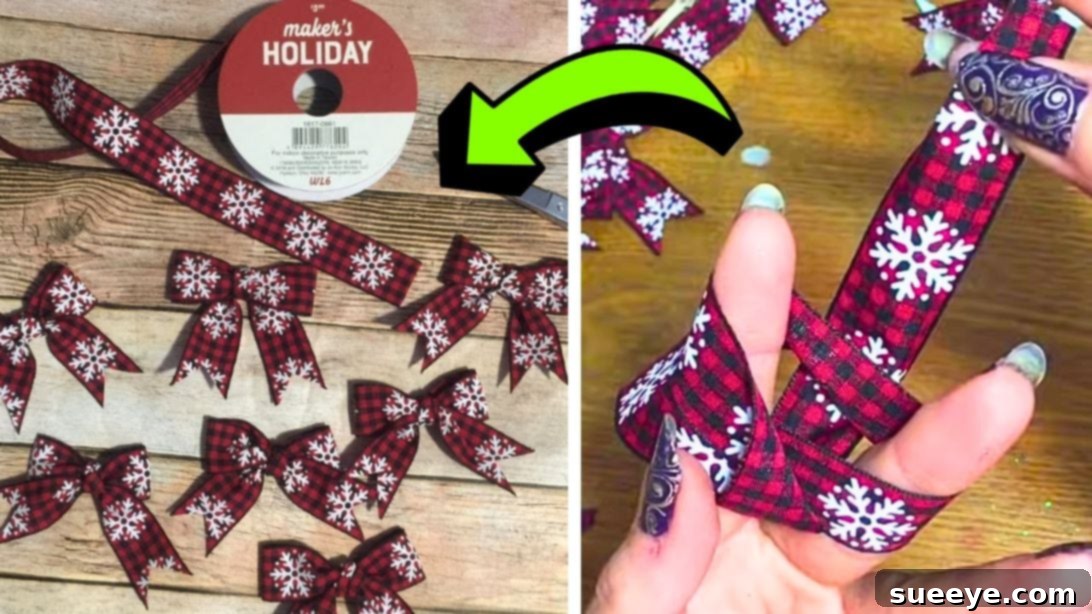
The ability to tie a beautiful, symmetrical bow often feels like a secret talent, reserved for seasoned crafters and gift-wrapping gurus. Many of us struggle with uneven loops, lopsided knots, and bows that simply refuse to look “perfect.” The good news? Achieving a consistently flawless bow doesn’t require years of practice or innate skill. There’s a clever technique that allows anyone, even absolute beginners, to create stunning bows in as little as 30 seconds!
If you’ve ever found yourself frustrated by tangled ribbons or less-than-perfect embellishments, prepare to revolutionize your crafting and gift-giving. This ingenious method ensures a perfect bow every single time, making your presents pop and your decorations dazzle with minimal effort. We’re breaking down the steps inspired by a fantastic video tutorial from This Southern Girl Can on YouTube. Get ready to master the art of the perfect bow!
Why This Bow Tying Method Is a Game-Changer
What makes this technique stand out from others? It’s incredibly straightforward, highly efficient, and yields consistently beautiful results. Here’s why you’ll love it:
- Beginner-Friendly: No prior experience with bow tying? No problem! The steps are easy to follow, making it accessible for anyone to pick up quickly.
- Lightning Fast: Once you get the hang of it, you’ll be tying perfect bows in under a minute, freeing up more time for other creative endeavors.
- Perfect Every Time: Say goodbye to wonky, uneven bows. This method guarantees symmetry and a professional finish, enhancing the look of anything you adorn.
- Versatile Applications: These charming bows aren’t just for gifts. Their consistent quality makes them ideal for a multitude of decorative and crafting projects.
- Minimal Tools Required: You only need a ribbon and your fingers, though a bow maker is an optional aid for those who prefer it.
Unleash Your Creativity: Endless Uses for Your Perfect Bows
Once you’ve mastered this quick and easy bow-tying technique, a world of creative possibilities opens up. These perfectly formed bows can elevate almost anything, adding a touch of elegance, charm, or festive cheer. Here are just a few ideas to inspire you:
- Gift Wrapping: The most obvious, yet most impactful use. A flawless bow instantly transforms a simple package into a thoughtful, beautifully presented gift. Mix and match ribbon colors and textures for different occasions.
- Holiday Decorations: Adorn your Christmas tree with handmade bows, create festive garlands, or add a pop of color to wreaths and swags. They’re also perfect for embellishing holiday stockings or mantelpiece decor.
- Craft Projects: From scrapbooking and card making to creating unique hair accessories like clips and headbands, these bows are a versatile addition to any craft project.
- Home Decor: Spruce up throw pillows, curtains, or even simple vases with a well-placed ribbon bow. They can add a touch of personality and warmth to any room.
- Floral Arrangements: Enhance bouquets, potted plants, or floral centerpieces with a sophisticated ribbon bow tied around the base or stems.
- Party Favors: Add a sweet and personalized touch to wedding favors, baby shower gifts, or birthday party goodie bags.
- Apparel & Accessories: Sew smaller bows onto sweaters, dresses, or hats for a unique fashion statement. They can also be used to embellish handbags or shoes.
- DIY Ornaments: Create charming hanging ornaments by tying bows onto various small decorative items or even making bows the central feature.
With such a consistent and beautiful result, your homemade bows will look professional and intentional, proving that even the simplest details can make a huge difference.
RELATED: 7 Easy Christmas Bows With No Bow Maker
Essential Materials for Crafting Your Perfect Bow:
Gathering your supplies is the first step to creating these delightful bows. The beauty of this method lies in its simplicity, requiring only a couple of fundamental items that you likely already have on hand.
- 7/8 inch Ribbon: This size is ideal for most standard bows, offering a good balance of presence and manageability. However, feel free to experiment with different widths once you’ve mastered the basic technique. Satin, grosgrain, and even wired ribbons can work beautifully.
- Sharp Scissors: A good pair of scissors is crucial for clean, crisp cuts, ensuring your bow tails look professional and don’t fray easily.
- Bow Maker (Optional): While the primary method described here uses your fingers, a bow maker can be a helpful tool for those who prefer a jig for consistent sizing or have difficulty manipulating ribbon with their hands. It’s not essential, but it can be a nice aid.
That’s it! With these simple materials, you’re ready to embark on your bow-tying journey and create stunning embellishments.
Step-by-Step Guide: How to Make a Perfect Bow Every Time
Follow these detailed instructions, and you’ll be amazed at how quickly you can create a beautiful, symmetrical bow. Pay close attention to the positioning of your fingers and the ribbon for the best results.
Step 1: Preparing Your Ribbon and Initial Placement
Begin by cutting a piece of ribbon approximately 12 inches long. The exact length can vary based on your desired bow size, but 12 inches is a great starting point for practice. Once cut, gently lay the ribbon flat across the front of your non-dominant hand’s index finger and middle finger. Hold the ribbon securely in place with your thumb, ensuring it doesn’t slip. Critically, make sure to leave a tail of about 1 to 1.5 inches hanging off the left side of your fingers. This short tail will be used later to form one of the bow’s loops, and its length directly impacts the final appearance.
Step 2: Creating the First Loop and Threading the Ribbon
Now, take the longer end of the ribbon (the one extending to the right) and bring it around the back of your index and middle fingers. Guide it smoothly over the top of your fingers again, so it now crosses the ribbon you’re holding with your thumb. Next, take this loose, longer end, fold it backward over itself, and carefully feed it *under* the initial loops you’ve formed and *in between* your two fingers (index and middle). This action begins to secure the ribbon and lay the foundation for the knot.
Step 3: Forming the Knot and Initial Adjustment
With the ribbon fed through your fingers, pull the longer end towards the back of your hand. Then, bring it up and over the top of the loops you’ve created. This is a crucial step for forming the knot. Now, look for the twisted loop that has naturally formed on the left side of your fingers. Carefully feed the end of the ribbon into this twisted loop, tucking it neatly underneath, just as demonstrated in the video tutorial. Once it’s threaded through, pull this end tightly to secure the knot. As you pull, gently twist and adjust the ribbon to ensure the loops are even and the bow begins to take its symmetrical shape. With the knot firm, carefully slide the nascent bow off your fingers, being careful not to undo your work.
Step 4: Final Adjustments and Finishing Touches
Once the bow is off your fingers, it’s time for the final finessing. Gently tug and pull at the loops and tails to perfect their shape and ensure they are symmetrical and plump. If the ribbon seems a little flat, you can gently puff out the loops with your fingers. Finally, take your scissors and trim the ribbon’s tails to your desired length and shape. You can cut them straight, at an angle, or create a classic V-notch for a polished look. And just like that, you’re done! You’ve created a beautiful, perfect bow. Remember, if using a bow maker, simply follow these same steps, using the pegs of the bow maker in place of your fingers.
Tips for Achieving Bow Perfection
While the steps are simple, a few extra tips can help you achieve truly outstanding results:
- Practice Makes Perfect: Don’t get discouraged if your first few bows aren’t flawless. A little practice will quickly build your muscle memory and confidence.
- Choose the Right Ribbon: The type of ribbon you use can significantly impact the final look.
- Satin Ribbons: Offer a luxurious, glossy finish but can be a bit slippery.
- Grosgrain Ribbons: Are sturdier with a ribbed texture, holding their shape well.
- Wired Ribbons: Are fantastic for creating bows that maintain their volume and shape, making them easy to manipulate and adjust.
Experiment to find your favorite!
- Maintain Consistent Tension: Throughout the process, try to keep an even tension on the ribbon. Too loose, and your bow will be floppy; too tight, and it might wrinkle or be difficult to adjust.
- Watch the Video: The original tutorial by This Southern Girl Can provides invaluable visual guidance. Watching each step in real-time can clarify any points that might be tricky to grasp from written instructions alone.
- Experiment with Sizes: Once comfortable with the basic technique, try using different ribbon widths and starting lengths to create bows of various sizes for different applications.
- Personalize Your Bows: Add embellishments like beads, charms, or small buttons to the center of your bows for a unique touch.
Unleash Your Inner Crafter: Tie a Perfect Bow Easily
Gone are the days of wrestling with ribbon and settling for less-than-perfect bows. This incredible, beginner-friendly method empowers you to create stunning, symmetrical bows in a mere 30 seconds, elevating your gifts and crafts to a professional level. Whether you’re decorating for the holidays, adding a special touch to a present, or enhancing your latest DIY project, these perfect bows will make a lasting impression.
So, grab your favorite ribbon, set aside a few minutes, and follow this foolproof guide. You’ll be amazed at how quickly you transform from a bow-tying novice into a master. Happy crafting!
All these images are credited to This Southern Girl Can via YouTube. Give her channel a visit and subscribe for more amazing tutorials!