
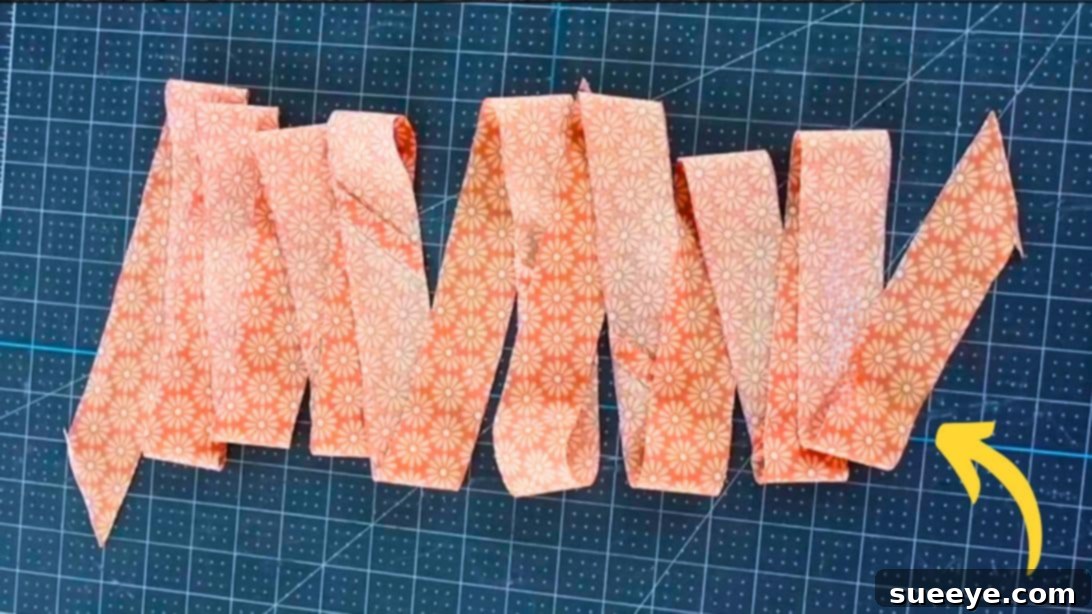
Mastering Continuous Bias Tape: A Step-by-Step Guide for Seamless Edges
For anyone passionate about sewing, quilting, or garment construction, the term “bias tape” is undoubtedly a familiar one. However, if you’re just starting your creative journey with needle and thread, you might be wondering what exactly this versatile strip of fabric is and why it’s so fundamental. Bias tape is essentially a narrow strip of fabric cut at a 45-degree angle to the selvage, also known as the bias grain. This unique diagonal cut gives the fabric strip a distinctive elasticity and drape, allowing it to curve smoothly around edges without puckering or adding unnecessary bulk. This characteristic makes it incredibly useful for a multitude of applications, from professionally finishing raw edges to adding decorative flair.
Its primary uses include binding the raw edges of quilts, garments, and home decor items, creating decorative piping, stabilizing necklines and armholes, and even crafting sturdy straps or ties. While many sewing supply stores offer pre-made bias tape in a wide array of colors and materials, the ability to create your own opens up a world of possibilities. Making your own bias tape means you can perfectly match the fabric of your project, use designer prints, or experiment with different fiber types for a truly custom finish. For quilters, in particular, mastering bias tape is an invaluable skill that ensures beautiful, long-lasting edges on their cherished creations.
Beyond the Conventional: Discovering the Continuous Bias Tape Method
Many sewers learn the traditional method of making bias tape: cutting individual strips on the diagonal and then painstakingly joining them end-to-end to achieve the desired length. While this method certainly works, it can be time-consuming, produce more fabric waste, and result in multiple seams along your finished edge, which can be less aesthetically pleasing. But what if there was a quicker, more efficient, and surprisingly simple way to produce yards of continuous bias tape from a single piece of fabric? Prepare to have your sewing world transformed!
This tutorial unveils an ingenious sewing hack that allows you to create continuous bias tape with minimal effort and maximum reward. This method is so streamlined that once you try it, you’ll likely never revert to the old strip-by-strip technique. It’s a secret weapon even some professional quilters or seasoned seamstresses might not have encountered yet. We’ll guide you through the process, inspired by brilliant tutorials like the one from littletoh on YouTube, demonstrating how to achieve a seemingly endless strip of bias tape from a single fabric square. Get ready to elevate your crafting game and achieve flawless finishes with ease.
For more essential sewing knowledge and clever shortcuts, be sure to explore these invaluable resources:
- 4 Tips On How To Lessen Sewing Mistakes
- 37 Life-Changing Sewing Hacks
- 5 Sewing Tips You Haven’t Heard Before
Understanding the Magic of the Bias Grain
Before diving into the “how-to,” let’s take a moment to understand the fundamental principle that makes bias tape so special: the fabric’s grain. Fabric is typically woven with two primary sets of threads: the warp (running parallel to the selvage) and the weft (running perpendicular to the selvage). These threads are strong and have minimal stretch. However, when you cut fabric on the bias – specifically at a 45-degree angle to these woven threads – you unlock the inherent elasticity of the fabric. This diagonal cut allows the threads to flex and stretch, providing that crucial give and drape that is essential for neatly binding curved edges without causing tension, pulling, or an undesirable rigid look.
This inherent flexibility is why bias tape is the preferred choice for finishing necklines, armholes, scalloped edges, or any part of a garment or quilt that isn’t perfectly straight. A strip cut on the straight grain would simply fight against the curve, leading to puckering and a less-than-professional finish. The bias cut, on the other hand, conforms beautifully, creating a smooth, elegant, and durable edge. Moreover, the bias cut helps reduce fraying compared to a straight-cut edge, contributing to the longevity of your projects.
Essential Materials and Tools for Making Continuous Bias Tape
While the continuous bias tape method is a clever hack, it still requires a few basic sewing supplies. Gathering these items before you begin will ensure a smooth and enjoyable crafting experience. Here’s what you’ll need:
- Fabric: A square piece of fabric is ideal for this method. For beginners, a 15 x 16-inch square of lightweight quilting cotton or broadcloth is a great starting point, as these fabrics are easy to handle and press. You can adjust the size of the square depending on how much bias tape you need; a larger square yields more tape.
- Ruler: A clear acrylic ruler, preferably a quilting ruler, is indispensable for accurate measuring and drawing straight lines. Look for one with clear markings.
- Scissors: Sharp fabric scissors are a must for clean cuts. Alternatively, a rotary cutter with a self-healing mat is highly recommended for precision and speed, especially when dealing with long strips.
- Fabric Marker or Tailor’s Chalk: For marking your cutting lines clearly on the fabric. Choose a marker that is washable or disappears with heat.
- Sewing Machine: For stitching the fabric pieces together.
- Iron and Ironing Board: Essential for pressing seams and pre-folding the bias tape.
- Pins: To secure fabric layers before sewing.
- Bias Tape Maker Tool (Optional but Recommended): These handy tools come in various sizes and help you quickly press and fold your raw bias strip into perfectly neat single-fold or double-fold bias tape. While not strictly necessary for making the strip, they save a lot of time and ensure professional-looking results when finishing your tape.
Pro Tip on Fabric: Always pre-wash and iron your fabric before starting. This prevents future shrinkage and ensures your bias tape lies flat and true. For your first attempt, choose a fabric with a simple weave and pattern to make marking and cutting easier.
Step-by-Step Guide: How to Make Continuous Bias Tape
Follow these detailed steps to transform a simple fabric square into a generous length of beautiful, continuous bias tape. Pay close attention to the pressing instructions, as proper pressing is key to a professional finish.
Step 1: Preparing Your Fabric Square and Making the Initial Diagonal Cut
Begin by laying your chosen fabric square flat on your cutting surface. Ensure it is perfectly smooth and wrinkle-free. For this tutorial, we’ll assume a 15 x 16-inch fabric piece, but the principles apply to any square or rectangular piece. Now, identify one corner of your fabric. Using your ruler and fabric marker, draw a diagonal line from one corner to the opposite corner, effectively dividing your square into two large triangles. This cut is crucial as it sets the fabric on the true bias. Carefully cut along this diagonal line using your sharp scissors or rotary cutter. You will now have two fabric triangles.
Step 2: Joining the Triangles to Form an Offset Strip
Take one of the cut triangles. Place the bottom edge of this triangle on top of the top edge of the other triangle, ensuring that the right sides of the fabric are facing each other. The goal here is to create a slightly offset rectangle. Align the edges so that the cut diagonal line from Step 1 becomes one continuous seam when sewn. You’ll notice that the two triangular points will extend beyond the main body of the fabric, creating small “dog ears” at either end. Pin these edges securely together, then sew a straight seam along this pinned edge with a 1/4-inch seam allowance. Once sewn, press the seam open flat with your iron. Pressing the seam open reduces bulk and creates a smoother transition, which is vital for pliable bias tape.
Step 3: Marking Your Continuous Cutting Lines
Lay your newly sewn fabric rectangle flat with the right side facing up. You should now have a parallelogram shape. Using your clear acrylic ruler and fabric marker, draw parallel lines across the entire fabric, always keeping the lines parallel to the bias edge (the diagonal seam you just created). For most general purposes, lines spaced 1 1/2 inches apart are a good starting point. This spacing will yield 1 1/2-inch wide bias tape before folding. However, you have complete control over the width; you can make your bias tape as wide or as narrow as your project requires. Just ensure your lines are consistently spaced. Once you’ve drawn all your lines, trim off any small bits of extra fabric from the long, non-diagonal edges to create clean, straight sides, making it easier to match in the next step.
Tip for Width: Consider the final application. A 1-inch strip might become a 1/2-inch single-fold or 1/4-inch double-fold tape. Always cut your raw strips at least twice the desired finished width (for single-fold) or four times the desired finished width (for double-fold).
Step 4: Forming the Continuous Tube with an Offset Seam
This is the magical step that transforms your marked fabric into a continuous spiral. Take the two long, straight edges of your parallelogram. Fold them together so that they meet, bringing the right sides of the fabric together. Here’s the critical part: you need to offset the lines you just drew. Instead of matching the lines perfectly one on top of the other, shift one edge relative to the other until each marked line meets the *next* adjacent line on the opposite side. For instance, the first line on one edge should meet the second line on the other edge, the second line should meet the third, and so on. This creates a staggered alignment. Pin these offset edges securely in place, ensuring that your marked lines remain perfectly aligned with their ‘next-door neighbor’ lines. Stitch a 1/4-inch seam along this pinned edge, creating a continuous tube. Again, press this seam open for minimal bulk and a smoother finished tape. When you’re done, you’ll have a tube with a spiral pattern of marked lines, and importantly, the two ends of your bias tape will be hanging over, creating a continuous path.
Step 5: Cutting Your Continuous Bias Strip
Now that you have your continuous fabric tube with the spiraling lines, it’s time to unleash your bias tape! Start cutting along the marked lines. Begin at one of the hanging ‘ends’ of the bias tape spiral, and simply follow the marked line around and around the tube. You’ll be cutting in a continuous spiral, much like peeling an apple. Keep your cutting tool (scissors or rotary cutter) steady and follow the lines precisely. As you cut, a long, uninterrupted strip of bias tape will emerge. Continue cutting until you reach the very end of your marked fabric. You’ll be amazed at the length of bias tape you’ve created from such a compact piece of fabric!
Optional Step: Pre-Folding Your Bias Tape for Easy Application
Now you have a long, raw strip of bias tape. For many applications, you’ll want to pre-fold and press this strip to create either single-fold or double-fold bias tape. This is where a bias tape maker tool truly shines:
- Single-Fold Bias Tape: Feed one end of your raw bias strip into the wide end of your bias tape maker tool (choose a tool size appropriate for your raw strip width). As you gently pull the fabric through the narrow end, it will automatically fold the raw edges inward towards the center. Follow closely behind with a hot iron, pressing the folds flat as they emerge. This creates a neat, uniform single-fold bias tape perfect for binding straight or gently curved edges.
- Double-Fold Bias Tape: To make double-fold bias tape, you start with a single-fold strip. Once you have a single-fold strip (either made with a tool or by hand), simply fold it in half again lengthwise, enclosing the raw edges within. Press firmly with your iron. Double-fold bias tape is incredibly durable and is commonly used for quilt binding, finishing thick edges, or creating decorative accents where both sides of the tape will be visible.
Pre-folding ensures consistency and saves a tremendous amount of time when you’re ready to attach the bias tape to your project.
Tips for Continuous Bias Tape Success
- Practice Makes Perfect: Don’t be discouraged if your first attempt isn’t flawless. The offset alignment in Step 4 can be a little tricky initially. Practice on scrap fabric until you get the hang of it.
- Fabric Choice Matters: For your first few tries, stick to a stable, lightweight cotton. Fabrics with stretch (like knits) or slippery surfaces (like silk) can be more challenging to cut and sew precisely.
- Accurate Measurements: Precision in cutting your initial square and drawing your parallel lines will directly impact the quality and uniformity of your bias tape.
- Press, Press, Press: Proper pressing at each stage is non-negotiable. It flattens seams, sets folds, and results in a crisper, more professional-looking bias tape.
- Use a Rotary Cutter: While scissors work, a rotary cutter with a mat provides superior accuracy and speed, especially for the long spiral cut.
- Storage: Once made and pressed, you can wind your continuous bias tape onto a cardboard bobbin or simply coil it neatly for storage until you’re ready to use it.
Embrace the Efficiency of Continuous Bias Tape
By mastering the continuous bias tape method, you’re not just learning a new sewing technique; you’re unlocking a more efficient and enjoyable way to approach your projects. Gone are the days of fiddly little strips and bulky seams. This clever hack empowers you to create custom bias tape in any fabric, ensuring a perfect match and a professional finish every time. Whether you’re binding a beloved quilt, adding a polished edge to a garment, or crafting unique home decor, continuous bias tape will become your go-to solution for beautifully finished edges.
So, gather your materials, follow these steps, and prepare to be amazed at the ease and quantity of bias tape you can produce. Your sewing projects will thank you for this incredible time-saving and quality-enhancing skill. Happy sewing!