
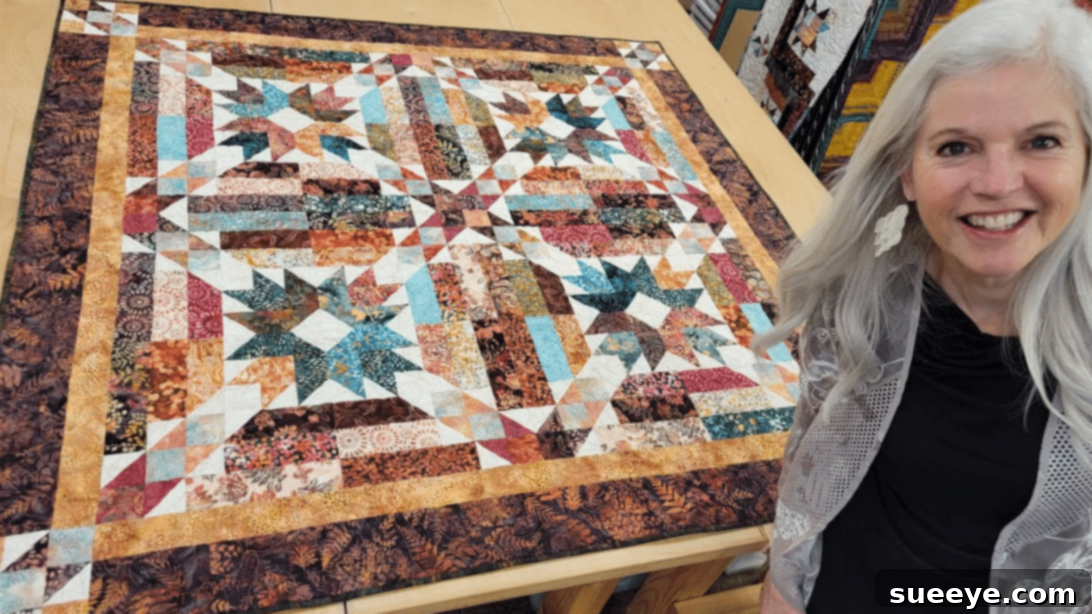
Embark on a delightful quilting journey with a project that promises both satisfaction and a stunning finished piece. There’s nothing quite like the thrill of discovering a new quilt pattern that can be brought to life over a weekend, and this particular design, a captivating Chain Link Quilt, has quickly become a favorite. Expertly demonstrated by Jordan Fabrics on YouTube, this project is not only visually appealing but also remarkably easy to make, making it an ideal choice for beginners seeking a gentle challenge and a rewarding introduction to the world of quilting.
The beauty of this Chain Link Quilt lies in its deceptively simple construction, which yields a complex-looking and elegant design. Jordan Fabrics is renowned for their exceptional ability to break down intricate quilting processes into clear, concise, and incredibly straightforward steps. Their teaching method ensures that even those new to sewing machines and fabric cutting can confidently follow along, minimizing frustration and maximizing success. We are confident that you can achieve a perfectly crafted quilt, even on your very first attempt, thanks to the impeccable guidance provided. Dive into the detailed instructions below to master this pattern, and for a comprehensive visual aid, be sure to watch the accompanying video tutorial from Jordan Fabrics.
Why the Chain Link Quilt is Perfect for Your Next Project
Quilting is more than just a craft; it’s a therapeutic art form that allows you to express creativity, relieve stress, and produce tangible, beautiful items. For beginners, choosing the right pattern is crucial for building confidence and developing fundamental skills. The Chain Link Quilt excels in this regard. Its design, characterized by interlocking chain motifs, provides an excellent opportunity to practice essential quilting techniques such as accurate cutting, precise piecing, and effective pressing. These skills are the bedrock of all quilting endeavors, and mastering them with a project like this sets you up for future success.
Beyond skill development, the Chain Link Quilt offers incredible versatility. Depending on your fabric choices, you can create a quilt that is vibrant and playful, sophisticated and modern, or classic and cozy. It makes a wonderful personalized gift, a charming wall hanging, or a snug throw for your living space. The repetition in the block construction means that once you’ve understood the first few steps, the rest of the quilt top comes together efficiently, allowing you to see rapid progress and stay motivated.
Essential Materials for Your Chain Link Quilt
Gathering the right materials and tools before you begin is a crucial first step in any successful quilting project. Precision is key in quilting, and having quality supplies makes the process smoother and the results more professional. Here’s a detailed look at what you’ll need:
- Assorted Print Fabrics: These will form the “links” of your chain. Choose a variety of prints that complement each other. Consider a mix of small, medium, and large-scale prints for visual interest. For beginners, 100% quilting cotton is highly recommended due to its ease of handling, minimal stretch, and durability. Pay attention to how the colors interact – a good contrast between your print fabrics and your background fabric will make the chain link design pop.
- Background Fabric: This fabric provides the negative space that allows your chain links to stand out. Often, a solid color or a tone-on-tone print works best. White, cream, or light grey are popular choices for a classic look, while a darker solid can create a dramatic effect. Ensure your background fabric provides sufficient contrast to your assorted prints.
- Ruler (Acrylic Quilting Ruler): An essential tool for precise cutting. A clear acrylic ruler, typically 6×24 inches or 6.5×12.5 inches, with clear markings, will be invaluable. Look for rulers with 1/4-inch increments and clear diagonal lines.
- Marking Pen, Pencil, or Chalk: Used for drawing lines on your fabric, especially for diagonal stitching or alignment. Choose a type that is easily removable or disappears (e.g., water-soluble pen, chalk wheel, or an air-erasable marker). Always test on a scrap piece of fabric first.
- Scissors or Rotary Cutter and a Cutting Mat: While sharp fabric scissors are always useful, a rotary cutter is a game-changer for quilters. It allows for quick, precise, and straight cuts through multiple layers of fabric when used with an acrylic ruler and a self-healing cutting mat. A 45mm rotary cutter is a versatile size. Ensure your cutting mat is appropriately sized for your workspace.
- Needle and Thread: For machine piecing, a universal needle size 80/12 or a quilting-specific needle is ideal. Use a high-quality 50-weight 100% cotton thread for piecing, matching the color to your background fabric or choosing a neutral like light grey or beige.
- Iron, for pressing: A good quality iron with steam functionality is indispensable. In quilting, we “press” seams, which involves lifting and placing the iron, rather than “ironing” (gliding the iron), to avoid stretching the fabric. Pressing creates flat, accurate seams that contribute to a professional finish.
- Sewing Machine: Any basic sewing machine capable of a straight stitch will work. Ensure it’s in good working order, with a fresh needle and properly wound bobbin. A quarter-inch presser foot can be incredibly helpful for maintaining consistent seam allowances.
- Pattern: This digital download from Jordan Fabrics is your blueprint. It provides all the specific cutting dimensions and detailed instructions crucial for the Chain Link Quilt. Make sure to download and print it before you begin.
RELATED: Easy Ribbon Star Quilt Block Tutorial
How to Make a Chain Link Quilt: Step-by-Step Guide
Now that you have all your materials ready, let’s dive into creating your beautiful Chain Link Quilt. Remember to maintain a consistent ¼-inch seam allowance throughout your piecing unless otherwise specified by the pattern.
Step 1: Preparing Your Fabric and Initial Strip Piecing
Begin by downloading the official Chain Link Quilt pattern here. This pattern contains precise cutting instructions for all your fabric pieces. Carefully cut your assorted print fabrics and background fabric to the specified sizes using your rotary cutter, ruler, and mat. Accuracy in this step is paramount for a successful outcome. Once your fabrics are cut, select one background fabric strip and one print fabric strip. Place them with their right sides facing each other, ensuring the edges are perfectly aligned. Stitch them together down both long sides, creating a fabric tube. This technique is often referred to as “tube piecing.” After stitching, you will cut this tube into specific triangular units, as visually demonstrated in the Jordan Fabrics video tutorial. These triangles will form the initial components of your chain links, so pay close attention to the cutting angles for a clean finish.
Step 2: Pressing Seams and Adding Background Squares
Once your fabric tubes are cut into individual units, it’s time to press your seams. Carefully open each unit and press the seams toward the darker fabric. This common quilting practice helps prevent the seam allowance from showing through lighter fabrics, especially after quilting. As you press, you might notice small “nubs” or “dog ears” at the corners; these are excess fabric bits from the diagonal cuts. Trim these off cleanly to ensure your pieces fit together perfectly. Next, take a background square and position it above one side of a print rectangle, ensuring their right sides are facing. This specific placement is key to creating a half-square triangle (HST) unit. Stitch diagonally from one corner of the background square to the opposite corner. This diagonal stitch line will be your guide for the next step, effectively creating a future seam line.
Step 3: Crafting Half-Square Triangles and Assembling the Block
After stitching diagonally, you will need to trim off the excess layers of fabric. Typically, this involves cutting ¼ inch away from your sewn diagonal line, on the side away from the corner you will keep. Discard the trimmed excess. Now, carefully press the remaining fabric open, revealing a perfectly formed half-square triangle unit. You will need to create matching half-square triangle units to form the full chain link block, often resulting in two identical units from one background square and print rectangle combination. Refer to the video for a clear visual on how these units are created and then arranged. Once you have your HSTs, gather them along with any additional background squares or rectangles required by the pattern. Arrange these pieces precisely into the block formation as expertly demonstrated in the video tutorial. This is where the magic of the chain link truly begins to emerge. Carefully stitch these arranged pieces together, taking care to match your points and seams. Continue to press your seams open or to the side (as instructed by the pattern or video) as you go. Pressing after each seam helps ensure flatness and accuracy, preventing bulk and distortion.
Step 4: Building the Quilt Top – From Blocks to a Finished Quilt
With your first chain link block complete, you now have the fundamental unit for your entire quilt. Continue to make additional blocks, replicating the precise steps you’ve just mastered. The pattern will specify how many blocks you’ll need for your desired quilt size. Once you have a sufficient number of blocks, you’ll begin the exciting process of piecing them together. The Chain Link design often involves arranging four blocks together to create a larger, distinct chain motif. Carefully align and stitch these four blocks, paying close attention to how the chain links connect and flow. Continue assembling these larger units into rows, and then stitch your rows together to form the complete quilt top. Once your quilt top is assembled, the creative possibilities for finishing are endless. You might choose to add decorative borders to frame your design, layer it with batting and a backing fabric, and then quilt it using your preferred method (machine quilting, hand quilting, or tie quilting). Finally, a durable and attractive binding will be added to the edges, giving your quilt a clean, professional finish. The Jordan Fabrics tutorial may offer specific suggestions for borders and finishing, allowing you to personalize your creation.
Creating your own Chain Link Quilt is a profoundly rewarding experience that combines the joy of crafting with the satisfaction of producing a beautiful, functional item. This project is not just about making a quilt; it’s about building confidence in your quilting skills, understanding the importance of precision, and developing an eye for design. The clear instructions from Jordan Fabrics make this complex-looking pattern accessible to everyone, ensuring a delightful and successful crafting adventure.
We encourage you to visit the Jordan Fabrics YouTube channel for more incredible quilting tutorials and to support their fantastic work. Subscribe to their channel to stay updated with their latest projects and expand your quilting repertoire. Happy quilting!
*All these images are credited to Jordan Fabrics via YouTube. Give their channel a visit and subscribe for more inspiration and tutorials!
Master the Art of Quilting with this Easy Chain Link Quilt Tutorial