
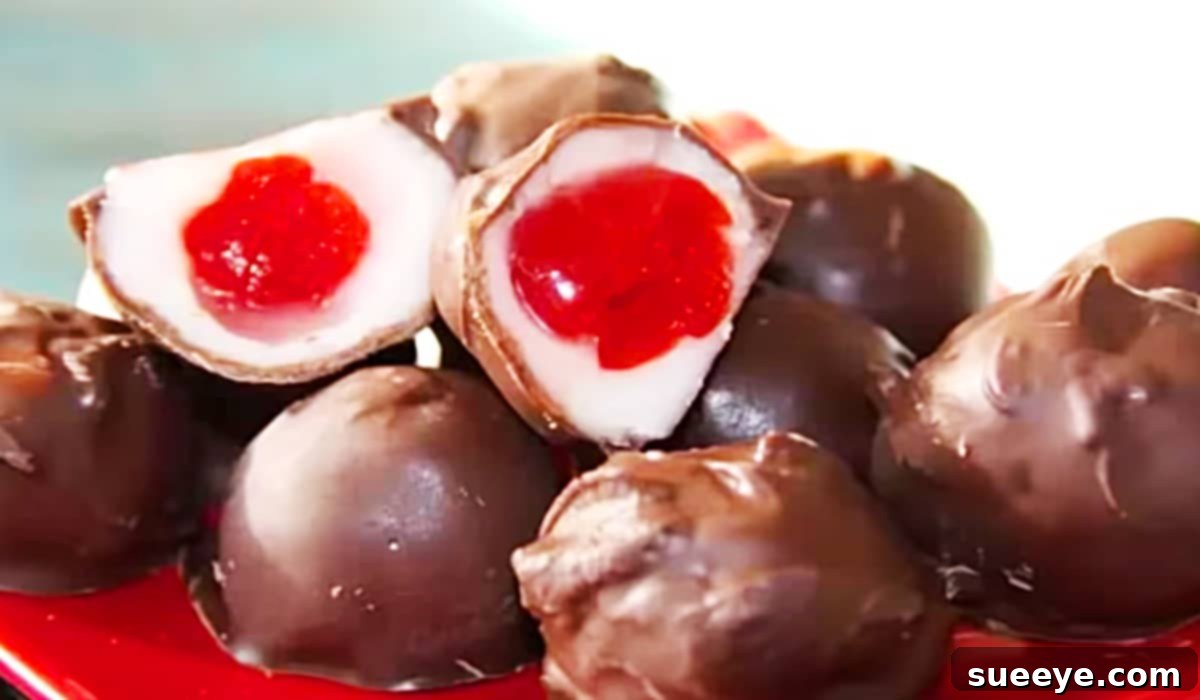
There’s something truly magical about the holiday season, and for many, that magic is often intertwined with cherished family recipes and the joy of homemade treats. Among the most iconic and beloved festive confections are chocolate-covered cherries. These delightful bites, with their bright, juicy center enveloped in a rich, creamy fondant and then encased in a crisp chocolate shell, evoke a sense of nostalgic warmth and celebration. When I first discovered this simple yet brilliant recipe from Cool Recipes on YouTube, I instantly knew it was a must-try. The idea of crafting these beautiful candies at home, especially using readily available Maraschino cherries, made it incredibly appealing. They looked like they would make the perfect, thoughtful gift for friends and family, adding a personal touch to holiday gifting. I vividly recall how my school teachers would receive tons of these elegant treats as Christmas presents, making the irresistible combination of chocolate and cherry forever synonymous with festive cheer and generosity. This recipe promises to bring that same joy and tradition right into your kitchen, making it an ideal project for anyone looking to add a touch of sweetness to their holiday season.
Beyond their charming appearance and irresistible taste, homemade chocolate-covered cherries offer a unique satisfaction that store-bought versions simply can’t match. You have complete control over the quality of ingredients, allowing you to tailor the sweetness and chocolate type to your exact preference. Whether you prefer the deep richness of dark chocolate, the classic sweetness of milk chocolate, or even the subtle creaminess of white chocolate, this recipe serves as a versatile canvas for your culinary creativity. It’s not just a recipe; it’s an invitation to create lasting memories, share delicious moments, and perhaps even start a new holiday tradition with your loved ones. Get ready to transform simple ingredients into extraordinary confections that will impress and delight everyone who takes a bite.
Ingredients For Homemade Chocolate Covered Cherries:
Crafting these exquisite chocolate-covered cherries requires only a handful of common ingredients, proving that sometimes the simplest components can yield the most impressive results. Here’s what you’ll need to gather:
- 60 Maraschino Cherries: Ensure these are thoroughly drained and dried. This step is crucial for preventing a watery filling and ensuring proper adhesion of the fondant and chocolate. You can gently pat them with paper towels multiple times or even let them air dry on a rack for a few hours.
- 3 Tablespoons of Butter: Softened to room temperature. Butter adds a rich, smooth texture to the fondant filling and contributes to its delightful creaminess. Using softened butter makes it much easier to incorporate with the other ingredients, ensuring a lump-free mixture.
- 3 Tablespoons of Corn Syrup: This ingredient is vital for creating the signature chewy, yet melt-in-your-mouth consistency of the cherry’s fondant center. Corn syrup also helps prevent crystallization, ensuring your filling stays smooth and luscious.
- 2 Cups of Sifted Powdered Sugar (Confectioners’ Sugar): Sifting the powdered sugar is an important step to remove any lumps, guaranteeing a silky-smooth fondant. This sugar forms the bulk of your creamy filling, providing its sweetness and structure.
- 1 Pound of Chocolate: The beauty of this recipe lies in its adaptability. You can use your favorite type of chocolate – whether it’s decadent dark chocolate for a sophisticated flavor, classic milk chocolate for a sweeter profile, or even a blend of both. High-quality chocolate will yield the best results for both taste and a smooth, appealing finish. Chocolate chips, baking bars, or even couverture chocolate can be used.
Directions: Crafting Your Chocolate Covered Cherry Masterpieces
This recipe from Cool Recipes, as demonstrated on YouTube, guides you through creating these delectable homemade candies in a few easy-to-follow steps. The process begins with preparing the luscious interior fondant and meticulously wrapping it around each cherry, followed by a luxurious chocolate coating.
Step 1: Preparing the Maraschino Cherries
The foundation of a perfect chocolate-covered cherry is a well-prepared cherry. Begin by carefully draining all the Maraschino cherries from their syrup. This step is more critical than you might think; any excess moisture will prevent the fondant from sticking properly and can even cause the chocolate coating to seize or bloom. Once drained, spread the cherries out on a layer of paper towels. Gently pat them dry, then cover them with another layer of paper towels and let them air dry for at least an hour, or even up to several hours, flipping them occasionally. The drier the cherries, the better your results will be. Some even recommend a quick blot with a clean cloth before proceeding to ensure maximum dryness.
Step 2: Crafting the Creamy Fondant Filling
Now it’s time to create the magical, sweet heart of your candies. In a medium-sized mixing bowl, combine the softened butter, corn syrup, and sifted powdered sugar. Using a sturdy spoon or a stand mixer with a paddle attachment, mix these ingredients together until a smooth, pliable dough forms. The consistency should be thick and slightly sticky, yet firm enough to handle and shape. If the mixture seems too sticky, add a tiny bit more sifted powdered sugar, a teaspoon at a time, until it reaches the desired texture. Conversely, if it appears too dry or crumbly, a few drops of additional corn syrup can help bring it together. The goal is a uniform, creamy dough that will perfectly encase your cherries.
Step 3: Encasing the Cherries in Fondant
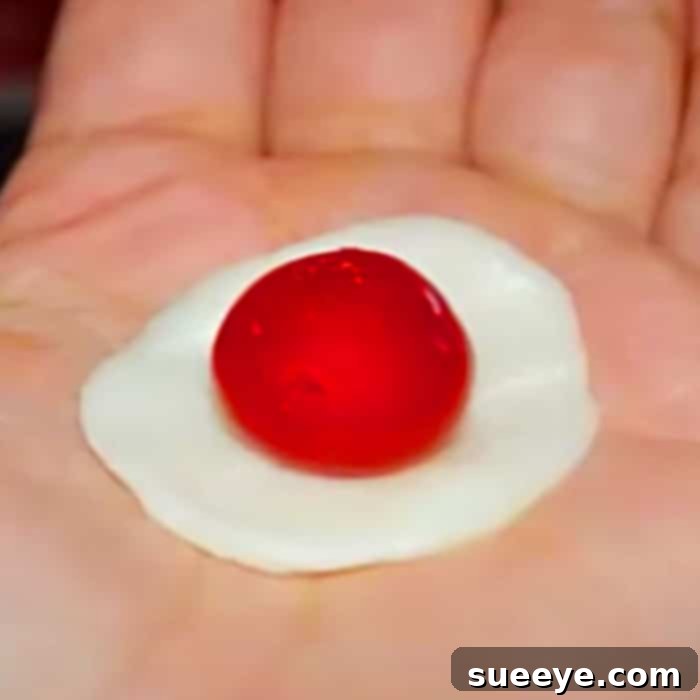
This step requires a little patience and a gentle touch, but it’s incredibly rewarding. Take a small amount of the fondant dough – roughly a half teaspoon to a full teaspoon, depending on the size of your cherries. Flatten this portion into a thin disc in the palm of your hand. Place one dried Maraschino cherry in the center of the disc. Carefully and completely wrap the fondant around the cherry, ensuring it’s fully sealed on all sides. Roll it gently between your palms to form a smooth, uniform ball. It’s important that no cherry is exposed, as this will help prevent the chocolate from cracking later. Repeat this process for all 60 cherries, placing the finished fondant-covered cherry balls on a parchment-lined baking sheet. Once all cherries are wrapped, place the baking sheet in the refrigerator for at least 30-60 minutes. Chilling the fondant balls will make them firmer and easier to dip in chocolate, preventing them from falling apart.
Step 4: Melting the Chocolate
While your fondant-covered cherries are chilling, prepare your chocolate. There are several effective methods for melting chocolate: a double boiler or a microwave. If using a double boiler, place a heatproof bowl over a pot of simmering water, ensuring the bottom of the bowl does not touch the water. Add your chopped chocolate (or chips) to the bowl and stir gently until it’s completely melted and smooth. If using a microwave, place the chocolate in a microwave-safe bowl and heat in 30-second intervals, stirring thoroughly after each interval, until fully melted. Be careful not to overheat the chocolate, as this can cause it to seize and become unusable. The goal is a smooth, glossy consistency perfect for dipping. A well-melted chocolate is key to a beautiful, even coating.
Step 5: Dipping and Setting the Cherries
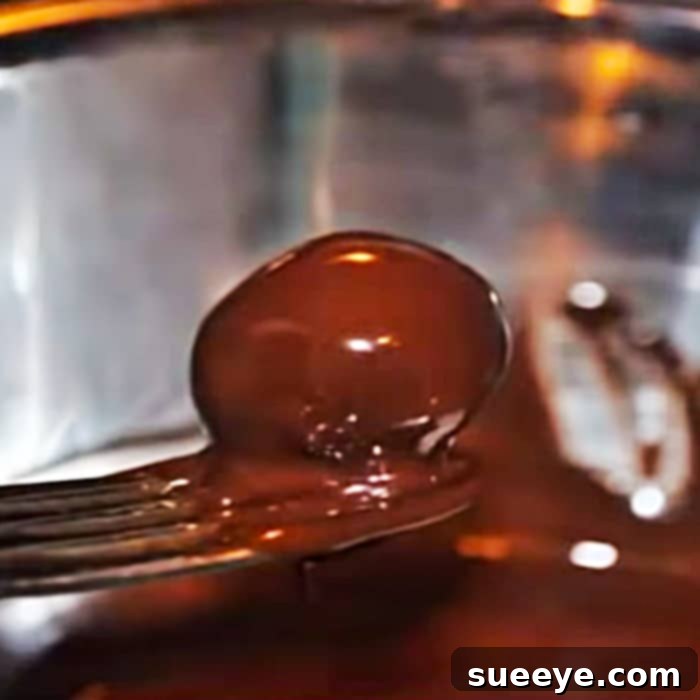
Once your chocolate is perfectly melted and your fondant-covered cherries are firm from chilling, it’s time for the final, most satisfying step. Using a dipping fork or a skewer, carefully submerge each cherry ball into the melted chocolate, ensuring it’s completely coated. Gently tap the fork against the side of the bowl to allow any excess chocolate to drip off. This helps create a smooth, even layer without pooling at the bottom. Carefully transfer the chocolate-dipped cherry to a baking rack (ideally one with small grates to prevent the cherries from falling through) lined with parchment paper or wax paper. This allows air to circulate, helping the chocolate to set quickly and evenly. Repeat this process until all your cherry dough balls are gloriously enrobed in chocolate. For a quicker set, you can place the rack of finished cherries in the refrigerator for about 15-30 minutes, or until the chocolate is firm to the touch.
Congratulations! You’ve just created a batch of exquisite homemade chocolate-covered cherries. This is such a simple and affordable recipe, and the resulting candies are truly spectacular. These chocolate-covered cherries make wonderful, heartfelt gifts for anyone of any age, perfect for holiday baskets, party favors, or simply as a delightful indulgence for yourself and your loved ones. The effort you put into making these will be evident in every delicious bite, a testament to the joy of homemade goodness.
Tips for Perfect Chocolate Covered Cherries
- Drying is Key: We can’t stress this enough – thoroughly drying the Maraschino cherries is the most crucial step. Excess moisture can cause the fondant to become sticky and difficult to work with, or even lead to sugar bloom on your finished chocolates.
- Work in a Cool Environment: If your kitchen is warm, the fondant can become too soft and sticky. Consider working in batches or chilling your hands if needed.
- Temperature Control for Chocolate: For the smoothest, glossiest finish that resists melting at room temperature, consider tempering your chocolate. While not strictly necessary for this recipe, it elevates the quality significantly. If not tempering, ensure your chocolate isn’t overheated.
- Use Good Quality Chocolate: The flavor of your finished cherries will largely depend on the quality of chocolate you use. Invest in a good brand that you enjoy eating on its own.
- Uniform Fondant Layer: Try to keep the fondant layer around each cherry consistent. This ensures even flavor distribution and a professional look.
- Chilling Times: Don’t rush the chilling steps. Both the fondant-covered cherries and the finished product benefit from adequate time in the refrigerator to firm up properly.
Creative Variations and Gifting Ideas
While the classic chocolate-covered cherry is undeniably delicious, there’s always room for personalization and creativity:
- Different Chocolate Types: Experiment with white chocolate, dark chocolate with varying cocoa percentages (e.g., 70% for a richer, less sweet treat), or even a combination.
- Flavor Enhancements: Add a tiny drop of almond extract or vanilla extract to your fondant mixture for an extra layer of flavor. Just be sparing, as a little goes a long way.
- Decorative Toppings: Before the chocolate sets, sprinkle with a pinch of sea salt, colorful sprinkles for a festive touch, finely chopped nuts, or a drizzle of contrasting melted chocolate.
- Presentation is Everything: When gifting, arrange your homemade chocolate-covered cherries in small decorative boxes lined with confectionery paper. Tie with a festive ribbon and add a handmade tag. They also look stunning on a tiered dessert stand for a holiday gathering.
- Miniature Tarts: For a twist, once the fondant-covered cherries are chilled, instead of dipping them, place them into mini tart shells and top with a chocolate ganache for a different texture.
Storage of Your Homemade Delights
Proper storage ensures your chocolate-covered cherries remain fresh and delicious for an extended period:
- Room Temperature: If stored in an airtight container at cool room temperature (below 70°F or 21°C), they can last for up to one week. However, the fondant will continue to liquefy over time, creating that signature juicy center.
- Refrigerator: For longer storage and to slow down the liquefaction of the fondant, store them in an airtight container in the refrigerator for up to 2-3 weeks. Allow them to come to room temperature for about 15-20 minutes before serving for the best flavor and texture.
- Freezer: For extended preservation, you can freeze chocolate-covered cherries for up to 2-3 months. Place them in a single layer on a baking sheet to freeze, then transfer them to an airtight freezer-safe container. Thaw them in the refrigerator overnight before serving.
Making chocolate-covered cherries at home is more than just following a recipe; it’s an experience that fills your home with wonderful aromas and your heart with the joy of creating something truly special. This 5-ingredient recipe is an accessible and rewarding way to partake in a beloved holiday tradition, ensuring that your festive season is filled with delicious treats and memorable moments. Enjoy the process, and savor every single bite!