
Irresistible Creamy Berry Trifle Recipe: Your Ultimate Guide to a Perfect Dessert
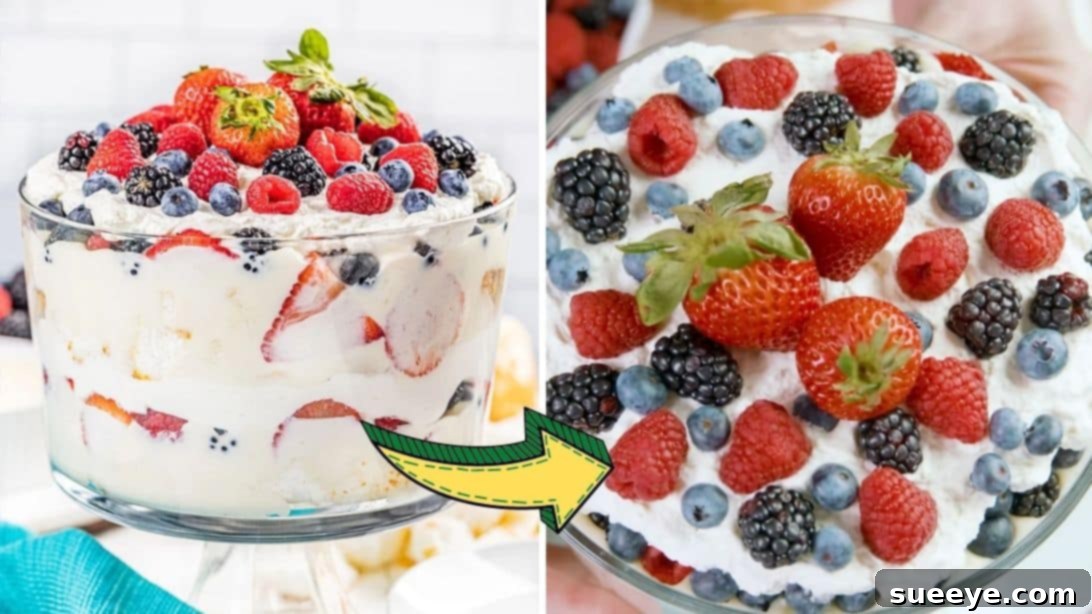
Prepare to delight your taste buds and impress your guests with this absolutely irresistible Creamy Berry Trifle! This show-stopping dessert is a vibrant symphony of flavors and textures, making it the ultimate treat for any gathering, from casual family dinners to elegant holiday parties. Layers of light, airy cake, velvety homemade vanilla pudding, an abundance of fresh, juicy berries, and fluffy whipped cream come together in a dessert that’s as beautiful to behold as it is delicious to eat. Forget complicated baking; this trifle is surprisingly simple to assemble, allowing you to create a gourmet experience with minimal effort. If you’re searching for a refreshingly delicious, creamy, and visually stunning dessert, look no further. This recipe, inspired by The Stay At Home Chef, will quickly become a cherished favorite in your recipe collection.
Why This Creamy Berry Trifle Will Be Your New Favorite Dessert
There are countless reasons to fall in love with this berry trifle. Beyond its breathtaking presentation, it offers a perfect balance of sweetness and tartness, with a delightful interplay of soft and creamy textures. It’s a versatile dessert that can be adapted to suit various occasions and dietary preferences, making it a crowd-pleaser for everyone. Here’s what makes it truly special:
- Effortlessly Elegant: With its distinct, colorful layers, this trifle naturally creates an impressive centerpiece for any dessert table, requiring no advanced decorating skills.
- Bursting with Fresh Flavors: The combination of vibrant, fresh berries with rich vanilla and sweet cream is a classic pairing that never fails to satisfy.
- Simple & Accessible: Despite its gourmet appearance, the steps are straightforward and require no baking from scratch (unless you wish to bake your own cake). The homemade pudding and whipped cream elevate the taste without adding complexity.
- Perfect for Any Occasion: Whether it’s a summer barbecue, a festive holiday, a birthday celebration, or just a treat for a Sunday afternoon, this trifle fits perfectly.
- Make-Ahead Friendly: You can assemble this trifle in advance, allowing the flavors to meld beautifully and freeing up your time on the day of your event.
Essential Ingredients for Your Trifle Masterpiece
Creating this magnificent creamy berry trifle starts with a selection of fresh, high-quality ingredients. While the overall list might seem extensive, many items are pantry staples, and each plays a crucial role in building the symphony of flavors and textures. The secret to an outstanding trifle lies in the homemade vanilla pudding and whipped cream, which provide unparalleled richness and freshness compared to store-bought alternatives.
Main Trifle Layers:
- 6 cups of Angel Food Cake or Sponge Cake, cubed: The foundation of our trifle. Angel food cake offers a wonderfully light and airy texture that absorbs moisture beautifully, while sponge cake provides a slightly richer, denser base. Choose your preferred option, ensuring it’s cut into manageable cubes for easy layering and serving.
- 4 cups of Fresh Berries, a delightful mix: The star of the show! A variety of fresh berries (strawberries, blueberries, raspberries, blackberries) not only adds a stunning visual appeal but also contributes a fantastic range of sweet and tart notes. Ensure they are washed and thoroughly dried before use to prevent the trifle from becoming watery.
- 4 cups of Homemade Vanilla Pudding: This creamy, luscious layer is the heart of the trifle, providing a rich, comforting flavor and smooth texture. Our homemade recipe ensures a depth of flavor that store-bought pudding simply can’t match.
- 4 cups of Homemade Whipped Cream: A light, airy, and essential component that crowns each layer, adding a decadent cloud-like texture and balancing the richness of the pudding and tartness of the berries.
For the Velvety Homemade Vanilla Pudding:
- 5 tablespoons of Unsalted Butter: Forms the base of a roux, providing richness and helping to thicken the pudding.
- 3 tablespoons of Cornstarch: Our primary thickening agent, ensuring a smooth, silky consistency without any lumps.
- 4 cups of Heavy Whipping Cream: The liquid base for our pudding, contributing to its creamy texture and rich flavor.
- ¼ cup of Granulated Sugar: Sweetens the pudding to perfection, complementing the vanilla and white chocolate.
- 1½ cups of White Chocolate Chips: Melts into the warm pudding, infusing it with a luxurious, subtle vanilla-like sweetness and an even creamier mouthfeel.
For the Fluffy Homemade Whipped Cream:
- 3 cups of Heavy Cream (very cold): The essential ingredient for light and stable whipped cream. Ensure it’s thoroughly chilled for best results.
- ⅓ cup of Powdered Sugar (confectioners’ sugar): Sweetens the cream and helps to stabilize it, preventing it from weeping.
Step-by-Step Guide: Crafting Your Dream Berry Trifle
Follow these detailed instructions to assemble your stunning creamy berry trifle. Each step is designed to ensure a perfect outcome, from the silkiest pudding to the most elegant layers.
Section 1: The Silky Smooth Vanilla Pudding
The foundation of this trifle is its rich, homemade vanilla pudding. Taking the time to prepare this component from scratch truly elevates the entire dessert.
- Prepare the Roux Base: Place a medium-sized, heavy-bottomed saucepan over low heat. Add the 5 tablespoons of butter and allow it to melt completely. Once melted, sprinkle in the 3 tablespoons of cornstarch. Whisk these two ingredients together continuously for about 1 minute until they form a smooth paste and are well combined. This is creating a roux, which will be the thickening agent for your pudding. Ensure you cook out the starchy flavor but don’t let it brown.
- Combine Liquids and Sweetener: Gradually pour in the 4 cups of heavy whipping cream and add the ¼ cup of granulated sugar to the saucepan. Whisk vigorously to fully incorporate the cream and sugar into the butter-cornstarch mixture, ensuring there are no lumps.
- Thicken to Perfection: Slowly increase the heat to medium-high, continuing to stir constantly with a whisk or a heat-resistant spatula. The continuous stirring is crucial to prevent the pudding from sticking to the bottom, scorching, or forming lumps. As the cream heats, it will begin to thicken. Keep stirring until the mixture reaches a gentle simmer and coats the back of a spoon thickly. This process usually takes about 8-12 minutes.
- Infuse with White Chocolate: Once the pudding has thickened and is simmering gently, immediately remove the pan from the heat. Add the 1½ cups of white chocolate chips to the hot pudding. Continue stirring until the white chocolate chips have completely melted and are smoothly incorporated into the pudding, creating a glossy, rich mixture.
- Chill for Setting: Transfer the warm pudding into a clean bowl. Cover the surface of the pudding directly with plastic wrap, pressing it down so it touches the pudding to prevent a skin from forming. Place the bowl in the refrigerator and allow it to cool completely and set, for at least 1 hour, or preferably 2-3 hours. The pudding should be firm enough to scoop.
Tip for Perfect Pudding: Always stir continuously, especially once the cream starts to heat up. Low to medium heat and constant agitation are key to a lump-free, perfectly thickened pudding.
Section 2: Fluffy Cloud Whipped Cream
No trifle is complete without generous dollops of freshly whipped cream. It adds an essential lightness and complements the other rich components beautifully.
- Prepare for Whipping: Ensure your heavy cream is very cold. For best results, chill your mixing bowl (preferably a metal one) and whisk attachment in the freezer for 10-15 minutes before you begin. This helps the cream whip up faster and hold its peaks better.
- Whip the Cream: Pour the 3 cups of very cold heavy cream into the chilled bowl. Add the ⅓ cup of powdered sugar. Using an electric mixer (stand mixer with whisk attachment or a hand mixer) on medium-high speed, whip the cream and sugar together. Continue whipping until stiff peaks form. Stiff peaks mean that when you lift the whisk, the cream holds its shape firmly. Be careful not to over-whip, as it can quickly turn into butter.
Tip for Perfect Whipped Cream: Always start with cold cream and a cold bowl/whisk. Watch the cream carefully and stop whipping as soon as stiff peaks form to maintain its light, fluffy texture.
Section 3: Assembling Your Stunning Trifle
Now comes the fun part – layering! A clear trifle dish is highly recommended to showcase the beautiful layers of your creation.
- Prepare the Cake: If you haven’t already, slice your angel food cake or sponge cake into approximately 1-inch cubes.
- Begin Layering – Cake Base: Spoon about 3 cups of the cubed cake into the bottom of your trifle dish, creating an even layer.
- Add Vanilla Pudding: Gently scoop about 2 cups of your chilled vanilla pudding mixture over the cake layer. Use an offset spatula or the back of a spoon to carefully spread it out evenly, ensuring it reaches the edges of the dish.
- Layer with Fresh Berries: Arrange about 2 cups of your fresh, mixed berries over the vanilla pudding. You can place them artfully around the edges for a decorative effect or simply scatter them evenly.
- Top with Whipped Cream: Scoop and spread about 2 cups of the freshly whipped cream over the berry layer. Smooth it out gently.
- Repeat and Build: Continue this layering process: cake, vanilla pudding, berries, and whipped cream. Repeat until you have used up all your ingredients, usually making 2-3 full sets of layers depending on the size of your trifle dish.
- Garnish and Serve: For the final touch, arrange a few whole, pristine berries on top of the last layer of whipped cream as an elegant garnish. If desired, you can also sprinkle a tiny bit of lemon zest for added brightness.
- Chill Before Serving: Cover the trifle loosely with plastic wrap and refrigerate for at least 30 minutes to allow the flavors to meld and the layers to set slightly. This also ensures it’s perfectly chilled for serving.
- Enjoy! Serve your beautiful creamy berry trifle and savor the compliments from your family and friends!
Tips for Trifle Perfection
To ensure your creamy berry trifle is nothing short of spectacular, consider these helpful tips:
- Choose a Clear Trifle Dish: A transparent glass trifle bowl is essential to display the beautiful layers. This is part of the trifle’s charm!
- Don’t Overload Layers: While it’s tempting to pile on, try to keep your layers relatively even in thickness for both visual appeal and balanced taste in each spoonful.
- Vary Your Berries: A mix of berries (strawberries, blueberries, raspberries, blackberries) offers a beautiful spectrum of colors and flavors. Always wash and gently pat them dry before adding to the trifle to prevent excess moisture.
- Cake Choices: While angel food and sponge cake are excellent, you can also experiment with pound cake, ladyfingers, or even leftover vanilla or lemon cake. For a chocolate lover’s twist, try chocolate cake!
- Make-Ahead Mastery: This trifle is an excellent make-ahead dessert. You can assemble it up to 8-12 hours in advance. The flavors actually deepen and meld beautifully as it sits in the refrigerator. Just add the final berry garnish right before serving to keep them looking fresh.
- Storage: Store any leftover trifle tightly covered in the refrigerator for up to 2-3 days. The cake may soften further over time, but it will still be delicious.
- Individual Servings: For a more controlled presentation, you can layer the trifle in individual clear glass jars or parfait glasses.
Variations to Explore
Once you master the classic creamy berry trifle, feel free to get creative with these delightful variations:
- Chocolate Berry Trifle: Substitute the vanilla pudding with chocolate pudding and use chocolate cake or brownies instead of vanilla cake.
- Tropical Trifle: Swap the berries for sliced mango, kiwi, pineapple, and passion fruit. A hint of coconut extract in the whipped cream would be divine!
- Lemon Berry Trifle: Add lemon zest to your vanilla pudding and whipped cream, or use a lemon-flavored cake for an extra zesty kick.
- Boozy Trifle: For an adult-only version, lightly drizzle the cake layers with a berry liqueur, Grand Marnier, or a sweet wine like Moscato before adding the pudding.
- Nutty Crunch Trifle: Add a layer of toasted almonds or pecans between the cake and pudding for a delightful textural contrast.
This Creamy Berry Trifle is more than just a dessert; it’s an experience. Its vibrant colors, delicate textures, and refreshing flavors make it an unforgettable treat that will surely become a staple in your entertaining repertoire. Whether you’re celebrating a special occasion or simply craving something extraordinary, this trifle delivers on all fronts. So, gather your ingredients, follow these simple steps, and prepare to create a truly magical dessert that everyone will adore. Happy truffling!
*These amazing images are all credited to The Stay At Home Chef via YouTube. Check her other content and follow for more delicious recipes!