
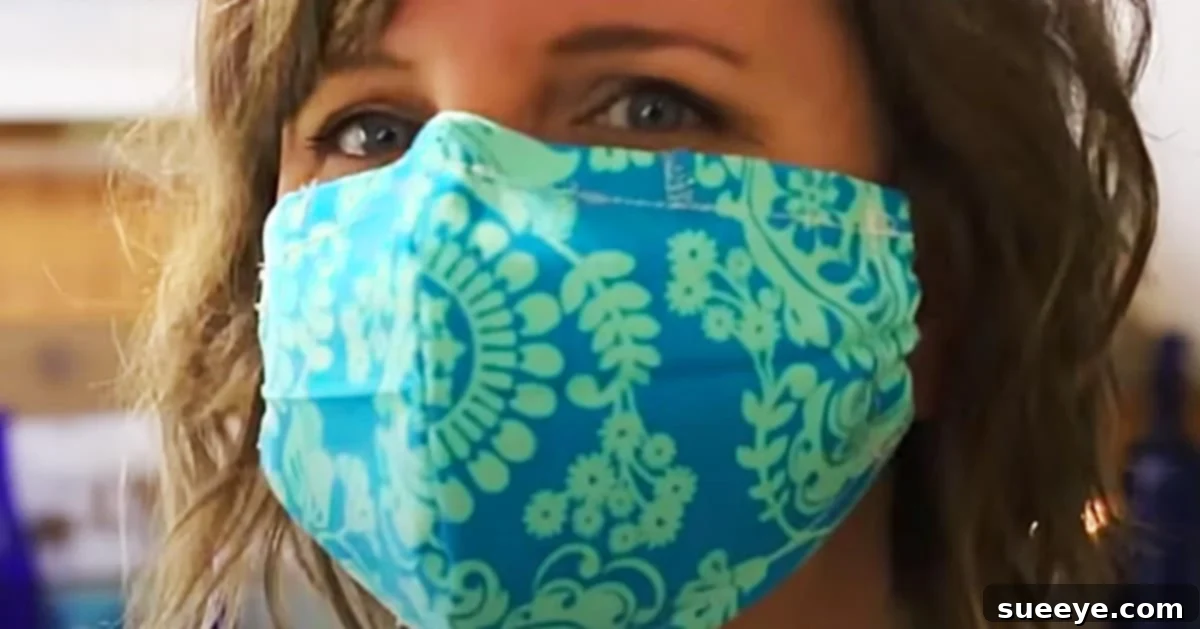
Craft Your Own Comfortable and Secure Fitted Face Mask: A Comprehensive DIY Guide
Are you tired of constantly adjusting a slipping scarf or an ill-fitting mask that leaves gaps and causes discomfort? The struggle for a truly comfortable and secure face covering is real for many. Traditional flat masks can often shift, slide down your nose, or leave openings around your cheeks, compromising their effectiveness and leading to frequent readjustments. If you’re seeking a solution that offers a snug fit, superior comfort, and peace of mind, then learning how to create your very own DIY fitted face mask is the perfect project for you.
Inspired by an excellent fitted face mask tutorial by Brittany Baily on YouTube, we discovered the answer to this common dilemma. This guide builds upon that fantastic resource, providing expanded insights and details to help you craft a mask that fits perfectly. What makes this particular design stand out is its clever use of a flat twist tie, often found on coffee bags, to create a customizable nose bridge. This feature allows the mask to drape seamlessly over your nose, preventing slippage and ensuring a much better seal than standard designs.
This sewing project is surprisingly simple, making it an ideal endeavor for beginners and experienced crafters alike. You’ll be amazed at how quickly you can create a collection of comfortable, reusable, and stylish fitted face masks. However, it is absolutely crucial to understand that homemade masks, while beneficial for source control and personal comfort, are not medical-grade Personal Protective Equipment (PPE). They have not been proven to protect against COVID-19 or other airborne pathogens to the same degree as certified medical masks. We recommend using them as an additional layer of protection or in conjunction with a disposable medical mask for enhanced safety. For the most accurate and up-to-date information regarding how to protect yourself against COVID-19, including guidelines on mask usage and other safe practices, please consult official health resources such as the CDC Website.
Why Choose a DIY Fitted Face Mask? The Benefits of a Custom Fit
Opting for a DIY fitted face mask offers numerous advantages over commercially mass-produced alternatives. Beyond the satisfaction of creating something with your own hands, a custom-made mask truly elevates the experience of wearing a face covering:
- Enhanced Comfort: A well-fitted mask eliminates the need for constant adjusting, preventing skin irritation and pressure points. The custom fit means no painful pulling on ears or uncomfortable tightness, allowing you to wear it for extended periods with ease.
- Improved Security and Protection: The primary goal of any face mask is to minimize the spread of respiratory droplets. A fitted mask, especially one with a nose wire, creates a much better seal around the contours of your face, reducing gaps through which air (and potentially droplets) can escape or enter. This enhanced security contributes to better source control.
- Personalization and Style: When you make your own mask, you’re not limited to generic designs. You can choose fabrics that reflect your personality, match your outfits, or even showcase your favorite patterns. This makes wearing a mask a little less utilitarian and a lot more enjoyable.
- Cost-Effectiveness: Reusable fabric masks are a smart financial choice in the long run. Instead of repeatedly purchasing disposable masks, you invest in materials once and create masks that can be washed and worn repeatedly.
- Eco-Friendly Option: By choosing reusable cloth masks, you contribute to reducing waste. Millions of disposable masks end up in landfills daily, and opting for a sustainable, washable alternative lessens your environmental footprint.
- Adjustability for All: The inclusion of adjustable ear loops (using beads) means one pattern can easily be adapted for different face shapes and sizes, ensuring a perfect fit for everyone in your family.
Essential Materials You’ll Need for Your Sewing Project
Gathering your materials before you start will make the sewing process smooth and enjoyable. Most items are readily available, and you might even have some of them around your home:
- Elastic Paracord or Covered Hair Bands: These are ideal for creating comfortable and durable ear loops. Paracord offers excellent stretch and resilience, while covered hair bands provide a soft, gentle feel against the ears. The key is to find elastic that is soft enough not to irritate but strong enough to hold its shape.
- A Bead (for adjusting the earpieces to fit): Small beads are essential for making the ear loops adjustable. They allow you to easily tighten or loosen the elastic, ensuring a snug yet comfortable fit around your ears without tying permanent knots. Choose beads with a hole large enough for your elastic to pass through easily.
- A Flat Twist Tie from a Coffee Bag: This is the secret ingredient for a perfectly molded nose bridge! The flat plastic-coated wire inside these ties is flexible enough to bend and conform to the shape of your nose, yet rigid enough to hold its position. This prevents the mask from slipping down and helps reduce glasses fogging.
- Quilter’s Cotton Fabric (or alternatives): High-quality, tightly woven cotton is highly recommended due to its breathability, durability, and filtration properties. Other suitable household fabrics include:
- Sheets: Old cotton sheets can be repurposed. Look for high thread count cotton for better filtration.
- Pillowcases: Similar to sheets, cotton pillowcases offer a good fabric source.
- Tea Towels: Some tightly woven tea towels can also work.
- Fabric Napkins: Choose thick, good-quality cotton napkins.
- Flannel: Provides extra warmth and softness, but ensure it’s a tight weave.
You’ll need at least two layers of fabric for the mask body. Consider using different patterns for the outer and inner layers for a fun design.
- Sharp Scissors: Essential for precise cutting of your fabric and pattern. A good pair of fabric shears will make a significant difference.
- A Sewing Machine: While it is technically possible to hand-sew this mask, a sewing machine will make the process much faster, create stronger seams, and give your mask a professional finish. Basic sewing machine skills are all that’s required.
- Paper (to draw your pattern): Any standard paper will work for creating your initial pattern template. Cardstock or heavier paper can be beneficial if you plan to reuse the pattern multiple times.
- Matching Thread: High-quality polyester or cotton thread that matches or complements your fabric color.
- Pins or Fabric Clips: To hold fabric layers together while sewing.
- Iron and Ironing Board: Crucial for pressing seams open or flat, giving your mask a crisp, professional look.
- Fabric Marker or Chalk: For tracing your pattern onto the fabric.
Step-by-Step Guide: Crafting Your Custom Fitted Mask
Creating your fitted face mask is a rewarding process. While this guide provides a comprehensive overview, we highly recommend following along with the detailed video tutorial by Brittany Baily on YouTube for visual guidance on each step. It’s designed to walk you through the entire process, from preparing your pattern to the final stitches.
Step 1: Preparing Your Pattern
The foundation of a perfectly fitted mask is an accurate pattern. You’ll start by making a simple pattern out of paper. The video tutorial provides clear instructions on how to draw the curves and dimensions necessary for the fitted shape. Take your time with this step, as precision here translates directly to the fit of your finished mask. You may want to create a test pattern first to hold up to your face and ensure it covers from the bridge of your nose down to your chin, and extends comfortably to your ears.
Start by creating a simple paper pattern, which will guide your fabric cutting for the perfectly fitted face mask.
Step 2: Fabric Selection and Cutting
Once your paper pattern is ready, it’s time to choose your fabric. Remember to select a tightly woven cotton for optimal performance and comfort. You’ll typically need to cut at least four fabric pieces – two for the outer layer and two for the inner lining – based on your pattern. Lay your fabric flat, pin the pattern securely, and carefully cut out your pieces, ensuring clean, even edges. Remember to account for seam allowances as instructed in the video.
Step 3: Assembling the Mask Body
This stage involves sewing the curved edges of your fabric pieces together. Typically, you’ll sew the two outer fabric pieces together along their main curve, and do the same for the two inner lining pieces. This creates the contoured shape of the mask. Pressing your seams flat after sewing each section is crucial for a neat and professional finish. The video tutorial will guide you on specific seam allowances and sewing techniques for these curves.
Step 4: Incorporating the Nose Wire
One of the distinguishing features of this mask is the customizable nose bridge. You will create a small channel along the top edge of the mask, either during or after joining the inner and outer fabric layers. This channel is where you’ll insert the flat twist tie from a coffee bag. Carefully slide the twist tie into this channel and secure it at both ends with a few stitches to prevent it from shifting or falling out during wear or washing. This allows you to mold the mask perfectly over your nose for a snug fit.
Step 5: Attaching and Adjusting Ear Loops
Next, you’ll attach the elastic paracord or covered hair bands to the sides of the mask to form the ear loops. The beauty of this design lies in its adjustability. Thread a bead onto each elastic loop before securing the ends. This bead can then be moved up and down to customize the length of the ear loop, ensuring a comfortable, personalized fit for any wearer. This eliminates ear strain and prevents the mask from gapping at the sides.
Utilize beads on the elastic ear loops to easily adjust and customize the fit of your DIY fitted face mask.
Step 6: Finishing Touches and Quality Check
Once all the main components are sewn, you’ll complete any final topstitching along the edges of the mask. This not only adds a decorative touch but also reinforces the seams, making the mask more durable. Give your finished mask a final press with an iron for a crisp look. Before wearing, always perform a quick quality check: ensure all seams are secure, the nose wire is in place, and the ear loops are properly adjusted.
Important Safety Disclaimer & Best Practices for Fabric Masks
While making your own fitted face mask is a wonderful way to achieve comfort and personal style, it is imperative to reiterate the safety information. Homemade fabric masks are not medical-grade respirators or surgical masks. They do not provide the same level of filtration or protection as N95 respirators or certified medical masks. Their primary purpose is to serve as source control, meaning they help contain respiratory droplets released by the wearer, and offer a basic barrier against larger droplets from others.
- Consult Official Guidelines: Always refer to the latest recommendations from public health authorities like the Centers for Disease Control and Prevention (CDC) or your local health department regarding mask usage, social distancing, and other protective measures against infectious diseases. The CDC Website remains an invaluable resource.
- Layering for Enhanced Protection: For increased protection in higher-risk situations, some health organizations suggest wearing a disposable medical mask underneath your fabric mask. The fitted fabric mask can help hold the disposable mask securely in place, creating a better seal.
- Proper Usage: Ensure your mask covers your nose, mouth, and chin completely without any gaps. Avoid touching the front of your mask while wearing it. Always wash your hands before and after handling your mask.
- Not a Substitute for Other Measures: A mask is just one tool in a comprehensive public health strategy. Continue practicing social distancing, frequent handwashing, and avoiding crowded indoor spaces, even when wearing a mask.
Caring for Your Reusable Fabric Mask
To maximize the lifespan and effectiveness of your DIY fitted face mask, proper care is essential. Regular cleaning helps maintain hygiene and preserves the fabric’s integrity.
- Washing Frequency: Wash your fabric mask after every use. This is crucial for maintaining hygiene, especially if you’ve been in public settings.
- Washing Instructions:
- Machine Wash: You can machine wash your mask with your regular laundry using hot water and detergent. The hot water helps to sanitize the fabric.
- Hand Wash: If machine washing isn’t an option, hand wash your mask in hot, soapy water. Scrub thoroughly for at least 20 seconds, similar to handwashing.
- Remove Nose Wire (if applicable): If your nose wire is not permanently sewn in, you might want to remove it before washing to prevent damage to the wire or your washing machine. If it’s sewn in, it should be fine.
- Drying:
- Machine Dry: Tumble dry on a high heat setting until completely dry.
- Air Dry: If machine drying, place the mask in direct sunlight or a clean, well-ventilated area until it is completely dry. Ensure it is fully dry before storing to prevent mildew.
- Storage: Store your clean, dry mask in a clean, breathable bag or container until its next use. Avoid storing it in places where it could get contaminated.
- When to Replace: Inspect your mask regularly for signs of wear and tear, such as stretched-out elastic, holes in the fabric, or a damaged nose wire. If your mask becomes visibly soiled, damaged, or no longer fits snugly, it’s time to replace it with a new one.
Conclusion: Embrace Comfort, Security, and Style with Your DIY Fitted Face Mask
Say goodbye to the frustration of ill-fitting, uncomfortable masks and embrace the superior comfort and security that a DIY fitted face mask provides. This project is a testament to the idea that practical solutions can also be personalized and enjoyable. With adjustable ear loops and a customizable nose wire, you’ll experience a level of comfort and fit that makes wearing a face covering less of a chore and more of a natural extension of your daily attire. We truly love how comfortable and effective this mask design is!
By following Brittany Baily’s excellent tutorial and utilizing the insights provided in this guide, you’re well on your way to crafting a collection of masks that not only look great but also stay securely in place, offering you peace of mind throughout your day. Gather your materials, fire up your sewing machine, and embark on this simple yet incredibly rewarding sewing adventure. Your face will thank you for the custom fit!