
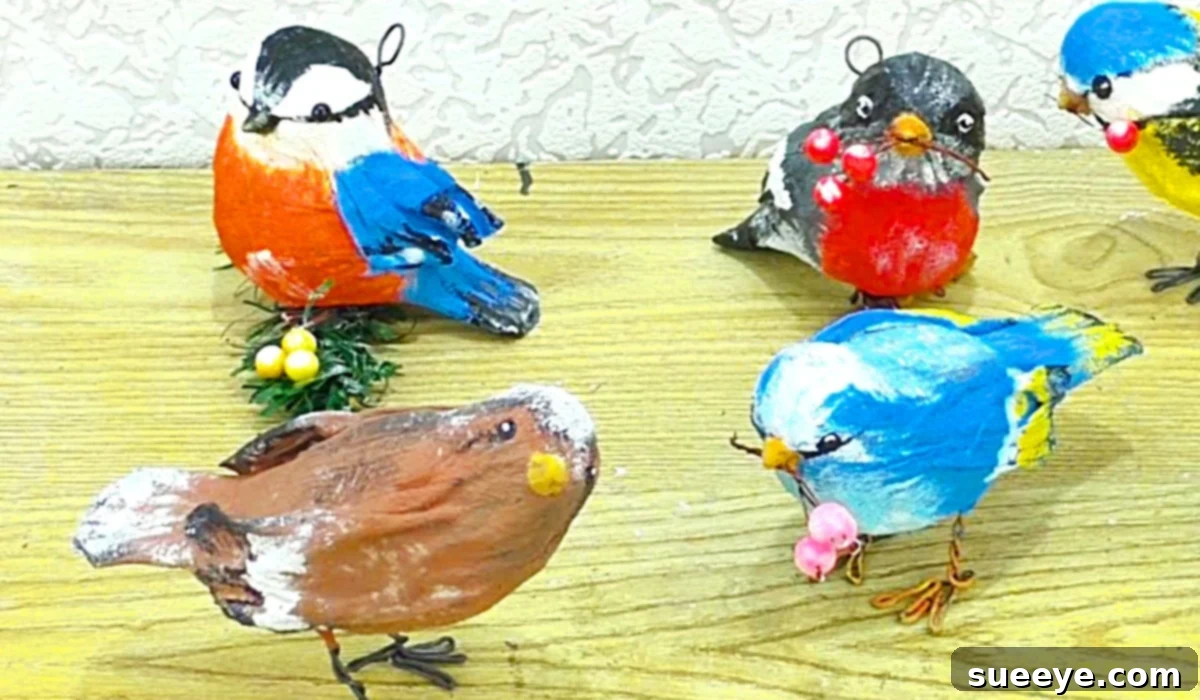
How To Make DIY Miniature Birds: A Charming Craft for Every Home
There’s a special kind of joy that comes from collecting beautiful things, and for many, birds hold an undeniable charm. Whether perched on a shelf, nestled in a display, or simply adding a touch of whimsy to a room, these feathered friends bring warmth and cheer. While the thrill of discovering unique pieces at garage sales and thrift shops is undeniable, there’s an even deeper satisfaction in creating something with your own hands. That’s precisely where the magic of DIY miniature birds comes into play – a delightful craft that allows you to bring your avian imagination to life.
Recently, I stumbled upon an incredibly inspiring DIY miniature bird video tutorial by Hobby Market on YouTube. What immediately captivated me was the simplicity and elegance of the method: creating a basic bird shape with aluminum foil, then transforming it into a delicate masterpiece by covering it with glue-soaked napkins. This technique not only makes the project accessible to crafters of all skill levels but also results in surprisingly sturdy and wonderfully textured miniature birds. I knew right away I had to add some of these lovely, homemade creations to my collection, and I’m thrilled to share the process with you.
Why Craft Your Own Miniature Birds?
Beyond the simple pleasure of making something beautiful, crafting DIY miniature birds offers a multitude of benefits. For passionate bird collectors, it’s an opportunity to personalize your assortment, creating unique pieces that perfectly match your aesthetic or even replicate specific bird species you adore. For those new to crafting, it’s an excellent entry point into decoupage and sculpting, requiring minimal specialized tools or advanced skills. These little birds make fantastic decorative accents for any room, can be incorporated into seasonal displays, or even serve as heartfelt, handmade gifts. Imagine a flock of these charming birds adorning a child’s nursery, a sunroom, or a mantelpiece – they truly brighten any space.
Moreover, this project taps into a wonderfully therapeutic creative process. The act of shaping the foil, carefully layering the napkins, and then bringing your bird to life with paint can be incredibly calming and meditative. It’s an ideal activity for a quiet afternoon, a fun project to share with family, or a way to unwind after a long day. Plus, by utilizing readily available and often inexpensive materials, it’s a budget-friendly way to add artistic flair to your home decor, proving that stunning artistry doesn’t always require a hefty investment.
Essential Materials for Your DIY Miniature Birds
One of the best aspects of this craft is that it requires only a handful of common household and craft supplies. You might already have most of these items on hand, making it incredibly easy to start your avian crafting adventure without a special trip to the store. Gathering your materials beforehand ensures a smooth and enjoyable crafting session.
- Aluminum Foil: This forms the sturdy yet pliable core of your bird. Standard kitchen foil works perfectly, allowing you to easily sculpt the basic body shape and ensuring your bird holds its form.
- Bendable Wire: Essential for creating sturdy and realistic bird legs. Craft wire, floral wire, or even paper clips can be adapted for this purpose. Look for wire that is easy to bend but firm enough to support the bird’s weight.
- Napkins (Thin to Medium Weight): These are the magic ingredient for the decoupage finish. Opt for plain white napkins or those with very subtle patterns. The thinner the napkin, the more transparent it becomes when soaked in glue, allowing for smooth layers. Medium-weight napkins can add a bit more texture and opacity if desired. Paper towels can also work in a pinch, but napkins tend to create a smoother finish.
- Elmer’s Glue or Mod Podge: Both are excellent decoupage mediums. Elmer’s glue (PVA glue) mixed with a little water works wonderfully, providing a strong bond and a matte finish. Mod Podge, a popular all-in-one glue, sealer, and finish, is also an excellent choice and comes in various finishes (matte, gloss, satin).
- Craft Paint (in your choice of colors): Acrylic craft paints are ideal for this project. They dry quickly, offer vibrant colors, and are easy to work with. Choose a palette that inspires you – whether you want to mimic real bird species or create fantastical, colorful creatures.
- Paintbrushes: You’ll need a range of sizes. A broader flat brush is useful for applying the glue mixture, while smaller, finer brushes are perfect for adding intricate details like eyes, beaks, and feather textures.
- (Optional) Clear Sealant/Varnish: To protect your finished birds and give them a professional touch, a clear sealant or varnish (matte or gloss) can be applied. This adds durability and can enhance the painted colors.
- (Optional) Embellishments: Consider tiny beads for eyes, glitter for a touch of sparkle, or even small twigs for perches to display your creations.
Step-by-Step Guide: Crafting Your Charming Miniature Birds
Creating these delightful birds is a rewarding process broken down into several manageable steps. The tutorial by Hobby Market on YouTube provides excellent visual guidance, but here’s a detailed breakdown to ensure your crafting journey is smooth and successful.
Step 1: Sculpting the Bird’s Foundation with Aluminum Foil
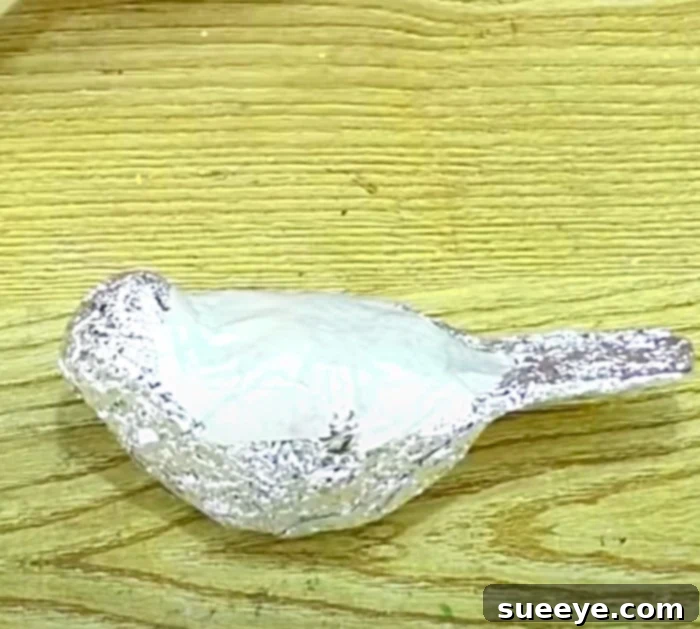
The first and most crucial step is to create the basic bird shape using aluminum foil. Begin by tearing off a piece of foil, roughly the size you want your bird to be. Crumple and compact it firmly, starting with a core for the body. Gradually add more foil, shaping it into the distinct form of a bird – an oval body, a round head, and a tapered tail. Don’t worry about perfection at this stage; focus on the overall silhouette and ensuring it’s dense and stable. You can create different sizes and shapes to mimic various bird species, from plump robins to slender sparrows. Ensure the foil is tightly packed so it doesn’t easily deform later. This initial sculpture will be the robust skeleton of your miniature bird.
Step 2: Adding the Wire Legs (Optional but Recommended)
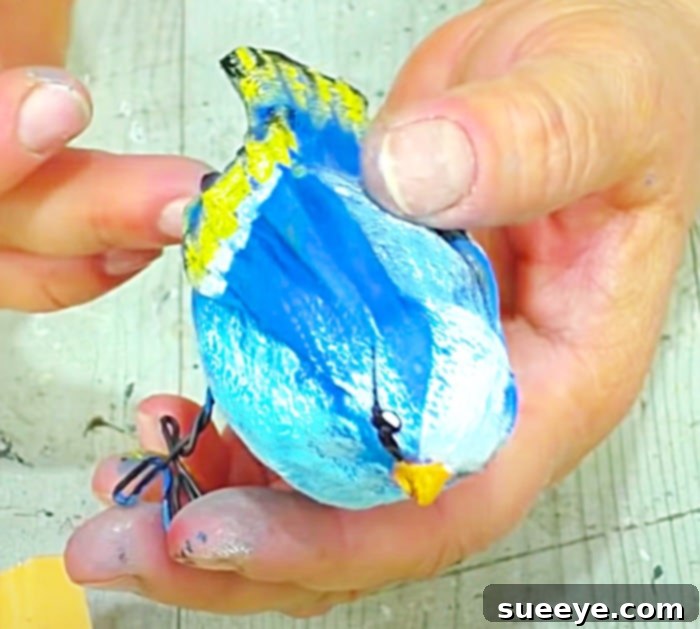
While optional, adding wire legs gives your birds a more finished and realistic look, allowing them to stand independently or perch on small branches. Take a length of bendable wire (about 4-6 inches, depending on your bird’s size) and bend it in half. Twist the two ends together for about an inch or so to form the upper part of the legs. Then, spread the two ends apart and bend them to create the “feet” or claws. Carefully insert the twisted end of the wire into the base of your aluminum foil bird’s body. Push it in firmly so it’s secure. You can adjust the length and angle of the legs to give your bird character – perhaps it’s standing tall, or gently perched as if about to take flight.
Step 3: Decoupage with Napkins and Glue
Now comes the magical transformation! Tear your napkins into small, irregular pieces – about 1-2 inches in size. Tearing, rather than cutting, creates softer edges that blend more seamlessly. If using Elmer’s glue, mix it with a small amount of water (about 3 parts glue to 1 part water) to create a more workable decoupage medium. If using Mod Podge, it’s ready to go. Using a paintbrush, apply a layer of the glue mixture to a section of your foil bird. Place a piece of napkin over the glue, then brush more glue over the napkin, smoothing out any wrinkles or air bubbles as you go. Overlap the napkin pieces slightly, covering the entire foil sculpture. Work in layers, ensuring full coverage, and pay special attention to smoothing the surface to create a feather-like texture. Allow each layer to dry partially if needed, especially if you’re building up several layers for extra strength and texture. The goal is to completely obscure the foil and create a smooth, hard shell. Once fully covered, let your bird dry completely, which might take several hours or even overnight, depending on humidity and the thickness of your glue layers. A fully dry bird will be rigid and ready for painting.
Step 4: Bringing Your Bird to Life with Paint
With a firm, dry, napkin-covered bird in hand, it’s time for the most expressive part: painting! Choose your craft paints and let your creativity soar. You can start with a base coat that covers the entire bird, then add details. Think about real bird markings – how colors blend, where shadows fall, and how light catches feathers. Use smaller brushes to add intricate details like eyes, beaks, and individual feather patterns. Don’t be afraid to experiment with color blending and layering to achieve depth. For eyes, a tiny dot of black with an even smaller dot of white can make your bird appear lifelike. You can add texture with dry brushing or create subtle shading with washes of diluted paint. This step truly allows each bird to develop its unique personality. Take your time and enjoy the artistic process!
Step 5: Finishing Touches and Sealing (Optional)
Once your paint is completely dry, you can add any final embellishments. This might include gluing on tiny beads for eyes if you didn’t paint them, adding a touch of glitter, or perhaps even gluing a small feather to the tail for extra realism. To protect your beautiful artwork and ensure its longevity, apply a clear sealant or varnish. This will guard against dust, moisture, and fading, and you can choose between a matte finish for a natural look or a gloss finish for a shiny, polished appearance. Allow the sealant to dry thoroughly according to the product instructions. Your charming miniature bird is now complete and ready to bring joy!
Creative Variations and Display Ideas
The beauty of this DIY project lies in its versatility. Once you’ve mastered the basic technique, you can experiment endlessly. Try crafting different bird species – a tiny blue tit, a vibrant cardinal, or a majestic owl. Vary the size and shape of your foil base to create a diverse flock. You can also play with colors and patterns; imagine birds with whimsical polka dots, stripes, or even abstract designs. For a seasonal touch, create festive birds for holidays like Christmas (red and green), Easter (pastel shades), or autumn (earthy tones).
When it comes to displaying your collection of homemade birds, the possibilities are endless. Arrange them in a decorative birdcage, place them gently on a bookshelf among your favorite reads, or use them to enhance a potted plant. They look stunning nestled in terrariums or cloches, creating miniature nature scenes. Attach a small loop of fishing line or thread before sealing, and you can hang them from branches to create a beautiful mobile or garland. These miniature birds also make wonderful additions to wreaths, centerpieces, or even as unique gift toppers for special occasions. Pairing them with natural elements like small twigs, moss, or pebbles can further enhance their charm and create a cohesive, organic display.
Tips for Success in Your Miniature Bird Crafting Journey
- Patience is Key: Don’t rush the drying times, especially between decoupage layers and after painting. Rushing can lead to a sticky finish or smudged paint.
- Work in Layers: For decoupage, thin, overlapping layers of napkins and glue work much better than thick, heavy ones. This prevents excessive wrinkles and ensures a smoother, more durable finish.
- Experiment with Textures: While smoothing is often desired, try gently dabbing the napkin with your brush in some areas to create a slightly textured, feather-like effect before it fully dries.
- Inspiration is Everywhere: Look at pictures of real birds, study their colors and markings. This will help you choose your paint palette and inspire detailed brushwork.
- Don’t Fear Imperfection: Handcrafted items have character! Embrace the unique quirks of each bird you create. They don’t have to be anatomically perfect to be beautiful and charming.
- Clean Your Brushes Promptly: Glue and acrylic paint can quickly ruin brushes if not cleaned immediately after use with warm water and soap.
- Protect Your Workspace: Lay down newspaper or a craft mat to protect your table from glue and paint spills.
Start Your Own Charming Collection Today!
The satisfaction of creating these adorable DIY miniature birds is truly immense. From the initial shaping of a simple piece of foil to the final brushstroke that brings a tiny eye to life, every step is a creative joy. I highly recommend this project to anyone, especially fellow bird lovers and those who appreciate the beauty of handmade decor. The result is a collection of unique, heartfelt pieces that add a significant amount of charm and personality to your home. They serve as a constant reminder of your creativity and passion, and they make delightful conversation starters.
So, why wait? Gather your materials, watch the inspiring tutorial by Hobby Market, and embark on your own miniature bird-making adventure. You’ll be amazed at how easily these darling little birds come to life under your hands, ready to brighten your day and add a touch of handcrafted elegance to your living space. Happy crafting!