
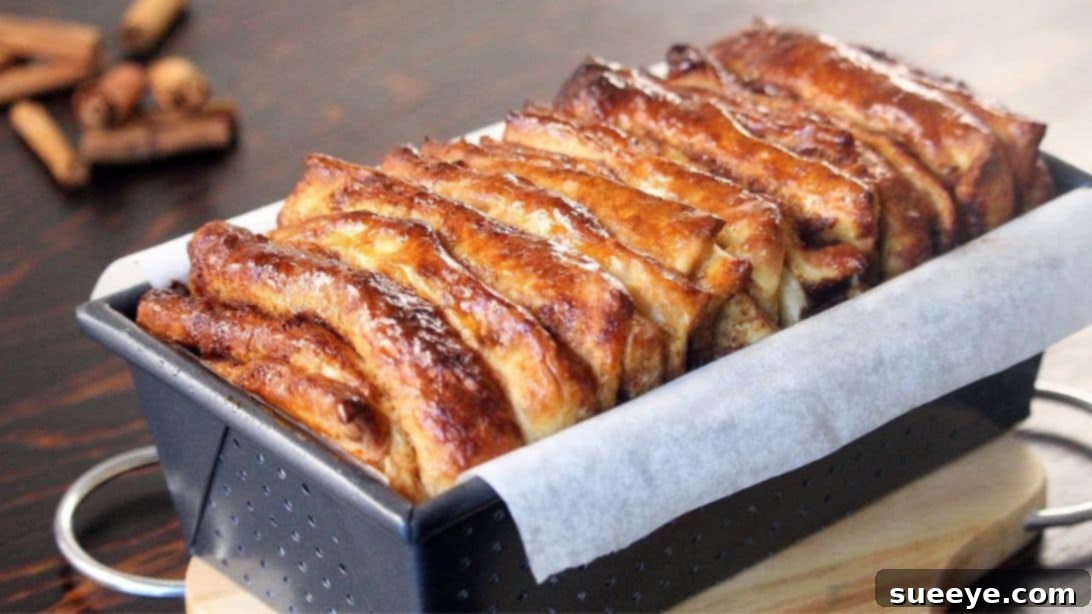
Super Soft Pull-Apart Cinnamon Bread: Your Ultimate Guide to a Warm, Sweet Treat
There’s something truly magical about the aroma of cinnamon wafting through your home. Its sweet, earthy, and woody notes are universally loved, making it a cornerstone spice in countless beloved pastries and desserts. If you’re among the many who cherish this aromatic ingredient, then prepare to discover your new favorite indulgence: this unbelievably soft pull-apart cinnamon bread. Inspired by the delightful creation from How Tasty, this recipe transforms simple ingredients into an irresistible treat that promises to be devoured in no time. It’s a surprisingly straightforward baking project that yields spectacular results, filling your kitchen with an inviting warmth and delighting every palate. Get ready to embark on a journey to bake the perfect, tender, and deliciously spiced pull-apart cinnamon bread that will become a staple in your home. Below, you’ll find comprehensive instructions and invaluable tips to guide you every step of the way.
Ingredients for Homemade Cinnamon Bread
Crafting this super soft pull-apart cinnamon bread begins with gathering the right ingredients. Each component plays a crucial role in achieving that perfect texture and unforgettable flavor. Ensure all your ingredients are fresh and measured accurately for the best results. Using ingredients at the specified temperatures, especially for the dough, is key to activating the yeast and achieving a wonderfully airy loaf.
For the Dough:
- 3 cups of all-purpose flour: The foundation of our bread. Using all-purpose flour provides a good balance of structure and tenderness.
- 1/2 teaspoon of salt: Essential for enhancing flavor and controlling yeast activity. Don’t skip it!
- 3 + 1/2 tablespoon of granulated sugar: Feeds the yeast, aids in browning, and adds a subtle sweetness to the dough itself.
- 2+1/2 teaspoon of active dry yeast: The leavening agent that makes our bread rise, creating that characteristic soft and airy texture. Ensure it’s fresh and active.
- 2/3 cup of milk (lukewarm): Provides moisture and helps activate the yeast. Lukewarm milk (around 105-115°F or 40-46°C) is crucial – too hot will kill the yeast, too cold won’t activate it.
- 1/4 cup of unsalted butter (melted): Adds richness, tenderness, and flavor to the dough. Using unsalted butter allows you to control the overall salt content.
- 2 large eggs (beaten): Contribute to the bread’s structure, richness, color, and moisture, making the final product wonderfully soft.
For the Filling:
- 1/3 cup of unsalted butter (softened at room temperature): The base of our luscious cinnamon filling. Softened butter mixes smoothly with sugar and cinnamon, creating a spreadable paste.
- 2/3 cup of dark brown Muscovado sugar: This sugar is key for its deep, rich molasses flavor and moist texture, which creates a wonderfully gooey and aromatic filling. If unavailable, regular dark brown sugar can be substituted.
- 1 big tablespoon of ground cinnamon: The star spice of our bread. Use good quality ground cinnamon for the most vibrant flavor.
Extra Ingredients for Preparation and Finishing:
- Flour for dusting the work surface: Prevents the dough from sticking while kneading and rolling.
- 1 beaten egg for brushing the top (egg wash): Creates a beautiful golden-brown crust and a slight sheen.
- Melted butter for brushing the top (optional): Adds extra richness and a glossy finish to the warm bread fresh out of the oven.
Step-by-Step Instructions: Crafting Your Pull-Apart Cinnamon Loaf
Follow these detailed steps carefully to create a magnificent pull-apart cinnamon bread that will impress everyone. Precision and patience are your best tools in baking, especially when working with yeast dough.
Step 1: Prepare the Dry Ingredients for the Dough
In a spacious mixing bowl, begin by combining the all-purpose flour and salt. Use a whisk to thoroughly blend these ingredients, ensuring the salt is evenly distributed. This initial step is important for uniform flavor throughout the dough. Next, incorporate the granulated sugar and the active dry yeast into the flour mixture. Give it another good whisk to combine all the dry components. The sugar will serve as food for the yeast, helping it activate effectively, while distributing the yeast evenly ensures a consistent rise.
Step 2: Combine the Wet Ingredients
In a separate, medium-sized bowl, prepare your wet ingredients. Add the lukewarm milk, ensuring it’s at the ideal temperature (around 105-115°F) to gently awaken the yeast without harming it. Follow with the melted unsalted butter and the two beaten eggs. Whisk these wet ingredients together until they are well combined and smooth. This pre-mixing ensures that all liquids are evenly distributed when added to the dry components, preventing overmixing later.
Step 3: Gradually Combine Wet and Dry Mixtures
Now, it’s time to bring the two mixtures together. Pour the wet ingredients into the dry ingredients in two gradual batches. After adding the first batch, use a sturdy spatula or wooden spoon to mix until almost combined. Then, add the second batch and continue mixing. The goal here is to just bring the ingredients together, forming a shaggy, somewhat sticky dough. Avoid overmixing at this stage; we’ll refine the dough’s texture during kneading.
Step 4: Knead the Dough to Perfection
Once the ingredients are mostly combined, it’s time to get your hands dirty! Begin kneading the dough directly in the bowl, or transfer it to a lightly floured surface if preferred. Continue kneading for approximately 5-7 minutes. As you knead, the dough will gradually become smoother and more elastic, pulling away cleanly from the sides of the bowl or your work surface. If you find the dough excessively wet and sticky, add a very small amount of extra flour, one tablespoon at a time, until it’s manageable. Conversely, if it feels too dry or stiff, incorporate a teaspoon or two of lukewarm milk. The ideal consistency is a soft, pliable dough that is slightly sticky to the touch, indicating good hydration and proper gluten development.
Step 5: First Rise (Bulk Fermentation)
Once kneaded, lightly grease the bowl or use the same bowl if it’s already clean, and place the dough inside. Turn the dough once to coat it lightly with oil. Cover the bowl securely with plastic wrap or a clean, damp tea towel. Now, find a warm, draft-free spot in your kitchen for the dough to rise. This process, known as bulk fermentation, typically takes about 1 to 1 1/2 hours, or until the dough has impressively doubled in size. A warm environment (around 75-80°F or 24-27°C) is ideal for yeast activity. This rise develops flavor and creates the airy structure of your bread.
Step 6: Prepare the Irresistible Cinnamon Filling
While your dough is undergoing its first rise, prepare the delectable filling. In a medium-sized bowl, combine the softened unsalted butter with the dark brown Muscovado sugar and the ground cinnamon. Using a spoon or a small spatula, mix these ingredients thoroughly until you achieve a wonderfully creamy, uniform paste. The butter should be soft enough to blend easily, but not melted, to ensure the filling stays in place when spread. The Muscovado sugar will contribute a deep, caramel-like sweetness that perfectly complements the warmth of the cinnamon.
Step 7: Roll Out the Dough and Spread the Filling
After the dough has doubled in size, gently punch it down to release the air. Lightly dust your clean work surface with flour. Transfer the dough onto the floured surface and use a rolling pin to roll it into a large rectangle, aiming for dimensions of approximately 20×14 inches. Strive for an even thickness across the entire rectangle. Once rolled, generously and evenly spread the prepared butter and cinnamon mixture over the entire surface of the dough, making sure to extend the filling right to the edges. Then, using a sharp knife or a pizza cutter, carefully cut the rectangle lengthwise into 6 long, equally sized strips.
Step 8: Stack and Cut the Dough Strips for Assembly
To create the “pull-apart” effect, carefully stack three of the cinnamon-coated dough strips directly on top of each other. Repeat this process with the remaining three strips, resulting in two distinct stacks of three layered strips. Now, take each stack and cut it crosswise into 4 smaller, roughly square-shaped portions. You should end up with a total of 8 layered squares. Prepare a 4.5 x 9-inch loaf pan by lining it with parchment paper, leaving an overhang on the sides for easy removal, and lightly greasing the paper. Carefully transfer the stacked squares into the prepared loaf pan, arranging them vertically side-by-side. Once all the squares are in the pan, gently spread apart each layer with your fingers to maximize the pull-apart effect once baked.
Step 9: Second Rise (Proofing) and Baking
Cover the loaf pan with a clean tea towel and let it rise at room temperature for an additional 30 minutes. This second rise, or proofing, allows the dough to relax and achieve its final volume before baking. Towards the end of this period, preheat your oven to 350 degrees F (175 degrees C). Once the bread has proofed, gently brush the top surface with the beaten egg wash. This will give your cinnamon bread a beautiful golden-brown color and a lovely sheen. Place the loaf pan into the preheated oven and bake for approximately 30-35 minutes. After about 20 minutes of baking, observe the crust. If it starts to brown too quickly, lightly cover the top of the loaf with aluminum foil to prevent it from burning while the interior finishes cooking.
Step 10: Finishing Touches and Serving
Once the baking time is complete and the bread is golden brown and cooked through, carefully remove the loaf pan from the oven. For an extra touch of richness and shine, and while the bread is still hot, you can optionally brush the top with additional melted butter. Let the bread cool in the pan for a few minutes before carefully transferring it to a wire rack. This allows it to set slightly. The best way to enjoy this super soft pull-apart cinnamon bread is while it’s still warm, allowing you to easily pull apart the tender, cinnamon-swirled layers. Serve it as a delightful breakfast, a satisfying brunch item, or a comforting dessert. Enjoy every sweet, aromatic bite!
Tips for Perfect Pull-Apart Cinnamon Bread
- Yeast Activation: Ensure your milk is lukewarm (105-115°F/40-46°C). If it’s too hot, it will kill the yeast; too cold, and the yeast won’t activate properly, leading to a dense loaf.
- Kneading is Key: Don’t skimp on kneading time. Developing the gluten is what makes the bread soft and chewy. The dough should be smooth and elastic when properly kneaded.
- Proofing Environment: A warm, draft-free spot is crucial for both rises. If your kitchen is cool, you can proof the dough in a slightly warmed oven (turned off, with the light on) or in a microwave with a cup of hot water.
- Softened Butter for Filling: Ensure the butter for the filling is truly softened, not melted. This allows for an even spread and prevents the filling from leaking out during baking.
- Don’t Overbake: Overbaking can dry out your bread. Keep an eye on it, especially after the 20-minute mark, and cover with foil if the top is browning too quickly. The internal temperature should reach about 200°F (93°C) for a fully cooked loaf.
- Even Spreading: When applying the cinnamon filling, aim for an even layer across the entire surface of the rolled-out dough. This ensures every piece gets a burst of flavor.
Variations and Serving Suggestions
While this classic cinnamon bread is perfect as is, there are many ways to customize it to your liking:
- Cream Cheese Glaze: For an extra decadent touch, whisk together 4 oz softened cream cheese, 1/2 cup powdered sugar, 2 tablespoons milk, and 1/2 teaspoon vanilla extract. Drizzle over the warm bread.
- Nutty Addition: Sprinkle finely chopped pecans or walnuts over the cinnamon filling before rolling for added texture and flavor.
- Orange Zest: Add 1 teaspoon of orange zest to the dough or the filling for a bright, citrusy note that beautifully complements the cinnamon.
- Chocolate Swirl: Mix mini chocolate chips into the cinnamon filling for a chocolate-cinnamon twist.
This pull-apart cinnamon bread is incredibly versatile. It’s fantastic served warm on its own with a cup of coffee or tea. You can also enjoy it as a special breakfast treat, an afternoon snack, or a delightful dessert after dinner. Its communal nature makes it perfect for sharing with family and friends.
Why You’ll Love Baking This Cinnamon Delight
Baking this Super Soft Pull-Apart Cinnamon Bread isn’t just about the delicious outcome; it’s an experience in itself. The process, from kneading the dough to watching it rise, is wonderfully therapeutic. The aroma that fills your home as it bakes is unparalleled, instantly creating a cozy and inviting atmosphere. When it’s finally out of the oven, the joy of pulling apart those tender, sweet, and spicy layers is incredibly satisfying. It’s a crowd-pleaser that evokes warmth, comfort, and homemade goodness, making any occasion feel a little more special. Whether you’re an experienced baker or new to working with yeast, this recipe is designed for success, promising a rewarding baking journey and an unforgettable treat.
We hope you enjoy making and sharing this delightful Super Soft Pull-Apart Cinnamon Bread. Happy baking!