
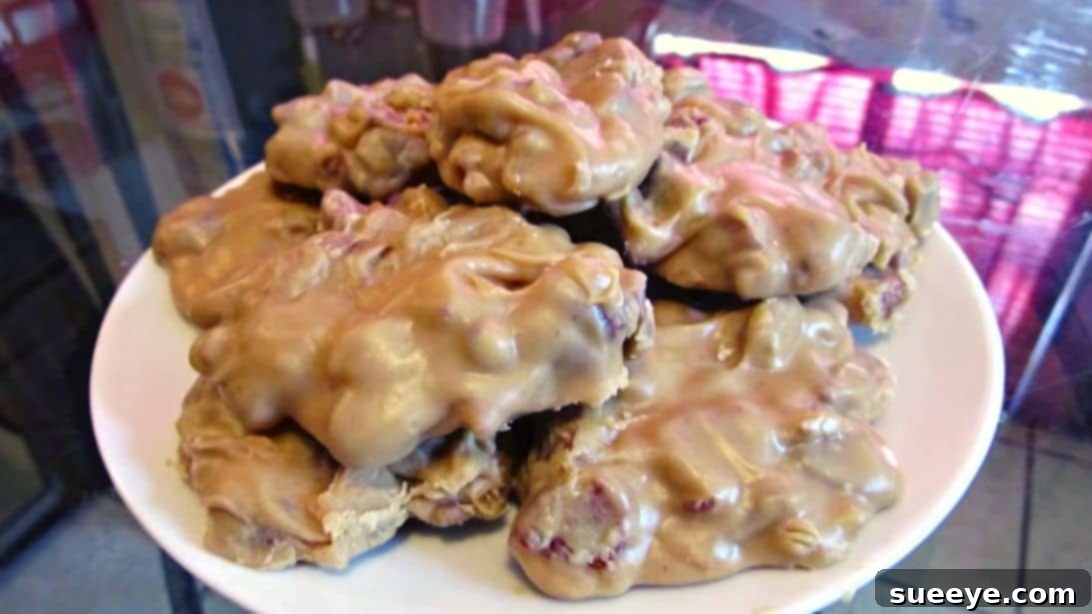
Few treats capture the sweet spirit of New Orleans quite like classic pecan pralines. These creamy, nutty confections are a beloved staple, offering a taste of Southern charm in every bite. While often associated with gourmet candy shops, the delightful truth is that making homemade New Orleans pralines is surprisingly simple. With just a handful of common ingredients and a bit of patience, you can recreate this iconic dessert right in your own kitchen.
This comprehensive guide will walk you through crafting perfect pralines, inspired by the straightforward method demonstrated by culinary expert Charlie Andrews. Forget complicated techniques; this recipe emphasizes ease and delivers an undeniably delicious result. I recently tried this recipe myself, and the batch vanished almost instantly – a testament to its irresistible appeal. My family adored them, and I’m already planning my next batch of these sweet, buttery delights. Get ready to impress your taste buds and loved ones with these incredibly easy and utterly yummy homemade pralines!
Why Homemade Pralines Are a Must-Try
There’s a unique satisfaction that comes from creating treats from scratch, and pralines are no exception. Opting for homemade pralines offers several advantages:
- Unmatched Freshness: Store-bought pralines, while tasty, often can’t compete with the melt-in-your-mouth freshness of a batch made just hours ago.
- Cost-Effective Indulgence: Praline candy can be pricey, especially for high-quality versions. Making them at home uses inexpensive, readily available ingredients, saving you money without sacrificing flavor.
- Customizable Perfection: Want more pecans? A dash more vanilla? Homemade allows you to adjust ingredients to your exact preference.
- Rewarding Experience: The process of transforming simple ingredients into a decadent candy is incredibly gratifying, making it a perfect activity for bakers of all skill levels.
A Sweet History of New Orleans Pralines
The story of pralines dates back to 17th-century France, where they were originally created for Marshal du Plessis-Praslin by his chef. These early pralines were sugar-coated almonds. When French settlers arrived in Louisiana, they brought the recipe with them, but adapted it to local ingredients. Pecans, abundant in the American South, replaced almonds, and cream was added to create a softer, creamier candy distinct from its European counterpart.
New Orleans quickly adopted this confection, and it became a quintessential part of its culinary identity. African American women, many of whom were skilled cooks, played a pivotal role in refining the recipe and popularizing pralines, selling them in the city’s streets and markets. Their contributions helped establish the praline as the iconic Southern candy we know and love today – a rich, creamy, and nutty confection that perfectly embodies the indulgent spirit of the Crescent City.
Ingredients for Your Perfect Pecan Pralines: Simple Yet Essential
The beauty of this classic New Orleans praline recipe lies in its simplicity. You only need a few core ingredients to achieve a fantastic result. Each component plays a crucial role in creating the signature taste and texture of these beloved candies.
- 1½ cups of pecan halves, chopped: Pecans are the star of the show. Using fresh, good-quality pecans will make a significant difference in the flavor. Chopping them roughly or in half ensures a good distribution throughout the candy while still providing that satisfying crunch.
- 1½ cups of sugar: Granulated sugar forms the sweet foundation of the praline. It caramelizes during the cooking process, giving the candy its rich, deep flavor.
- 1½ cups (12 fluid ounces) of evaporated milk: This is a key ingredient for achieving the pralines’ characteristic creamy texture. Evaporated milk, being a concentrated milk product, helps to prevent crystallization and contributes to a smooth, luscious consistency.
- 2 tsp of vanilla extract: Vanilla is essential for enhancing the overall flavor profile. Use pure vanilla extract for the best taste, as it adds a warm, aromatic note that complements the pecans and sugar beautifully.
- ½ stick of unsalted butter, melted: Butter adds richness, flavor, and helps to create a smoother, more tender praline. Using unsalted butter allows you to control the overall saltiness of the candy. Melting it beforehand helps it incorporate more smoothly into the mixture.
Step-by-Step Directions for Easy Homemade Pralines
Making pralines is a delightful process that transforms simple ingredients into an extraordinary candy. Follow these detailed steps to ensure your pralines turn out perfectly creamy and delicious.
Step 1: Preparation and Initial Cooking
Begin by preparing your pecans. Take 1½ cups of pecan halves and chop them roughly or in half. The size of the chop is a matter of preference; some like larger pieces for a more prominent nutty bite, while others prefer smaller ones for even distribution. Once chopped, set them aside. Next, choose a heavy-bottomed pot, ideally one that is non-stick, to prevent scorching. Place the pot on your stove and preheat it over medium-high heat. The heavier bottom helps distribute heat evenly and prevents the mixture from burning. Into the warmed pot, add the sugar, evaporated milk, melted unsalted butter, and vanilla extract. Give these ingredients a thorough stir until they are well combined. It’s crucial to ensure everything is mixed homogeneously before the mixture comes to a boil.
Allow the mixture to come to a full boil, stirring continuously. This constant stirring is vital for about 12 minutes to prevent the sugar from crystallizing and to ensure even cooking. As the mixture cooks, you’ll observe it starting to thicken and rise slightly in the pot. This indicates that it’s reaching the right consistency. For those who prefer precision, a candy thermometer can be incredibly helpful here; aim for the soft ball stage, which is typically between 238°F and 242°F (114°C to 117°C). If you don’t have a thermometer, observe the mixture carefully for the described visual cues. After approximately 12 minutes of continuous stirring and boiling, your praline base will be ready for the next stage.
Step 2: Adding Pecans and Setting
Once your praline base has reached the desired consistency (after about 12 minutes of boiling and stirring), it’s time to incorporate the star ingredient. Add in the chopped pecans to the hot mixture. Immediately begin stirring all the ingredients together continuously for about 6 minutes. During this crucial stirring period, the mixture will continue to cook slightly off the heat, and it will start to cool and thicken. You’ll notice it gradually changing texture, becoming more viscous and less runny. This extended stirring helps the pralines achieve their signature creamy, slightly fudge-like consistency.
Keep a close eye on the consistency. If, by chance, the mixture becomes too thick too quickly and is difficult to scoop, don’t worry – it’s an easy fix. You can adjust the consistency by stirring in a tablespoon of whole milk. Add it gradually, stirring well after each addition, until the praline mixture loosens up to a more manageable, scoopable texture. Be careful not to add too much milk, as this could make the pralines too soft. Once you’ve achieved the perfect consistency, prepare for setting. Lay a sheet of parchment paper or a silicone baking mat on a clean, flat surface like a table or baking sheet. Using a large spoon or a small ice cream scoop, quickly scoop out generous spoonfuls of the praline mixture onto the parchment paper. Work efficiently, as the mixture will continue to set as it cools.
Shape the pralines into desired rounds or irregular disks. Don’t worry about perfection; rustic charm is part of their appeal. Allow the pralines to cool completely and set for about an hour. During this time, they will firm up into delectable, chewy candies. Resist the urge to touch or move them until they are fully set, as disturbing them too early can affect their texture. Once firm, they are ready to be enjoyed!
Tips for Praline Perfection
While this recipe is straightforward, a few expert tips can elevate your homemade pralines from great to absolutely extraordinary:
- Invest in a Candy Thermometer: For consistent results, a candy thermometer is your best friend. Hitting the “soft ball stage” (238-242°F / 114-117°C) precisely is key to creamy, not grainy, pralines.
- Patience is a Virtue: Don’t rush the cooling or stirring processes. The continuous stirring helps develop the right texture, and allowing them to cool undisturbed is crucial for proper setting.
- Mind the Humidity: High humidity can be the enemy of candy making. Try to make pralines on a dry day, as excessive moisture in the air can prevent them from setting properly or make them sticky.
- Choose the Right Pot: A heavy-bottomed pot prevents scorching and helps distribute heat evenly, which is vital for candy making.
- Don’t Scrape the Sides: As you stir, avoid scraping down the crystallized sugar from the sides of the pot. These sugar crystals can fall into your mixture and cause the entire batch to become grainy.
- Storage Secrets: Store your cooled pralines in an airtight container at room temperature. They typically stay fresh for about 1-2 weeks. You can also layer them between sheets of parchment paper to prevent sticking.
Common Praline Pitfalls and How to Avoid Them
Even with a simple recipe, things can sometimes go awry. Here are a few common issues and how to troubleshoot them:
- Grainy Pralines: This is often caused by sugar crystallization. Ensure you stir continuously during the initial boil and avoid scraping down sugar crystals from the pot’s sides. A quick fix can sometimes be re-melting the mixture with a tablespoon of water or milk, reheating it, and trying again.
- Runny Pralines: If your pralines don’t set, they likely haven’t been cooked long enough. The sugar mixture didn’t reach the correct temperature (soft ball stage). You can often salvage them by returning the mixture to the pot, reheating, and cooking it longer until it reaches the proper temperature.
- Hard or Brittle Pralines: Conversely, if your pralines are too hard, they were cooked too long, past the soft ball stage. Unfortunately, this can be harder to fix, but you can try adding a bit more evaporated milk and gently reheating to see if it softens.
- Burnt Pralines: This typically happens if the heat is too high or the mixture isn’t stirred enough, causing the sugar to scorch at the bottom of the pot. Always use medium-high heat and stir constantly.
Serving and Enjoying Your Homemade Pralines
Once your homemade pecan pralines have cooled and set, they are ready to be savored. These delightful candies are perfect as an after-dinner treat, a sweet snack with your morning coffee, or as an elegant addition to any dessert platter. Pralines also make a wonderful homemade gift for friends and family, especially during the holidays. Their rich flavor and unique texture are sure to be a hit with anyone who appreciates classic Southern confections. You can even crumble them over ice cream or incorporate them into other desserts for an extra layer of pecan-infused sweetness.
Thank you to Charlie Andrews via YouTube for the inspiration and excellent video tutorial that guided this recipe. His simple approach makes homemade candy accessible to everyone. If you enjoyed crafting these delicious pralines, we highly recommend visiting his YouTube channel and subscribing for more fantastic video tutorials and culinary insights!
Classic New Orleans Pecan Pralines Recipe
Embrace the tradition and create a batch of these truly irresistible pecan pralines today. Happy cooking, and enjoy the sweet taste of New Orleans!