
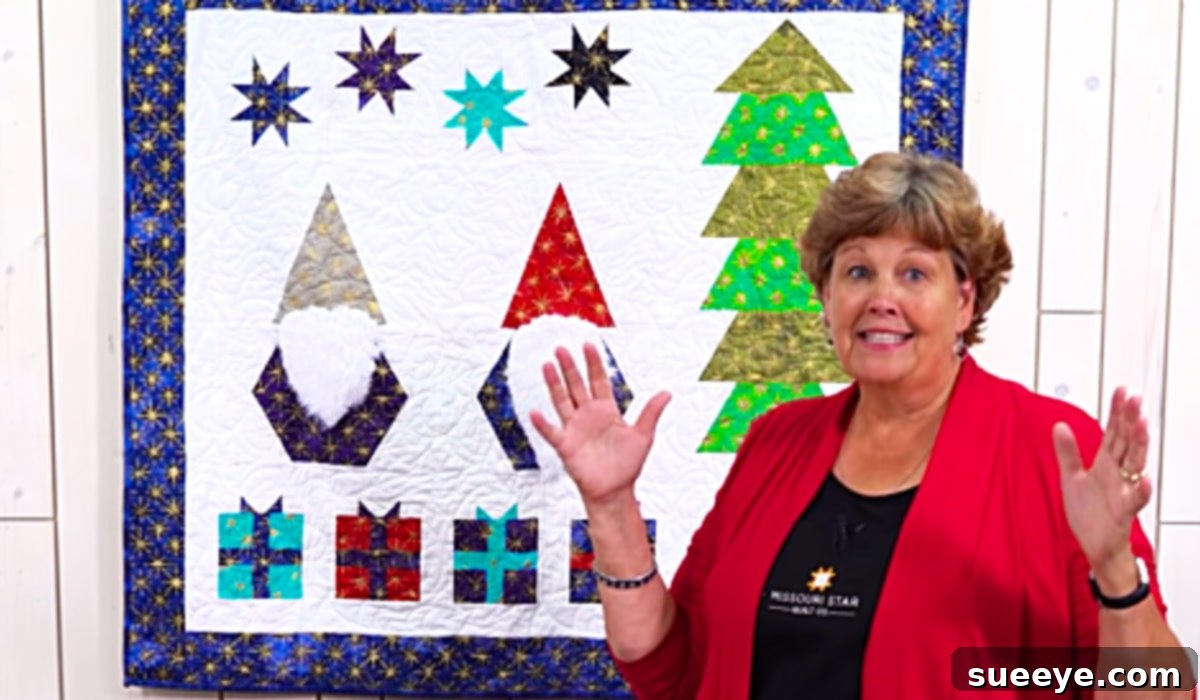
Craft a Charming Winter Gnome Wall Hanging Quilt: A Free Pattern Tutorial by Missouri Star Quilt Company
The magic of quilting often lies in transforming simple fabric pieces into something truly extraordinary and heartwarming. Among the luminaries in the quilting world, Jenny Doan of the Missouri Star Quilt Company stands out with her exceptional talent and wonderfully approachable tutorials. Her ability to distill complex techniques into simple, easy-to-understand steps makes quilting accessible to everyone, from absolute beginners to seasoned artisans. Each project she presents is not only visually stunning but also unique, consistently inspiring quilters worldwide.
It was with this admiration that I recently discovered an absolutely enchanting Winter Gnome Wall Hanging Quilt video tutorial by the Missouri Star Quilting Company on YouTube. The moment I saw this festive Christmas pattern, I knew it was a project I simply had to make. The design was utterly delightful, capturing the whimsical spirit of the winter holidays with charming gnomes. My initial thought was to craft it into a cozy curtain for my craft room, a perfect touch of seasonal cheer. Given the project’s apparent simplicity, I was confident it would be a quick and rewarding make, adding a personal, handmade touch to my holiday decor.
Why Choose a Gnome Quilt for Your Holiday Decor?
Gnomes have become beloved symbols of warmth, luck, and holiday spirit, making them an ideal motif for winter and Christmas decorations. A handmade gnome quilt offers a unique way to incorporate this charming trend into your home. Unlike mass-produced decor, a DIY gnome quilt allows for personalization, letting you choose fabrics that perfectly match your existing color scheme or express your individual style. Wall hangings are also incredibly versatile; they don’t take up floor space, can be easily moved, and instantly transform any room with a festive touch. This particular pattern from Missouri Star Quilt Company is designed to be accessible, ensuring that even those new to quilting can achieve beautiful results and proudly display their creation.
Essential Materials for Your Whimsical Winter Gnome Wall Hanging Quilt
Before embarking on any quilting adventure, gathering all the necessary materials is the first crucial step. The beauty of this project lies in its relative simplicity, requiring a manageable list of supplies. The free pattern download from Missouri Star Quilt Company will provide specific measurements and fabric requirements, ensuring you have everything you need for the gnome design. Here’s a detailed breakdown of the tools and textiles that will bring your gnomes to life:
- Free Pattern Download: The foundation of your project! Make sure to download and print the pattern from the Missouri Star Quilt Company website. This will guide you through cutting all the necessary applique pieces and assembling your quilt.
- Assorted Fabrics: According to the pattern instructions, you’ll need various fabrics for the gnome hats, bodies, noses, and backgrounds. This is where your creativity can truly shine. Consider using a mix of festive prints, solids, and tone-on-tone fabrics. For a classic winter look, think about reds, greens, whites, grays, and blues. For a modern twist, explore metallic accents or unconventional color palettes. Remember to pre-wash your fabrics to prevent shrinking and color bleeding.
- Faux Fur: This is the secret ingredient for those wonderfully fluffy gnome beards! A small piece of faux fur in white, cream, or a soft gray will add incredible texture and character to your gnomes. Look for options with a good pile for a realistic, plush beard effect.
- Sharp Fabric Scissors: Essential for precise cutting, especially when working with smaller applique pieces and the faux fur.
- Rotary Cutter: A quilter’s best friend for cutting straight lines quickly and accurately. Choose a comfortable size, typically 45mm or 60mm.
- Self-Healing Cutting Mat: Protect your work surface and your rotary cutter blade with a good quality self-healing mat.
- Iron and Ironing Board: Crucial for pressing seams open or to one side, flattening fabric, and preparing applique pieces. Proper pressing makes a huge difference in the final look and accuracy of your quilt.
- Sewing Machine: A reliable sewing machine with a straight stitch and perhaps a zigzag or applique stitch function will be necessary.
- Thread: All-purpose polyester or cotton thread that matches your fabrics, especially for piecing and any visible applique stitching.
- Batting: The middle layer of your quilt, providing warmth and dimension. A thin cotton or blend batting is suitable for a wall hanging.
- Backing Fabric: A piece of fabric for the back of your quilt, slightly larger than your quilt top. This is an opportunity to use a fun coordinating print!
- Binding Fabric: Strips of fabric used to finish the edges of your quilt, giving it a polished look.
- Heat ‘n Bond Lite (or similar fusible web): Highly recommended for applique. This allows you to iron your fabric pieces onto the background before stitching, making placement easy and secure.
- Pins or Fabric Clips: For holding fabric layers together.
- Seam Ripper: Every quilter needs one for those inevitable “learning opportunities.”
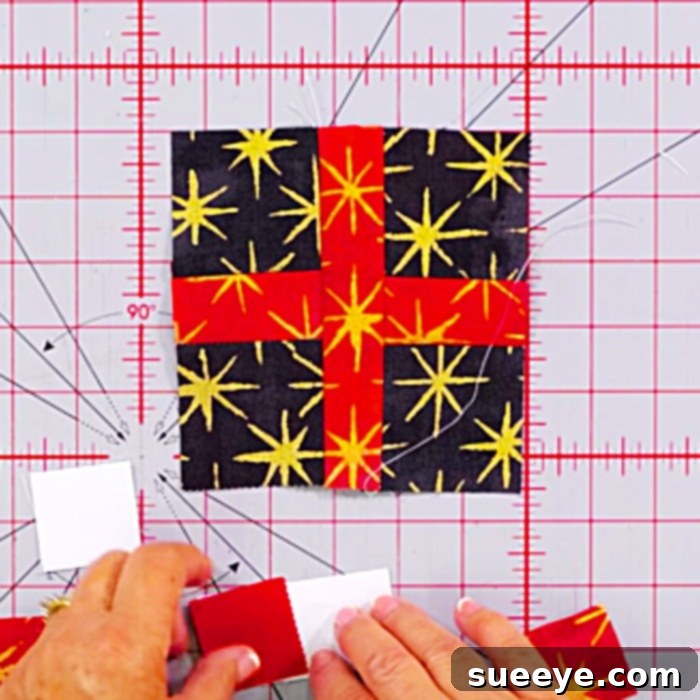
Step-by-Step Directions: Crafting Your Festive Winter Gnome Quilt
The beauty of the Winter Gnome Wall Hanging Quilt video tutorial by Missouri Star Quilting Company on YouTube lies in its clear, concise instructions. Jenny Doan breaks down what might seem like an intricate project into a series of manageable, enjoyable steps. Here’s a detailed overview of the process you’ll follow to create this festive holiday project:
1. Download and Prepare Your Quilt Pattern
Your journey begins with the free pattern download. Print it out carefully, ensuring it prints to scale (often indicated by a 1-inch test square). Once printed, cut out all the individual pattern pieces for your gnomes. These templates will serve as your guides for cutting your fabric accurately.
2. Fabric Selection and Preparation for Applique
Review the pattern’s fabric requirements. Select your fabrics, keeping in mind the distinct parts of the gnome: hats, noses, bodies, and the background blocks. For the gnome bodies and hats, choose fabrics that offer good contrast and visual interest. For the small gnome noses, a solid or subtle print fabric works well. Cut your background blocks to the size specified in the pattern. This will form the canvas upon which your gnomes will be placed.
3. Creating Your Applique Pieces
This is where your gnomes start to take shape. Using your pattern templates, trace the shapes for the gnome hats, bodies, and noses onto the paper side of your Heat ‘n Bond Lite (or similar fusible web). Roughly cut around these traced shapes, leaving a small margin. Iron the fusible web pieces onto the wrong side of your chosen fabrics, following the manufacturer’s instructions. Once cooled, carefully cut out each fabric shape precisely along your traced lines. Peel off the paper backing to reveal the adhesive.
4. Assembling the Gnome Figures
Lay out your background fabric blocks. Arrange the cut applique pieces onto the background blocks, positioning them according to the pattern or to your own creative preference. The fusible web allows you to temporarily place and adjust until you are happy with the arrangement. Once satisfied, iron the applique pieces onto the background fabric, securing them in place. The tutorial will guide you on the exact placement for each gnome component.
5. Adding the Faux Fur Beards
The faux fur beards are a delightful detail that truly brings the gnomes to life. Cut the faux fur for the beards using the beard template provided in the pattern. When cutting faux fur, it’s often best to cut from the back side with a craft knife or just the very tips of your scissors to avoid cutting too much of the fur fibers. Position the faux fur beard piece under the gnome’s nose and hat, allowing it to spill out from beneath. You can secure this by carefully stitching around the edges of the beard (either by machine or hand) or by using a strong fabric glue for a no-sew option, ensuring the fur itself isn’t caught in the stitching.
6. Applique Stitching
To permanently secure your applique pieces and add a decorative touch, you will stitch around the edges of each fabric shape (hats, bodies, noses). Jenny Doan often demonstrates simple machine applique techniques, such as a zigzag stitch, blanket stitch, or a straight stitch close to the edge. The tutorial will show you the exact stitching methods she uses for a clean, professional finish. This step not only secures the pieces but also adds definition and texture to your gnomes.
7. Assembling the Quilt Top and Finishing
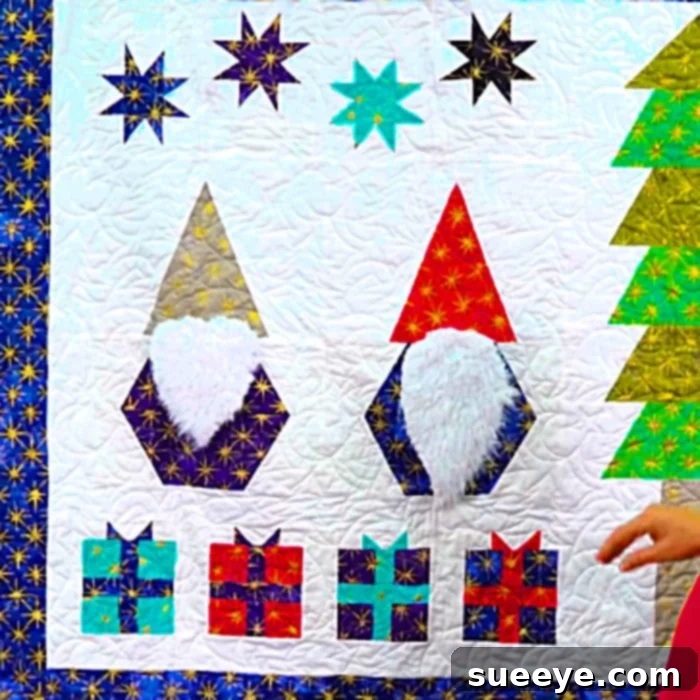
Once all your gnomes are appliqued onto their background blocks, you will follow the pattern to assemble these blocks into the complete quilt top. This usually involves sewing the blocks together in rows and then sewing the rows together. After your quilt top is complete, you will create the “quilt sandwich” by layering your backing fabric (right side down), batting, and quilt top (right side up). Baste these layers together using pins or basting spray. Quilt your layers together, either by machine or hand. For a wall hanging, simple straight lines, meandering, or even tying with yarn can work beautifully. Finally, trim any excess batting and backing, and bind the edges of your quilt for a neat, finished look. The video tutorial will guide you through these crucial finishing steps.
Tips for a Successful Gnome Quilt Project
- Watch the Tutorial Fully: Before you start cutting, watch Jenny Doan’s video tutorial from beginning to end. This will give you a complete understanding of the process and any specific tips she offers.
- Practice Applique: If you’re new to applique, consider doing a small practice piece on scrap fabric to get comfortable with the technique and your chosen stitch.
- Press, Press, Press: Good pressing habits are vital in quilting. Pressing seams and applique pieces flat ensures your quilt lays nicely and your measurements remain accurate.
- Choose Contrasting Fabrics: Ensure there’s enough contrast between your gnome elements (hat, body, nose) and the background fabric so they stand out beautifully.
- Take Your Time: While this project is designed to be quick, don’t rush through steps. Enjoy the process of creating something handmade and unique.
- Customize: Feel free to experiment with different hat designs, colors, or even add small embellishments like bells or beads (if safe for display).
Beyond the Wall: Creative Ways to Display Your Gnome Quilt
While designed as a wall hanging, your finished gnome quilt offers a multitude of creative display options. As I initially envisioned, it would make a charming and festive craft room curtain, allowing a subtle amount of light through while adding personality. Here are a few other ideas:
- Door Decor: Hang it on your front door (protected from elements) or an interior door to welcome guests.
- Table Runner: A longer, narrower version could make an adorable holiday table runner.
- Pillow Cover: Adapt the gnome blocks to create festive throw pillow covers for your sofa.
- Gift Giving: A handmade gnome wall hanging makes a thoughtful and personal gift for friends, family, or as a hostess gift during the holidays.
- Mini Quilt Series: Create several individual gnome blocks and frame them as a series for a gallery wall.
- Nursery Decor: With softer, pastel fabrics, a gnome quilt could be a sweet addition to a baby’s nursery during the winter months.
This is truly such a beautiful and rewarding quilt project. Its small size means it can be made relatively quickly, making it an ideal choice for a last-minute holiday decor refresh or a heartfelt gift. The clear guidance from Jenny Doan ensures a joyful and successful quilting experience. So gather your fabrics, fire up your sewing machine, and let the festive spirit of these charming gnomes fill your home with handmade warmth!