
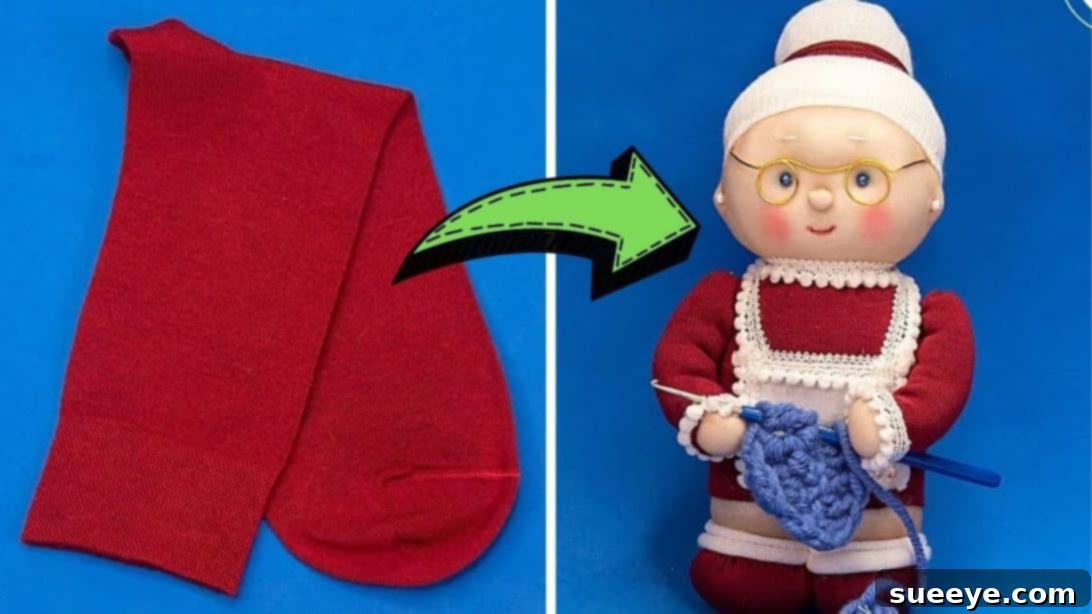
Craft Your Own Adorable Grandma Sock Doll: An Easy DIY Guide
Unleash your creativity and embark on a delightful crafting journey with this comprehensive guide to making an absolutely adorable grandma doll from simple socks. This project is not only incredibly charming but also surprisingly straightforward, making it perfect for crafters of all skill levels, including beginners. Inspired by the wonderful video tutorial from Miarti – Creative Ideas on YouTube, we’ve expanded upon their fantastic concept to bring you an enriched, detailed instruction set designed for maximum enjoyment and success. Whether you’re looking to create a personalized gift, a unique decorative item, or simply want to try a fun and rewarding sewing project, this grandma sock doll is sure to warm hearts and spark joy.
Making handmade dolls is a timeless craft that offers a wonderful way to express affection and creativity. These sock dolls, in particular, hold a special appeal due to their rustic charm and the accessibility of materials. You’ll be amazed at how easily ordinary socks can be transformed into a character-filled companion. So, gather your supplies, find a cozy spot, and let’s dive into the enchanting world of DIY sock doll making!
Materials You’ll Need:
To begin your charming grandma sock doll project, ensure you have the following materials readily available. Most of these items are common household craft supplies, making this an economical and convenient DIY:
- Red Socks: These will primarily be used for the doll’s clothing, such as a dress or blouse and sleeves. Choose a vibrant red for a classic grandma look.
- White Sock: Essential for forming the doll’s head and hair, giving her that signature white or grey hair appearance.
- White and Red Thread: White thread will be used for general stitching, while red thread is perfect for adding details like the mouth. Make sure they are strong and suitable for sewing.
- Needle: A basic hand-sewing needle will suffice. Choose one with an eye large enough for your thread.
- Stockings: Pantyhose or old tights (preferably a neutral or skin-like tone) are crucial for creating the doll’s body, offering a stretchy and smooth base.
- Polyester Fiberfill: The magic ingredient for stuffing your doll, giving it shape and softness. Ensure you have an ample amount for a plump and huggable doll.
- Scissors: A good pair of fabric scissors will make cutting your socks and stockings much easier and cleaner.
- Red Hair Tie: To create a lovely hair bun for your grandma doll.
- Small Beads (for eyes): Optional, but highly recommended for giving your doll expressive eyes.
- Blusher (or pink fabric paint/marker): To add a touch of rosy cheek color to your doll.
- Cotton Swab: For applying blusher smoothly.
- Small Wire or Plastic for Glasses: To craft a pair of cute reading glasses for your doll.
- Hot Glue Gun and Sticks: For securely attaching the glasses and other small embellishments.
Step-by-Step Instructions: Crafting Your Grandma Sock Doll
Follow these detailed steps carefully to bring your adorable grandma sock doll to life. Take your time with each stage, and don’t hesitate to personalize your doll as you go!
Step 1: Building the Doll’s Body and Initial Features
The foundation of your grandma doll begins with creating her soft, huggable body and defining her basic head and limb structure.
- Prepare the Body Base: Start by taking your stockings. Begin stuffing them generously with polyester fiberfill. Distribute the fiberfill evenly to create a smooth, firm, and consistently shaped body. Continue stuffing until the body reaches your desired height and plumpness. Remember, the fiberfill density will determine how firm or soft your doll is, so aim for a pleasant, squeezable texture.
- Secure the Body: Once you’re satisfied with the doll’s size and shape, firmly tie off the open ends of the stockings to secure the fiberfill. Carefully cut off any excess stocking material, leaving a neat and contained form.
- Form the Neck: Thread your needle with a double strand of strong white thread. Insert the needle through the stockings at the point where the neck should naturally form, typically about one-fifth of the way down from the top. Wrap the thread tightly around this section several times, cinching it in. Pull the thread taut enough to clearly define the neck area, creating a distinct separation between the head and body. Secure with a firm knot to prevent unraveling.
- Shape the Legs: To create the legs, insert your needle through the bottom center of the doll’s body. Pull the needle out from the middle of the body’s front area, ensuring the stitch passes through the internal fiberfill. Repeat this process several times, stitching back and forth through the body’s lower section. Each stitch will help to indent and divide the lower body, gradually forming two distinct leg shapes. Aim for symmetry to give your doll balanced legs.
- Dress the Doll: Take your red socks. Measure them against the doll’s body to determine the appropriate length for her dress or shirt. Cut the socks to size, creating sleeves and a main body piece. Carefully “dress” the doll by slipping the cut sock pieces onto her. Once positioned, stitch the collar of the “shirt” or dress securely around the doll’s neck area, ensuring a neat and tailored look.
- Establish the Hairline and Facial Guides: Take your white sock, which will form the doll’s hair and initial head covering. Place it over the doll’s head, positioning it about halfway down the head to create a realistic hairline. Use pins to temporarily secure the white sock in place. At this stage, carefully mark with pins where you envision the eyes and nose to be located. This temporary guide is crucial for accurate facial feature placement.
- Sew the Ears: Now, decide where you want the ears to be positioned on the doll’s head. Using your needle and thread, carefully sew small, rounded shapes on either side of the head, creating subtle ear forms. Ensure they are symmetrical and proportional to the head.
Step 2: Adding Facial Details, Hair, Arms, and Feet
This step focuses on bringing your doll’s personality to life through her facial expressions, hair, and completing her limbs.
- Create and Attach the Nose: Take a small piece of polyester fiberfill and tightly roll it into a tiny ball. Insert this into a small scrap piece of stocking. Sew the edges of the stocking around the fiberfill ball, forming a neat, rounded nose. Wrap a double thread securely around the base of this small nose and tie a knot. Carefully remove the marking pin for the nose from the doll’s face. Using your needle and thread, securely sew this handmade nose onto the doll’s face in the designated spot, ensuring it protrudes slightly for a three-dimensional effect.
- Sew the Mouth: Thread your needle with red thread. Carefully embroider a gentle, curved line beneath the nose to form the doll’s mouth. A simple “U” shape or a slight smile can add a lot of character. Secure your stitches firmly at the back of the head.
- Secure the Hair Base: Once the facial features are in place, securely sew the white sock (which forms the hairline) onto the doll’s head. Make sure it’s snug and doesn’t shift. Carefully trim off any excess ends of the white sock, leaving just enough material to form the hair.
- Shape the Hair and Bun: Add more polyester fiberfill into the remaining white sock material on the doll’s head. Begin to shape this fiberfill into a desired hairstyle, typically a bun for a grandma doll. Once you’re happy with the shape, sew the open end of the sock closed to hold the fiberfill in place. To create a more pronounced and adorable hair bun, add another smaller layer of polyfill on top of the already formed hair, shaping it into a neat circle.
- Add the Hair Tie and Eyes: Tie a red hair tie snugly around the base of the hair bun, adding a touch of color and securing the bun’s shape. Next, carefully sew the small bead eyes onto the doll’s face, positioning them precisely where you marked earlier. Ensure they are securely fastened. Use black thread to sew small, curved eyebrows above the eyes, enhancing her expression.
- Add Blush and Glasses: Using a cotton swab dabbed lightly in blusher (or a tiny bit of pink fabric paint), gently apply a touch of color to the doll’s cheeks. This adds warmth and a lifelike glow. For the reading glasses, carefully shape a small piece of wire or plastic into a pair of tiny spectacle frames. Use a hot glue gun to attach both ends of these reading glasses securely to the doll’s face, just above the nose.
- Construct the Arms: Take scrap pieces from your red socks to create the sleeves for the doll’s arms. Sew these sleeve shapes. At the end of each sleeve, attach a small piece of stocking stuffed with a tiny amount of polyfill to form the hands. Sew these arm pieces onto the doll’s body at the shoulders, ensuring they are positioned symmetrically.
- Create the Feet: For the feet, cut two small, round shapes from your remaining sock material. Stuff each round piece with polyester fiberfill to create a plump, foot-like shape. Neatly sew these stuffed feet onto the bottom of the doll’s legs, completing her lovable form.
*All these images are credited to Miarti – Creative ideas via YouTube. Give her channel a visit and subscribe for more inspiring craft tutorials!
Why Make a Grandma Sock Doll? The Joy of Handmade Creations
Crafting a grandma sock doll isn’t just about following instructions; it’s about creating something with soul and purpose. Here are a few reasons why this DIY project is so rewarding:
- Personalized Gifts: A handmade doll makes an incredibly thoughtful and unique gift for grandparents, children, or anyone who appreciates a touch of whimsy. You can customize her outfit, hair, and accessories to reflect the personality of the recipient or even create a doll in their likeness.
- Sentimental Value: Unlike mass-produced toys, a handmade doll carries a story and the love of its creator. It can become a cherished heirloom, passed down through generations.
- Eco-Friendly Craft: This project encourages upcycling old socks and stockings, giving new life to materials that might otherwise be discarded. It’s a fun way to practice sustainable crafting.
- Creative Outlet: For many, crafting is a form of therapy. The process of planning, stitching, and seeing your creation come to life can be incredibly relaxing and fulfilling.
- Beginner-Friendly: With clear instructions and simple sewing techniques, this project is accessible to novice crafters. It’s a fantastic way to learn basic hand-sewing skills without feeling overwhelmed.
Tips for Success and Personalizing Your Sock Doll
To ensure your grandma doll project is a resounding success and truly reflects your personal touch, consider these helpful tips:
- Take Your Time: Rushing can lead to mistakes. Enjoy the process and allow yourself ample time for each step. Precision in stuffing and stitching will result in a more polished doll.
- Even Stuffing: When filling the stockings with fiberfill, make sure to distribute it as evenly as possible. Lumps can detract from the doll’s appearance. Use a blunt stick or your fingers to push the stuffing into all areas.
- Strong Stitches: Use double-threaded needles for most stitches, especially for securing limbs and facial features. This ensures durability, so your doll can withstand lots of hugs!
- Experiment with Expressions: The eyes, nose, and mouth are key to your doll’s personality. Before permanent attachment, consider different placements for beads and embroidered lines to give her a unique expression – a gentle smile, a thoughtful look, or a cheerful grin.
- Accessorize! Don’t stop at glasses and a bun. You can add tiny fabric aprons, pearl necklaces made from small beads, a mini handbag, or even a small knitted shawl. These details elevate the doll from simple to spectacular.
- Vary Hair Colors: While white socks are traditional for a “grandma” look, you could use beige, brown, or even colorful socks for different hair styles and ages.
- Consider Other Characters: Once you’ve mastered the grandma doll, apply these techniques to create a grandpa doll, a child doll, or even pet animals using various colored socks.
Caring for Your Handmade Sock Doll
To keep your charming grandma sock doll looking her best for years to come, follow these simple care instructions:
- Spot Cleaning: For minor dust or small stains, gently spot clean the doll with a damp cloth and mild soap. Avoid saturating the doll with water, as it can be difficult to dry the fiberfill thoroughly.
- Air Dry: If the doll does get damp, ensure it is thoroughly air-dried in a well-ventilated area, away from direct sunlight or heat, to prevent mildew.
- Gentle Handling: While handmade dolls are often quite sturdy, treat them with care, especially if they have small, delicate accessories.
Embark on Your Crafting Adventure!
Creating this grandma sock doll is more than just a craft; it’s an experience that results in a tangible piece of warmth and artistry. From the initial stuffing of the stockings to the final touch of blush on her cheeks, every step contributes to bringing a unique character to life. We hope this expanded tutorial inspires you to pick up your needle and thread and discover the immense satisfaction of creating something beautiful with your own hands. This project is a testament to the fact that even the simplest materials can be transformed into something truly extraordinary. Happy crafting, and may your homemade grandma doll bring endless smiles!