
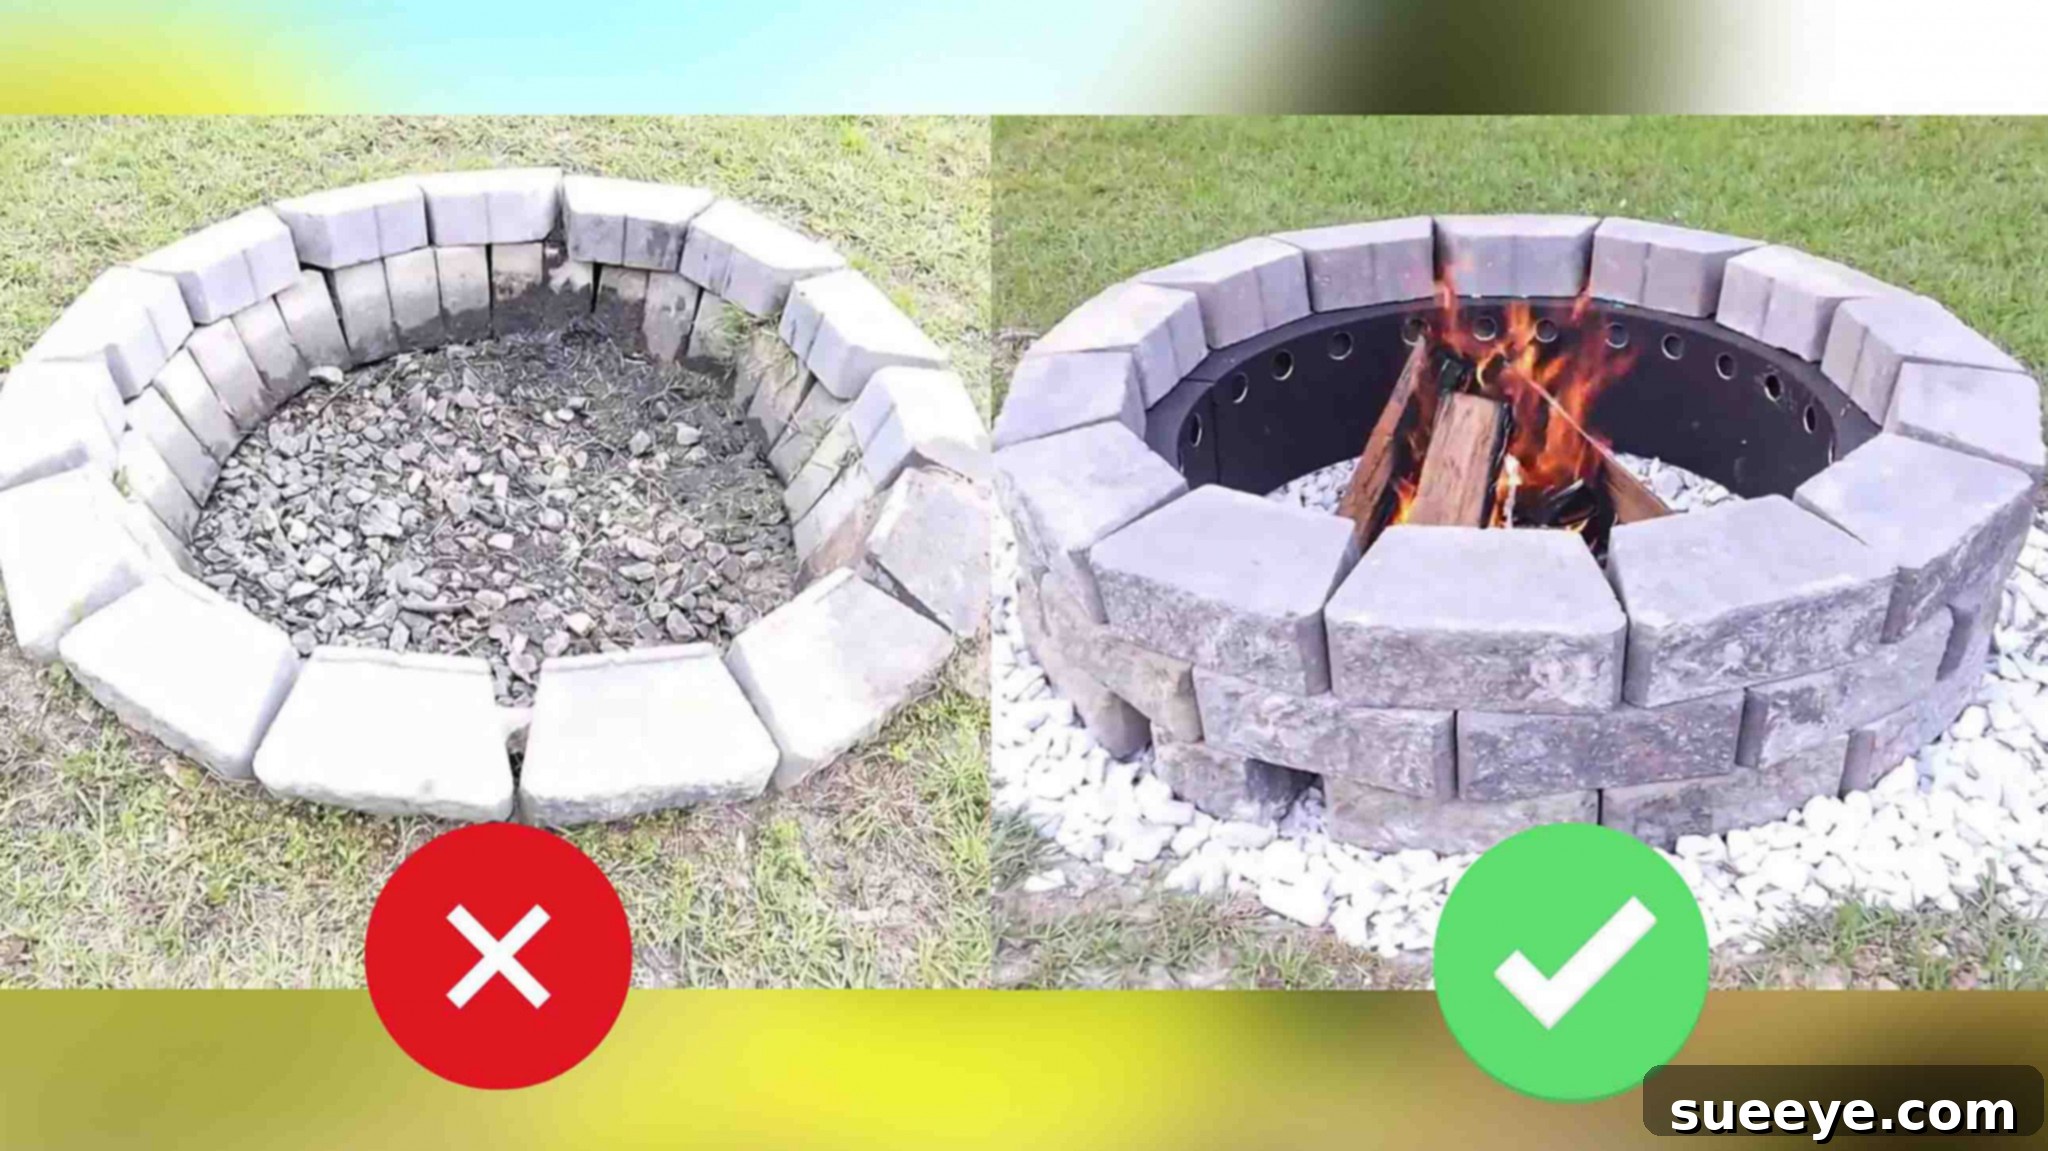
Build Your Own Backyard Oasis: The Ultimate DIY Smokeless Fire Pit Guide
Dreaming of cozy evenings spent around a warm fire, sharing stories, and making memories, but dreading the stinging eyes and smoky clothes? Store-bought smokeless fire pits can cost a fortune and often disappoint in size and performance. And if you attempt a DIY version without the right blueprint, you might end up with more smoke than fire, turning your outdoor retreat into a hazy mess. Fret no more! This comprehensive guide will walk you through building a highly effective, genuinely smokeless fire pit inspired by the brilliant tutorial from How To Home on YouTube. It’s not only incredibly budget-friendly but also surprisingly easy to construct, ensuring you get maximum enjoyment with minimal hassle. Say goodbye to smoke and hello to perfect backyard ambiance!
Why a Smokeless Fire Pit? The Ultimate Backyard Upgrade
A traditional fire pit can be a fantastic addition to any outdoor space, but the smoke it produces often detracts from the experience. This is where a smokeless fire pit shines. But what makes it “smokeless”? The magic lies in its design, which promotes secondary combustion. Here’s why you’ll love having one:
- No More Stinging Eyes: Say goodbye to constantly shifting seats to avoid the smoke plume that follows you around.
- Fresh Clothes & Hair: Enjoy your evening without smelling like a campfire afterward, keeping your clothes and hair free from smoke odor.
- Enhanced Ambiance: A clear, unobstructed view of the dancing flames creates a more serene, inviting, and magical atmosphere.
- Neighbor-Friendly: Reduce smoke drift into neighboring yards, ensuring a peaceful environment for everyone in your community.
- More Efficient Burn: The unique design encourages a hotter, more complete burn, which means you use less wood and produce less messy ash.
- Environmentally Conscious: By burning off more particulates and uncombusted gases, you achieve a cleaner burn, contributing to reduced air pollution.
This DIY project taps into clever engineering principles to achieve its impressive smokeless performance, creating a highly efficient fire pit that rivals expensive commercial models at a fraction of the price. With just a few basic materials and tools, you can transform your outdoor space into the ultimate gathering spot. Let’s gather your supplies and get started!
Materials and Tools for Your Smokeless Fire Pit
One of the best aspects of this DIY smokeless fire pit is its accessibility. Most materials can be found at your local home improvement store, and the tools required are standard for any DIY enthusiast. This makes it an achievable weekend project for almost anyone.
Essential Materials:
- Fire Ring: Choose either a 36-inch or 27-inch diameter fire ring. This metal ring forms the inner core of your fire pit and is crucial for containing the fire and providing structural integrity to the overall design. Its size will dictate the scale of your fire pit.
- 12-inch Retention Wall Pavers: You’ll need a sufficient quantity of these pavers to create at least three layers around your chosen fire ring. The exact number will depend on the diameter of your fire ring and your desired final height. These pavers form the robust outer structure and, critically, create the essential air channels.
- Optional (but Recommended for Best Results): Crushed gravel or paver base material. This is used underneath your fire pit location to ensure proper leveling, excellent drainage, and a stable, long-lasting foundation.
Tools You’ll Need:
- Hole Saw Kit: This is an essential tool for drilling the crucial secondary air intake holes in the metal fire ring. Ensure you select a durable bit specifically designed for cutting through metal.
- Power Drill: Necessary to operate the hole saw effectively and safely. A cordless drill offers greater flexibility.
- Masonry Chisel: Used for precisely breaking the retention wall pavers, which is vital for creating the primary air passages at the base of your fire pit.
- Nice Size Mallet (or Sledge Hammer): To strike the masonry chisel with controlled force, allowing you to break pavers accurately.
- Measuring Tape: For accurate measurements to ensure precise placement of the fire ring and consistent spacing of the pavers.
- Level: Absolutely vital for ensuring that each layer of your pavers is perfectly flat and stable, which is key for a well-built fire pit.
- Safety Glasses: Absolutely critical personal protective equipment (PPE). Always wear these to protect your eyes from flying debris when cutting, drilling, or breaking materials.
- Work Gloves: Protect your hands from rough edges, splinters, and minor abrasions during handling of stones and tools.
- Dust Mask: Highly recommended when working with masonry materials to avoid inhaling fine dust particles, especially when cutting or breaking pavers.
- Wheelbarrow or Cart: Extremely useful for efficiently moving heavy pavers, gravel, and other materials around your worksite.
Having all your materials and tools laid out and ready before you begin will make the construction process much smoother, safer, and more enjoyable. Now, let’s dive into the step-by-step instructions and bring your smokeless fire pit to life!
Step-by-Step Directions for Building Your Smokeless Fire Pit
Follow these detailed instructions to construct a high-performing smokeless fire pit that will become the focal point of your backyard and the envy of your neighborhood. Remember to prioritize safety throughout the build!
Step 1: Foundation, Air Gap, and Primary Airflow Channels
The success of your smokeless fire pit hinges on proper airflow and a stable base. This first step is crucial for establishing the initial cool air intake system that fuels primary combustion.
- Prepare Your Site: Begin by selecting a clear, level area for your fire pit. Ensure this location is a safe distance (at least 10-20 feet) from any permanent structures (like your home, garage, or shed), fences, low-hanging tree branches, bushes, and any other flammable materials. For optimal stability and drainage, consider excavating a shallow area (a few inches deep) and laying down a compacted base of crushed gravel or paver base material. This will create a solid, level foundation that prevents settling and improves drainage, extending the life of your fire pit.
- Assemble the Fire Ring: Unpack and assemble your chosen 36-inch or 27-inch fire ring according to the manufacturer’s instructions. Carefully ensure all connections are secure and tightened. This ring will serve as the inner chamber of your fire pit.
- Position the Fire Ring: Place the fully assembled fire ring precisely in the center of your prepared site. Take a moment to ensure it is perfectly level using your spirit level, as this will impact the evenness of your subsequent paver layers.
- Lay the First Layer of Pavers and Create the Essential Air Gap: Start carefully placing the 12-inch retention wall pavers around the outside perimeter of the fire ring. This is where the ingenious design for smokeless operation begins! It is absolutely critical to maintain a consistent 1 and 1/2 inch (approximately 3.8 cm) gap between the outer edge of the fire ring and the inner edge of your pavers. This deliberate gap is vital; it will serve as the primary conduit for cool air to be drawn into the fire pit. Use your measuring tape regularly to ensure this precise spacing is maintained consistently around the entire circumference. This air channel is insulated by the pavers and allows air to preheat before entering the fire.
- Create Primary Air Passageways with Half-Pavers: For cool air to effectively enter the 1.5-inch air pocket you’ve meticulously created, you need strategic entry points at the very base of your fire pit.
- Identify four points that are roughly equidistant (evenly spaced) around the circumference of your first paver layer.
- At these four designated spots, carefully remove the full pavers you just laid.
- Using your masonry chisel and mallet, carefully break two of these full pavers exactly in half. Safety Reminder: Always wear safety glasses and sturdy work gloves when breaking stone. Work on a stable, flat surface, and ensure no one is standing too close to avoid injury from flying chips.
- Place one of these newly broken half-pavers back into each of the four gaps you created. Position them such that there’s an intentional opening on either side of the half-paver, creating direct channels for external cool air to be drawn into the 1.5-inch gap surrounding the fire ring. These ground-level air inlets are absolutely critical for the initial stage of combustion, supplying the primary oxygen to your fire.
Step 2: Second Layer, Secondary Combustion Holes, and Final Layer
With the primary airflow successfully established, this step focuses on creating the critical conditions for secondary combustion, which effectively burns off uncombusted smoke particles, leading to that coveted smokeless effect.
- Position Half-Pavers and Continue Second Layer: With the broken half-pavers securely in place and forming the primary air inlets in the first layer, proceed to lay the second layer of full retention wall pavers directly on top of the first. To enhance structural stability and create a robust build, stagger your pavers (much like traditional brickwork), ensuring that the joints of the second layer do not align directly over the joints of the first. This staggering also helps to cover the specific gaps created by the half-pavers in the layer below. Throughout this process, diligently ensure that the 1.5-inch gap between the fire ring and the pavers is consistently maintained.
- Create Secondary Air Intake Holes: This is an absolutely pivotal step for achieving the smokeless operation. These holes introduce preheated air directly into the flame zone for secondary combustion.
- Equip your power drill with the appropriate hole saw bit, ensuring it’s suitable for cutting through metal.
- Carefully drill a series of evenly spaced holes all the way around the top part of the fire ring. These holes should be strategically positioned just above the level of your second paver layer, ensuring they draw in the now-heated air from the 1.5-inch air channel below.
- Space the holes evenly, approximately 4 to 6 inches apart, depending on the overall diameter of your fire ring. The ideal size for these holes typically ranges from 1 to 2 inches in diameter. The objective is to create multiple, uniform points where preheated, oxygen-rich air can be injected into the fire chamber just above the main flames. This influx of hot, oxygenated air will ignite the unburnt smoke particles and gases rising from the primary fire, initiating secondary combustion and significantly reducing visible smoke.
- Safety Reminder: Always wear eye protection and gloves when drilling metal. Ensure the fire ring is stable and secured before you begin drilling. After drilling, carefully deburr any sharp edges around the newly created holes to prevent cuts.
- Add the Final Layer of Stones: Once all the secondary air holes are accurately drilled into the fire ring, proceed to add the final row (the third layer) of full retention wall pavers around the fire pit. This top layer helps to further contain the heat, adds to the aesthetic appeal, and provides additional stability to your fire pit structure. Again, remember to stagger the pavers for maximum strength and a professional finish.
The Science Behind the Smokeless Magic
Understanding how your DIY smokeless fire pit works enhances appreciation for its clever and efficient design. The remarkable “smokeless” effect is primarily achieved through a process known as secondary combustion, which effectively re-burns the smoke and uncombusted gases before they have a chance to escape into the atmosphere. Here’s a detailed breakdown of the science:
- Primary Combustion: This is the initial and main burning of wood that occurs at the bottom of the fire pit. As wood burns, it undergoes pyrolysis, releasing various gases and unburnt solid particulates (soot). It is these gases and particulates that, in a traditional fire pit, we perceive as visible smoke.
- Dual-Airflow System: The Key Differentiator: Your fire pit’s ingenious design employs a sophisticated dual-airflow system to maximize combustion efficiency:
- Primary Air Intake (Bottom): The 1.5-inch gap around the fire ring, meticulously created in Step 1, combined with the strategically placed half-paver inlets at the base, draws in cool, ambient air from the outside environment. This cool air then begins to rise through the insulated chamber formed between the metal fire ring and the surrounding pavers. As it rises adjacent to the hot firebox, this air becomes significantly preheated, improving its oxygen density and reactivity. This preheated air is crucial for fueling the primary combustion, making the fire burn hotter and more efficiently from the bottom up.
- Secondary Air Intake (Top): As the preheated air continues its ascent through the insulated chamber, it eventually exits through the series of holes you drilled around the top edge of the fire ring (as completed in Step 2). By this point, the air is superheated and highly oxygen-rich. When this hot, oxygenated air mixes with the unburnt smoke (gases and particulates) rising from the primary fire, it causes a rapid and powerful second combustion reaction.
- Complete Combustion: This secondary burn consumes the smoke particles and gases that would otherwise escape as visible smoke, transforming them into additional heat and light rather than atmospheric pollutants. The net result is a much cleaner, significantly hotter burn with dramatically reduced visible smoke, providing that sought-after “smokeless” experience that allows you to enjoy your fire without irritation.
This ingenious design ensures that you get more usable heat, less waste, and a far more enjoyable and healthier fire pit experience for everyone involved.
Tips for Optimal Performance and Enjoyment
To consistently get the best and most smoke-free experience from your new DIY smokeless fire pit, consider integrating these practical tips into your fire-making routine:
- Use Dry, Seasoned Hardwood: The type and condition of wood you burn are paramount for minimizing smoke. Always use seasoned (air-dried for at least 6-12 months), dry hardwoods such as oak, maple, hickory, or ash. These woods burn hotter and more completely. Avoid wet or “green” wood, as its high moisture content creates excessive steam and smoke as it attempts to burn off. Similarly, softwoods like pine, fir, and cedar tend to produce more smoke and creosote build-up.
- Start with Kindling and Build Gradually: Begin your fire with a small amount of dry kindling (e.g., small twigs, paper, natural fire starters) and progressively add smaller pieces of wood. Allow a robust, hot base fire to establish itself before adding larger logs. A strong primary fire is essential for properly heating the incoming air for the secondary combustion system to function effectively.
- Avoid Overloading the Fire Pit: While it might be tempting to fill your fire pit to the brim, avoid overfilling it with wood. Leave ample space for air to circulate freely around and above the burning logs. Overloading can smother the fire, impede crucial airflow, and inhibit the secondary burn process, which will lead to increased smoke production.
- Maintain Unobstructed Airflow: Regularly inspect and ensure that the external air inlets at the base of your fire pit (the areas with the half-pavers) are clear of any debris such as leaves, dirt, or ash. Consistent and unobstructed primary airflow is vital for the entire smokeless system to operate as intended.
- Strategic Ash Management: It’s beneficial to allow a small, thin bed of ash (about an inch deep) to accumulate at the bottom of the fire pit, as it acts as an insulator, helping the fire burn hotter. However, too much ash can impede crucial airflow from the bottom, reducing efficiency and potentially increasing smoke. Periodically clean out excessive ash, ensuring the bottom grate (if your fire ring has one) and lower air inlets remain clear.
- Consider Weather Conditions: While your smokeless fire pit is engineered to minimize smoke, extremely strong or gusty wind conditions can still affect its performance. High winds can disrupt the delicate airflow dynamics and cause some smoke to swirl or drift. For the most enjoyable and truly smokeless experience, choose calmer evenings.
Safety First: Important Considerations for Fire Pits
Building and enjoying a fire pit should always prioritize safety to protect yourself, your loved ones, and your property. Please adhere to these critical guidelines:
- Strategic Location Selection:
- Always place your fire pit on a stable, completely non-combustible surface. This includes bare dirt, gravel, concrete pavers, or a stone patio. Avoid grass, wood decks, or any other flammable surfaces directly beneath the fire pit.
- Maintain a safe and generous clearance of at least 10-20 feet from any structures (such as your home, garage, sheds), fences, overhanging tree branches, dense bushes, and any other potentially flammable materials. Check your local fire codes, as minimum clearances may vary.
- Never operate a fire pit under a patio cover, inside an enclosed space, or near any low-hanging combustible items.
- Immediate Fire Extinguishment Resources: Always have a readily accessible fire extinguisher, a large bucket of water, or a charged garden hose within arm’s reach and ready for immediate use. Accidents can happen quickly.
- Constant Supervision: Never, under any circumstances, leave a burning fire unattended, even for a brief moment. A sudden gust of wind can carry embers, or the fire could flare unexpectedly. Ensure children and pets are always kept at a safe, supervised distance from the fire pit.
- Wind Awareness: Avoid using your fire pit on very windy days. Strong winds can easily carry hot embers and sparks far distances, potentially igniting unintended fires in dry grass or other combustible materials.
- Complete Extinguishment Protocol: Before concluding your gathering and leaving the fire pit, ensure the fire is completely and thoroughly extinguished. Douse the embers with plenty of water, and then stir the ashes and remaining materials to confirm that no hot embers or smoldering pockets remain. Feel the ashes to ensure they are cool to the touch.
- Tool Safety During Construction: When you are in the process of building the fire pit, always wear appropriate personal protective equipment (PPE), including durable safety glasses, sturdy work gloves, and a dust mask. This is especially important when cutting, drilling, or breaking stones and metal.
- Adhere to Local Regulations: Before you begin, always check your local city or county ordinances regarding open fires and fire pits. Some areas may have specific restrictions on burn times, types of materials allowed, or even require permits, especially during dry seasons or drought conditions.
Maintenance for Longevity: Keeping Your Fire Pit in Top Shape
With a little regular care and attention, your DIY smokeless fire pit will provide many years of memorable, smoke-free enjoyment. Here’s how to maintain it to ensure its peak performance and extend its lifespan:
- Regular Cleaning and Ash Removal: Once the fire pit has completely cooled (which can take several hours), regularly remove excess ash and debris. A small shovel or scoop, perhaps coupled with a shop vacuum, can be helpful for this task. Avoid letting too much ash build up, as an excessive layer can impede the crucial bottom airflow, reducing the fire’s efficiency and potentially increasing smoke.
- Inspect for Wear and Tear: Periodically conduct a thorough inspection of your fire pit. Check the metal fire ring for any signs of rust, corrosion, or degradation. Examine the surrounding pavers for any developing cracks, chips, or signs of instability. Addressing minor issues promptly, such as loose pavers or surface rust, can prevent them from escalating into more significant and costly repairs.
- Protect from the Elements: While the concrete pavers are inherently durable, consistently covering your fire pit when it’s not in use can significantly extend its overall lifespan, especially protecting the metal fire ring. A high-quality, waterproof, and UV-resistant cover will shield it from rain, snow, harsh sunlight, and falling debris, preventing premature weathering and rust.
- Winterizing (for Colder Climates): If you live in a region with particularly harsh winters, consider taking extra steps to protect your fire pit. Covering it comprehensively is a good start. For maximum protection, you might even consider temporarily removing and storing the metal fire ring indoors during the coldest months to prevent potential damage from freezing and thawing cycles, which can accelerate rust and material fatigue.
Frequently Asked Questions (FAQs)
How does a smokeless fire pit truly work?
A smokeless fire pit operates on the principle of secondary combustion. It works by drawing in cool air from inlets at the base, heating this air within an insulated double-wall chamber, and then releasing this preheated, oxygen-rich air into the firebox just above the main flames. This influx of hot air reignites and burns off unburnt smoke particles and gases, resulting in significantly less visible smoke.
What kind of wood is best to use in a smokeless fire pit?
For optimal smokeless performance and a clean, efficient burn, always use seasoned, dry hardwoods such as oak, maple, hickory, or ash. These woods burn hotter and produce less smoke. Avoid using green (unseasoned) wood, softwoods like pine, or any construction scraps, as they tend to produce much more smoke and creosote due to their high moisture content or chemical treatments.
Is this DIY smokeless fire pit really as effective as expensive store-bought ones?
Yes, absolutely! When built correctly and precisely following the airflow principles and dimensions outlined in this comprehensive guide, this DIY smokeless fire pit can achieve performance and smoke-reducing capabilities comparable to many high-end commercial models. The core engineering principle of promoting secondary combustion remains the same, but you get to enjoy significant cost savings by building it yourself.
How long will it take to build this fire pit?
For someone with basic DIY experience and all materials and tools readily available, gathering the supplies and completing the construction could typically take anywhere from a half-day to a full day. The steps involving breaking the stones and accurately drilling the holes are often the most time-consuming parts, but with careful planning and execution, it is a very manageable weekend project.
What if I don’t have a masonry chisel or hole saw?
The masonry chisel and a metal-specific hole saw are crucial tools for implementing the smokeless design features. While you might be able to rent these specialized tools from a local tool rental store or borrow them from a friend, attempting to substitute them with inappropriate tools could compromise the fire pit’s functionality, efficiency, or even lead to safety hazards. Investing in or renting the correct tools is highly recommended for achieving the desired smokeless effect and ensuring a successful build.
Conclusion: Enjoy Your New Smokeless Backyard Retreat!
Congratulations! By meticulously following this detailed guide, you’ve not only constructed a functional, beautiful, and inviting outdoor feature but also mastered the art and science of creating a truly smokeless fire pit. This rewarding DIY project offers an unparalleled combination of cost-effectiveness, relative ease of assembly, and exceptional performance, definitively proving that you don’t need to break the bank for a premium backyard experience. Imagine countless enchanting evenings bathed in the warm, clean glow of smoke-free flames, surrounded by friends and family, sharing laughter and stories without the irritation of smoke. Your new smokeless fire pit is far more than just a place to burn wood; it’s a meticulously crafted hub for connection, ultimate relaxation, and for creating cherished, lasting memories. So, gather your loved ones, ignite your fire, and wholeheartedly embrace the magic of your very own smoke-free outdoor oasis!