
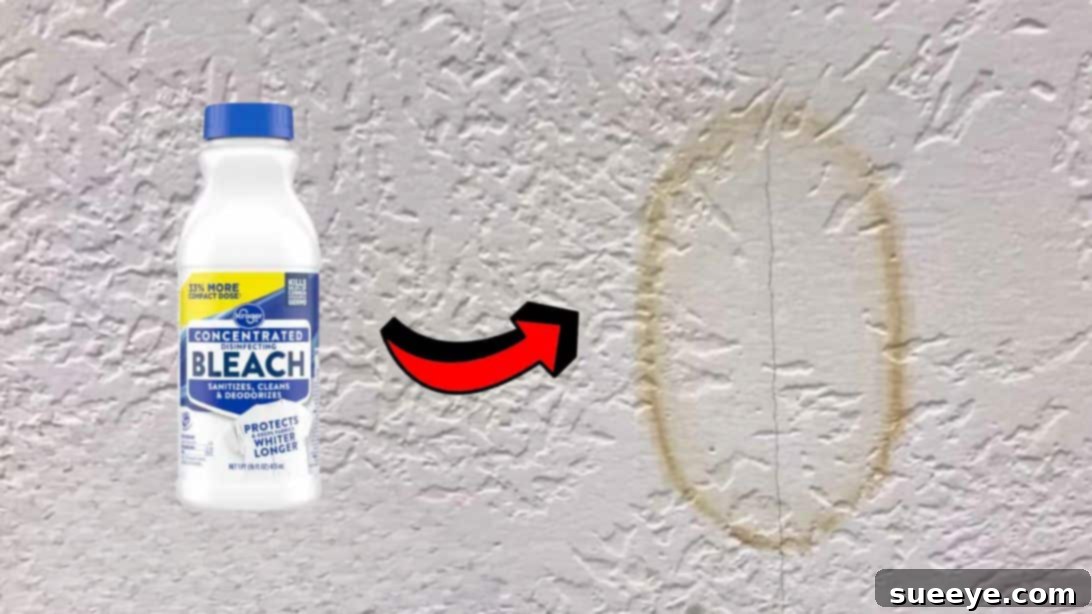
Those unwelcome brown rings on your ceiling are a tell-tale sign of a water stain. Often, the immediate thought is to reach for a can of paint, but painting over water stains can be a frustrating and costly endeavor. It’s time-consuming, physically demanding, and often requires multiple coats to truly hide the discoloration. What if there was a simpler, more efficient way to restore your ceiling’s pristine appearance without ever picking up a paintbrush?
Thanks to an ingenious homemade solution shared by Abbotts At Home – DIY, you can effectively eliminate water stains from your ceiling, making them vanish as if by magic. This isn’t just a temporary cover-up; it’s a true fix that restores your ceiling to its original state, leaving no trace that a water stain was ever there. Imagine saving yourself considerable money, precious time, and strenuous effort with this incredibly easy technique using a common household item: bleach.
RELATED: How To Remove Hard Water Stains and Soap Scum in the Shower
Before diving into any DIY solution, especially one addressing water damage, the absolute first and most crucial step is to ensure the source of the leak has been completely identified and permanently fixed. Attempting to clean water stains without resolving the underlying leak is futile, as the stains will inevitably reappear. Once you’re confident that the leak is fully cleared and your ceiling is no longer exposed to ongoing moisture, you are ready to tackle those unsightly water stains with confidence.
However, it’s vital to understand the limitations of this technique to ensure successful results and prevent unintended damage. This method is specifically designed and effective only for white ceilings. If your ceiling is colored, please do not attempt this treatment, as the bleach solution will lighten or remove the paint color, resulting in an uneven and patchy appearance. Additionally, if you have previously tried to paint over a water spot, this bleach-based solution may no longer be effective, as the new layer of paint can interfere with the bleach’s ability to penetrate and neutralize the stain. Finally, and perhaps most importantly, safety should always be your top priority. Bleach is a powerful chemical, so always wear protective gloves and a mask when preparing and applying the solution. This precaution helps you avoid direct skin contact and inhaling harmful fumes, ensuring a safe and successful cleaning process.
Essential Tools and Materials for Ceiling Water Stain Removal
To embark on this DIY ceiling stain removal project, you’ll need just a few readily available items. Gathering these materials beforehand will ensure a smooth and uninterrupted process:
- Household Bleach (standard chlorine bleach)
- Clean Water (tap water is fine)
- Mist Spray Bottle (crucial for even application)
- Protective Gloves (chemical-resistant recommended)
- Safety Mask (to avoid inhaling fumes)
- Old Towels or Plastic Sheeting (for floor and furniture protection)
- Paper Towel or Clean, Soft Cloth (for dabbing)
Step-by-Step Guide: How to Remove Water Stains from Your Ceiling Without Painting
Follow these detailed steps carefully to effectively eliminate those stubborn water stains and restore your ceiling’s pristine look:
Step 1: Prioritize Safety and Prepare Your Solution
Before you begin handling any chemicals, your first action must be to put on your protective gloves and safety mask. Proper ventilation in the room is also highly recommended. Once you’re safely geared up, grab your mist spray bottle. Carefully measure and fill the bottle with a solution consisting of 1/3 household bleach and 2/3 clean water. This specific ratio provides enough potency to tackle the stain without being overly aggressive on your ceiling surface. After adding both ingredients, gently shake or swirl the bottle to ensure the bleach and water are thoroughly mixed. A well-mixed solution ensures consistent effectiveness across all stained areas.
Step 2: Optimize Your Spray Bottle Setting
The success of this method hinges on even application. Adjust your spray bottle nozzle to emit a fine mist rather than a direct stream. A mist setting creates a much lighter, more uniform layer of the solution over the stain. This prevents dripping, avoids saturating the ceiling excessively, and ensures that the active ingredients of the bleach are distributed broadly, allowing them to work their magic without causing localized damage or streaks. Test the spray on a piece of scrap material if you’re unsure of the setting.
Step 3: Protect Your Surroundings
Bleach can damage or discolor fabrics, wood finishes, and flooring. To safeguard your home, meticulously cover your floor and any furniture in the immediate vicinity of the stained ceiling area with plastic sheeting or old towels. This barrier will catch any accidental drips or overspray, preventing potential damage to your belongings. It’s much easier to take a few extra minutes for protection now than to deal with ruined carpets or furniture later.
Step 4: The Initial Application and Waiting Period
With your protective gear on and surroundings secured, carefully aim your mist spray bottle at the water stain. Apply a very light, even layer of the bleach solution directly onto the discolored area. The goal is to dampen the stain, not soak the ceiling. Immediately after spraying, gently use a clean paper towel to dab the treated spot a little bit. The dabbing motion helps to lightly work the solution into the surface without scrubbing. It is crucial NOT to rub or scrub the ceiling, as this can damage the paint, create an uneven finish, or even remove ceiling texture, especially on delicate surfaces. If you have a popcorn ceiling, refrain from any rubbing or dabbing whatsoever; simply spray a light mist and let it sit. Allow the solution to work its magic for approximately 4 minutes, or until the area appears dry. During this time, the bleach oxidizes the stain, breaking down the discoloring compounds.
Step 5: Inspect, Reapply, and Ensure Complete Drying
After the initial application has dried, carefully inspect the ceiling for any lingering traces of the water stain. If you can still perceive a few faint stains or a slight discoloration, repeat the application process. Lightly spray the remaining stained areas again with a fine mist of the solution and gently dab as before (unless it’s a popcorn ceiling, in which case, just spray). Allow this second application to sit and dry completely for another few minutes. Persistence often pays off with stubborn stains. It’s imperative to maintain vigilance: if any bleach solution drips onto a non-white wall or surface, immediately wipe it off with a clean, wet rag to prevent lightening or discoloration. Once the stains are gone and the treated area is thoroughly dry, ensure that the room is well-ventilated for a period before it is fully occupied again. This allows any residual bleach fumes to dissipate completely, ensuring the safety and comfort of anyone entering the space.
Why This Method Works: The Science Behind the Magic
The effectiveness of this DIY bleach solution lies in the chemical properties of chlorine bleach. Bleach is a powerful oxidizing agent. When it comes into contact with the organic compounds that make up the water stain (often caused by rust, tannins from wood, or other impurities in the water), it chemically alters their structure. This oxidation process breaks down the chromophores—the parts of the molecules responsible for absorbing certain wavelengths of light and thus displaying color. By neutralizing these chromophores, the bleach essentially “bleaches out” the color of the stain, making it invisible to the naked eye. This is why it’s so effective on white surfaces, as it doesn’t leave a secondary color behind, and why it should be avoided on colored ceilings, where it would strip the existing pigment.
Troubleshooting and When to Consider Alternatives
While this bleach method is highly effective for most superficial water stains on white ceilings, there might be instances where it doesn’t yield perfect results. If the stain persists after several applications, it could indicate a deeper issue. Very old stains that have deeply penetrated the ceiling material, or stains caused by particularly stubborn substances like oil or grease mixed with water, might be more challenging. Additionally, if the ceiling material itself has been severely compromised or warped by prolonged water exposure, the stain removal might not be enough to restore its integrity. In such cases, or if you suspect mold growth (which often accompanies severe water damage), it’s best to consult a professional for a more thorough assessment and repair.
Preventing Future Water Stains: Proactive Measures
The best way to deal with water stains is to prevent them from occurring in the first place. Regularly inspect your roof, plumbing, and attic for any signs of leaks or moisture issues. Pay attention to changes in paint, bubbling, peeling, or damp spots on walls and ceilings, especially after heavy rains. Ensure your gutters are clean and draining properly, and consider routine maintenance checks for any pipes running through your attic or upper floors. Addressing small leaks immediately can prevent them from escalating into larger, more damaging problems that lead to unsightly ceiling stains.
Reclaim Your Ceiling: Fix Water Stains on Ceiling Without Painting It!
There you have it! A truly magical, cost-effective, and surprisingly easy DIY solution to eradicate those frustrating water stains from your ceiling without the laborious and expensive process of painting. By following these clear steps and prioritizing safety, you can restore the beauty of your home’s ceilings with minimal effort and maximum impact. This method not only saves you money on paint and supplies but also frees up your valuable time and energy, allowing you to enjoy a pristine, stain-free environment. Give this technique a try and witness firsthand how a simple bleach solution can make those stubborn water marks disappear, leaving your ceiling looking fresh and new. Say goodbye to brown rings and hello to a spotless home!