
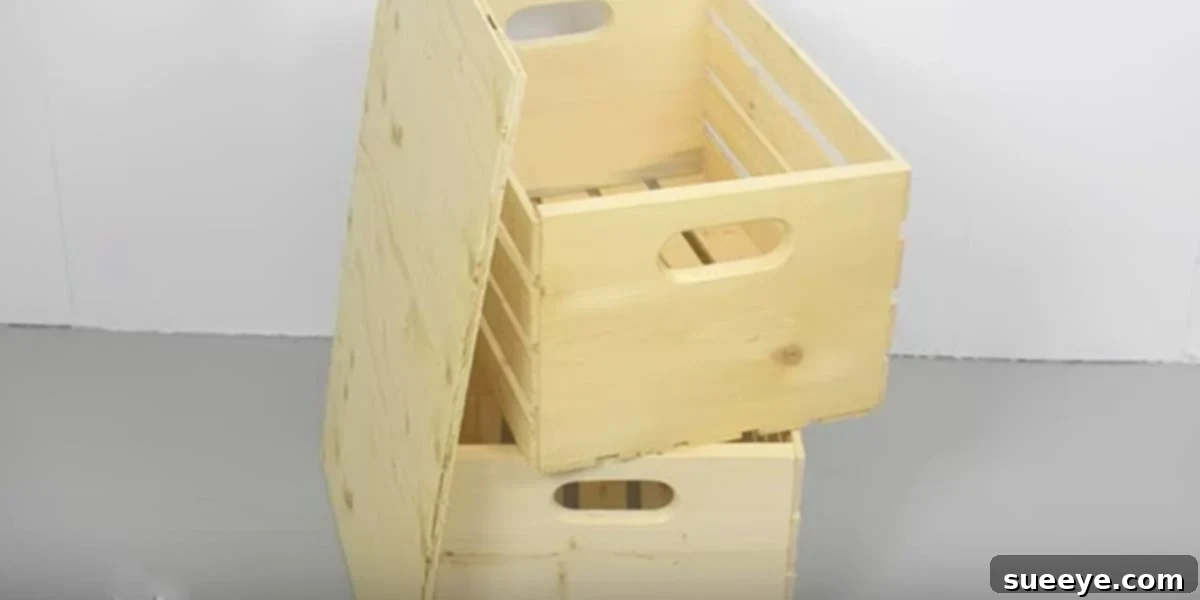
Transform Your Home with an Easy & Stylish DIY Crate Ottoman
Are you on the hunt for a creative, budget-friendly way to infuse personality and charm into your living space? Look no further! This fantastic DIY crate ottoman project is not only incredibly simple to execute but also remarkably affordable, making it the perfect weekend endeavor. Imagine crafting a beautiful, functional piece that looks like it came from a high-end boutique, all while spending minimal time and money. You can typically complete one of these charming ottomans in about an hour, proving that truly impactful home decor doesn’t have to be complicated or expensive. Projects like this, combining ease, affordability, and stunning results, are truly a decorator’s dream!
This crate ottoman holds a special place in my heart as one of my absolute favorite pieces in my home. Its unique blend of rustic charm and elegant style brings an undeniable warmth and character to any room it graces. What makes this DIY project even more appealing is the source of its primary material: old wooden crates. These versatile containers can often be unearthed for dirt cheap, or even completely free, at flea markets, antique shops, or through local community groups. This incredible accessibility ensures that creating a custom, stylish ottoman is within everyone’s reach, regardless of budget.
Why a DIY Crate Ottoman is a Must-Have for Every Home
I find immense joy in adorning my home with unique pieces that tell a story, and this DIY crate ottoman fits perfectly within that aesthetic. It joins other beloved items, like an old Coca-Cola carton I cleverly repurposed into a fun and functional tabletop, complementing my vintage eclectic decor. There’s a certain magic about these older pieces; they possess a character and craftsmanship that often feels absent from modern mass-produced goods. I feel incredibly fortunate whenever I stumble upon such treasures, and the moment I laid eyes on these old wooden crates, I knew they held immense potential for something truly special. The ability to transform something overlooked into a stunning centerpiece is incredibly rewarding, allowing us to marry the timeless appeal of the past with the practical needs of the present.
Unleashing Unrivaled Versatility and Functionality
- Multi-functional Marvel: Beyond its primary role as a comfortable footrest, your DIY crate ottoman is a chameleon in home decor. It can effortlessly transition into extra seating for guests, a convenient side table for your morning coffee or a stack of magazines, or even smart hidden storage if designed with a hinged lid. This adaptability makes it an invaluable addition, especially in compact living areas where furniture needs to serve multiple purposes.
- Unbeatable Cost-Effectiveness: One of the most compelling advantages of this DIY project is the significant cost savings. While stylish ottomans can command high prices in retail stores, you can craft a sophisticated, custom version for a fraction of the cost. The key is sourcing inexpensive or free wooden crates, coupled with affordable foam and fabric.
- Tailored to Your Taste: The true beauty of any DIY endeavor lies in the power of personalization. With this project, you have complete creative control over every detail. Select a fabric that perfectly matches your existing decor or introduces a bold new accent color. Choose a paint or stain for the crate that aligns with your desired aesthetic, whether it’s a rustic distressed look or a sleek modern finish.
- Embrace Sustainable Living: Repurposing an old wooden crate is a fantastic way to practice sustainability and eco-friendly decorating. By giving new life to an item that might otherwise be discarded, you’re contributing to waste reduction and adding a unique, upcycled element to your home that boasts character and history.
Gather Your Materials: What You’ll Need for Your Crate Ottoman
Before you begin assembling your stylish new ottoman, ensure you have all the necessary components at hand. Most of these items are readily available at your local hardware store, craft supply store, or through online retailers.
- A Sturdy Wooden Crate: The foundation of your project! Look for a crate made from solid wood. Options include vintage fruit crates, old wine crates, or robust industrial crates. Prioritize one that is structurally sound and relatively clean.
- Plywood or MDF Board: A piece approximately 1/2 to 3/4 inch thick, cut to precisely fit the outer dimensions of your crate’s top opening. This will serve as the firm base for your upholstered cushion.
- High-Density Foam: Aim for foam that is 2 to 4 inches thick for optimal comfort. Cut it slightly smaller than your plywood base (e.g., about 1/2 inch smaller on each side) to allow the fabric to wrap neatly without excessive bulk.
- Upholstery Batting: A roll of soft polyester batting is crucial. It wraps around the foam, creating a smoother, softer, and more rounded appearance for your cushion, preventing any harsh edges from showing through the fabric.
- Durable Upholstery Fabric: This is where your personal style shines! Select a fabric that is not only visually appealing but also robust enough for an ottoman. Consider patterns, textures (like velvet, linen, or faux fur), or durable options such as canvas or heavy-duty denim. Ensure you purchase enough fabric to cover the foam and plywood, leaving generous overhang for secure stapling (typically, measure twice the height of your foam plus the width/length of the board, with extra for the sides).
- Heavy-Duty Staple Gun and Staples: An absolute essential for securely attaching the fabric and batting to the plywood base. Ensure you have enough staples.
- Wood Glue and/or Wood Screws: For firmly attaching the finished upholstered cushion to the wooden crate.
- Sandpaper: A variety of grits (e.g., 80-grit for rough spots, 120-grit for smoothing, 220-grit for a fine finish) to prepare both the crate and the plywood for a professional look.
- Optional Additions to Elevate Your Design:
- Paint or Wood Stain: To customize the crate’s appearance, giving it a fresh color, a distressed finish, or highlighting its natural wood grain.
- Casters or Decorative Legs: To add mobility to your ottoman or to elevate its height and introduce an additional stylistic element.
- Drill: Necessary for pre-drilling pilot holes if you plan to use screws or attach legs.
- Sharp Fabric Scissors: For clean, precise cuts of your upholstery fabric.
Step-by-Step Guide: Crafting Your Own Stylish Crate Ottoman
Creating your bespoke crate ottoman is a straightforward process, designed to be enjoyable and achievable even for those new to DIY upholstery. Follow these detailed steps to bring your vision to life.
- Prepare Your Wooden Crate: Start by thoroughly cleaning your crate to remove any dust, dirt, or debris. Once clean, use your sandpaper to smooth all surfaces, paying particular attention to any rough edges, splinters, or sharp corners. If you intend to paint or stain the crate, now is the time to do so. Apply your chosen finish according to the product’s instructions and allow it to dry completely before proceeding. Proper preparation ensures a smooth, professional finish and prevents any snags in your upholstery fabric.
- Cut and Prepare the Cushion Base: Accurately measure the top exterior dimensions of your wooden crate. Using these measurements, cut your plywood or MDF board to size. This board will serve as the sturdy foundation for your upholstered cushion. Lightly sand the edges of the board to ensure they are smooth and free of splinters.
- Assemble the Cushion Layers:
- Lay your high-density foam on a clean, flat work surface.
- Carefully place the upholstery batting over the foam, ensuring it fully covers all sides with a generous few inches of overhang.
- Center your prepared plywood base on top of the batting and foam.
- Gently flip this entire stack over, so the plywood is now on the bottom, and the foam and batting layers are facing upwards.
- Upholster the Cushion with Fabric:
- Spread your chosen upholstery fabric face down on a clean, flat surface, ensuring it is free of wrinkles.
- Carefully center your foam/batting/plywood stack (with the plywood side facing up) on the fabric.
- Beginning in the middle of one side, pull the fabric tautly over the plywood base and secure it with your heavy-duty staple gun. Work your way around the edges, pulling the fabric firmly and consistently to achieve a smooth, wrinkle-free finish.
- For the corners, meticulously fold the fabric as you would when wrapping a gift. Create neat, crisp pleats, pull them tight, and staple them down securely. Ensure all edges are tightly affixed and that the fabric is evenly upholstered. Trim any excess fabric close to the staples to reduce bulk and ensure a tidy finish.
- Attach the Upholstered Cushion to the Crate: Once your cushion is fully upholstered and perfectly formed, carefully center it on top of your prepared wooden crate. You can secure it using L-brackets screwed into both the crate and the plywood, strong wood glue, or by drilling pilot holes from inside the crate upwards into the plywood base and then inserting screws. Whichever method you choose, ensure the cushion is firmly attached and completely stable, with no wobbling.
- Add Finishing Touches (Optional but Recommended): If you decided to add casters or decorative legs, now is the time to attach them to the bottom of the crate. Ensure they are evenly spaced and securely fastened for maximum stability and a polished look. Finally, give your new ottoman a thorough inspection, checking for any loose staples, uneven fabric, or other minor adjustments needed for perfection.
Design & Customization Ideas to Make Your Ottoman Truly Yours
The beauty of a DIY project is the freedom to customize it to your heart’s content. Here are some inspiring ideas to personalize your crate ottoman and ensure it perfectly complements your home’s unique aesthetic:
- Fabric Finesse:
- Bold Patterns: Choose a vibrant geometric print, a classic damask, or a cheerful floral design to make your ottoman a striking focal point in the room.
- Luxurious Textures: Elevate the feel with sumptuous velvet for a touch of opulence, a cozy faux fur for ultimate comfort, or natural linen or cotton for a relaxed, airy vibe.
- Durability First: For high-traffic areas or homes with pets and children, opt for performance fabrics or heavy-duty upholstery materials known for their stain resistance and longevity.
- Crate Character:
- Distressed Charm: Apply a coat of paint, then lightly sand the edges and raised areas to create a beautiful, aged, and rustic distressed look that adds character.
- Natural Beauty: If the crate’s natural wood grain is appealing, simply clean it well and apply a clear varnish, wax, or wood sealer to protect and enhance its inherent beauty.
- Bold Hues: Paint the crate in a solid, contrasting color to your fabric choice for a playful pop of color and visual interest.
- Legs for Days:
- Industrial Edge: Attach sleek metal hairpin legs or robust, vintage-style caster wheels for a modern, industrial, and effortlessly cool aesthetic.
- Classic Elegance: Opt for beautifully turned wooden legs, stained or painted to match or contrast with your crate, to achieve a more traditional or refined look.
- Minimalist Look: Simple, low-profile glides or small bun feet can keep the ottoman grounded, providing a clean and contemporary appearance.
- Beyond the Basic:
- Tufting: For a touch of sophistication and classic elegance, add buttons to create a tufted effect on the cushion.
- Trim & Tacks: Embellish the edges of your upholstered cushion with decorative upholstery tacks (nailhead trim) or a coordinating fabric trim for a truly refined, custom finish.
- Hidden Storage: Consider designing your cushion with hinges to create a functional storage compartment within the crate, perfect for stowing away blankets, magazines, remote controls, or children’s toys, keeping your space tidy.
The Enduring Appeal of Vintage and Upcycled Decor in Modern Homes
There’s an undeniable magic that vintage and upcycled pieces bring to a home. Unlike items churned out by mass production, they arrive with a story, a sense of history, and an authenticity that instantly enriches a home’s atmosphere. My personal adoration for truly unique items, exemplified by that cherished old Coca-Cola carton I transformed into a tabletop, stems from this very sentiment. These pieces aren’t merely decorative; they are conversation starters, infusing layers of interest and personality into your living space that modern items often struggle to replicate. The deep satisfaction of discovering an old crate, recognizing its untapped potential, and then meticulously transforming it into a functional and beautiful piece of furniture is immense. It’s a powerful testament to the idea that “all the good stuff was made years ago,” but with a dash of creativity and effort, we can continuously breathe new life and contemporary relevance into these timeless treasures for our modern homes.
Why Engaging in DIY Projects is Incredibly Rewarding
Embarking on DIY projects extends far beyond mere cost savings; it’s a profoundly fulfilling and enriching experience. The journey from a simple concept to a tangible, beautiful object crafted with your own hands instills a deep sense of accomplishment and pride. It fosters unparalleled personal expression, granting you the freedom to create pieces that flawlessly align with your unique aesthetic vision—a level of customization rarely achieved with off-the-shelf purchases. Beyond the tangible outcome, the creative process itself can be incredibly therapeutic, offering a welcome and mindful escape from the stresses of daily routines. It presents an invaluable opportunity to acquire new skills, hone problem-solving abilities, and cultivate confidence in your creative capabilities. Each completed project stands as a testament to your ingenuity and serves as a distinctive, personal addition to your home that truly no one else will possess.
When I finally completed my first crate ottoman, the excitement was absolutely palpable! I specifically chose a fabric that perfectly complemented my sofa, and the finished piece looked absolutely stunning in my living room. It’s truly amazing how many fantastic, inspiring ideas are so readily available online today – a luxury we simply didn’t have access to when many of these beautiful vintage pieces were originally crafted. We truly get the best of both worlds now: we can discover the enduring charm of old-world craftsmanship and seamlessly blend it with modern innovation, endless inspiration, and accessibility to create something truly unique.
Feeling inspired and ready to create your own bespoke crate ottoman? Join Lise from Lise Luxury as she provides an expert, step-by-step guide to making this gorgeous ottoman in her detailed tutorial. Her professional insights and clear instructions will empower you to confidently craft a beautiful, functional, and personalized piece for your home with ease.
(For detailed visual instructions, please search for Lise Luxury’s “DIY Crate Ottoman Tutorial” on your preferred video platform.)