
Master Your Craft: 5 Ingenious Crochet Hacks for Seamless Projects
Crocheting is a wonderfully rewarding craft, a journey of creativity that continually offers new techniques and insights. Whether you’re just picking up your first hook or you’ve been weaving intricate patterns for over a decade, there’s always something new to learn or a clever trick to discover that can elevate your work. These ingenious crochet hacks, brought to you by the experts at Crafters Anonymous, are designed to make your projects easier, cleaner, and more professional-looking. Get ready to transform your crocheting experience with these game-changing tips!
Essential Materials for Your Crochet Journey
Before diving into these fantastic hacks, ensure you have your basic crochet toolkit ready. While specific projects may call for varying supplies, these are the fundamental items you’ll need:
- Crochet Hook, Size H/5.00mm: A versatile mid-range hook size, excellent for many worsted weight yarn projects.
- Crochet Hook, Size P/11.5mm: Ideal for chunky yarns, quick projects, or when you want a looser stitch.
- Yarn: A selection of your favorite yarns, from acrylic to wool, in various weights and colors. Having a few different types on hand will allow you to experiment with these hacks effectively.
Unlocking Crochet Excellence: 5 Transformative Hacks
#1: Achieving a Perfectly Straight and Clean Foundation Edge
The very beginning of any crochet project, the foundation chain, often dictates the overall look and feel of your piece. Many crocheters start by skipping the first stitch and working into the second chain, which is standard but can leave your starting edge with a noticeable ribbed appearance and less elasticity. This can sometimes make the bottom edge look different from the rest of your project or even cause it to curl.
To avoid this common issue and create a beautifully uniform foundation, try working into the “back nub” or “back bump” of your chain stitches. Instead of inserting your hook into the top ‘V’ of the chain, flip your chain over. You’ll see a series of small bumps running along the back. This simple adjustment makes a significant difference:
- Begin by making your usual foundation chain.
- Skip your first chain, just as you normally would.
- Instead of going into the second chain’s top ‘V’, rotate your chain slightly to find the tiny bump (the back nub) on the back of that second chain stitch.
- Insert your hook directly into this back nub.
- Complete your stitch as usual.
- Continue this method for all subsequent stitches in your foundation chain.
By working into these back nubs, you create a foundation edge that mimics the top of a row of stitches. This results in an incredibly clean, neat, and professional-looking bottom edge that is also more elastic and much easier to sew into if needed, as it matches the top of your crochet work perfectly.
#2: Embrace the Power of Foundation Stitches for Superior Starts
Do you ever find that your initial foundation chain is too tight, too loose, or just plain difficult to work into? Foundation stitches are a revolutionary technique that combines the foundation chain and the first row of stitches into one seamless process. This not only saves time but also produces a more elastic and professional-looking edge, especially crucial for projects that need a bit of stretch, like garments or blankets.
Let’s focus on the Foundation Single Crochet (FSC), a popular and versatile option:
- Start with a slip knot on your hook, then chain two.
- Insert your hook into the second chain from the hook.
- Yarn over and pull up a loop (you now have two loops on your hook). This forms the ‘chain’ part of your foundation stitch.
- Yarn over again and pull through only the first loop on your hook (this completes the ‘chain’ part).
- Yarn over and pull through both loops on your hook (this completes the ‘single crochet’ part). You’ve made your first FSC stitch!
- To make your second FSC, insert your hook into the two loops at the base of the stitch you just created (these loops form the ‘chain’ part of the previous stitch).
- Yarn over and pull up a loop (three loops on hook).
- Yarn over and pull through only the first loop (chain part complete).
- Yarn over and pull through both remaining loops (single crochet part complete).
- Repeat steps 6-9 for each subsequent FSC stitch.
Foundation stitches create a much stretchier and more forgiving edge compared to a traditional chain. They are perfect for virtually any project that begins with a straight edge, from scarves and blankets to the brim of a hat. Once you try foundation stitches, you’ll wonder how you ever crocheted without them.
#3: Maximizing Yarn Potential with Multiple Strands
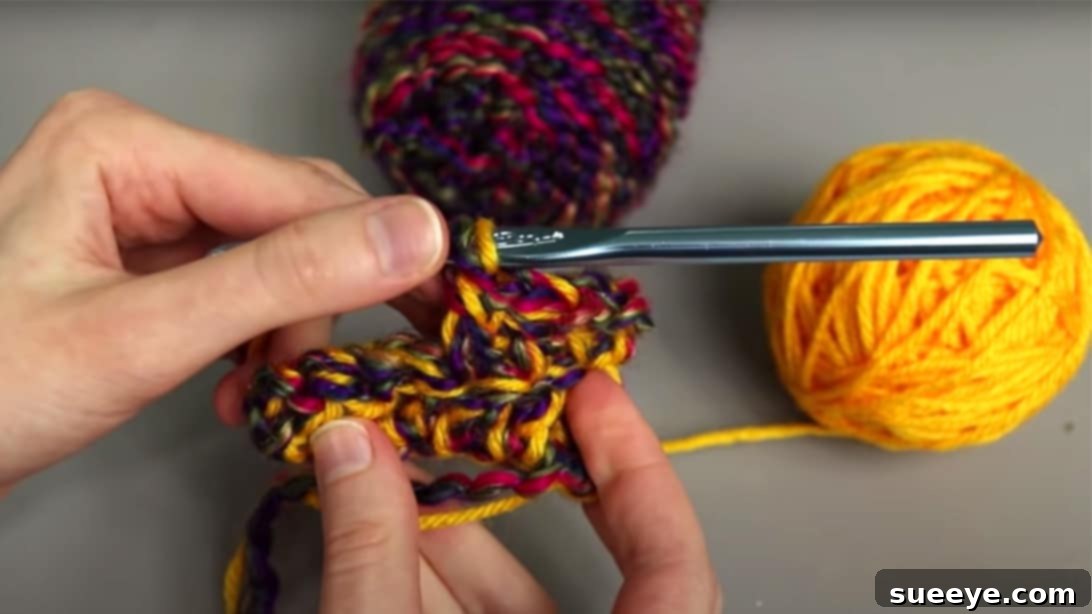
Ever found yourself with a large crochet hook but only thin, sport-weight yarn? Or perhaps you want to create a unique texture or color blend that single-strand yarn can’t achieve? This hack offers an incredibly simple yet effective solution: using multiple strands of thinner yarn together to achieve the thickness of a chunkier yarn.
This technique is not only a fantastic way to utilize your existing stash, but it also opens up a world of creative possibilities:
- Select two or more strands of yarn that you want to combine. These can be the same color, different shades of the same color, or contrasting hues.
- Treat all selected strands as a single strand of yarn. Make a slip knot with all strands held together.
- Insert your hook through the slip knot, ensuring all strands are captured.
- Begin crocheting as you normally would, making sure to yarn over and pull through all the active strands with each stitch.
The benefits of this hack are numerous:
- Create Chunky Yarn: Instantly transform thinner yarns into a chunky weight, allowing you to use larger hooks and complete projects faster.
- Custom Color Blends: Combine different colored yarns to create stunning marled, variegated, or ombre effects. This is particularly brilliant for achieving specific color patterns like buffalo plaid or gingham, where a subtle blend can make all the difference.
- Improve Stitch Definition: Some yarns, such as “homespun” or highly textured varieties, can make it notoriously difficult to see your stitches, leading to missed stitches or an uneven fabric. By combining a tricky yarn with a contrasting, smooth yarn (like a simple acrylic), the smooth yarn acts as a guide, making it much easier to see where to insert your hook and creating better stitch definition.
- Add Durability: Doubling up strands can add strength and density to your fabric, making it more durable for items like bags or rugs.
Experiment with different yarn weights and textures to discover new and exciting fabric effects. This hack is a fantastic way to get more out of your yarn stash and unleash your inner yarn artist!
#4: The Invisible Seamless Join for Flawless Finishes
When working projects in the round, such as hats, granny squares, or amigurumi, fastening off the last stitch can often leave an unsightly knot or a noticeable bump where the round ends. This ‘fasten off’ point can disrupt the smooth flow of your stitches and diminish the professional appearance of your finished item. The invisible seamless join, also known as the “faux stitch,” is a simple yet powerful technique to make your joins virtually disappear.
Here’s how to achieve a perfectly smooth and undetectable finish:
- When you’ve completed your final stitch of the round, cut your yarn, leaving a tail of about 6-8 inches.
- Pull the yarn tail completely through the loop on your hook to fasten off as you normally would.
- Thread this yarn tail onto a tapestry needle (also known as a yarn needle).
- Look for the next “V” stitch after your last real stitch. This is typically the first stitch of the round you are finishing.
- Insert your tapestry needle from the underside (back) of this first ‘V’ stitch and up through both loops of the ‘V’. Pull the yarn tail through gently, but don’t pull too tightly.
- Now, go back to the top of your very last stitch (where the yarn tail originally came out). Insert your needle down into the center of this stitch, going underneath both strands of the top ‘V’. It creates a new ‘V’ stitch that mimics the surrounding stitches.
- Pull the yarn gently until the tension matches the other stitches, creating a seamless connection.
- Finally, weave in the remaining yarn tail into your project’s stitches to secure and hide it completely. Work it into a few adjacent stitches to prevent unraveling.
This technique creates a perfectly formed “faux” stitch that blends seamlessly with the actual stitches, making the join almost impossible to spot. It’s an essential trick for anyone who wants their finished crochet pieces to look polished and store-bought.
#5: The Alternative Turning Chain for Straighter Edges
Just like our second hack eliminated the need for a foundation chain, this hack addresses another common element that can impact the neatness of your work: the turning chain. When starting a new row, especially with taller stitches like double crochets, crocheters typically chain two or three stitches, which counts as the first stitch. However, these traditional turning chains can often leave a visible gap, create a slightly looser edge, or simply not look as uniform as the actual stitches.
Enter the Alternative Turning Chain (ATC), also known as “stacked single crochets.” This method creates a sturdy, straight edge that perfectly mimics a standard stitch, making your project edges much tidier and more professional.
Here’s how to create an Alternative Turning Chain for double crochet:
- At the end of your row, turn your work as usual.
- Insert your hook into the very first stitch of the previous row (not into a chain space).
- Yarn over and pull up a loop, just like you would for a single crochet. You now have two loops on your hook.
- Yarn over and pull through both loops. This completes your first single crochet.
- Now, to “stack” another single crochet on top, insert your hook into the left vertical bar of the single crochet you just made.
- Yarn over and pull up a loop (two loops on hook).
- Yarn over and pull through both loops.
You have now created an Alternative Turning Chain that looks remarkably like a regular double crochet stitch. It eliminates the gap often associated with traditional chain-3 turning chains and provides a much more solid and aesthetically pleasing edge. This technique can be adapted for half double crochet (one stacked single crochet) and even taller stitches, making it a versatile tool for achieving impeccable edges in all your flat crochet projects.
Elevate Your Crochet Journey Today!
Learning these simple yet powerful crochet hacks can dramatically improve the quality and enjoyment of your crafting. From achieving cleaner edges and more elastic foundations to seamlessly finishing off your work and experimenting with unique yarn combinations, these tips from Crafters Anonymous are invaluable additions to any crocheter’s toolkit. Don’t be afraid to experiment and practice these techniques until they become second nature. Happy crocheting!