
How to Easily Fix a Stripped Screw Hole in Wood Furniture: The Toothpick and Wood Glue Hack
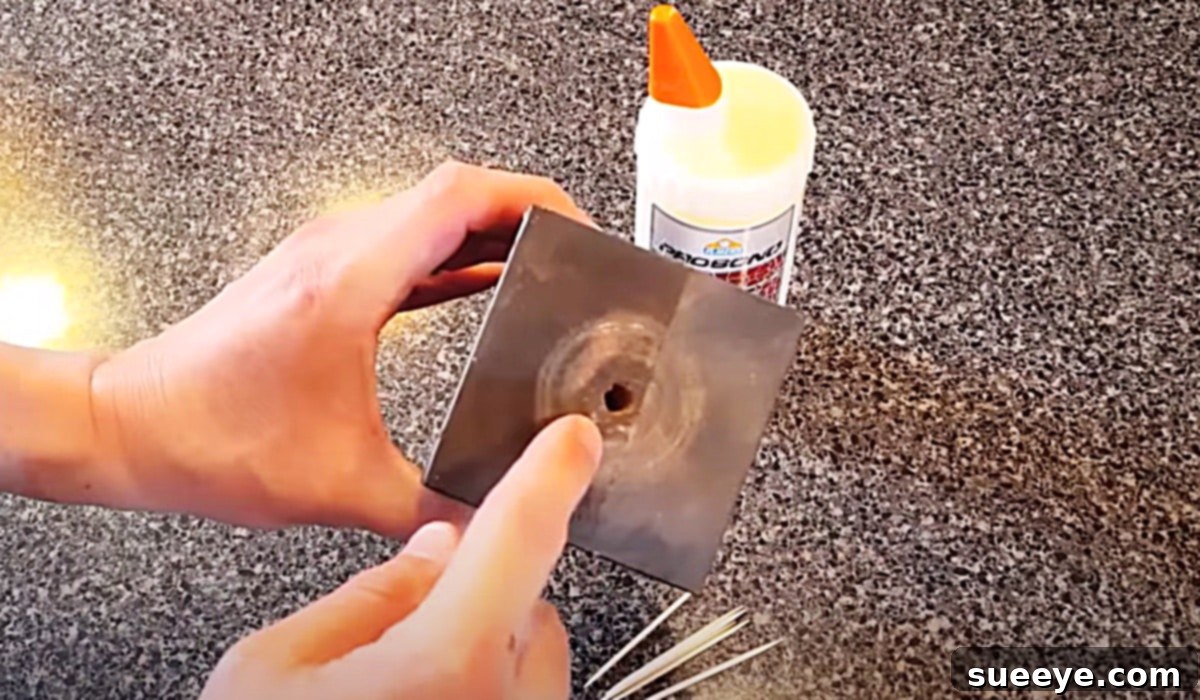
There’s nothing quite as frustrating as a wobbly piece of furniture or a hinge that won’t stay put because a screw has lost its grip. We’ve all been there: a beloved sofa leg snaps, a cabinet door sags, or a chair creaks with every movement because the screw hole in the wood has become stripped. Recently, I faced this exact dilemma when a brand new, albeit discounted, sofa for my game room suffered an unfortunate accident. A slightly overzealous sit from my uncle caused one of the legs to break clean off, revealing a completely stripped screw thread in the wood.
Initially, my heart sank. The sofa was a steal at $50, marked down from $500, and I loved its casual comfort. Now, it seemed destined for the curb. Repairing a stripped thread in wood can seem daunting, but thankfully, a quick search on YouTube led me to a brilliant, simple, and incredibly effective solution. The tutorial by Dandlinc on YouTube revealed an ingenious hack using common household items: toothpicks and wood glue. This method proved to be a true game-changer, transforming a seemingly irreparable problem into a quick, sturdy fix. Let’s dive into how you can apply this woodworking secret to your own furniture repairs.
Understanding the Problem: Why Screw Holes Strip
Before we jump into the fix, it’s helpful to understand why screw holes strip in the first place. This common issue typically arises due to several factors. Over-tightening screws is a primary culprit, as it can enlarge the hole beyond the screw’s ability to grip. Softwoods, often used in less expensive furniture, are more prone to stripping due to their less dense grain structure. Frequent assembly and disassembly, such as when moving furniture, also gradually wear down the wood fibers around the screw, leading to a loose fit. Lastly, sustained stress or sudden impact, like the incident with my sofa, can simply cause the existing threads to give way, leaving you with a screw that spins uselessly without biting into the wood. Recognizing these causes can help prevent future occurrences, but for now, let’s focus on the quick and robust repair.
Essential Materials for a Toothpick & Wood Glue Repair:
- Wood Glue: A high-quality wood glue is crucial for a strong bond. Ensure it’s suitable for the type of wood you’re working with.
- Toothpicks: Standard wooden toothpicks are perfect. You’ll need a handful, depending on the size of the stripped hole. Round or flat toothpicks both work effectively.
- Side Cutters or Small Hack Saw: Essential for trimming any excess toothpick material flush with the wood surface after the glue has dried. A sharp utility knife can also work in a pinch, but be cautious.
- Damp Cloth: Useful for wiping away any excess glue before it dries.
- Small Brush or Applicator (Optional): For precise glue application inside the hole.
Step-by-Step Directions for the Toothpick & Wood Glue Hack:
This ingenious method, beautifully demonstrated by Dandlinc on YouTube, is remarkably straightforward and requires minimal DIY experience. It’s a permanent and incredibly strong solution for nearly any stripped screw hole in wood. Follow these steps carefully to restore your furniture’s stability.
Step 1: Prepare the Stripped Hole and Apply Wood Glue
Begin by cleaning out the stripped screw hole. Ensure there are no loose wood fibers, sawdust, or debris that could hinder the glue’s adhesion. Once clean, generously apply wood glue into the hole. Don’t be shy; you want to ensure the entire inner surface of the hole is coated. You can use a small brush, a toothpick itself, or simply squeeze the glue directly from the bottle. The goal is to create a solid binding agent for the new material we’re about to introduce.
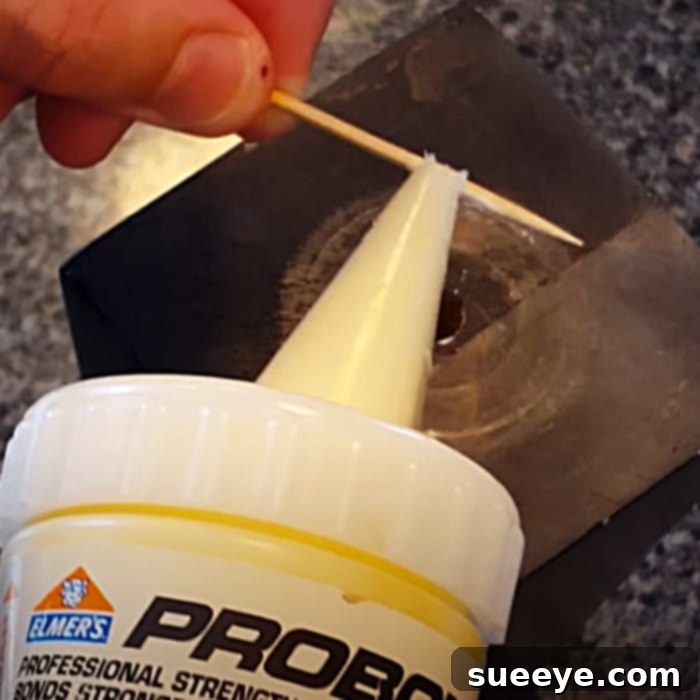
Step 2: Insert and Pack the Toothpicks
Now, take your wooden toothpicks and begin inserting them into the glue-filled hole. Push them in firmly, one by one, until the hole is completely packed. The key here is to create a dense, solid mass within the stripped area. You might need to break some toothpicks to fit shorter sections, ensuring every bit of void space is filled. The toothpicks act as new material for the screw to bite into, while the wood glue binds them together and to the original wood, creating a new, reinforced structure. The tighter you pack them, the stronger your repair will be. Wipe away any excess glue that squeezes out immediately with a damp cloth.
Step 3: Allow the Glue to Cure Completely
This is arguably the most critical step for a lasting repair. Resist the urge to rush! Wood glue needs ample time to dry and cure to achieve its maximum strength. Follow the manufacturer’s recommendations for drying time, which can range from a few hours to 24 hours, depending on the glue type, humidity, and temperature. For best results, allow it to cure overnight. A fully cured glue bond will be rock-solid, providing a durable foundation for the screw. Trying to re-insert the screw too soon will compromise the repair and likely lead to a re-stripped hole.
Step 4: Trim Excess Toothpicks Flush
Once the glue is completely dry and hard, you’ll likely have toothpick ends protruding from the hole. Use your side cutters, small hack saw, or a sharp utility knife to carefully trim these excess pieces flush with the wood surface. The goal is to create a smooth, even surface, ensuring that the furniture part you are reattaching will sit flat and securely. Take your time with this step to avoid damaging the surrounding wood or leaving jagged edges.
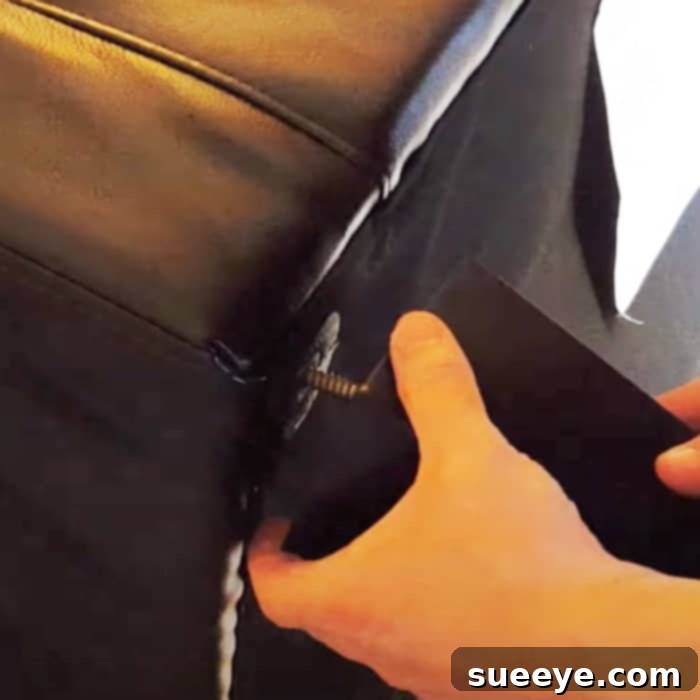
Step 5: Re-insert the Screw and Reattach the Furniture Part
With the hole now reinforced and smooth, you’re ready to re-insert the screw. Carefully align the furniture leg, hinge, or other component, and slowly drive the screw back into the newly fortified hole. You will feel the screw bite into the solid mass of toothpicks and dried glue, creating a surprisingly strong new thread. Be mindful not to over-tighten, as this could strip the new threads you’ve just created. Tighten until snug and stable. Test the repaired part for stability; you should find it as solid, if not more so, than the original connection.
Why This Toothpick Method Works So Well
The magic of the toothpick and wood glue hack lies in its simplicity and the inherent properties of the materials. When toothpicks are packed into a stripped screw hole, they effectively fill the void created by the damaged wood. The wood glue then acts as a powerful adhesive, soaking into the porous toothpicks and the surrounding original wood fibers. As the glue cures, it hardens, creating a dense, composite material that is often stronger than the original softwood. When the screw is re-inserted, it carves new threads into this solid, reinforced matrix of toothpicks and dried glue, providing an exceptionally strong grip. This method offers a far more durable solution than simply using a larger screw or a weak wood filler, especially for parts that bear weight or undergo frequent stress.
Common Applications for This Wood Repair Hack
While my initial need for this repair was a sofa leg, the toothpick and wood glue method is incredibly versatile and can be applied to a wide array of stripped screw holes in wooden items around your home. It’s perfect for wobbly chair legs, loose table supports, or even detached cabinet door hinges that repeatedly pull out of the wood. You can use it to secure drawer slides, fix sagging shelves, or reattach decorative trim. Essentially, any wooden item where a screw has lost its purchase can benefit from this simple yet robust repair. It’s an indispensable trick for anyone who enjoys DIY projects or simply wants to prolong the life of their furniture and household items without spending a fortune on professional repairs or new replacements.
Tips for Preventing Stripped Screw Holes in the Future
While the toothpick and wood glue hack is a fantastic repair solution, preventing stripped screw holes from occurring in the first place is always the best approach. Here are a few valuable tips to help maintain the integrity of your wooden furniture and fixtures. Always use screws of the appropriate size and type for the material; screws that are too thin or too short may not grip adequately, while those that are too thick can split the wood. When assembling new furniture or working with new wood, it’s crucial to pre-drill pilot holes. These small, guiding holes ensure the screw enters cleanly without forcing the wood fibers apart excessively. Always match the pilot hole size to the screw’s shank, not its threads. Finally, avoid over-tightening. Once a screw feels snug, give it just a quarter to half turn more to secure it, but resist the urge to crank it down with excessive force, especially when using power tools. Regular, gentle tightening checks can also catch loose screws before they fully strip their holes.
Conclusion: A Simple Fix for a Common Problem
The frustration of a stripped screw hole can make you feel like throwing out perfectly good furniture. However, with the simple yet powerful toothpick and wood glue hack, you have a reliable, cost-effective, and incredibly durable solution at your fingertips. My discounted sofa, once on the brink of becoming firewood, now stands firm and sturdy, thanks to this brilliant trick I learned from Dandlinc’s excellent tutorial. This method not only saves time and money but also empowers you to tackle common household repairs with confidence. So, the next time a screw loses its grip, don’t despair—grab some toothpicks and wood glue, and watch as you give your furniture a new lease on life!