
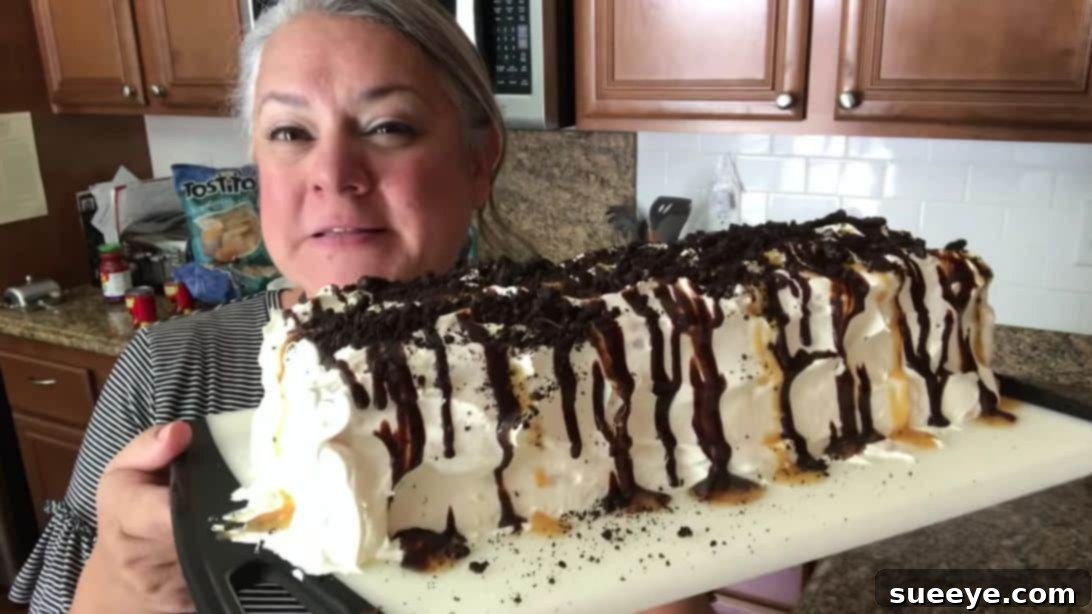
Easy No-Bake Oreo Fudge Ice Cream Cake: The Ultimate Crowd-Pleasing Dessert
Prepare to delight your taste buds and impress your guests with this incredibly simple yet utterly delicious No-Bake Oreo Fudge Ice Cream Cake! Inspired by the fantastic recipe from *How Ines Rolls* on YouTube, this dessert masterpiece requires just seven common ingredients and minimal effort. It’s the perfect solution when you need a show-stopping treat for a family gathering, a casual get-together with friends, or simply a sweet indulgence for yourself. Both adults and kids alike will find every layer of this cake irresistible and mouthwatering. With its rich chocolatey fudge, creamy texture, and crunchy Oreo bits, who could resist?
Why This No-Bake Oreo Fudge Ice Cream Cake Will Be Your New Favorite
This isn’t just another dessert; it’s a game-changer for anyone who loves easy, impressive, and utterly delicious treats. Here’s why this Oreo Fudge Ice Cream Cake deserves a permanent spot in your recipe collection:
- Effortless Preparation: Forget complicated baking steps! This is a true no-bake wonder, meaning you won’t need to turn on your oven. The process is straightforward, making it accessible for even beginner cooks.
- Irresistible Flavor Combination: The classic pairing of rich hot fudge, creamy vanilla ice cream, and crunchy Oreo cookies creates a symphony of textures and tastes that is hard to beat. Each bite is a harmonious blend of sweet, cool, and satisfyingly decadent.
- Perfect for Any Occasion: Whether it’s a summer BBQ, a birthday celebration, a holiday meal, or just a weekend treat, this ice cream cake fits right in. It’s a guaranteed crowd-pleaser that leaves everyone asking for the recipe.
- Kid-Friendly Fun: The ingredients and assembly are simple enough that older children can even help out, making it a fun family activity. Plus, kids absolutely adore anything involving Oreos and ice cream!
- Minimal Ingredients: With only seven key ingredients, you likely have most of what you need already in your pantry or freezer. This simplicity means less shopping and more time enjoying your dessert.
- Make-Ahead Convenience: Since it needs to freeze for several hours, this dessert is ideal for preparing in advance, freeing up your time on the day of your event.
Ingredients You’ll Need for Your Decadent Oreo Fudge Ice Cream Cake
Gathering your ingredients is the first step to creating this delightful dessert. The beauty of this recipe lies in its simplicity and the readily available nature of each item. Here’s a detailed look at what you’ll need:
- ½ cup of hot fudge topping: Opt for a good quality hot fudge. Warming it slightly is crucial for achieving a smooth, pourable consistency that blends perfectly with the other ingredients, creating that luxurious, thick fudgy layer.
- 1 (8 ounces) tub of cool whip: This frozen whipped topping adds an incredibly light and airy texture to the cake, both within the fudge mixture and as a delightful frosting. Ensure it’s thawed in the refrigerator before use but still cold.
- 8 pieces of Oreo cookies: The iconic chocolate sandwich cookies are essential for their distinct flavor and satisfying crunch. Crushing them provides textural contrast and disperses that beloved Oreo taste throughout the cake. You can crush more if you want extra topping!
- 1 package of chocolate Instant pudding mix: This ingredient acts as a thickening agent and flavor enhancer for our fudge layer. You’ll only use about half of a standard package (typically 3.4 oz or 3.9 oz), which is enough to create a rich, stable, and fudgy consistency without making it overly sweet or dense.
- 12 pieces of vanilla ice cream sandwich: These convenient individual treats form the structural foundation and creamy core of your ice cream cake. Their classic vanilla flavor complements the chocolate and fudge beautifully, and their soft texture makes them easy to layer.
- Chocolate syrup: A drizzle of chocolate syrup just before serving adds an extra layer of chocolatey goodness and a beautiful visual appeal, making the cake even more enticing.
- Caramel syrup: The sweet, buttery notes of caramel syrup provide a delightful contrast to the rich chocolate, elevating the flavor profile and adding another dimension to your finished cake.
Essential Equipment for Your No-Bake Masterpiece
While the ingredients are simple, having the right tools on hand will make the assembly process even smoother:
- Large Mixing Bowl: Crucial for combining the fudge, Cool Whip, and pudding mixture without any spills.
- Whisk: Essential for thoroughly blending the ingredients into a smooth, consistent fudge layer.
- Spatula or Offset Knife: Perfect for spreading the pudding mixture and frosting the cake with Cool Whip evenly.
- 9×13 Inch Baking Dish or Similar Sized Pan: This standard size is ideal for fitting 12 ice cream sandwiches and creating a beautifully layered cake. A glass or ceramic dish works best for freezing.
- Microwave-Safe Bowl: For warming the hot fudge topping.
- Ziploc Bag and Rolling Pin (optional): For crushing Oreos if you don’t have a food processor.
Step-by-Step Guide to Crafting Your Easy Oreo Fudge Ice Cream Cake
Step 1: Prepare the Fudge Mixture
Begin by gently warming your hot fudge topping. Pour about half a cup of hot fudge into a microwave-safe bowl and heat it for 15-30 seconds, just enough to make it fluid and easy to mix, but not scorching hot. Meanwhile, prepare your Oreo cookies. You can place the 8 Oreo pieces in a Ziploc bag and crush them with a rolling pin until they are roughly broken into small chunks and crumbs, or use a food processor for a finer crumb. In a large mixing bowl, pour in the warm hot fudge topping. Next, add approximately one cup of thawed Cool Whip to the fudge. Whisk these two ingredients together thoroughly until they are well combined and form a smooth, uniform base. Then, add about half of your package of instant chocolate pudding mix to the bowl. Continue to mix everything together until the mixture thickens and achieves a rich, fudgy consistency. If you find the mixture is too thick to work with, you can add a tablespoon or two of milk to thin it out slightly, mixing until desired consistency is reached. Finally, fold in a generous portion of your crushed Oreo cookies, ensuring they are evenly distributed throughout the fudgy mixture. Set aside a small amount of crushed Oreos for the final topping.
Step 2: Assemble the Layers
Now it’s time to build your cake! Unwrap all 12 vanilla ice cream sandwiches. Arrange the first layer by placing 4 pieces of ice cream sandwiches snugly at the bottom of your chosen baking dish, creating a single, even layer. If necessary, you can trim the sandwiches slightly to fit your dish perfectly. Carefully spread half of the prepared fudgy pudding mixture evenly over the first layer of ice cream sandwiches. Use a spatula or the back of a spoon to ensure full coverage. Next, add another layer of 4 ice cream sandwiches on top of the pudding mixture, pressing them down gently to create a compact layer. Pour the remaining half of the fudge pudding mixture over this second layer, spreading it out smoothly and evenly from edge to edge. Finally, place the last 4 ice cream sandwiches on top to complete your layered foundation.
Step 3: Frost, Freeze, and Finish
With all the layers in place, it’s time for the finishing touches. Take the remaining Cool Whip from the tub and generously frost the entire cake. Spread the Cool Whip smoothly over the top and sides of the cake, creating an inviting, fluffy white coating. Once frosted, cover the dish with plastic wrap or foil, ensuring it’s sealed tightly to prevent freezer burn. Carefully place the cake into your freezer. For best results and optimal firmness, allow the cake to freeze for at least 4 hours. Ideally, freezing it overnight will ensure it’s perfectly solid and easy to slice. When you’re ready to serve, remove the cake from the freezer. Drizzle generously with both chocolate syrup and caramel syrup, creating an appealing marbled effect. For that extra touch of texture and flavor, sprinkle the reserved crushed Oreo cookies over the top. Slice, serve, and enjoy your spectacular homemade ice cream cake!
Expert Tips for the Perfect Oreo Fudge Ice Cream Cake
To ensure your no-bake ice cream cake turns out perfectly every time, keep these helpful tips in mind:
- Chill Your Cool Whip: While Cool Whip thaws, keep it cold in the refrigerator until ready to use. This helps maintain its stability and texture when mixed.
- Don’t Overmix the Pudding: Once the pudding mix is added, mix until just combined and thickened. Overmixing can sometimes lead to a thinner consistency.
- Adjust Pudding Consistency: If your fudge pudding mixture seems too thick, add milk a tablespoon at a time until it reaches a spreadable, fudgy consistency. If it’s too thin, you might add a tiny bit more pudding mix (a teaspoon at a time) or just embrace a slightly softer fudge layer.
- Press Layers Gently: When adding the ice cream sandwich layers, press them down gently but firmly. This helps to eliminate air pockets and ensures a cohesive cake structure.
- Freeze Thoroughly: The freezing time is crucial. A minimum of 4 hours is needed, but an overnight freeze guarantees a perfectly set cake that’s easy to slice and serve without melting too quickly.
- Warm Your Knife for Clean Slices: For super clean slices, dip your knife in hot water and wipe it dry between each cut. This technique will make cutting through the frozen layers much easier.
- Experiment with Toppings: While chocolate and caramel syrup are classic, feel free to get creative with other toppings like chopped nuts, mini chocolate chips, sprinkles, or even fresh berries.
Creative Variations & Customizations
This Oreo Fudge Ice Cream Cake recipe is wonderfully adaptable! Don’t be afraid to experiment and make it your own with these delicious ideas:
- Different Cookie Flavors: Instead of traditional Oreos, try Golden Oreos, Nutter Butters, or even crushed graham crackers for a different base flavor.
- Pudding Power: Swap the chocolate instant pudding for vanilla, cheesecake, white chocolate, or even a butterscotch flavor to change up the main profile.
- Extra Toppings: Enhance the final look and taste with additional toppings like chopped peanuts, toasted coconut flakes, mini chocolate chips, colorful sprinkles, or chocolate shavings.
- Fruit Fusion: For a refreshing twist, layer in thin slices of fresh strawberries or bananas between the ice cream sandwiches and fudge mixture.
- Boozy Twist: For an adult-only version, you could lightly brush the ice cream sandwich layers with a coffee liqueur or a chocolate liqueur for an added depth of flavor.
Serving Suggestions for Your Delicious Dessert
This Oreo Fudge Ice Cream Cake is a standalone star, but here are a few ways to enhance the serving experience:
- Perfect Temperature: While it needs to be frozen solid, letting it sit at room temperature for 5-10 minutes before slicing can make it slightly easier to cut and the textures a bit softer and more enjoyable.
- Pairing: Serve slices alongside a hot cup of coffee, a cold glass of milk, or even a scoop of plain vanilla ice cream if you want to dial up the indulgence even further.
- Garnish: A sprig of mint or a few fresh berries on the plate can add a touch of elegance and a pop of color.
Storage Instructions
Proper storage ensures your ice cream cake remains delicious for days:
- Freezer-Friendly: Any leftover cake should be stored in an airtight container or tightly wrapped in plastic wrap and aluminum foil to prevent freezer burn.
- Duration: It will keep well in the freezer for up to 2 weeks.
- Thawing: When ready to enjoy again, you can eat it directly from the freezer or let it soften for a few minutes at room temperature for a creamier texture.
Frequently Asked Questions (FAQs) About Oreo Fudge Ice Cream Cake
Can I make this cake ahead of time?
Absolutely! This is one of the best features of this no-bake dessert. You can prepare and freeze the cake up to a week in advance. Just be sure to wrap it tightly to prevent freezer burn and loss of freshness. Add the final drizzles of syrup and crushed Oreos just before serving for the best presentation.
What if I don’t have Cool Whip?
While Cool Whip gives a specific light and stable texture, you could try using homemade whipped cream. However, ensure it’s stabilized whipped cream (often made with gelatin or cream cheese) to prevent it from deflating once mixed or when frozen and thawed. The texture might be slightly different but still delicious.
Can I use homemade fudge instead of store-bought?
Yes, you can! If you have a favorite homemade fudge recipe, feel free to use it. Just make sure it has a pourable consistency when warm, similar to store-bought hot fudge topping, for easy mixing. Allow it to cool slightly before combining with the Cool Whip to prevent melting.
How do I crush Oreos without a food processor?
The easiest way is to place the Oreo cookies in a sturdy Ziploc bag, seal it, and then use a rolling pin, a meat mallet, or even the bottom of a heavy glass to crush them into your desired consistency. You can make them fine crumbs or leave some larger chunks for more texture.
My pudding mixture is too thick or thin. What should I do?
If your mixture is too thick, try adding a tablespoon of milk at a time, mixing well after each addition until it reaches a spreadable consistency. If it’s too thin, it might be due to incorrect measurements or overmixing. You could try adding a tiny bit more instant pudding mix (a teaspoon at a time) or simply proceed with a slightly softer fudge layer – it will still taste great!
Indulge in Sweet Simplicity!
This Easy No-Bake Oreo Fudge Ice Cream Cake is more than just a dessert; it’s a testament to how simple ingredients and minimal effort can create something truly extraordinary. Whether you’re a seasoned baker or a kitchen novice, this recipe is designed for success, promising a decadent treat that will garner rave reviews. So, go ahead, gather your ingredients, follow these simple steps, and prepare to enjoy the ultimate crowd-pleasing dessert that everyone will adore. Happy dessert making!
*These amazing images and the original recipe inspiration are all credited to *How Ines Rolls* via YouTube. Check her other content and follow for more delightful recipes!