
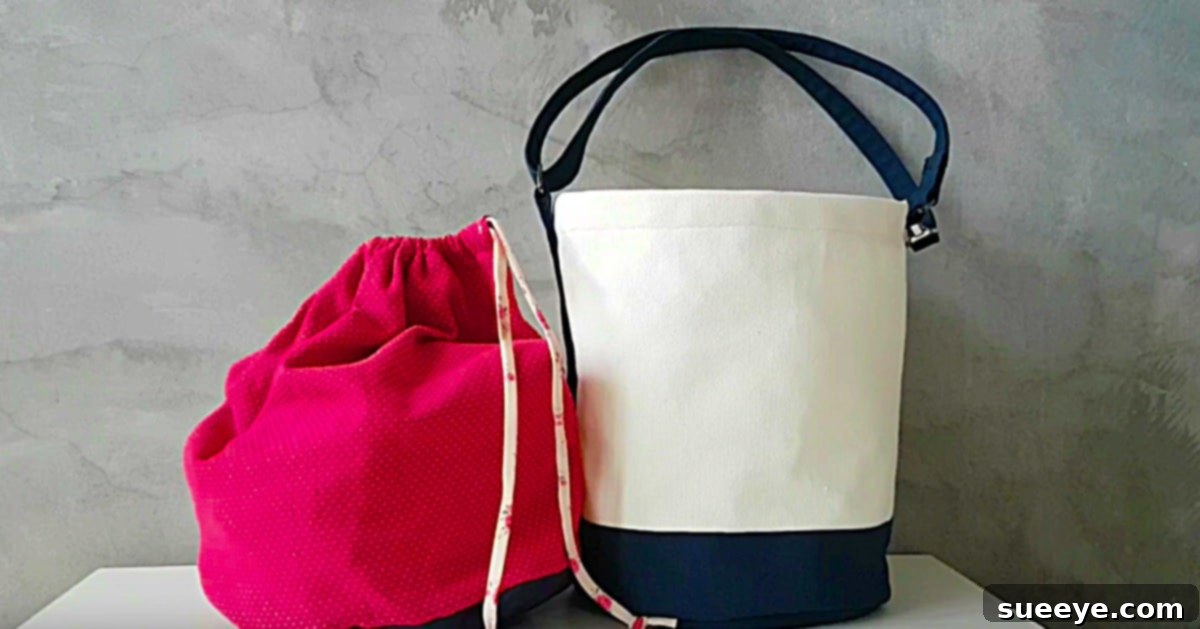
Unlock your creativity and craft a truly unique accessory with this fantastic DIY Bucket Bag project. What makes this particular bag stand out are two key features: its incredibly durable construction using readily available canvas from a simple drop cloth, and its thoughtful, open-top design. This means it transitions effortlessly from your sewing machine to your next shopping trip, allowing you to load purchases directly into your stylish, self-made tote without fumbling with closures. Imagine the convenience of a robust, custom-made bag that perfectly suits your daily needs – from grocery runs to carrying craft supplies or even as an attractive storage solution in your home.
The journey to creating your own canvas bucket bag begins with gathering a few essential materials. You’ll need two main types of fabric: a sturdy canvas, ideally sourced from an affordable canvas drop cloth found at any hardware store like Home Depot, and a complementary regular cotton fabric for accents, borders, and the strap. This combination provides both resilience and aesthetic appeal. The sewing instructions are designed to be straightforward and rewarding, making this project accessible for many skill levels. By following the detailed pattern linked from @SaltyDIY, you’ll embark on a creative process that results in a highly functional and fashionable bag.
A crucial element in achieving a professional finish and a bag that truly stands up – both literally and figuratively – is the choice of interfacing. While softer interfacing might suffice for a simple tote used solely for transport, if you envision your bucket bag maintaining its elegant shape and standing upright on a desk or counter as an attractive holder, heavy fusible interfacing is indispensable. Placed strategically between your canvas and cotton fabric layers, fusible interfacing provides a robust structure. I’ve found that projects incorporating fusible interfacing, which you can easily iron directly onto your fabric, tend to go more smoothly and result in a much more durable and polished component for your finished project. This initial preparation, including cutting your pattern with precision, lays the groundwork for a successful and enjoyable sewing experience.
Why DIY a Canvas Bucket Bag? Beyond Just Sewing
Creating your own canvas bucket bag is more than just a crafting project; it’s an investment in practicality, sustainability, and personal expression. In a world increasingly conscious of environmental impact, a reusable, durable bag is a smart choice. Canvas, especially from a drop cloth, is a robust and long-lasting material that can withstand heavy use and repeated washing, significantly reducing your reliance on single-use plastic bags. Furthermore, the inherent strength of canvas makes this bag ideal for carrying heavier items, whether it’s a load of fresh produce from the farmer’s market or books from the library.
Beyond its ecological benefits, a handmade bag offers unparalleled customization. You choose the colors, the accent fabrics, and you can even add personal touches like embroidery, unique pockets, or decorative stitching. This level of personalization ensures your bag isn’t just another accessory, but a reflection of your style and effort. Moreover, the satisfaction derived from creating something functional and beautiful with your own hands is immense. It’s a tangible accomplishment that can boost confidence and foster a deeper appreciation for handmade goods. This DIY project also represents significant cost savings compared to purchasing high-quality, durable bags from boutiques. By utilizing an affordable canvas drop cloth, you’re transforming a utilitarian item into a chic and practical fashion statement.
Essential Materials for Your Durable Bucket Bag
Success in any sewing project hinges on selecting the right materials. For this robust bucket bag, your choices will directly impact its durability, structure, and overall aesthetic. Let’s delve into the specifics:
-
The Star Material: Canvas Drop Cloth
The foundation of this project is the canvas drop cloth. These are widely available at hardware stores like Home Depot, Lowe’s, or even art supply stores. They are incredibly cost-effective, durable, and come in various weights. For a bag that needs to stand up to heavy use and maintain its shape, opt for a heavier weight canvas (e.g., 10-12 oz). If your drop cloth is very stiff, you might consider pre-washing it to soften it slightly and pre-shrink the fabric before cutting. This ensures your finished bag won’t shrink unevenly after its first wash. The natural, rustic look of the canvas drop cloth adds a wonderful character to the bag, making it versatile for many styles.
-
The Complementary Touch: Regular Cotton Fabric
This lighter cotton fabric serves multiple purposes: creating the bottom border trim, inner lining (if desired), and the straps. Choose a print or solid color that complements your canvas. Quilting cottons are often a good choice due to their wide variety of designs and easy-to-work-with nature. Ensure your cotton fabric is also pre-washed and ironed smooth before cutting to prevent puckering or shrinking after the bag is sewn.
-
The Secret to Structure: Heavy Fusible Interfacing
As mentioned, heavy fusible interfacing is key to giving your bucket bag that desired stand-up quality. This material has an adhesive on one side that bonds to your fabric when heat is applied with an iron. It provides significant body and stiffness, preventing your bag from collapsing. When selecting, look for “heavyweight” or “stabilizer” fusible interfacing. Make sure to follow the manufacturer’s instructions for application to ensure a strong, bubble-free bond. Using fusible interfacing ensures that the structure is integrated seamlessly into your fabric layers, providing long-lasting shape retention.
-
Strong Foundations: Thread and Hardware
For sewing canvas and multiple layers of fabric, a strong, polyester all-purpose thread is recommended. You might even consider a heavy-duty or upholstery thread if your sewing machine can handle it, especially for seams that will bear a lot of stress. Additionally, while the original design features an open top, if you later decide to add a functional drawstring, you will need a drawstring cord and possibly cord stops or grommets, though this is entirely optional.
Tools for a Seamless Sewing Experience
Having the right tools at hand will make your bucket bag project much more enjoyable and efficient. Here’s a quick checklist:
- Sewing Machine: A standard home sewing machine capable of handling multiple layers of fabric. A walking foot attachment can be incredibly helpful for feeding thick materials evenly.
- Sharp Fabric Scissors or Rotary Cutter: For precise cuts.
- Cutting Mat and Ruler: Essential if using a rotary cutter.
- Iron and Ironing Board: Crucial for applying fusible interfacing and pressing seams for a crisp finish.
- Pins or Fabric Clips: To hold fabric layers together securely.
- Measuring Tape or Ruler: For accurate measurements.
- Seam Ripper: Every sewist’s best friend for correcting mistakes.
- Fabric Marker or Chalk: For transferring pattern markings.
Directions: Step-by-Step Guide to Your DIY Canvas Bucket Bag
With your materials and tools ready, it’s time to dive into the construction of your durable and stylish bucket bag. Precision in each step will lead to a professional-looking finished product.
First, prepare your pattern and fabric. Begin by downloading and cutting your pattern pieces exactly as instructed in the @SaltyDIY video tutorial. Accuracy here is paramount for a well-fitting bag. Once your paper pattern is ready, carefully cut out your outer fabric layer (the canvas), your stiff canvas drop cloth (for structure, if not using a separate stiffener), and your cotton fabric pieces, ensuring all grain lines are respected. Remember to cut your interfacing pieces as well, mirroring the corresponding fabric pieces.
Taking your time during this initial cutting phase will save you potential headaches later on. Use a sharp pair of fabric scissors or a rotary cutter for clean, crisp edges. If your canvas drop cloth is already very stiff and you’re using it as both the outer fabric and the primary stabilizer, you might not need a separate stiff canvas layer, but rather focus on the fusible interfacing. Pay close attention to any notches or markings on the pattern, as these will guide your assembly.
Next, focus on the bottom border trim. Carefully stitch down the bottom border trim to the main body of your bag. This step often involves attaching the accent cotton fabric to the lower edge of your main canvas body. Ensure your seams are straight and evenly spaced according to your seam allowance. Pressing your seams flat after stitching each section will give your bag a much cleaner, more professional appearance. This border provides a lovely visual break and can reinforce the base of your bag.
When working with canvas and potentially interfacing, using an iron for pressing seams after each stitching stage is crucial. It helps to set the stitches, flatten the fabric, and ensure everything lies smoothly. Consider using a slightly longer stitch length than usual for canvas, as this can help prevent skipped stitches and create stronger seams.
Now, assemble the bag’s main structure. Sew the bag body pieces together to form a cylindrical shape. Once the sides are joined, carefully attach the circular base (often referred to as the “floor of the bag”) to the bottom edge of your bag body. This step requires careful pinning and sometimes clipping the curves of the circle and cylinder to ensure a smooth, even attachment without puckering. Stitch slowly and steadily to achieve a strong, even seam all around the base.
Joining the circular base to the cylindrical body can be tricky. Use plenty of pins or fabric clips to hold the two pieces together, distributing the fabric evenly around the curve. If your sewing machine has a free arm, now is a good time to use it. You might need to make small clips into the seam allowance of the cylinder to help it curve around the circle smoothly. Once sewn, check your seam from the right side, and if happy, trim the seam allowance and press it open or towards the base.
At this stage, your bag will begin to take its definitive shape, much like the photo below. This is an exciting moment as your fabric pieces transform into a recognizable form. Take a moment to admire your progress and ensure all seams are secure and even. Turn the bag right side out to get a clear view of its structure.
This is where all your careful cutting and stitching truly pay off. The bag should stand relatively upright, especially if you’ve used heavy fusible interfacing. This visual milestone provides encouragement and helps you visualize the final product. Address any minor imperfections now before proceeding to the final steps.
Finally, complete your bag by making and attaching your straps and creating the drawstring liner. Follow the detailed instructions provided in the video tutorial for constructing durable and comfortable straps. Reinforce the strap attachment points to ensure they can withstand the weight you intend to carry. The drawstring liner, while allowing for the bag’s primary open-top design for easy shopping, can also be finished in a way that provides optional closure if desired, or simply adds a neat, professional finish to the bag’s interior, as detailed in the video.
Straps are critical for both functionality and comfort. Typically, they involve folding and stitching layers of cotton fabric to create sturdy handles. Pay close attention to how they are attached to the bag body – often involving a square or X-stitch pattern for extra strength. For the drawstring liner, even if you prefer an open-top bag, finishing the top edge with a neat lining creates a clean interior and prevents fraying. If you opt for a functional drawstring, ensure the casing is wide enough for your chosen cord and that the openings are reinforced. This versatility means your bag can serve multiple purposes, from a quick-access shopping tote to a more secure carry-all.
Customization and Personalization: Make It Truly Yours
The beauty of DIY projects lies in the freedom to personalize. Your canvas bucket bag is a blank canvas (pun intended!) for your creativity. Here are a few ideas to make your bag uniquely yours:
- Add Pockets: Integrate interior or exterior pockets for small items like keys, phone, or wallet. Patch pockets are easy to add, or you could sew a zippered pocket for extra security.
- Embroidery or Appliqué: Hand-stitch a monogram, a favorite quote, or a decorative design onto the canvas. Appliqué fabric scraps can add texture and color.
- Fabric Painting: Use fabric paints to create bold designs, stencils, or abstract art on the plain canvas.
- Different Strap Styles: Instead of simple fabric straps, consider using leather straps for a more sophisticated look, or add D-rings to make the straps detachable.
- Closures: While designed as an open-top bag, you could easily add a magnetic snap, a simple button loop, or a zipper if you prefer a more secure closure for certain uses.
- Decorative Trims: Sew on decorative ribbons, pom-pom trim, or even tassels for a touch of bohemian flair.
Care and Maintenance for Your Handmade Bag
To ensure your DIY canvas bucket bag remains a trusty companion for years to come, proper care is essential. Since it’s made from canvas and cotton, most bags can be machine washed. However, always check the care instructions for your specific canvas and interfacing materials. Generally, machine wash on a gentle cycle with cold water to prevent shrinking or fading, especially if you’ve used different colored fabrics. Air dry or tumble dry on a low setting. Avoid high heat, as it can damage the fusible interfacing or cause excessive shrinking. If your bag becomes wrinkled, a quick press with an iron can restore its crisp appearance.
The Joy of a Handmade Bag: A Rewarding Conclusion
This canvas bucket bag is not just a utility item; it’s a testament to your skill and creativity. Excellent for shopping, carrying daily essentials, or even as a chic storage bin, it truly suits a multitude of needs. Its sturdy construction, derived from an inexpensive canvas drop cloth, ensures longevity and practicality, while the simple, open design maximizes convenience. By following these clear, step-by-step instructions and the helpful video tutorial, you will successfully create a beautiful and robust bag that you can be proud to use for years to come. Embrace the satisfaction of creating something functional, durable, and uniquely yours!