
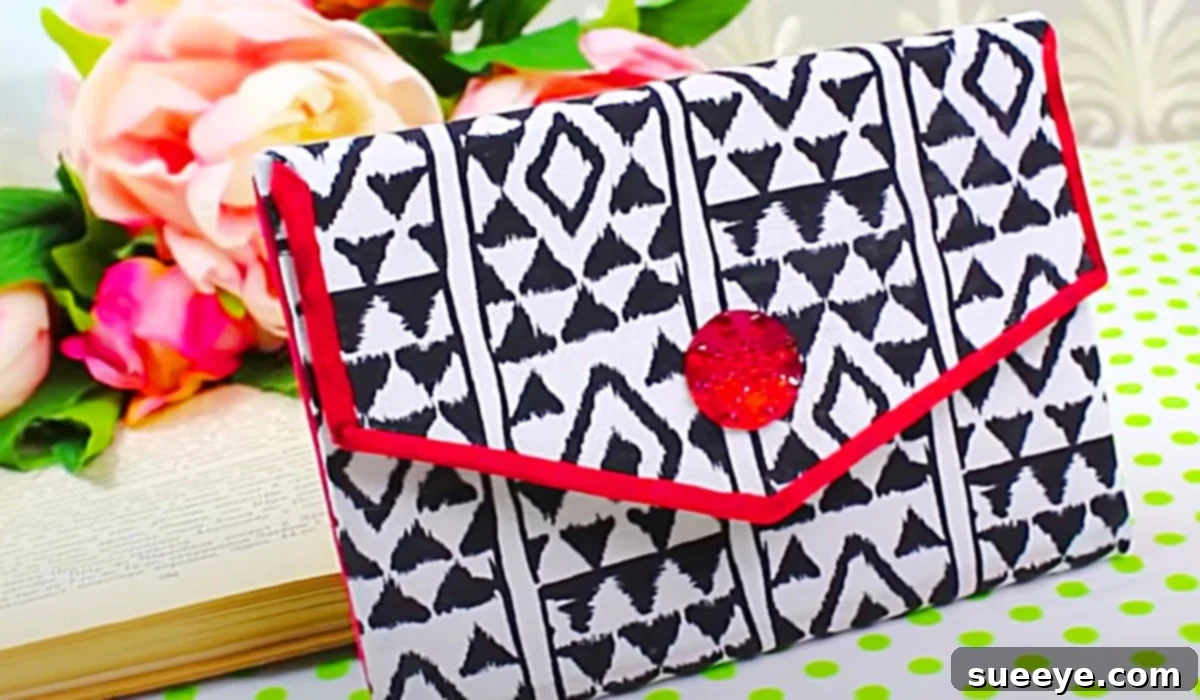
DIY No-Sew Clutch Bag: Craft Your Stylish Accessory Effortlessly
Are you looking for a fun, creative project that results in a chic and functional accessory, all without needing a sewing machine? Look no further! The art of crafting a DIY no-sew clutch bag has captured the hearts of fashion enthusiasts and crafters alike, offering a simple yet incredibly rewarding experience. Inspired by brilliant tutorials like those from DIY Crafts TV, transforming a few simple materials into a stylish clutch has never been easier or more accessible.
This beginner-friendly project allows you to create a personalized clutch bag that perfectly complements any outfit, from casual jeans to a more dressed-up ensemble. Imagine stepping out with a unique accessory that reflects your personal style, knowing you crafted it with your own hands. Beyond its aesthetic appeal, this no-sew method is incredibly practical, making it an ideal choice for anyone new to DIY fashion or those looking for a quick and satisfying craft. I eagerly embraced this project, gathering remnant fabrics from my local craft store’s clearance section, a testament to how cost-effective and sustainable this hobby can be. Let’s delve into how you can make your very own elegant clutch, adding a touch of handmade charm to your wardrobe.
The Allure of the No-Sew Clutch: Style, Simplicity, and Sustainability
In a world dominated by mass-produced fashion, the appeal of a handmade item, especially one as practical and chic as a clutch bag, is undeniable. A no-sew clutch offers a unique blend of benefits that make it a standout DIY project. Firstly, its accessibility is unmatched; the absence of a sewing machine requirement means anyone, regardless of their crafting experience, can achieve professional-looking results. This opens up the world of custom accessory making to a much wider audience, fostering creativity and self-expression.
Secondly, a DIY clutch provides unparalleled customization opportunities. From selecting your favorite fabric patterns and textures to choosing unique embellishments and closures, every element can be tailored to your specific taste. This personal touch ensures your clutch is truly one-of-a-kind, setting it apart from anything you could buy in a store. Moreover, opting for a no-sew project often encourages the use of upcycled or remnant materials, promoting sustainability by giving new life to forgotten fabrics. This eco-conscious approach not only saves money but also contributes to a more mindful consumption of resources. Whether you’re crafting it for a special occasion, as a thoughtful gift, or simply to add a versatile piece to your accessory collection, the no-sew clutch embodies creativity, practicality, and personal style.
Essential Materials for Your DIY No-Sew Clutch Bag
Gathering the right materials is the first exciting step in bringing your no-sew clutch to life. The beauty of this project lies in its simplicity and the flexibility it offers in material selection. While specific dimensions are provided, feel free to adapt them to create a clutch that perfectly suits your needs – whether you envision a compact evening bag or a slightly larger carrier for your essentials.
- Main Fabric (approximately 42 x 20 cm): This will be the exterior of your clutch. Consider various options like sturdy cotton, elegant faux leather, denim for a casual look, or even satin for a more formal touch. Patterned fabrics can add personality, while solid colors offer versatility.
- Stabilizer/Interfacing (approximately 32 x 17 cm cardboard or equivalent): This component is crucial for giving your clutch structure and shape. The original instructions suggest cardboard, which provides excellent rigidity, ideal for a clutch that needs to stand up on its own. However, for a softer, more pliable bag that drapes a little, you might explore alternative stabilizers.
- Foam Sheet (approximately 38 x 17 cm): A foam sheet adds a layer of cushioning and a subtle puffiness, contributing to the clutch’s overall feel and finish. It also helps to smooth out any slight imperfections in the main fabric and gives the bag a more substantial, luxurious quality.
- Hot Glue Gun and Glue Sticks: Your primary “sewing” tool! A reliable hot glue gun is essential for securely bonding all the fabric layers and components. Ensure you have plenty of glue sticks on hand, as you’ll be using it generously.
- Velcro or Other Closure Mechanism: Velcro provides a quick and secure closure. Alternatively, you could consider magnetic snaps (which can be glued in place) or even a decorative button paired with a small fabric loop (also glued) for a more elegant touch.
- A Button (optional, for decoration or closure): If opting for a button closure, choose one that complements your fabric. Even if using Velcro, a decorative button on the flap can add a sophisticated focal point.
- Elmer’s Glue or Fabric Glue: While hot glue is great for structural bonding, a good fabric glue or multi-purpose craft glue like Elmer’s can be useful for more delicate applications, attaching lining, or for specific embellishments where a thinner, more spreadable adhesive is preferred.
- A Pair of Scissors: Sharp fabric scissors are vital for clean, precise cuts. Investing in a good pair specifically for fabric will make your cutting process much smoother and more accurate.
When selecting your fabrics, don’t be afraid to experiment with textures and patterns. Using remnants from previous projects or fabrics from the clearance bin not only keeps costs down but also adds a unique, eco-friendly dimension to your handmade clutch.
Preparing Your Workspace and Pattern for Success
A well-prepared workspace is key to a smooth and enjoyable crafting experience. Before you begin cutting and gluing, take a moment to set up your area. Clear a flat, clean surface, ensuring you have ample space to spread out your fabric and pattern pieces. Good lighting is also essential for precision cutting and gluing. Gather all your tools and materials within easy reach, so you don’t have to interrupt your flow once you start.
The foundation of any great DIY project lies in an accurate pattern. For this no-sew clutch, you’ll typically start by downloading a simple, one-piece pattern. Once downloaded, print it at 100% scale to ensure the dimensions are correct. Carefully cut out the paper pattern. This template will guide all your subsequent cuts, so precision here is paramount.
Step-by-Step Guide: Crafting Your Stylish No-Sew Clutch
Now that your materials are ready and your workspace is set, it’s time to dive into the exciting process of assembling your clutch. Follow these detailed steps to bring your vision to life, creating a durable and fashionable accessory.
Step 1: Cutting Your Fabric and Stabilizer Pieces
Lay your chosen main fabric flat, face down. Carefully place your paper pattern on top, securing it with pins or weights to prevent shifting. Using sharp fabric scissors, cut out the main fabric piece precisely along the pattern lines. Repeat this process for your foam sheet and your chosen stabilizer (cardboard or interfacing). If you’re using heavy fusible interfacing for a more professional finish, remember to cut it slightly smaller than your main fabric, typically by about 0.5 cm around all edges, to prevent bulkiness at the seams and ensure a clean fold. This attention to detail in cutting sets the stage for a polished final product.
Step 2: Attaching the Stabilizer and Foam Layers
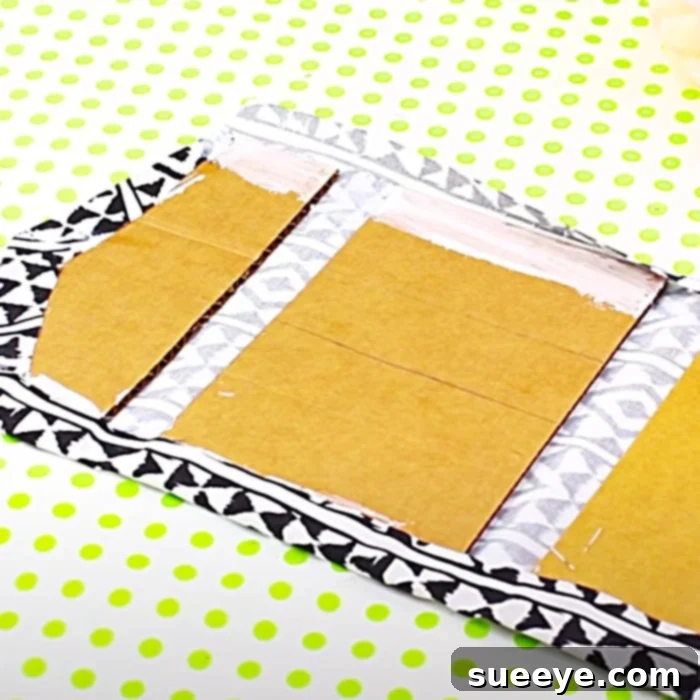
This step is critical for giving your clutch its desired structure and body. If using cardboard or a non-fusible stabilizer, apply a thin, even layer of Elmer’s glue or fabric glue to one side of the cardboard/stabilizer. Carefully center it onto the wrong side of your main fabric, pressing down firmly to ensure good adhesion. Smooth out any bubbles or wrinkles. Next, apply glue to the foam sheet and adhere it on top of the stabilizer, creating a cushioned layer. If you opt for fusible interfacing, place the fusible side down onto the wrong side of your main fabric. Using an iron set to the appropriate temperature for your fabric, press firmly, holding the iron in place for several seconds as per the interfacing instructions. This heat will bond the interfacing permanently to your fabric, creating a robust and tailored finish.
Step 3: Forming the Main Body of the Clutch
With your fabric and stabilizer now fused, it’s time to shape the clutch. Referring to your pattern, identify the fold lines. Carefully fold the bottom section of your main fabric upwards, creating the main pocket of the clutch. Ensure the edges align perfectly. Apply a strong line of hot glue along the side edges of this folded section, pressing firmly to secure the bond. Work in small sections if necessary to prevent the glue from cooling too quickly. This forms the central compartment where you’ll store your essentials. Allow the glue to cool and set completely before moving on.
Step 4: Adding the Interior Lining (Optional but Recommended)
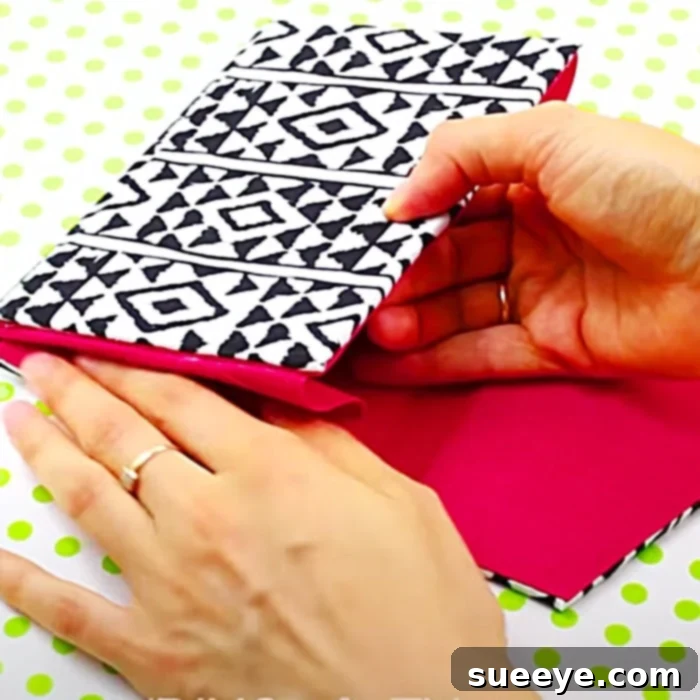
While optional, adding a lining significantly elevates the look and feel of your no-sew clutch, providing a clean interior finish and protecting your items. Cut a piece of lining fabric (a lightweight cotton or satin works well) slightly smaller than your main fabric piece, ensuring it will fit neatly inside the glued main body without bulging. Apply fabric glue or a thin line of hot glue around the inside edges of your clutch pocket. Carefully insert the lining fabric, smoothing it into place from the center outwards to prevent wrinkles. Ensure the top edge of the lining is neatly tucked under the fold of the clutch opening. A contrasting lining color can add a delightful pop of surprise!
Step 5: Securing the Clutch Closure
The closure is both functional and a design element. If using Velcro, cut two small pieces. Apply hot glue to the back of one Velcro piece and firmly press it onto the underside of the clutch flap. Then, apply glue to the second Velcro piece and carefully align it on the main body of the clutch, ensuring it matches up perfectly with the first piece when the flap is closed. Press firmly. For a button closure, you can use strong fabric glue to attach a decorative button to the front flap. Create a small loop from a thin strip of fabric or elastic and glue it securely to the underside of the flap, positioning it to hook over the button when closed. Magnetic snaps are another sophisticated option; they typically come with prongs that can be bent or can be securely glued in place with strong adhesive.
Step 6: Embellishing Your Clutch with Personalized Touches
This is where your creativity truly shines! Enhance your no-sew clutch with various embellishments to make it truly yours. Consider adding a small faux leather tassel to one side, gluing on sparkling rhinestones or fabric appliques, or even using fabric paint to create a unique design. You could also attach a decorative charm or a small metal chain for a wrist strap using strong glue or jump rings (if your clutch design allows). The possibilities are endless, allowing you to tailor your clutch to perfectly match your personal style and the occasions you plan to use it for.
Styling Your Handmade No-Sew Clutch
One of the greatest joys of creating your own no-sew clutch bag is the ability to perfectly integrate it into your existing wardrobe. Far from being just a utilitarian item, your handmade clutch is a statement piece, a reflection of your unique style. As mentioned, it effortlessly pairs with casual ensembles like jeans and a stylish top, instantly elevating a relaxed look with a touch of curated chic. Imagine a denim clutch with a subtle sparkle for a daytime outing, or a faux leather one adding an edgy touch to a comfortable sweater and leggings.
But the versatility of a DIY clutch extends far beyond casual wear. For semi-formal events, a clutch crafted from a rich velvet, silk, or satin fabric can add an elegant finish to a cocktail dress or a tailored jumpsuit. Experiment with textures – a faux fur clutch for winter events or a woven straw clutch for summer gatherings can make a significant impact. Consider the color palette of your wardrobe; a neutral-toned clutch (black, nude, grey) will be incredibly versatile, while a bold, patterned clutch can serve as a vibrant accent piece, drawing attention and adding a pop of color to an otherwise monochromatic outfit. Your handmade clutch isn’t just a bag; it’s an extension of your personal aesthetic, offering endless possibilities for creative self-expression through fashion.
Caring for Your Unique No-Sew Clutch
To ensure your beautiful, handmade no-sew clutch remains a cherished accessory for years to come, proper care and maintenance are essential. The cleaning method largely depends on the materials you chose. For most fabric clutches, spot cleaning is usually the safest approach. Use a damp cloth with a mild soap solution to gently blot any stains, avoiding excessive rubbing which could damage the fabric or loosen the glue bonds. Always test your cleaning solution on an inconspicuous area first.
If your clutch features delicate embellishments like rhinestones or beads, be extra careful not to dislodge them. For clutches made with faux leather or other non-fabric materials, a simple wipe-down with a damp cloth is often sufficient. Avoid submerging your clutch in water, as this could weaken the adhesive and warp any cardboard or foam stabilizers used. When not in use, store your clutch in a cool, dry place, away from direct sunlight, which can fade fabrics over time. Stuffing it lightly with tissue paper can help maintain its shape. With a little care, your personalized no-sew clutch will continue to be a stylish and functional addition to your accessory collection, proudly showcasing your crafting talent.
Conclusion: Embrace the Joy of No-Sew Crafting
Crafting your own DIY no-sew clutch bag is more than just a creative project; it’s an empowering journey into the world of accessible fashion design. From the initial spark of inspiration to the final touch of embellishment, each step allows for personal expression and a deep sense of accomplishment. This guide, drawing inspiration from the clear instructions provided by sources like DIY Crafts TV, demonstrates just how straightforward it can be to create a professional-looking accessory without the need for a sewing machine.
The resulting clutch is not just a practical item for carrying your essentials; it’s a unique fashion statement, a testament to your creativity, and a conversation starter. Whether you choose vibrant patterns or elegant solids, rigid structure or soft draping, your handmade clutch will be a reflection of your individual style. So, gather your materials, clear your workspace, and embark on this enjoyable crafting adventure. You’ll be amazed at the beautiful, personalized accessory you can create, adding a touch of handmade charm and sustainable style to your everyday look.