
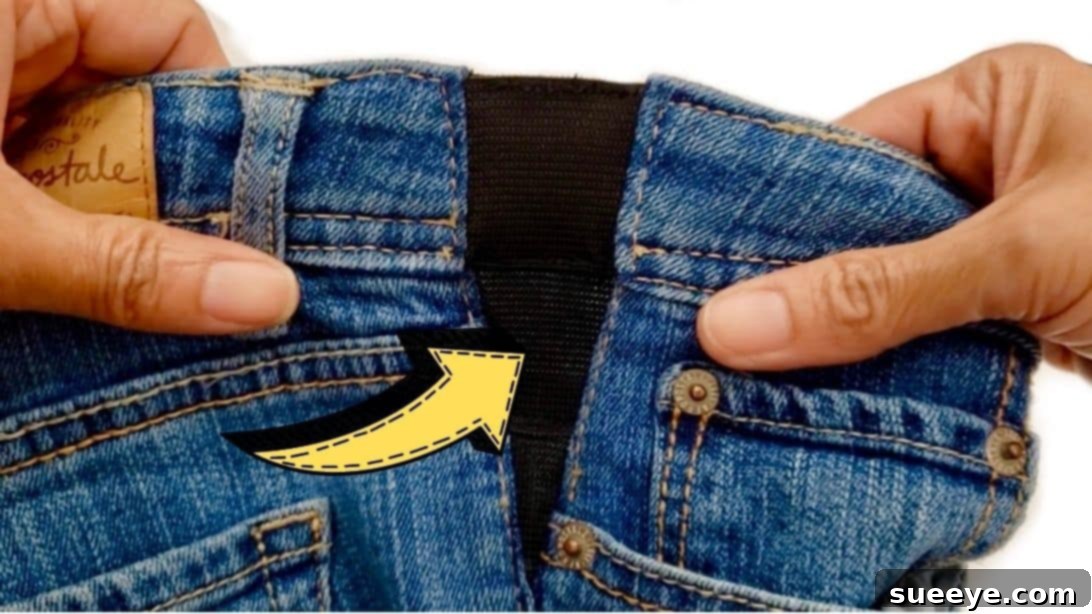
There’s nothing quite as frustrating as finding your favorite pair of jeans has become a little too snug. Whether it’s due to a change in size, accidental shrinkage in the wash, or simply desiring a more relaxed fit, the thought of parting with a beloved, perfectly worn-in pair can be heartbreaking. Before you consider replacing them, or if you’ve recently purchased a pair that isn’t quite right and can’t be returned, there’s a practical and budget-friendly solution. With just a few basic sewing tools and some elastic, you can easily enlarge your jeans for a comfortable, custom fit.
This comprehensive guide will walk you through the process of altering your jeans using elastic inserts, inspired by the clever techniques shared by Downtown Tailoring on YouTube. Not only will you save money by extending the life of your existing wardrobe, but you’ll also gain a valuable skill that can be applied to other garments. Get ready to transform your tight jeans into a comfortable staple once more!
Why Alter Your Jeans Instead of Buying New?
In an age where fast fashion often encourages disposable clothing, learning to mend and alter your garments is a sustainable and rewarding practice. Beyond the environmental benefits, there are several compelling reasons to consider altering your jeans rather than just buying a new pair:
- Cost-Effectiveness: Denim can be expensive. Altering a pair of jeans you already own is significantly cheaper than purchasing a new one, especially if they are a high-quality or designer brand.
- Sustainability: By extending the lifespan of your clothing, you contribute to reducing textile waste and the environmental impact associated with new garment production.
- Sentimental Value: Some jeans hold special memories or simply fit perfectly in every way except for a slightly tight waistband. Keeping them allows you to preserve these cherished items.
- Achieve a Perfect Fit: Off-the-rack clothing rarely fits every body type perfectly. Alterations allow you to tailor your jeans precisely to your measurements, ensuring maximum comfort and a flattering silhouette.
- Unique Customization: Altering your jeans can also be an opportunity to add a personalized touch, making them truly unique to you.
This tutorial focuses on addressing the common issue of jeans that are too tight around the waist or hips, offering a simple yet effective solution using elastic.
Essential Materials for Jeans Enlargement
Before you begin your denim alteration project, gather all the necessary tools and materials. Having everything ready will make the process smoother and more enjoyable.
- Wide Elastic Band: The type of elastic you choose is crucial. Opt for a high-quality, sturdy elastic that is at least 1 to 1.5 inches wide for the best results, especially for the waistband. Knit elastic is often preferred for waistbands as it maintains its elasticity when stretched and sewn through. The length needed will depend on the extent of enlargement required for both side seams and the waistband.
- Fabric Marking Tools:
- Chalk or Marking Pen: Essential for clearly marking your cut and stitch lines on the denim. Ensure it’s a type that will easily wash out or disappear after use.
- Seam Ripper: This small but mighty tool is indispensable for carefully unpicking stitches without damaging the fabric. Invest in a good quality, sharp seam ripper to make the unpicking process quick and easy.
- Sharp Fabric Scissors: Using scissors specifically designed for fabric will ensure clean, precise cuts through denim. Avoid using these scissors on paper or other materials to keep them sharp.
- Ruler or Measuring Tape: Accuracy is key in sewing. A flexible measuring tape is ideal for measuring curves and lengths on your jeans, while a ruler can help draw straight lines.
- Sewing Machine & Supplies: While some small parts could be hand-sewn, a sewing machine is highly recommended for durability and a professional finish, especially when working with denim.
- Denim Needle: These needles are stronger and sharper, designed to penetrate thick denim fabric without breaking or skipping stitches.
- Strong Polyester Thread: Choose a thread that matches the color of your jeans as closely as possible for a seamless look. Polyester thread is durable and resistant to breakage, making it ideal for denim.
- Pins or Fabric Clips: To hold elastic and fabric securely in place before sewing.
- Iron & Ironing Board (Recommended): Pressing your seams as you go creates a much more professional and neat finish. It helps to flatten the fabric and ensure accurate sewing.
Step-by-Step Guide to Enlarging Your Jeans with Elastic
Follow these detailed instructions carefully to successfully enlarge your favorite jeans. Remember to work slowly and precisely for the best outcome.
Step 1: Preparing the Jeans and Side Seams for Alteration
The first step involves strategically opening up the waistband and side seams of your jeans to create space for the elastic inserts. Begin by putting on your jeans (if possible) or holding them up to yourself to identify exactly where the tightness occurs. This will help you determine the best placement for your elastic. Most commonly, enlargement is needed at the side seams and across the back waistband.
Lay your jeans flat on a clean, well-lit surface. Using your fabric chalk or marking pen, draw a straight vertical line on the side of the waistband. This line should align with the existing side seam, extending from the top edge of the waistband downwards. This mark serves as a guide for where you will begin to unpick the stitches.
Now, take your seam ripper and carefully begin to unpick the threads on the waistband. Start at your marked line and rip about 3 to 4 inches wide. You don’t need to unpick the entire waistband; just create enough opening to insert the elastic comfortably. Be gentle to avoid tearing the denim fabric. Next, extend your ripping down the side seams of the jeans, about 1.5 to 2 inches from the waistband opening. This will create small vertical openings on each side seam where the elastic panels will be integrated.
Once the seams are ripped, you’ll have raw edges of denim. To prevent these edges from fraying and to ensure a durable alteration, you need to reinforce them. Carefully sew along the raw edges of the opened side seams with a ¼-inch seam allowance. As you reach the end of the ripped section, pivot your fabric (with the needle down in the fabric) and continue sewing across the bottom of the ripped area, creating a neat, reinforced finish. This small but important step will encase the raw edges, making your alteration long-lasting and professional.
Step 2: Customize and Integrate the Elastic Inserts
With your jeans prepared, it’s time to measure, cut, and attach the elastic. This step involves creating both side seam elastic panels and potentially an additional elastic piece for the main waistband, depending on where you need the most give.
First, measure the length of the opening you created along the side seam. Cut a piece of your wide elastic band for each side seam. For a typical enlargement, you might aim for an elastic insert that, when sewn in, measures approximately 7 to 8 inches in length. The key is to add about 2 inches to your measured gap (the original 1.5-2 inch ripped section) to account for the elastic’s natural stretch and the seam allowances needed for attachment. This extra length ensures that when the elastic is sewn in and relaxed, it provides the desired stretch without puckering the denim too much when at rest.
Consider the orientation of your elastic. You can decide whether to sew the elastic horizontally or vertically within the side seam opening. Vertical elastic will provide stretch primarily along the length of the seam, offering more give around the hip area. Horizontal elastic will stretch across the width of the seam, which can be useful if you’re primarily targeting an increase in waist circumference directly at the side. For most cases, a vertical insertion along the side seam works best to integrate smoothly with the existing seam lines.
Carefully pin the elastic segment into the opened side seam, ensuring even distribution. You will need to slightly stretch the elastic as you sew to ensure it lies flat and provides proper give. Use a zigzag stitch on your sewing machine. This stitch allows the elastic to stretch without popping the threads. Sew both sides of each elastic insert securely into the denim. Remember to backstitch at the beginning and end of each seam for reinforcement.
Next, consider the main waistband. For additional comfort and flexibility directly at the top edge, cut another piece of elastic specifically for the waistband. This piece will be sewn horizontally into the opening you created at the top edge of the waistband. This often works best across the back section of the waistband, allowing for discreet expansion. Measure the width of your waistband opening and cut an elastic piece that is slightly shorter than the opening (by about 1-2 inches) to ensure it creates tension and stretch when sewn in. Pin this elastic piece horizontally across the inside of the waistband opening, stretching it slightly as you sew. Again, a zigzag stitch is ideal here to maintain the elastic’s stretch capabilities.
For visual guidance and to explore alternative methods, we highly recommend watching the full video tutorial by Downtown Tailoring on YouTube. The video provides excellent demonstrations of these techniques and may even show 2 more easy ways to sew elastic to your jeans, enhancing your understanding and confidence.
Pro Tips for a Perfect Jeans Alteration
To ensure your jeans alteration is successful, durable, and looks professionally done, keep these expert tips in mind:
- Test on Scrap Fabric: If you’re new to sewing elastic, practice on a scrap piece of denim first. This will help you get a feel for stretching the elastic while sewing and finding the right stitch settings on your machine.
- Choose the Right Needle and Thread: Always use a denim needle and strong polyester thread. This prevents needle breakage and ensures your stitches hold up to the wear and tear denim receives.
- Take Your Time: Rushing can lead to mistakes. Go slow, especially when unpicking seams and sewing the elastic. Precision is key for a neat finish.
- Press Your Seams: After each sewing step, take a moment to press your seams flat with an iron. This makes subsequent sewing easier, prevents bulk, and gives the finished garment a crisp, professional appearance.
- Avoid Overstretching Elastic: While you need to stretch the elastic as you sew it, be careful not to overstretch it. Too much tension can cause the fabric to pucker excessively or the elastic to lose its recovery over time. Aim for a gentle, even stretch.
- Try On Frequently: If possible, try on your jeans after you’ve pinned the elastic in place (before final sewing) to check the fit and comfort. This allows for adjustments before committing to permanent stitches.
- Consider Aesthetic Finish: If the elastic insert is visible, try to match the elastic color to your denim as closely as possible, or choose a contrasting color for a deliberate design detail.
- Wash Before Altering: Always wash and dry your jeans before making any alterations. This ensures any potential shrinkage happens beforehand, so your alterations will be accurate to the final fabric size.
Troubleshooting Common Alteration Challenges
Even with careful planning, you might encounter a few hiccups. Here are some common problems and their solutions:
- Elastic Too Tight/Loose: If the jeans are still too tight after the alteration, you might need to unpick the elastic and use a longer piece, or stretch it less while sewing. If they are too loose, you used too much elastic or didn’t stretch it enough; replace with a shorter piece or sew with more tension.
- Uneven Stretch: This usually happens if the elastic wasn’t stretched uniformly while sewing. Try to maintain consistent tension as you feed the elastic through the machine. Pins placed at even intervals can help guide you.
- Fabric Puckering Excessively: This can occur if the elastic is too taut, or if your stitch length is too short. Try a longer zigzag stitch and ensure you’re not overstretching the elastic. Pressing the seams thoroughly can also help minimize puckering.
- Needle Breakage or Skipped Stitches: This is a strong indicator that you need a new, sharp denim needle. Denim is thick, and a regular or dull needle will struggle to penetrate it, leading to issues.
- Thread Breaking: If your thread keeps snapping, it could be due to an old or low-quality thread, incorrect tension settings on your machine, or a damaged needle. Check all these factors.
Conclusion: Reclaim Your Favorite Jeans with DIY Alterations
You no longer have to mourn the loss of your favorite jeans to a little extra snugness. By following this detailed guide, armed with just a few basic sewing tools and some elastic, you can confidently undertake a DIY alteration project that breathes new life into your denim. This process not only saves you money and promotes sustainable fashion practices but also provides the satisfaction of wearing a garment that truly fits you perfectly.
Embrace the comfort, style, and sustainability that comes with a perfectly altered pair of jeans. Don’t be afraid to try this simple sewing technique – with a little patience and precision, you’ll be enjoying your “new” favorite jeans in no time. For further visual assistance and additional techniques, remember to visit Downtown Tailoring’s YouTube channel, where you can find the original video tutorial and many other helpful sewing projects!