
Embarking on a quilting journey is an incredibly rewarding experience, especially when you find projects that are both beautiful and achievable for beginners. As someone who loves diving into new crafting adventures, I’m always on the lookout for beginner-friendly patterns that help hone my skills without overwhelming me. There’s a special charm in straightforward, fuss-free projects, particularly those that make brilliant use of pre-cut fabrics like fat quarters and jelly rolls. These pre-cuts simplify the fabric selection process and often lead to beautifully cohesive quilts.
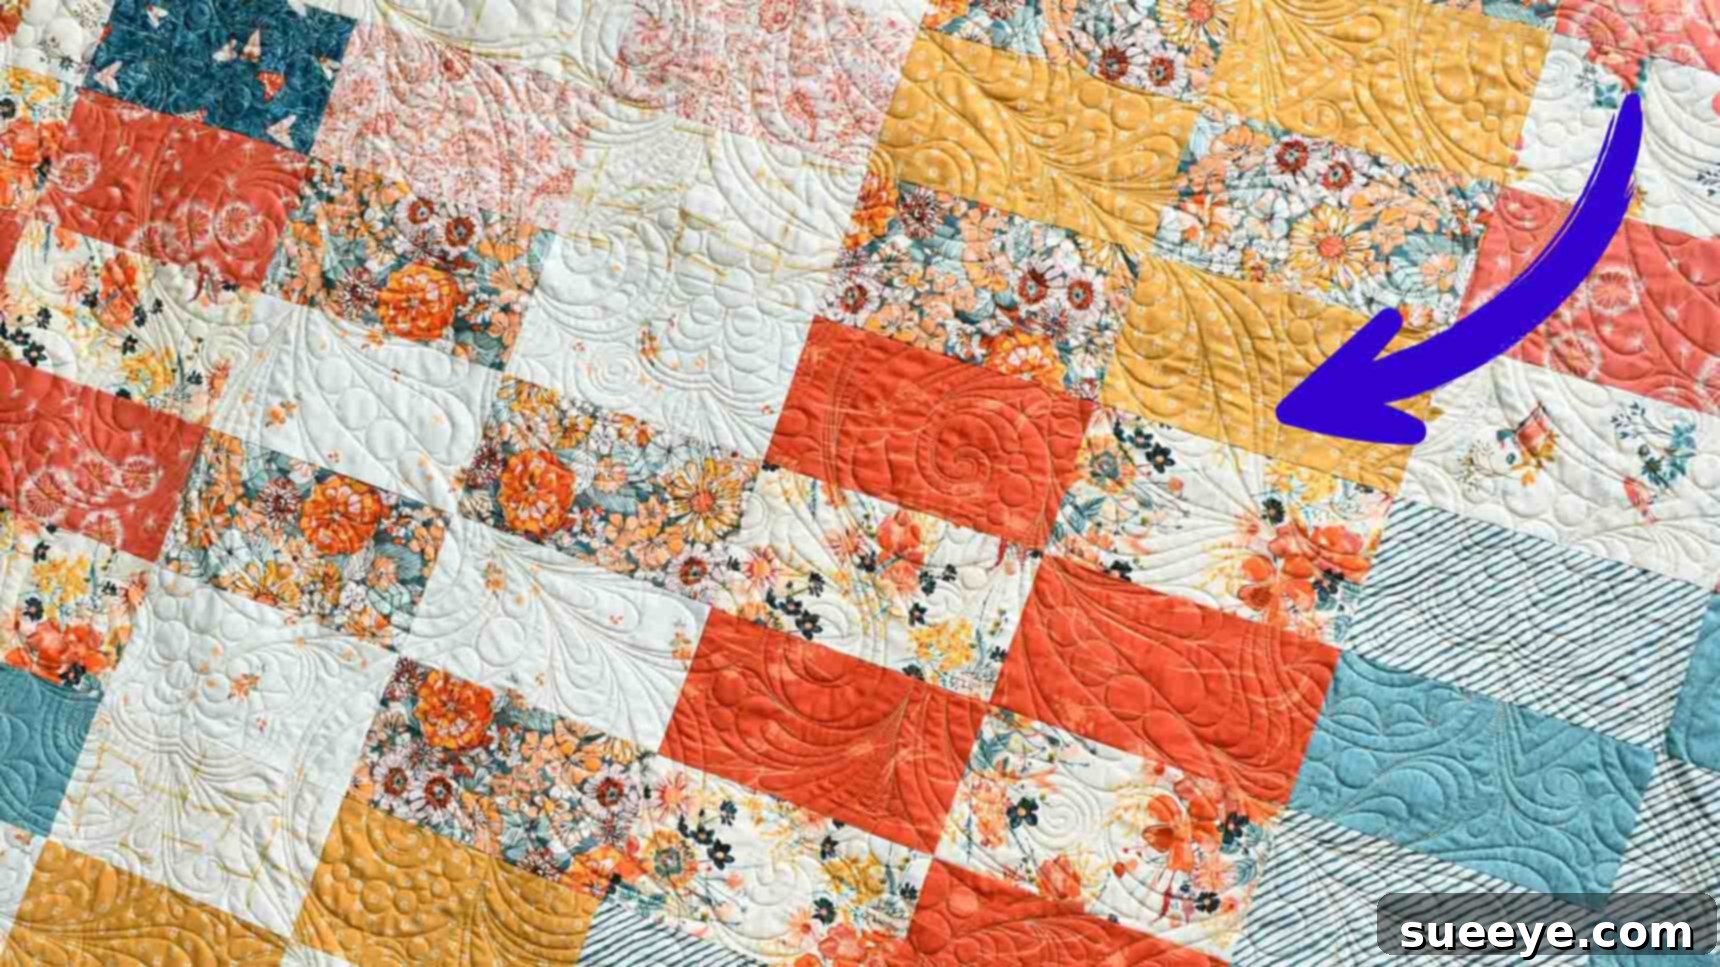
Just recently, while exploring the vibrant world of quilting tutorials on YouTube, I stumbled upon an absolute gem from Moonkin Stitchery. This particular design, a “Checkered Brick Quilt,” immediately caught my eye because it promised simplicity and a stunning finished look. What truly made this project stand out was its exclusive use of fat quarters – those lovely 18″ x 20″ rectangles of fabric that quilters adore. The process was so incredibly simple and engaging that I managed to complete the quilt top in a single day!
This Checkered Brick Quilt proved to be the perfect canvas for showcasing my collection of fat quarters, especially those with big, bright, and bold prints that deserve to be highlighted. Its design allows those vibrant patterns to truly pop, creating a dynamic and cheerful aesthetic. What’s more, this versatile pattern comes with a free guide for various dimensions, meaning you can easily scale it up or down to create anything from a cozy baby quilt to a generous bedspread.
Are you ready to create a beautiful, personalized quilt that’s perfect for gifting or adding a touch of handmade warmth to your own home? Whether you prefer visual learning or detailed written instructions, this guide has you covered. Dive into the step-by-step process below, or follow along with the video tutorial provided by Moonkin Stitchery. Let’s transform those beautiful fat quarters into a cherished quilted masterpiece!
Master the Checkered Brick Quilt: An Easy Fat Quarter Project for Beginners
The Checkered Brick Quilt is more than just a pattern; it’s an invitation for beginners to experience the joy of quilting with minimal fuss and maximum satisfaction. Its straightforward piecing technique builds confidence, while the quick completion time keeps you motivated. By utilizing fat quarters, you benefit from pre-coordinated fabric bundles, making color selection a breeze and ensuring your quilt has a cohesive, professional look. This project is ideal for showcasing beautiful prints, making it a fantastic way to bring your fabric stash to life.
Materials You’ll Need for Your Checkered Brick Quilt
Before you dive into cutting and sewing, gathering all your materials is crucial. This list provides the essentials for a throw-sized quilt, but remember that the beauty of this pattern lies in its adaptability. You can easily adjust the quantities for larger or smaller projects, and the free pattern linked below offers guidance for various dimensions.
For a Cozy Throw Size (Approximately 54″ x 68″):
- 12 pcs. Print Fat Quarters (18″ x 20″ rectangles): These are the stars of your quilt! Choose a variety of prints and colors that you love and that will contrast nicely to create the “checkered brick” effect. Consider a mix of large and small prints, or even some solids, to add depth and interest.
- 1/2 yard Binding Fabric: This fabric will frame your quilt, giving it a neat, finished edge. Choose a color that complements your fat quarters and provides a cohesive border.
- 3 & 3/4 yards Backing Fabric: The backing is the bottom layer of your quilt. It can be a single piece of wide fabric or multiple pieces sewn together to reach the required dimensions. Don’t be afraid to choose a fun coordinating print for the back, too!
- 66″ x 80″ Batting: This is the middle layer that provides warmth, loft, and allows for quilting stitches. Common types include cotton, polyester, or blends. Cotton is popular for its natural feel, while polyester offers more loft.
- Access to the Free Pattern: Ensure you have the pattern on hand for detailed instructions and sizing guides. You can download it directly from Moonkin Stitchery.
- (Click here for the free pattern)
Essential Quilting Tools (Not listed above but highly recommended):
- Sewing Machine: A basic machine with a straight stitch capability is all you need. Ensure it’s in good working order and threaded correctly.
- Rotary Cutter: A sharp rotary cutter (45mm or 60mm) is indispensable for precise, efficient cutting.
- Self-Healing Cutting Mat: Protect your work surface and your rotary blade.
- Quilting Rulers: A large rectangular ruler (e.g., 6″ x 24″) and a smaller square ruler (e.g., 6.5″ x 6.5″) are incredibly helpful for accurate cuts.
- Fabric Scissors: For any smaller snips or trimming threads.
- Pins or Fabric Clips: To hold fabric pieces together before sewing.
- Iron and Ironing Board: Absolutely critical for crisp seams and flat blocks.
- Coordinating Thread: High-quality polyester or cotton thread that matches or blends with your fabrics.
- Seam Ripper: Every quilter needs one for those inevitable “learning opportunities.”
Directions: Your Step-by-Step Quilting Journey
Quilting is a process that rewards patience and precision. Following these steps carefully will ensure your Checkered Brick Quilt comes together beautifully. Remember, the key to success in quilting, especially for beginners, is accurate cutting and pressing.
Step 1: Preparing Your Fabric and Assembling the First Blocks
Precision begins even before the first stitch. Proper preparation of your fat quarters is fundamental for accurate block assembly.
- Ironing and Squaring Up: To begin, take each of your fat quarters and iron them perfectly flat. Any wrinkles or creases can lead to inaccurate cuts. Once flat, “square up” your fat quarters. This means trimming off any uneven edges to ensure you have a perfect 18″ x 20″ rectangle (or close to it, depending on how the fat quarter was cut). Use your rotary cutter, cutting mat, and a long quilting ruler to achieve clean, straight edges. This initial squaring is crucial for all subsequent cuts to be precise.
- Subcutting Rectangles: With your edges cleaned up and squared, proceed to subcut eight (8) 5″ x 9″ rectangles from each fat quarter. To maximize efficiency and accuracy, you can layer a couple of fat quarters if they are perfectly aligned. Always use your ruler to measure carefully and your rotary cutter for clean, straight cuts. You will end up with a substantial number of these rectangles, which form the building blocks of your quilt.
- Selecting Fabrics for Contrast: Now comes the fun part of fabric selection for your individual blocks. From your stack of subcut rectangles, select two different prints that offer good contrast. For instance, pick four 5″ x 9″ rectangles from one print and four from a distinctly different, yet complementary, print. The contrast is vital for the checkerboard pattern to stand out effectively.
- Laying Out the Checkerboard Pattern: Arrange these eight rectangles (four of each print) on a flat surface, such as your design wall or floor, to form a small checkerboard pattern. A typical arrangement might be:
Print A | Print B
        Print B | Print A
        Print A | Print B
        Print B | Print A
Visualize how the colors and patterns interact to ensure you’re happy with the contrast and placement.
- Sewing Blocks Together to Form Rows: Once you’re satisfied with your layout, carefully pick up the rectangles in each row, keeping them in order. Sew the rectangles within each row together using a precise 1/4-inch seam allowance. This is the standard seam allowance in quilting and maintaining it consistently is key to your blocks squaring up correctly. After sewing each row, press the seams. For checkerboard patterns, often pressing seams in opposite directions for alternating rows (e.g., row 1 seams to the left, row 2 seams to the right) helps when joining rows, as it allows the seams to “nest.”
- Completing the Quilt Block: Lastly, with your rows sewn and pressed, sew those rows together to complete your individual quilt block. Again, use a 1/4-inch seam allowance. Take care to align the seam intersections precisely to ensure your checkerboard pattern is perfectly matched. Press the final seams of the block, either open or to one side, whichever preference you have. Aim for a flat, square block.
Step 2: Assembling Your Quilt Top
Once you have a stack of beautifully crafted individual quilt blocks, it’s time to bring them all together to form the complete quilt top.
- Repeat and Multiply: Continue the process described in Step 1, making as many quilt blocks as required for the specific quilt size you are aiming for. The free pattern will provide guidance on the exact number of blocks needed for each dimension. Take your time, maintain accuracy, and enjoy watching your stack of blocks grow!
- Strategic Quilt Layout: Once all of your individual blocks are complete, lay them out on a large flat surface – a design wall, the floor, or a bed works perfectly. This step is crucial for visualizing your final quilt. Arrange your blocks side by side, experimenting with different placements until you achieve a layout that is aesthetically pleasing and balanced. Pay attention to how colors and patterns flow from one block to the next. This is your last chance to make adjustments before sewing!
- Sewing Blocks into Rows: Carefully, row by row, pick up your arranged blocks, ensuring they stay in the correct order. Pin the blocks within each row together, matching all seam intersections precisely. Sew these blocks together using that consistent 1/4-inch seam allowance. After each row is complete, press your seams. Again, considering pressing directions (e.g., alternating for each row) can make joining rows in the next step smoother.
- Joining Rows to Complete the Quilt Top: With all your rows sewn and pressed, it’s time to join them to form the entire quilt top. Lay out your rows and pin them together, taking special care to align the seam allowances between rows. Accurate alignment here will ensure your quilt top is straight and the pattern flows seamlessly. Sew the rows together with a 1/4-inch seam. Once all rows are joined, give your entire quilt top a final, thorough press from the front and back. This will flatten all the seams and make your quilt top look crisp and professional, ready for the next stages of quilting.
Beyond the Quilt Top: Finishing Your Checkered Brick Quilt
Congratulations, you’ve assembled a beautiful quilt top! But the journey doesn’t end there. To transform your quilt top into a finished, cozy heirloom, you’ll need to complete a few more essential steps: basting, quilting, and binding.
Basting Your Quilt Layers
Basting is the process of temporarily securing your three quilt layers together: the backing, the batting, and the quilt top. This prevents shifting during the quilting process. Lay your backing fabric right side down, smooth it out completely. Place your batting on top of the backing, also smoothed. Finally, center your quilt top right side up on top of the batting. You can baste your layers using several methods:
- Pin Basting: Use curved safety pins placed every few inches across the entire quilt.
- Spray Basting: Use a temporary fabric adhesive spray to glue the layers together.
- Thread Basting: Hand-sewing long, loose stitches through all layers.
Ensure there are no wrinkles or puckers in any layer before securing them.
Quilting Your Layers Together
Quilting is the decorative stitching that holds all three layers permanently together, giving your quilt texture and durability. This can be as simple or as intricate as you like. For a beginner-friendly approach:
- Stitch-in-the-Ditch: Quilt along the seam lines of your pieced blocks. This is a subtle yet effective method that helps define the piecing.
- Straight-Line Quilting: Quilt parallel lines across your quilt, either horizontally, vertically, or diagonally. You can use a walking foot on your sewing machine to help feed the layers evenly.
- Free-Motion Quilting: This involves lowering your feed dogs and moving the quilt freely under the needle to create custom designs. It requires practice but offers immense creative freedom.
Choose a quilting design that you feel comfortable executing. The goal is to secure the layers and add to the overall aesthetic of your quilt.
Adding the Binding
The binding is the final border that encases the raw edges of your quilt, providing a clean, durable finish. Typically, binding strips are cut 2.5 inches wide, sewn together end-to-end to create one long strip, and then folded in half lengthwise. You will:
- Sew the raw edge of the binding to the raw edge of your quilt, usually with a 1/4-inch seam.
- Miter the corners for a professional look.
- Flip the folded binding to the back of the quilt and secure it either by hand-stitching for an invisible finish or by machine-stitching for speed and durability.
Consider a Quilt Label
While optional, adding a small fabric label to the back of your quilt is a wonderful tradition. Include information like your name, the date you finished the quilt, and perhaps the recipient’s name. It turns your handmade item into a cherished family heirloom.
Beginner-Friendly Checkered Brick Quilt Tutorial
For those who benefit from visual learning, Moonkin Stitchery’s YouTube tutorial offers an excellent companion to these written instructions. Watching the steps in action can clarify techniques and provide valuable insights into achieving precise cuts and perfect seams. Don’t hesitate to pause, rewind, and rewatch sections as needed. A visual demonstration can be incredibly helpful for understanding fabric orientation, pressing techniques, and sewing nuances.
Tips for Quilting Success: Elevate Your Craft
Even with simple patterns, a few universal quilting tips can significantly improve your results and make the process more enjoyable:
- Accuracy is Paramount: In quilting, precision is key. A scant 1/4-inch seam allowance is essential. Practice sewing a perfect 1/4-inch seam using a seam guide or a special quilting foot if your machine has one. Tiny variations can throw off an entire quilt.
- Pressing, Not Ironing: Understand the difference. When piecing, “press” your seams by lifting and placing the iron rather than sliding it. Sliding can stretch and distort your fabric, especially on the bias. Press for crisp, flat seams after every stitch.
- Invest in Quality Tools (Gradually): While you don’t need everything at once, a good rotary cutter, sharp blade, quality mat, and clear rulers are worth the investment. They make cutting more accurate and less frustrating.
- Test Your Stitch: Before starting on your quilt, sew a few practice seams on scrap fabric. Check your tension and seam allowance to ensure everything is perfect.
- Take Your Time: Quilting is a marathon, not a sprint. Rushing leads to mistakes. Enjoy the process, the tactile feel of the fabric, and the satisfaction of watching your creation come to life.
- Don’t Fear the Seam Ripper: Every quilter, no matter how experienced, uses a seam ripper. View it as a tool for improvement, not a sign of failure. It’s better to fix a mistake early than to live with a crooked block.
- Label Your Quilt: Make it a habit to add a label to the back of your finished quilt with your name, the date, and any other special notes. It adds a personal touch and creates a legacy for your beautiful handmade item.
- Join a Community: Connect with other quilters online or in person. Sharing tips, celebrating successes, and troubleshooting challenges can be incredibly supportive and inspiring.
Your Quilting Journey Begins Here!
The Checkered Brick Quilt pattern is truly a fantastic starting point for anyone new to the world of quilting. It offers an ideal balance of simplicity, speed, and stunning visual appeal, all while making excellent use of those beloved fat quarters. You’ll gain valuable experience in accurate cutting, precise piecing, and the importance of pressing – fundamental skills that will serve you well in all your future quilting endeavors.
Don’t let the idea of making a quilt intimidate you. With this clear, step-by-step guide and the helpful video tutorial from Moonkin Stitchery, you have all the resources you need to succeed. Imagine the satisfaction of holding a beautiful, handmade quilt that you created yourself! It’s not just a blanket; it’s a tangible representation of your creativity, patience, and love.
So, gather your favorite fat quarters, set up your sewing space, and prepare to embark on a truly rewarding creative adventure. We can’t wait to see your unique Checkered Brick Quilts come to life! Share your progress and finished projects – inspire others with your handmade joy!