
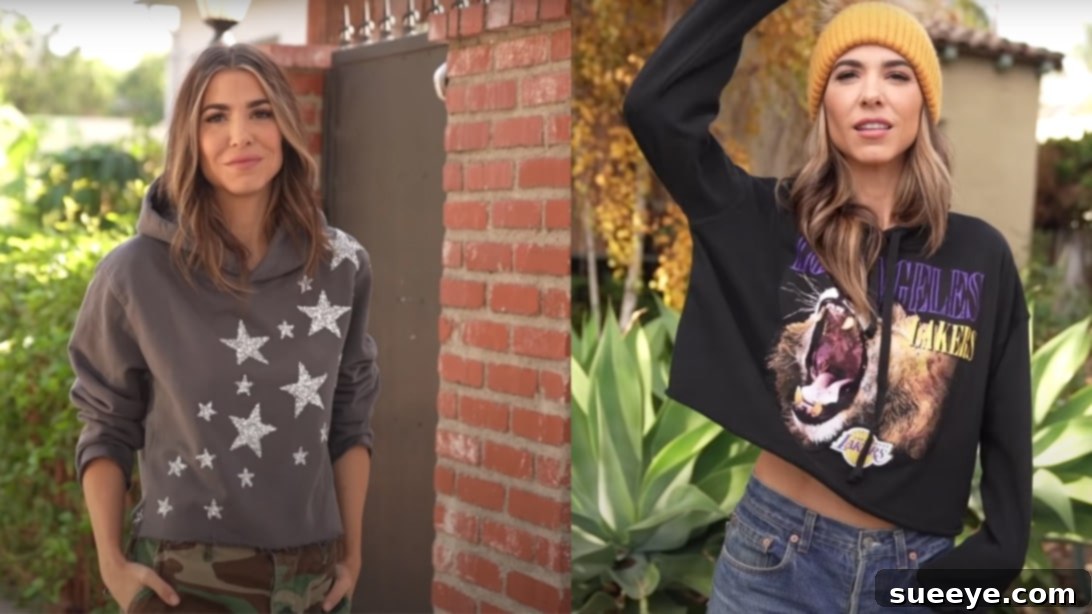
There’s a special joy in wearing clothes that truly reflect your personality, pieces that carry a story and a touch of your own creativity. For me, customizing my sweatshirts is more than just a hobby; it’s a way to infuse my wardrobe with unique, sentimental items. I often find myself with a collection of thrifted or old sweatshirts, brimming with potential but lacking that distinct spark. That’s why I was thrilled to discover The DIY Designer’s channel on YouTube, a treasure trove of innovative ideas for upcycling plain sweatshirts. Her aesthetic perfectly aligns with my own, making it a truly inspiring resource. If you’re ready to transform your ‘boring’ sweatshirts into fabulous, one-of-a-kind pieces, let’s dive into five incredible DIY methods that will empower you to unleash your inner fashion designer!
Unleash Your Inner Designer: 5 Creative Ways to Upcycle Your Sweatshirts
Why settle for mass-produced fashion when you can create something truly original? Upcycling isn’t just a trend; it’s a sustainable and incredibly rewarding way to refresh your wardrobe, save money, and express your unique style. These five DIY techniques will guide you through transforming any basic sweatshirt into a personalized masterpiece, from subtle fit adjustments to bold artistic statements.
1. The Perfect Fit & Stylish Cutouts: Mastering Sweatshirt Silhouettes
One of the easiest yet most impactful ways to elevate a simple sweatshirt is by altering its fit and creating intentional cutouts. This method allows you to tailor an oversized garment to your body or add fashion-forward details like an off-shoulder neckline or a cropped hem. It’s about taking control of the silhouette and making it distinctly yours.
Materials for Fit & Cutouts:
- Loose-fitting sweatshirt (the perfect canvas!)
- Sharp fabric scissors
- Pins
- Fabric chalk or washable marker
- Sewing machine or needle and thread
- Cloth iron
- Ironing mat
- Measuring tape or ruler
Directions for Shoulder & Neckline Adjustments:
- Try On and Mark: Begin by trying on your chosen sweatshirt. Stand in front of a mirror and use pins to mark the areas you wish to adjust, particularly around the shoulders and neckline. Do you want a wider boat neck, a chic off-shoulder look, or a flattering V-neck? Mark these intentions carefully.
- Precise Cutting: Take off the sweatshirt and lay it flat. For a classic off-shoulder or boat neck, carefully cut a gentle slope from your marked point on the shoulder down towards the neckband, about 1.5 to 2 inches deep. For a V-neck, fold the sweatshirt in half lengthwise and cut a ‘V’ shape from the center. Always start with smaller cuts; you can always remove more fabric, but you can’t put it back!
- Refine the Fit: Try the sweatshirt on again. Assess if the adjustments are just right or if further trimming is needed. Use pins to fine-tune the fit. When satisfied, lay it flat again and make any final, precise cuts in layers to ensure symmetry.
- Secure the Edges (Optional but Recommended): To prevent fraying and give your new neckline a finished look, you can sew a simple hem around the cut edges. For knit fabrics like sweatshirts, a zigzag stitch or an overlock stitch on a sewing machine works best. If hand-sewing, use a small whipstitch or running stitch. This step is crucial for durability and a professional finish.
Directions for Hem Adjustments (Cropping & Styling):
- Determine New Hem Height: Decide where you want your new hem to fall. Whether you’re going for a trendy crop top or a slightly shortened look, fold the hem to your desired height and pin it securely all the way around.
- Sewing the New Hem: When sewing, it’s often best to start your needle right where an existing seam already exists, such as a side seam. Carefully sew around the sweatshirt, following your pinned line. A straight stitch works well here, but a zigzag stitch offers more stretch for knit fabrics.
- Test and Trim: Try the shirt on to confirm the fit and length. If it’s perfect, carefully cut off the excess fabric below your new seam, leaving a tidy half-inch seam allowance.
- Iron for a Crisp Finish: Finally, it’s time to iron. Lay the sweatshirt flat on your ironing mat. When pressing the new hem, make sure to push the seam allowance up towards the body of the shirt as you iron. This technique helps to press out any built-up gatherings of the fabric, ensuring a smooth, clean, and professional-looking hem.
2. Sparkling Embellishments: Rhinestones, Patches & More for Instant Glam
If you’re looking to add a touch of sparkle, personality, or a bold statement, iron-on rhinestones, patches, and other embellishments are your best friends. This method is fantastic for transforming a plain sweatshirt into a focal point of your outfit with minimal effort.
Materials for Embellishments:
- Sweatshirt (any color or style)
- Iron-on rhinestone patches or individual rhinestones
- Assorted decorative patches (embroidered, chenille, etc.)
- Fabric tack or washable fabric glue (for initial placement)
- Cloth iron
- Ironing mat
- Parchment paper or thin cloth
- Ruler or measuring tape (for precise placement)
Directions for Rhinestone Application:
- Unpack and Design: Start by unpacking your chosen rhinestone patches or individual rhinestones. Lay your sweatshirt flat and begin to arrange your embellishments. Be as creative as you like! Consider symmetrical designs, scattered patterns, or a bold statement across the chest or sleeves.
- Secure Placement: Once you’re happy with your design, use small dots of fabric tack or washable fabric glue to temporarily hold the rhinestones in place. This is especially useful for individual rhinestones or intricate patterns, preventing them from shifting during the ironing process. Unlike pins, fabric tack won’t leave holes.
- Ironing for Adhesion: Flip the sweatshirt inside out. Place it on your ironing mat. Position a piece of parchment paper or a thin pressing cloth over the area where the rhinestones are located on the inside. This protects the fabric. Carefully iron from the back (inside out). The heat from the iron will activate and stimulate the glue on the rhinestones’ backs, ensuring they adhere firmly to the fabric. Apply firm, even pressure for 15-20 seconds for each section, avoiding sliding the iron.
- Cool and Check: Allow the fabric and rhinestones to cool completely before flipping the shirt back to its right side. Gently test the adhesion of a few rhinestones. If any feel loose, repeat the ironing process on that specific area.
Directions for Iron-On Patches:
For iron-on patches, the process is similar to rhinestones. Place the patch, cover with a thin cloth, and iron from the right side according to the patch’s specific instructions. For extra security, especially on frequently washed items, you can hand-sew a few stitches around the edges of the patch after ironing.
3. The Distressed & Edgy Look: Creating a Worn-In Vibe
Achieve that effortlessly cool, lived-in aesthetic by distressing your sweatshirt. This method is perfect for creating a vintage feel, adding texture, and giving a rebel edge to any plain garment. It’s about controlled destruction for maximum style impact.
Materials for Distressing:
- Sweatshirt (preferably cotton or a cotton blend for best results)
- Sharp fabric scissors
- Razor blade or craft knife
- Pumice stone or fine-grit sandpaper
- Wire brush or cheese grater (optional, for intense fraying)
- Bleach (optional, use with extreme caution and ventilation)
- Plastic gloves (if using bleach)
- Newspaper or cardboard (to protect surfaces)
Directions for Shredding, Cutting & Fraying:
- Plan Your Distressing: Lay your sweatshirt flat. Decide where you want the distressing to be. Common areas include the neckline, cuffs, hem, elbows, and shoulders. Consider making small, strategic cuts or larger holes, depending on your desired look.
- Making Cuts: Use sharp fabric scissors or a craft knife to make small horizontal slits, small holes, or to cut away sections of fabric. For a natural, worn look, vary the length and placement of your cuts. You can also create small slits along the seams for subtle detailing.
- Fraying Edges: To make the cuts look natural and frayed, gently pull at the threads around the edges of your cuts. For more intense fraying, use a razor blade, a wire brush, or even a cheese grater to rough up the fabric around the cuts and along the edges of the cuffs and hem. This process breaks down the fibers, creating that desirable worn-in effect.
- Softening and Weathering: Use a pumice stone or sandpaper to gently rub areas of the sweatshirt, particularly along seams, edges, and high-wear spots like the elbows. This will soften the fabric and create a faded, weathered appearance.
- Optional: Bleach Splatter/Wash (Use with Extreme Caution!): If you want to add a faded or tie-dye effect, you can carefully use diluted bleach. Always wear gloves, work in a well-ventilated area, and protect all surfaces with newspaper. Lightly splatter diluted bleach onto specific areas or soak parts of the sweatshirt in a diluted bleach solution for a few minutes. Immediately rinse thoroughly with water and then wash the sweatshirt with regular detergent to neutralize the bleach.
- Wash and Dry: After distressing, wash your sweatshirt. The agitation in the washing machine will enhance the fraying and softening, making your distressed look even more authentic.
4. Custom Designs with Fabric Paint & Stencils: Wearable Art
Unleash your artistic side by transforming your sweatshirt into a unique canvas using fabric paints and stencils. This method allows for endless creative possibilities, from bold graphic designs to intricate patterns or personalized text.
Materials for Fabric Painting:
- Sweatshirt (pre-washed and dried)
- Fabric paints (acrylic-based fabric paints are best)
- Paintbrushes, sponges, or fabric markers
- Stencils (pre-made or cut your own from stencil film/cardboard)
- Cardboard or plastic insert (to place inside the sweatshirt)
- Masking tape or painter’s tape
- Iron or heat-setting tool
Directions for Fabric Painting:
- Prepare Your Sweatshirt: Always start with a clean, dry, and pre-washed sweatshirt. Place a piece of cardboard or plastic inside the sweatshirt, directly under the area you plan to paint. This prevents the paint from bleeding through to the back layer.
- Secure Your Stencil: Position your chosen stencil on the sweatshirt. Use masking tape to secure its edges firmly to the fabric, ensuring there are no gaps for paint to seep under.
- Apply Fabric Paint: Dip your brush or sponge into the fabric paint. For stenciling, it’s often best to use a dabbing motion rather than brushing, which can push paint under the stencil. Apply thin, even layers. Multiple thin layers are better than one thick layer, which can crack. If freehand painting, let your creativity flow!
- Dry and Remove Stencil: Carefully remove the stencil while the paint is still slightly wet (this helps prevent lifting dried paint edges). Allow the painted design to air dry completely according to the fabric paint manufacturer’s instructions, typically 24-72 hours.
- Heat Set the Design: Once fully dry, it’s crucial to heat set the fabric paint to make it permanent and washable. Place a thin cloth or parchment paper over your design. Using an iron set to the recommended temperature for your fabric (usually cotton setting with no steam), press firmly over the design for 30-60 seconds, lifting and moving the iron to cover the entire painted area. Follow the paint’s specific heat-setting instructions.
- Care Instructions: After heat-setting, your customized sweatshirt is ready to wear! For best results, wash inside out on a gentle cycle with cold water and air dry or tumble dry on low.
5. Color Transformation: Tie-Dye & Dyeing Techniques
Revitalize a drab sweatshirt with a burst of color through classic tie-dye or other dyeing techniques. This method is incredibly fun, produces vibrant results, and ensures no two sweatshirts are ever exactly alike, making each piece truly unique.
Materials for Tie-Dye & Dyeing:
- Sweatshirt (natural fibers like cotton work best for vibrant colors)
- Tie-dye kit (includes dyes, soda ash, rubber bands, gloves) OR individual fabric dyes
- Plastic sheeting or garbage bags (to protect your work surface)
- Buckets or squeeze bottles (for mixing and applying dyes)
- Salt (often used as a fixative for certain dyes)
- Plastic gloves
- Old clothes or apron
Directions for Tie-Dye:
- Prepare Your Workspace and Sweatshirt: Lay down plastic sheeting to protect your work area. Wear old clothes and gloves. Pre-wash your sweatshirt without fabric softener. For most tie-dye kits, the sweatshirt should be damp (but not dripping wet) for the dye to spread effectively. Some kits require soaking in a soda ash solution first – always follow your kit’s instructions!
- Folding and Binding Techniques: This is where the magic happens!
- Spiral: Lay the sweatshirt flat. Pinch the fabric in the center and twist it clockwise, gathering the fabric into a flat spiral. Secure with 3-4 rubber bands forming wedges.
- Crumple: Simply crumple the damp sweatshirt into a tight ball and secure it randomly with several rubber bands.
- Stripes/Accordion Fold: Fold the sweatshirt in an accordion style, then secure it with rubber bands at regular intervals to create stripes.
- Experiment with other techniques like bullseye, heart shape, or scrunch.
- Apply Dyes: Mix your dyes according to the kit instructions. Wearing gloves, apply the dyes to different sections of your bound sweatshirt using squeeze bottles or by carefully dipping sections into buckets of dye. Be strategic with your color placement to achieve your desired pattern.
- Process and Set: Once all colors are applied, place the dyed sweatshirt in a plastic bag or wrap it in plastic cling film. Allow it to sit for the recommended processing time, usually 6-24 hours. The longer it sits, the more vibrant the colors will be.
- Rinse and Wash: Wearing gloves, rinse the sweatshirt under cold running water (while still bound with rubber bands) until the water runs clear. Then, remove the rubber bands and continue rinsing until all excess dye is gone. Finally, wash the sweatshirt in a washing machine on a cold, gentle cycle with a small amount of mild detergent. For the first few washes, wash it separately to prevent any residual dye from coloring other clothes. Air dry or tumble dry on low.
By experimenting with these five DIY methods, you’ll not only refresh your wardrobe but also discover the immense satisfaction of creating something truly unique. Upcycling is a journey of creativity, sustainability, and personal expression. So grab those ‘boring’ sweatshirts, unleash your imagination, and start crafting pieces that scream YOU!