
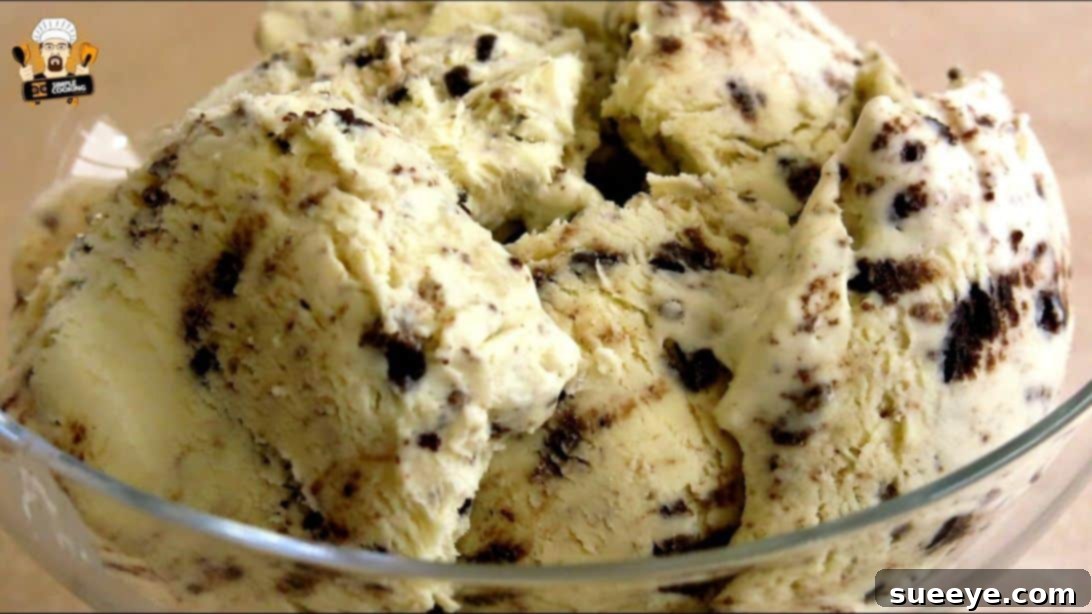
Indulge in Homemade Bliss: The Easiest 3-Ingredient Oreo Ice Cream Recipe
There’s something truly magical about ice cream. It’s more than just a cold treat; it’s a spoonful of pure comfort, a delightful escape on a tiring day, and an undisputed champion of desserts. For many, including myself, it’s an absolute favorite, a go-to solace that instantly brightens any moment. While store-bought options are plentiful, there’s an unparalleled satisfaction that comes from creating your own culinary masterpieces right in your kitchen. Imagine a dessert that combines the rich, satisfying crunch of America’s favorite cookie with the silky smoothness of homemade ice cream, all without the need for a specialized ice cream maker. Sounds too good to be true? Think again!
Last weekend, with a little extra time on my hands and a craving for something extraordinary, I embarked on a delightful culinary adventure. I stumbled upon an incredibly simple yet utterly brilliant recipe for 3-ingredient homemade Oreo ice cream by SimpleCookingChannel on YouTube. Skeptical but intrigued by the promise of such simplicity, I decided to give it a whirl. And wow, was I pleasantly surprised! Who knew that crafting such a decadent dessert could be so effortless? The preparation took me less than 15 minutes, and the results were nothing short of spectacular. This recipe isn’t just easy; it’s a game-changer, delivering an incredibly creamy, rich, and utterly delicious Oreo ice cream that will have you wondering why you ever bought it from a store. It’s truly a must-try experience for any dessert enthusiast!
Why This 3-Ingredient Oreo Ice Cream Recipe is a Must-Try
Beyond its incredibly simple ingredient list, this no-churn Oreo ice cream recipe stands out for several compelling reasons:
- Effortless Preparation: Forget the complicated steps and specialized equipment. If you can whisk and fold, you can make this ice cream.
- No Ice Cream Maker Required: This is the ultimate “no-churn” recipe, meaning you won’t need any expensive gadgets. Just a bowl, a whisk (or an electric mixer), and a freezer-safe container.
- Rich and Creamy Texture: Despite its simplicity, the combination of thick cream and sweetened condensed milk creates an incredibly smooth, luxurious texture that rivals premium store-bought brands.
- Customizable Delight: While Oreo is the star, this base recipe is fantastic for experimenting with other cookies, candies, or flavorings.
- Perfect for Any Occasion: Whether it’s a casual family treat, a potluck dessert, or a sweet indulgence after a long day, this homemade ice cream fits every bill.
- Kid-Friendly Fun: Involve the little ones in crushing the Oreos or mixing ingredients for a fun, interactive kitchen activity.
Ready to create your own batch of frozen happiness? Let’s dive into the simple ingredients you’ll need.
The Essential 3 Ingredients for Your Oreo Ice Cream
The beauty of this recipe lies in its minimalist approach. With just three core ingredients, you’re on your way to a gourmet dessert experience. Quality matters here, so choose your ingredients wisely for the best possible outcome.
- 6 to 12 Oreo Cookies: The star of the show! The quantity can be adjusted based on your preference for cookie chunks. Classic Oreos work wonderfully, but feel free to experiment with different Oreo flavors for a unique twist.
- 2 ½ cups of Thick Cream: This is the foundation of your ice cream’s creamy texture. You can use full-fat pure cream or heavy whipping cream (at least 35% milk fat). Ensure it’s very cold for optimal whipping. The higher the fat content, the richer and more stable your whipped cream will be.
- 1 can (13.9 oz) of Sweetened Condensed Milk: This ingredient is crucial for sweetness and to prevent ice crystal formation, giving your ice cream that desirable smooth, scoopable consistency without an ice cream machine. Do not substitute with evaporated milk or regular milk, as they will not yield the same results.
That’s it! Just three simple items to unlock a world of creamy, crunchy, Oreo-filled delight.
Tools You’ll Need
While an ice cream maker is explicitly not required, a few basic kitchen tools will make the process even smoother:
- Large Mixing Bowl: Preferably chilled, especially for whipping the cream.
- Electric Mixer or Hand Whisk: For whipping the cream to stiff peaks.
- Food Processor (Optional): For crushing Oreos quickly and evenly. Alternatively, a Ziploc bag and a rolling pin work just as well.
- Silicone Spatula: Ideal for gently folding ingredients together without deflating the whipped cream.
- Freezer-Safe Container with Lid: A loaf pan, a plastic storage container, or an airtight glass dish will work perfectly for freezing your ice cream.
Step-by-Step Guide: Crafting Your Homemade Oreo Ice Cream
Follow these simple steps to create a dessert that will impress everyone, including yourself!
Step 1: Prepare Your Oreo Cookies
The first step is to transform your beloved Oreo cookies into delicious crumbs or chunks. Take six to twelve pieces of Oreo cookies, depending on how cookie-dense you want your ice cream to be. You have a couple of options for crushing them:
- Using a Food Processor: Place the Oreos directly into your food processor. Pulse them until they reach your desired consistency. For a smooth ice cream with scattered cookie bits, aim for fine crumbs. If you prefer a delightful textural contrast, leave some larger chunks in the mix. This method is quick and efficient.
- Manual Crushing: If you don’t have a food processor, no problem! Place the Oreos in a sturdy zip-lock bag. Seal the bag, ensuring most of the air is removed. Then, use a rolling pin, a meat mallet, or even a glass with a flat bottom to crush them. Apply steady pressure and roll or tap until you achieve the desired level of chunkiness. This can be quite satisfying and allows for precise control over the size of your cookie pieces.
Once crushed, set your Oreo pieces aside. The anticipation builds with every crumb!
Step 2: Whip the Thick Cream to Perfection
This step is crucial for achieving that light, airy, and creamy texture. Pour your 2 ½ cups of very cold thick cream (pure cream or heavy whipping cream) into a large mixing bowl. For best results, consider chilling your bowl and whisk attachments in the freezer for 10-15 minutes beforehand. This helps the cream whip up faster and hold its volume better.
Using an electric mixer (or a hand whisk if you’re feeling energetic), begin whisking the cream on medium speed. Gradually increase the speed to high. Continue whisking until the cream transforms from a liquid into a fluffy, voluminous, and whipped consistency. You’re looking for stiff peaks – when you lift the whisk, the cream should hold its shape firmly without collapsing. Be careful not to over-whisk, as this can turn it into butter.
Step 3: Gently Combine the Flavors
Now for the magical fusion! To your beautifully whipped cream, add the entire can of sweetened condensed milk. This provides both the essential sweetness and the non-crystallizing factor that gives your no-churn ice cream its smooth texture. Next, introduce your crushed Oreos. You can add all the Oreo crumbs and chunks at once, or if you prefer a more even distribution or wish to reserve some for layering, you can gradually fold them in.
Using a silicone spatula, gently fold all the ingredients together. The key word here is “fold,” not stir vigorously. You want to incorporate the condensed milk and Oreos into the whipped cream without deflating the air you’ve just whipped in. Use an upward motion from the bottom of the bowl, bringing the mixture over the top, turning the bowl as you go. Continue until everything is just combined and you see no streaks of condensed milk. Overmixing can lead to a less airy, denser ice cream.
Step 4: Freeze to Perfection
Once your irresistible Oreo ice cream base is perfectly mixed, it’s time for the final, most patient step. Transfer the mixture into a freezer-safe container with a tight-fitting lid. This could be a loaf pan, a plastic container, or a reusable airtight glass dish. Smooth out the top gently with your spatula.
Place the container in your freezer. For the absolute best consistency – rich, creamy, and perfectly scoopable – allow it to freeze overnight, or for a minimum of 6-8 hours. The longer it freezes, the firmer and more stable it will become. Once fully frozen, your homemade 3-ingredient Oreo ice cream is ready to be served and thoroughly enjoyed!
Tips for the Best Homemade Oreo Ice Cream
While this recipe is incredibly forgiving, a few expert tips can elevate your homemade ice cream from great to absolutely phenomenal:
- Chill Your Equipment: For faster and more stable whipped cream, place your mixing bowl and whisk attachments in the freezer for 10-15 minutes before whipping.
- Use Cold Cream: Ensure your heavy cream is straight from the fridge and very cold. Warm cream simply won’t whip up as well or hold its volume.
- Don’t Overmix the Whipped Cream: Stop whisking as soon as stiff peaks form. Overmixing can cause the cream to separate and become grainy.
- Gently Fold: When incorporating the condensed milk and Oreos, use a gentle folding technique with a spatula. This preserves the air in the whipped cream, which is vital for the ice cream’s light and airy texture.
- Airtight Container is Key: Store your ice cream in an airtight, freezer-safe container to prevent ice crystals from forming on the surface and to keep it fresh.
- Patience for Freezing: Resist the urge to peek or scoop too early. Allowing it to freeze overnight ensures the best texture and firmness.
- Let it Soften Slightly: For easier scooping, let the ice cream sit at room temperature for 5-10 minutes before serving.
Creative Variations & Customizations
This 3-ingredient recipe is a fantastic blank canvas for your creativity. Once you’ve mastered the basic Oreo version, consider these delicious variations:
- Different Oreo Flavors: Swap classic Oreos for Mint Oreos, Peanut Butter Oreos, Golden Oreos, or any seasonal flavor for an exciting twist.
- Add Other Mix-ins: Experiment with chocolate chips (milk, dark, white), chopped nuts (pecans, walnuts, almonds), sprinkles, mini marshmallows, or other crushed cookies (e.g., chocolate chip cookies, graham crackers).
- Swirls of Flavor: Before freezing, gently swirl in ribbons of caramel sauce, hot fudge, fruit purees, or even peanut butter for an extra layer of deliciousness.
- Extracts for Extra Depth: A teaspoon of vanilla extract, peppermint extract, or almond extract can dramatically alter the flavor profile. Add it when whipping the cream.
- Coffee Kick: Dissolve a teaspoon of instant coffee powder in a tablespoon of hot water, let it cool, and add it to the mixture for a subtle coffee flavor.
Serving Suggestions
Once your homemade Oreo ice cream is perfectly chilled and set, the serving possibilities are endless:
- Classic Scoops: Serve in a bowl or a cone, perhaps with an extra sprinkle of Oreo crumbs on top.
- Ice Cream Sandwiches: Scoop between two soft cookies or wafers for a delightful sandwich.
- Sundae Bar: Create a fun sundae bar with hot fudge, whipped cream, cherries, and extra crushed Oreos.
- Milkshakes: Blend with milk and a little extra sweetened condensed milk for a thick, creamy Oreo milkshake.
- Dessert Companion: Serve alongside a warm brownie, a slice of apple pie, or a fruit tart for a decadent contrast.
The Irresistible Appeal of Homemade Ice Cream
There’s a unique charm in crafting your own ice cream. It’s not just about the incredible taste; it’s about the entire experience. The simple joy of transforming a few basic ingredients into a luxurious treat, the pride of serving something made with your own hands, and the control you have over the quality and customization of your dessert. Homemade ice cream is often fresher, richer, and bursting with more intense flavors than its store-bought counterparts. It evokes a sense of nostalgia, reminding us of simpler times and delightful kitchen experiments.
This 3-ingredient Oreo ice cream recipe perfectly embodies that appeal. It breaks down any barriers that might make you hesitant to try making ice cream at home, proving that you don’t need fancy equipment or culinary expertise to create something truly exceptional. It’s a testament to the fact that sometimes, the simplest recipes yield the most satisfying results.
For more simple and easy recipes like this, make sure to visit SimpleCookingChannel on YouTube. They offer a treasure trove of great desserts and dishes that you’ll surely love, inspiring countless delicious creations in your own kitchen.
Embrace the Sweet Simplicity: Your New Favorite Dessert Awaits!
So, what are you waiting for? Gather your three ingredients, set aside a little time, and prepare to be amazed. This 3-ingredient homemade Oreo ice cream is more than just a recipe; it’s an invitation to rediscover the joy of simple, delicious home cooking. It’s creamy, crunchy, delightfully sweet, and ridiculously easy to make. Whether you’re a seasoned chef or a kitchen novice, this no-churn wonder promises a spoonful of pure bliss. Go ahead, make a batch, and treat yourself to the ultimate comfort food experience!