
There’s an undeniable magic to a homemade pie. While the filling often steals the spotlight, the true foundation of any exceptional pie lies in its crust. A truly outstanding pie crust is more than just a vessel; it’s an integral part of the culinary experience, offering a delightful contrast in texture and a rich, buttery flavor that complements any sweet or savory filling. Achieving that coveted golden-brown hue and delicate flakiness might seem like a daunting task, a secret held only by seasoned bakers. However, with the right techniques and a few key insights, you can consistently create a pie crust that will impress everyone, from casual dinner guests to discerning dessert aficionados.
The journey to the perfect pie crust begins not with a complex recipe, but with understanding a fundamental principle: the interaction of cold butter and flour. This seemingly simple relationship is the cornerstone of flakiness, creating the airy, delicate layers that make a pie crust irresistible. Beyond this core concept, several other steps and tips are crucial for transforming basic ingredients into a masterpiece. This comprehensive guide will walk you through every aspect, ensuring you master the art of making the most delicious and flaky pie crust every single time. Prepare to elevate your baking and delight in the unparalleled satisfaction of serving a pie with a crust so perfect, it becomes the star of the show.
RELATED: Easy Flaky Butter Pie Crust Recipe
To further enhance your understanding and technique, this detailed tutorial, inspired by expert demonstrations such as those from Chicago Tribune on YouTube, will illuminate the proper methods required to achieve an impeccably flaky and tender pie crust. We’ll not only delve into the ‘how-to’ but also highlight common pitfalls to avoid, ensuring your efforts result in success rather than frustration. By following these refined steps, you’ll gain the confidence to create a crust that not only tastes incredible but also boasts a stunning appearance, fresh out of the oven, ready to be filled with your favorite ingredients. Get ready to transform your pie-making skills and become renowned for your exquisite crusts.
Essential Ingredients for a Flawless Pie Crust
Crafting the perfect pie crust requires a precise combination of high-quality ingredients, each playing a vital role in the final texture and flavor. Understanding the function of each component will empower you to make informed decisions and troubleshoot any issues that may arise during the baking process. Here’s a breakdown of what you’ll need and why:
- 2¼ cups of All-Purpose Flour: Flour forms the structural backbone of your pie crust. All-purpose flour is ideal for its balanced protein content, which provides enough gluten for elasticity without making the crust overly tough. It binds the butter and water, creating the delicate matrix that will become flaky upon baking. Sifting your flour can also help ensure a lighter, more consistent dough.
- 2¼ tsp of Kosher Salt: Salt is more than just a seasoning; it’s a flavor enhancer. It balances the richness of the butter and prevents the crust from tasting bland. Kosher salt is often preferred by bakers for its clean taste and larger crystals, which distribute evenly. Do not omit the salt, even for sweet pies, as it significantly contributes to the overall deliciousness.
- ½ tbsp of Granulated Sugar: A small amount of sugar in the crust serves several purposes. It aids in browning, giving the crust a beautiful golden hue, and it also contributes to a more tender texture. Additionally, sugar subtly enhances the flavor, making the crust more appealing, especially for sweet fillings.
- 1⅛ (9 tbsp) Sticks of Unsalted Butter: This is the star ingredient for flakiness and flavor. Unsalted butter allows you to control the total salt content in your recipe. The key here is the butter’s temperature – it must be extremely cold. When cold butter pieces melt in the oven, they release steam, creating air pockets that separate the layers of dough, resulting in that signature flaky texture. The fat also contributes rich, buttery flavor and tenderness.
- 1 tbsp of White Vinegar: This might seem like an unusual addition, but vinegar is a secret weapon for tender pie crusts. The acetic acid in vinegar helps to inhibit gluten development in the flour. Gluten, when overdeveloped, can make a pie crust tough and chewy. By adding vinegar, you ensure the dough remains pliable and easy to work with while resulting in a remarkably tender crust after baking.
- ½ cup of Ice-Cold Water: Water is essential for hydrating the flour and bringing the dough together. Using ice-cold water is critical because it helps keep the butter pieces solid and prevents them from melting prematurely into the flour. If the butter melts before baking, you’ll end up with a dense, crumbly crust rather than a flaky one. Adding water gradually ensures you achieve the perfect consistency without over-hydrating the dough.
Gathering these ingredients and understanding their roles will set you on the path to creating a truly spectacular pie crust that is both delicious and structurally perfect for any pie.
Crafting the Perfect Pie Crust: A Step-by-Step Guide
Making a truly exceptional pie crust is an art, but one that is easily mastered with patience and precision. Follow these detailed steps to achieve a crust that is consistently flaky, tender, and flavorful, ready to elevate any pie filling you choose.
Step 1: Preparing the Butter and Initial Flour Mixture
The secret to extreme flakiness lies in the butter’s temperature and how it’s incorporated. Begin by cutting your unsalted butter into small, uniform half-inch cubes. This ensures even distribution and consistent pockets of flakiness. Once cubed, divide the butter in half: place one half in the refrigerator and the other half in the freezer. Keeping butter at different temperatures will yield distinct textures in the final crust; the refrigerated butter blends more thoroughly, while the frozen butter creates larger, more defined flakes. In a food processor, combine the all-purpose flour, kosher salt, and granulated sugar. Pulse these dry ingredients a few times to ensure they are well mixed. Next, add the chilled butter (the half that was in the refrigerator) to the dry mixture. Pulse the food processor in short bursts, about 1-second intervals, until the butter is incorporated into pea-sized pieces and no larger chunks of butter are visible. This step creates a base of tender flour-butter crumbs.
Step 2: Incorporating Frozen Butter and Liquid Components
Now, retrieve the remaining half of the butter directly from the freezer. Add these super-cold butter cubes to the flour mixture in the food processor. Continue to pulse in short bursts until the frozen butter is also broken down into various sizes, from pea-sized to small lentil-sized pieces. It’s crucial not to over-process at this stage; you want distinct pieces of butter, not a smooth paste. Set this butter-flour mixture aside. In a separate small bowl, combine the ice-cold water with the white vinegar. The vinegar’s acidity is vital as it helps to inhibit the formation of tough gluten strands, resulting in a more tender crust. Begin by adding 5 tablespoons of this liquid mixture to the flour and butter mixture. The goal is to add just enough liquid to bring the dough together without making it sticky or overly wet.
Step 3: Forming and Resting the Dough
Pulse the mixture in the food processor a couple more times, observing the dough’s consistency. To check if it’s properly hydrated, take a small amount and squeeze it between your fingers. If it holds together without crumbling, it’s ready. If it’s too dry, add more cold water, one teaspoon at a time, pulsing after each addition, until the desired consistency is achieved. Be cautious not to add too much water, as this can make the dough tough. Once the dough comes together, transfer it to a lightly floured surface. Gently gather the dough and knead it very briefly, just enough to form a smooth ball. Avoid over-kneading, which can develop too much gluten and result in a tough crust. Divide the dough ball into two equal portions, flatten each into a disk, wrap them tightly in plastic wrap, and place them in the refrigerator to rest for at least 20 minutes, or ideally, overnight. This resting period allows the flour to fully hydrate and the gluten to relax, making the dough easier to roll and more tender when baked.
Step 4: Rolling Out the Dough
Once the dough has rested and is thoroughly chilled, remove one disk from the refrigerator. On a generously floured work surface (to prevent sticking), gently flatten the dough disk slightly with your hand. Then, using a floured rolling pin, begin pounding the dough gently to start softening it and making it more pliable. This prevents cracking at the edges when you start rolling. Start rolling the dough from the center outwards, rotating it frequently and adding a dusting of flour to both the dough and the rolling pin as needed. Aim for a uniform thickness of about ⅛ inch (approximately 3mm). Once rolled to the desired size and thickness, carefully trim off any excess dough around the edges to create a neat circle or square, depending on your pie tin. Gently transfer the rolled dough to a lightly greased and floured pie tin, ensuring it is perfectly centered to prevent uneven edges or gaps.
Step 5: Fitting the Crust and Final Resting
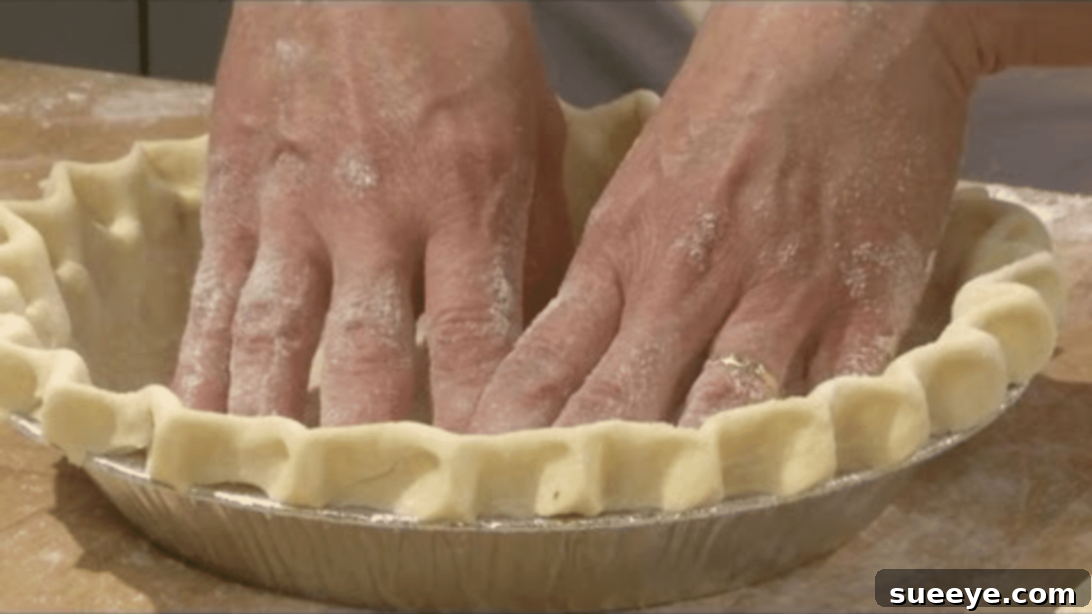
Carefully press the dough down into the bottom and up the sides of the pie tin, ensuring it covers the entire surface nicely without stretching it. Stretching the dough can cause it to shrink back significantly during baking. Trim any excess dough from the edges, leaving about a ½-inch overhang. Roll this overhang under itself to create a neat, thick edge. Then, crimp the edges decoratively using your fingers or a fork, as demonstrated in various baking tutorials (such as the one linked in the introduction). This not only creates a beautiful finish but also helps to hold the crust’s shape during baking. After fitting and crimping, place the pie tin with the prepared dough back into the refrigerator or freezer for at least another 20 minutes. This final chilling step is crucial; it re-chills the butter, firming it up before it hits the hot oven, which significantly helps prevent the crust from shrinking and ensures optimal flakiness. Your pie crust is now ready for blind baking or filling, depending on your pie recipe.
*All these images are credited to Chicago Tribune via YouTube. Give their channel a visit and subscribe for more!
Unlocking the Ultimate Flakiness: The Science Behind the Perfect Pie Crust
While the steps above meticulously guide you through the process, truly understanding the ‘why’ behind each action is what transforms a good baker into a great one. The ultimate secret to a remarkably flaky pie crust, one that boasts delicate layers and a tender crumble, lies deep within the interaction of its core ingredients, primarily butter and flour, and the control of temperature.
The Magic of Cold Butter Pockets
At its heart, flakiness is achieved by creating tiny pockets of steam within the dough during baking. When you incorporate cold butter into flour, whether by hand, with a pastry blender, or in a food processor, you are essentially creating distinct, small pieces of butter coated in flour. It’s crucial that these butter pieces remain relatively solid and separate, rather than fully blending into a smooth dough like you would for a cookie. This is why using cold butter, and even dividing it between refrigerated and frozen temperatures as suggested, is so important. The smaller, refrigerated pieces blend more into the flour, contributing to tenderness, while the larger, frozen pieces are responsible for those dramatic, airy flakes.
As the pie bakes in a hot oven, these solid butter pieces begin to melt. As they melt, the water content within the butter turns into steam. This steam then pushes apart the layers of flour-coated butter, creating minute air pockets. These pockets are what give the pie crust its characteristic light, airy, and flaky texture. If the butter melts before it even goes into the oven (due to warm hands, warm water, or an ambient kitchen temperature), you lose the potential for steam creation, resulting in a dense, tough, or crumbly crust rather than a flaky one.
Controlling Gluten Development for Tenderness
Another critical aspect of the perfect pie crust is tenderness. While gluten provides structure, too much of it can make a crust chewy and difficult to eat. This is where ingredients like vinegar and the gentle handling of the dough come into play. Vinegar, with its acetic acid, helps to interfere with the formation of long, strong gluten strands. This subtle chemical intervention keeps the dough pliable and contributes significantly to a more tender finished product. Similarly, using ice-cold water not only helps keep the butter cold but also slows down gluten development. Over-mixing or over-kneading the dough vigorously will also activate and develop gluten excessively, so a light touch is always best when forming and rolling the dough.
The Importance of Resting
The resting periods for the dough, both after initial mixing and after being placed in the pie tin, are not to be skipped. Resting allows the flour to fully hydrate, distributing the moisture evenly throughout the dough. More importantly, it gives the gluten strands, which inevitably develop even with careful handling, a chance to relax. Relaxed gluten means the dough will be much easier to roll out without snapping back, and it will be less prone to shrinking dramatically in the oven, ensuring your beautifully crimped edges hold their shape.
A Holistic Approach to Perfection
Ultimately, creating the perfect pie crust is a harmonious blend of precise ingredient temperatures, understanding the science of fat and flour interaction, and practicing gentle handling techniques. Each step, from chilling the butter to resting the dough, plays a pivotal role in building a crust that is not only visually appealing but also delivers an unforgettable taste and texture experience. Embrace these secrets, and you’ll consistently produce pie crusts that are the envy of every baker.