
Unlock the Power of DIY Cleaning Slime: Your Ultimate Guide to No-Glue Toothpaste Slime for Every Nook and Cranny
In our modern lives, dust, crumbs, and grime have a notorious way of accumulating in the most challenging and hard-to-reach places. From the intricate crevices of your car’s interior to the tiny gaps between keyboard keys and the often-forgotten household air vents, keeping these areas pristine can feel like an endless battle. Traditional cleaning methods often fall short, pushing debris deeper or failing to capture it entirely. What if there was a fun, effective, and incredibly simple solution? Enter DIY cleaning slime – a revolutionary approach to tackling those stubborn bits of dirt.
This remarkable cleaning tool, particularly a homemade toothpaste slime, leverages its unique viscoelastic properties to conform to irregular surfaces, delve into tight spaces, and lift away dust and particles with impressive ease, leaving virtually no residue. Imagine a cleaner that’s not only incredibly effective but also cost-efficient, satisfying to make, and even a little bit fun to use. Inspired by an ingenious recipe for Lysol slime shared by Slime DIY on YouTube, we’re diving deep into the world of no-glue toothpaste slime, exploring its myriad uses and guiding you through its incredibly simple creation process. Get ready to transform your cleaning routine and discover a truly versatile cleaning companion!
Why Cleaning Slime is a Game-Changer for Hard-to-Reach Dirt
Traditional cleaning methods, while effective for broad surfaces, often struggle with intricate details and confined spaces. Brushes can merely push dust around or deeper into crevices, cloths can leave behind fibers, and sprays can introduce unwanted moisture to electronics. Cleaning slime, however, offers a unique advantage. Its soft, pliable, and slightly tacky texture allows it to effortlessly mold into any shape, reaching dust and debris that other tools simply cannot. When pressed onto a surface, the slime adheres to dirt particles, encapsulating them within its structure as you lift it away. This means no more frustrating attempts to dislodge crumbs from your keyboard or trying to wipe down those impossibly narrow car air vents.
The beauty of a DIY cleaning slime, especially one made with toothpaste, lies in its simplicity and efficiency. It acts like a magnet for tiny particles, pulling them out without scratching delicate surfaces or leaving behind any sticky residue. Furthermore, toothpaste, a key ingredient in this recipe, adds a mild abrasive quality and a fresh scent, enhancing its cleaning power and leaving surfaces not just dirt-free but also subtly refreshed.
Beyond the Basics: Where to Deploy Your Toothpaste Cleaning Slime
While the initial inspiration might be for car detailing, the versatility of this homemade cleaning slime extends far beyond. As I prepared for my own spring cleaning, I quickly realized its potential for a multitude of household tasks. Here are some key areas where your DIY toothpaste slime will shine:
- Car Detailing Excellence: This is where cleaning slime truly excels.
- Air Vents: Easily reach deep into car vents, dashboard crevices, and air conditioning grilles to extract accumulated dust, lint, and small debris.
- Dashboard & Console: Navigate around buttons, dials, cup holders, and the gear shift console to pick up crumbs, dust, and pet hair.
- Door Panels & Storage: Clean textured surfaces and tight corners in door pockets.
- Steering Wheel Crevices: Reach the seams and buttons on your steering wheel.
- Home Cleaning Hacks: Tackle those overlooked spots!
- Keyboards & Electronics: Gently press and lift to remove crumbs, dust, and pet hair from between keys, laptop vents, remote controls, and even game controllers. It’s much safer than spraying liquids!
- Household Air Vents & Grilles: Home heating/cooling vents, bathroom exhaust fans, and even intricate decorative grilles often collect layers of dust. The slime makes quick work of these.
- Window Sills & Blinds: Dust and pollen love to settle in the grooves of window sills and between blind slats. The slime conforms perfectly to these shapes, picking up every particle.
- Baseboards & Floor Edges: The often-forgotten dust and hair bunnies that gather along baseboards and where the floor meets the wall can be easily picked up.
- Small Ornaments & Figurines: For delicate items with intricate details that are difficult to dust with a cloth, the slime can gently lift away dirt.
- Drawer Liners & Jewelry Boxes: Pick up tiny bits of lint, dust, or fabric fibers from drawer bottoms or jewelry compartments.
- Small Appliances: Clean around the buttons and crevices of blenders, coffee makers, and other kitchen gadgets.
The fresh scent of the toothpaste further enhances the cleaning experience, leaving a subtle, clean aroma in its wake, particularly noticeable in confined spaces like car interiors.
The Magic Behind No-Glue Toothpaste Slime: Simple Science, Powerful Clean
One of the most appealing aspects of this cleaning slime recipe is its “no-glue” nature. Unlike many traditional slime recipes that rely on craft glue and borax, this version utilizes common household ingredients, making it safer, more accessible, and quicker to prepare. The magic largely comes from the chemical reactions between the toothpaste, water, and salt.
Toothpaste, especially the gel varieties, contains thickening agents, humectants (like glycerin), and often a binding agent, which provide the initial viscous base. When water is added, it helps to hydrate these components and achieve the desired consistency. The critical ingredient, salt, acts as an activator. In many slime recipes, salt interacts with the polymers in the toothpaste, causing them to cross-link and form the characteristic slimy, non-Newtonian fluid texture we’re looking for. This process transforms the runny mixture into a cohesive, pliable, and non-sticky cleaning tool that can effectively grab and hold onto dust and debris.
Gathering Your Simple Ingredients for This DIY Cleaning Hack
The beauty of this cleaning slime recipe lies in its absolute simplicity and the fact that you likely already have all the necessary components in your home. Forget specialized cleaning supplies; with just these three basic items, you’re minutes away from creating a powerful cleaning ally.
Ingredients For Your Ultimate Cleaning Slime:
- Toothpaste: The star of our show! Any regular toothpaste (paste or gel) will work, but many users find that gel toothpastes provide a slightly smoother, more pliable slime. Avoid toothpastes with large abrasive particles or heavy coloring if you’re concerned about potential residue on very delicate surfaces, though standard varieties are generally fine. Fluoride or non-fluoride, whitening or regular – the choice is yours, impacting only the scent and minor properties.
- Water: Plain tap water is perfectly adequate. It acts as a solvent and helps achieve the desired consistency, allowing the toothpaste polymers to properly interact with the salt.
- Salt: Common table salt (sodium chloride) is your activator. Fine-grained salt tends to dissolve and incorporate more easily than coarse salts. This ingredient is crucial for transforming the sticky toothpaste-water mixture into a cohesive, non-tacky slime.
You’ll also need a mixing bowl (a disposable one works great for easy cleanup) and a stirring utensil, such as a spoon or craft stick.
Step-by-Step Guide: Crafting Your Powerful Cleaning Companion
Making this cleaning slime is not only incredibly easy but also quite satisfying. Follow these detailed steps to create your own effective no-glue toothpaste cleaning slime:
Directions:
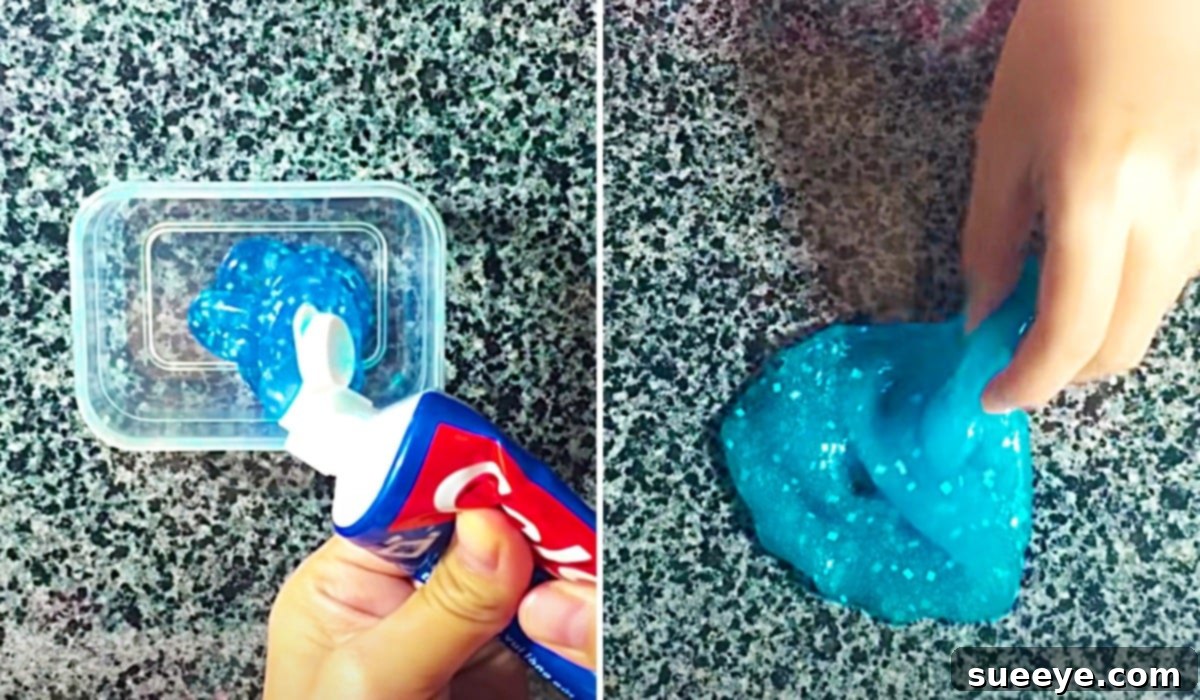
- Prepare Your Base: Begin by squeezing a generous amount of toothpaste into your mixing bowl. A good starting point is about a quarter to a half cup, depending on how much slime you wish to make. Remember, you can always make more!
- Introduce Water Gradually: Start by adding about a teaspoon of water to the toothpaste. Begin stirring vigorously with your spoon. The mixture will initially be very thick and pasty. Continue adding water, a teaspoon at a time, and stir thoroughly after each addition. The goal here is to gradually loosen the toothpaste into a somewhat sticky, slightly thinner consistency, but not too runny. Patience is key in this step; too much water too quickly can make the slime difficult to activate.
- Activate with Salt: Once you have a slightly sticky, uniform paste, it’s time to add the salt. Start with a pinch (about 1/4 teaspoon) of salt and sprinkle it over the mixture. Stir continuously and observe the changes. You’ll notice the mixture beginning to thicken and pull away from the sides of the bowl.
- Stir and Knead for Perfection: As you stir, the slime will start to become less sticky and more cohesive. Continue adding tiny pinches of salt, stirring well after each addition, until the slime starts to firm up and become less tacky to the touch. Eventually, it will reach a point where you can pick it up without it sticking excessively to your hands. At this stage, take the slime out of the bowl and begin kneading it with your hands. Kneading is crucial as it further combines the ingredients and helps achieve the perfect elastic, non-sticky texture.
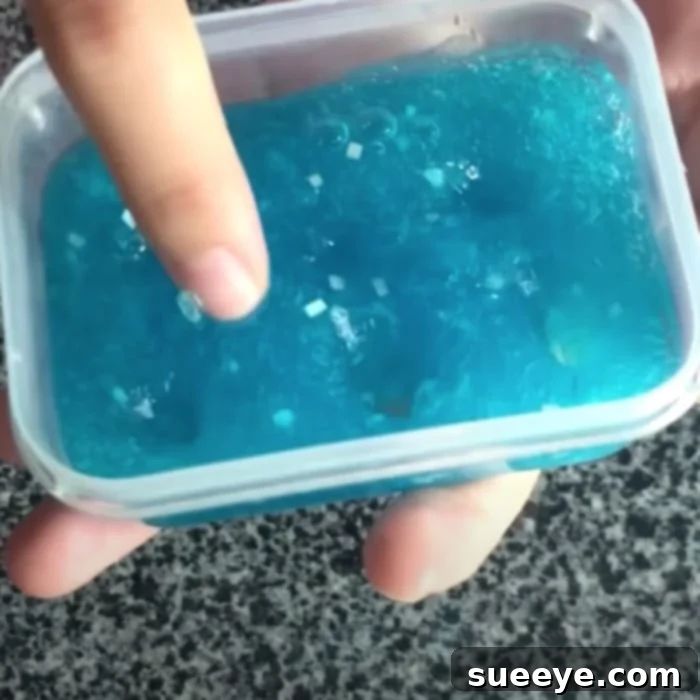
- Test and Adjust: The ideal cleaning slime should be pliable, slightly stretchy, and tacky enough to pick up dust but not so sticky that it leaves residue on your hands or the surfaces you’re cleaning. If your slime is too sticky, knead in a tiny bit more salt. If it’s too stiff or crumbly, add a few drops of water and knead until it softens. Continue adjusting until you achieve the desired consistency.
The entire process, as demonstrated by Slime DIY on YouTube, is incredibly straightforward and takes just a few minutes once you get the hang of it.
Tips for Optimal Slime Cleaning and Maintenance
Once you’ve created your perfect batch of cleaning slime, knowing how to use and care for it will maximize its effectiveness and lifespan:
- How to Use: For best results, gently press the slime onto the surface you wish to clean, allowing it to conform to the contours. Do not rub or aggressively wipe. Instead, press down firmly for a few seconds, then slowly roll and lift the slime away. You’ll see the dust and debris clinging to it!
- When to Discard: Your cleaning slime has a finite life. Once it becomes visibly dirty, changes color significantly, or loses its tackiness and ability to pick up grime, it’s time to dispose of it and make a fresh batch.
- Storage: To prolong the life of your slime, store it in an airtight container or a resealable plastic bag at room temperature when not in use. This prevents it from drying out or collecting new dust.
- Safety Precautions: While made with common ingredients, cleaning slime is not edible. Keep it out of reach of small children and pets to prevent accidental ingestion or choking hazards. Always supervise children if they are assisting with the making or use of the slime. Avoid using it on very porous surfaces where a faint toothpaste residue might remain, or on extremely delicate electronics without testing a small, inconspicuous area first.
- Test First: When cleaning a new type of surface or material, always test a small, hidden area first to ensure no adverse reactions or residue are left behind.
Troubleshooting Your Toothpaste Slime
Even with simple recipes, sometimes things don’t go exactly as planned. Here are some common issues and how to fix them:
- Slime is Too Sticky: If your slime is sticking to your hands excessively or leaving residue, it likely needs more activator. Knead in very small pinches of salt until it reaches the desired non-tacky consistency.
- Slime is Too Stiff or Crumbly: This usually means there’s too much salt or not enough water. Add a few drops of water (literally, drop by drop) and knead thoroughly. Continue until it becomes pliable again.
- Slime Isn’t Forming Properly: Ensure you’re using plain toothpaste and not a gel designed for specialized purposes (like heavy whitening with crystals, which might alter the texture). Make sure you’re adding salt gradually and kneading sufficiently. Sometimes, different toothpaste brands react slightly differently, so minor adjustments to water/salt ratios may be needed.
- Slime Dries Out Quickly: This often happens if it’s not stored in an airtight container. Make sure to seal it properly after each use. You can sometimes revive slightly dry slime by kneading in a tiny bit of water.
Embrace the Clean: Your New Favorite DIY Cleaning Hack
From the satisfying feel of making it to the undeniable effectiveness in cleaning those previously impossible-to-reach spots, DIY no-glue toothpaste slime is a cleaning hack you won’t want to live without. It’s an incredibly cost-effective, fun, and efficient way to maintain a pristine environment in your car, office, and home. Say goodbye to irritating dust and frustrating crumbs and embrace the simple power of homemade cleaning solutions.
So, gather your ingredients, follow these easy steps, and prepare to be amazed by the cleaning prowess of your very own toothpaste slime. Give it a try for your next spring cleaning session or car detailing project, and let us know your favorite ways to use this versatile cleaner!