
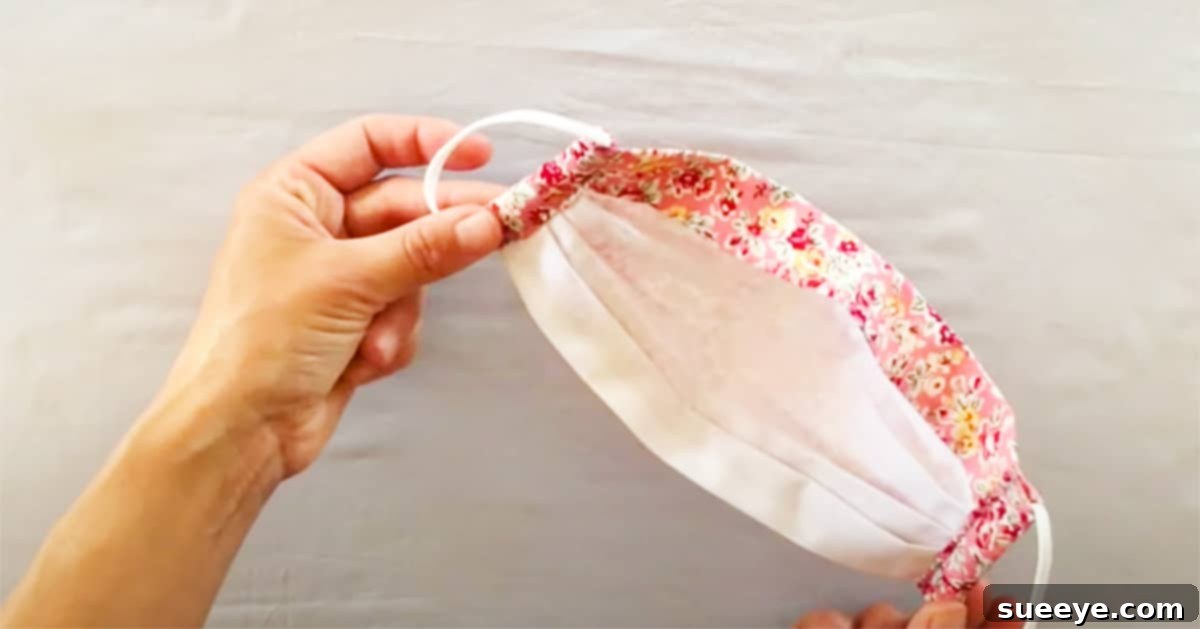
Craft Your Own Comfort: The DIY Pleated Reverse Nose Fold Face Mask by Sophie Passmore
In a world where personal protection has become paramount, the demand for comfortable, effective, and stylish face masks continues to grow. While commercial options abound, there’s a unique satisfaction and often superior comfort found in a well-crafted DIY pleated reverse nose face mask. Among the myriad of patterns available, Sophie Passmore’s design stands out on YouTube as a truly innovative and significantly improved solution for optimal breathability and a secure fit. This particular face mask pattern is lauded for its ingenious reverse nose fold, a feature that meticulously contours over the bridge of the nose without the need for a traditional nose wire, ensuring a snug and secured mask that stays in place.
One of the most appealing aspects of Sophie’s design is its commitment to both comfort and practicality. The absence of a nose wire simplifies the construction process and removes a common point of discomfort for many mask wearers. Despite not having a wire, the reverse nose fold ensures an incredibly secure closure around the nose and cheeks, minimizing gaps and maximizing protection. Furthermore, Sophie goes the extra mile by providing a comprehensive mask size chart, an invaluable resource that empowers creators to tailor this pleated face mask to virtually any face size or shape. This adjustability means that whether you need a larger or smaller mask, the pattern can be easily adapted, making it a truly versatile project for anyone with basic sewing skills. If you’ve been looking for an easy, quick, and highly effective face mask pattern, this DIY project is an absolute must-try.
Why Sophie Passmore’s Reverse Nose Fold Mask Excels
What sets this particular pleated face mask apart from other DIY patterns? It’s a combination of thoughtful design elements that prioritize user comfort, functionality, and ease of construction. Let’s delve into the specific benefits that make this mask a superior choice for daily wear:
Superior Breathability and Comfort
The pleated structure of this mask isn’t just for aesthetics; it’s a key component in enhancing breathability. When expanded, the pleats create a pocket of air around the mouth and nose, allowing for easier inhalation and exhalation. This design prevents the fabric from clinging uncomfortably to your face, a common issue with flatter mask styles. The generous air space means you can wear this mask for longer periods without feeling stifled or restricted, making it ideal for extended outings or work shifts.
The Genius of the Reverse Nose Fold: No Nose Wire Needed
Perhaps the most revolutionary aspect of Sophie Passmore’s design is the integrated reverse nose fold. This innovative feature replaces the need for an often cumbersome and sometimes irritating nose wire. Instead, the clever fabric manipulation creates a natural contour that molds over the bridge of your nose, forming a snug and secure seal. This eliminates pressure points, reduces irritation, and ensures the mask stays firmly in place without constant adjustment. For those who struggle with nose wires poking, bending out of shape, or being uncomfortable, this design offers a refreshing and practical alternative.
Fog-Free Vision for Glasses Wearers
One of the most persistent frustrations for individuals who wear glasses while donning a face mask is the dreaded lens fogging. The secure fit provided by the reverse nose fold is a game-changer in this regard. By creating a tight seal around the nose and upper cheeks, it effectively prevents warm, moist breath from escaping upwards and condensing on your spectacles. This means clearer vision, enhanced safety, and a much more pleasant wearing experience for everyone who relies on corrective eyewear.
Adjustable and Versatile for All Face Shapes
The ability to easily adjust the size of this mask based on Sophie’s comprehensive chart is a significant advantage. Whether you’re making masks for children, adults with smaller faces, or those who require a larger fit, the pattern can be modified to ensure a perfect, custom fit every time. The pleated design itself also offers a degree of flexibility, expanding or contracting to accommodate different facial movements without compromising the seal. This versatility makes it an excellent pattern for families or for gifting to friends.
Sleek, Non-Bulky Aesthetic
Beyond its functional superiority, this mask also boasts an attractive and streamlined appearance. Unlike some other mask designs that can appear bulky or overly complex, the Sophie Passmore pleated mask has a neat, tailored look. It sits comfortably on the face without excessive fabric, making it a stylish accessory that complements various outfits while providing essential protection.
Essential Supplies for Your DIY Pleated Face Mask
Gathering the right materials is the first step to creating a high-quality and durable face mask. For Sophie Passmore’s innovative reverse nose fold design, you’ll need the following basic sewing supplies. Remember to choose materials that are breathable, washable, and comfortable against the skin.
- Fabric: Opt for tightly woven, 100% cotton fabric for the main body of the mask. Quilting cottons are an excellent choice due to their weave density and durability. Consider using two different patterns or colors for the front and back for a reversible option or simply to differentiate. Ensure your fabric is pre-washed and ironed to prevent shrinkage and make it easier to work with.
- Lining Fabric: While often the same as your main fabric, you might choose a softer, lighter cotton for the inner lining for added comfort. Again, pre-wash and iron this material.
- Elastic: This will form the ear loops or head straps. You can use ¼-inch flat elastic, round cord elastic, or even soft jersey strips for a gentler feel. Adjustable elastic with silicone stoppers is also a fantastic option to ensure a customized fit. The quantity will depend on whether you opt for ear loops or a continuous head strap.
- Gardening Wire or Safety Pin: Not for the mask structure itself, but an indispensable tool for threading the elastic through the side channels. A large safety pin is often the easiest and most accessible choice.
- Iron and Ironing Board: Crucial for pressing seams, setting pleats, and creating crisp edges, which significantly improves the mask’s professional appearance and ease of construction.
- Sewing Machine: A standard sewing machine will make quick work of this project. Ensure it’s in good working order and you have suitable thread (polyester or cotton blend) that matches or complements your fabric.
- Basic Sewing Notions: Don’t forget your scissors, pins or fabric clips, a ruler or measuring tape, and a fabric marker or tailor’s chalk for marking.
Step-by-Step Directions to Craft Your Reverse Nose Fold Mask
Creating this pleated reverse nose fold face mask is a rewarding project for anyone with fundamental sewing knowledge. While we’ll outline the key steps here, for a complete visual guide and intricate details, we highly recommend watching Sophie Passmore’s full tutorial on YouTube. Her video provides invaluable insights into achieving perfect pleats and a secure fit.
1. Prepare Your Fabric Pieces
Begin by cutting your front and back fabric pieces according to the measurements provided in Sophie’s mask size chart. Precision in this step is vital for the mask’s fit and overall symmetry. Ensure your fabrics are pre-washed, dried, and thoroughly ironed to remove any wrinkles. With the right sides of your main fabric and lining fabric facing each other, carefully center them. These two pieces should be of the same size, with a slight overlap at the front on each side, preparing them for the initial stitching that forms the foundation of the mask’s unique shape. This careful alignment is key to achieving the distinctive reverse nose fold later on.
2. Stitching the Main Body and Creating the Reverse Nose Fold
Follow Sophie’s tutorial closely for the initial stitching to create the fundamental shape of the mask, which includes the clever construction of the reverse nose fold. This critical step involves sewing specific seams that, when turned right side out, will naturally form the contour for the nose bridge without needing any wire. Pay close attention to seam allowances and sharp corners, as these details contribute significantly to the mask’s professional finish and comfortable fit. Press your seams open for a crisp, flat appearance before moving on.
3. Forming the Pleats and Ridges
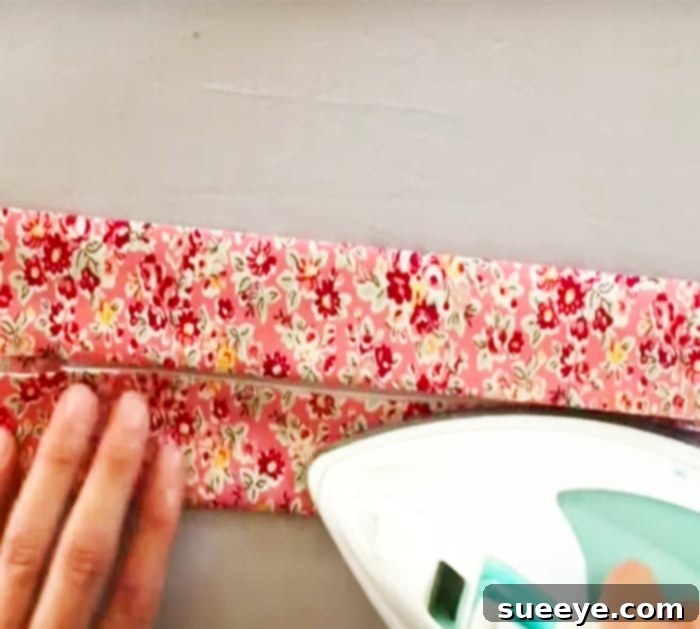
Once the initial structure is complete and turned right side out, the next crucial phase involves creating the signature pleats and ridges. These pleats are essential for both the mask’s aesthetic and its functional breathability. Using your iron, meticulously press the fabric to form crisp, even pleats. Sophie’s video will guide you on the precise placement and depth of these pleats. Ironing them in place is vital, as it sets the fabric and makes the subsequent steps much easier, ensuring your mask maintains its shape and offers optimal air circulation.
4. Constructing the Side Channels for Elastic
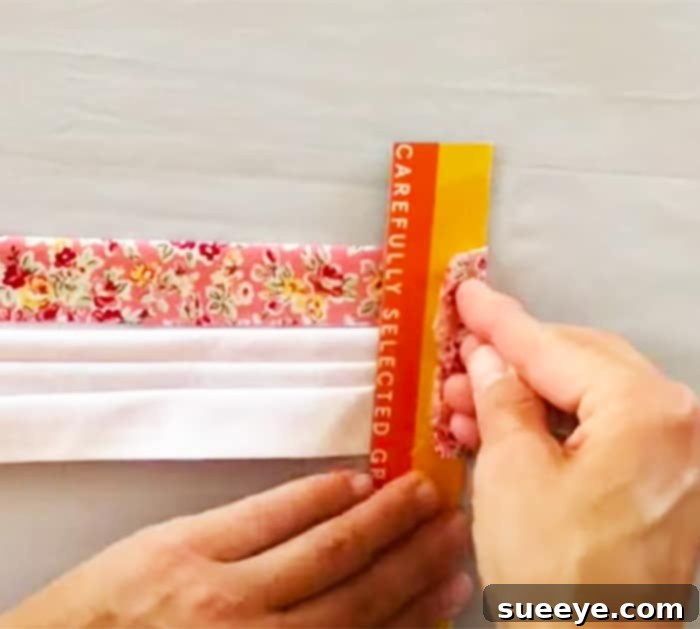
With your pleats securely pressed, you’ll now focus on creating the side channels where the elastic will be threaded. This step begins by pressing a very small hem inwards towards the body of the mask on each side. The goal is to create a neat, folded edge that will form the casing for your elastic. It’s imperative to ensure that these side channels are wide enough to comfortably accommodate your chosen elastic and allow a safety pin to pass through easily. Once pressed, stitch very close to the mask’s main body side of the channel, securing the hem in place while leaving the outer edge open for threading. This stitching should be neat and strong to withstand repeated use and washing.
5. Threading the Elastic
Now it’s time to add the elastic that will hold your mask in place. Attach one end of your elastic to a safety pin. This makes threading through the narrow channels significantly easier. Gently push the safety pin, guiding the elastic through the entire length of one side channel, then repeat for the other. Once threaded, you can knot the ends of the elastic to form ear loops, or thread it through and tie a continuous loop to go around the head. For adjustable elastic, simply feed it through, attach a cord stopper, and tie off the ends. Adjust the length until the mask feels snug but comfortable, without pulling on your ears or face.
6. Finishing Touches
After threading and securing the elastic, give your mask a final inspection. Trim any loose threads and press the entire mask one last time to ensure all seams and pleats are crisp and well-defined. Your DIY pleated reverse nose fold face mask is now complete and ready for use!
Tips for Crafting a Perfect DIY Face Mask
- Pre-Wash Your Fabric: Always wash and dry your fabric before cutting and sewing to prevent shrinkage after the mask is made.
- Precision is Key: Accurate cutting and measuring will lead to a better-fitting and more professional-looking mask.
- Iron Frequently: Pressing seams open and pleats flat throughout the process makes sewing easier and results in a much neater finish.
- Test the Fit: Before securing the elastic permanently, try on the mask to ensure it fits snugly and comfortably. Adjust the elastic length as needed.
- Consider a Filter Pocket: While not part of the original design, you could adapt the pattern to include an inner pocket for an additional filter layer if desired.
- Quality Thread: Use a good quality polyester or poly-cotton blend thread that will stand up to repeated washing.
- Care Instructions: Recommend washing your fabric masks regularly in hot water and tumble drying on high heat to sanitize them.
Embrace Comfort and Protection with Your Homemade Mask
Overall, Sophie Passmore’s DIY pleated reverse nose fold face mask is an exceptional design, especially for those seeking a comfortable and effective mask without the fuss of a nose wire. Its thoughtful construction addresses common mask-wearing complaints, making it an ideal choice for everyday protection. The design’s inherent breathability ensures comfort during prolonged wear, while the ingenious reverse nose fold guarantees a secure, gap-free fit that is particularly beneficial for glasses wearers, effectively eliminating lens fogging.
Beyond its protective qualities, the mask’s non-bulky and sleek appearance is an added bonus, proving that safety doesn’t have to compromise style. Whether you’re a seasoned seamster or new to the world of DIY sewing, this pattern offers a rewarding project that results in a highly functional and comfortable face mask. We encourage you to watch Sophie Passmore’s tutorial, gather your supplies, and create a mask that not only protects you but also brings a touch of handmade comfort to your daily life. Share your creations and experience the difference of a truly well-designed homemade face mask!