
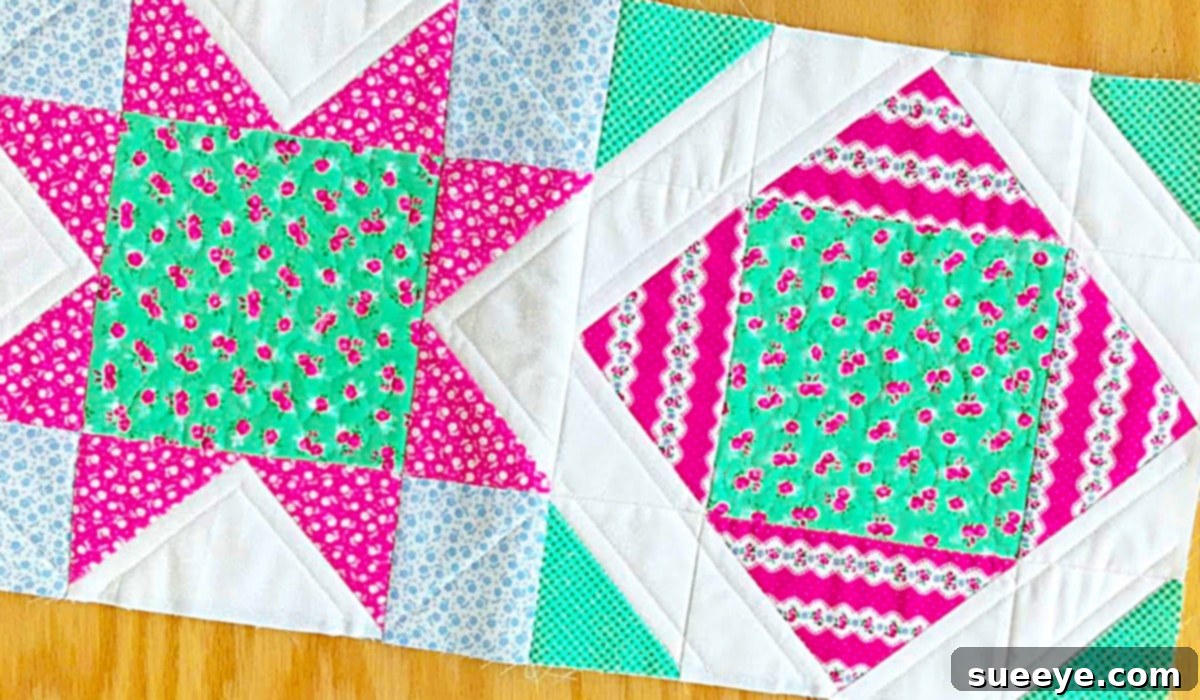
Mastering Quilt Block Joining: A Seamless Quilt-As-You-Go Method Without Sashing
Creating beautiful quilt blocks is an incredibly rewarding part of the quilting journey. Each block tells a story, a testament to your creativity and precision, and the process of piecing them together can be truly therapeutic. However, many quilters, especially beginners, often find themselves at a crossroads when it comes to assembling these individual masterpieces into a cohesive, finished quilt. The traditional methods of joining blocks can sometimes feel daunting, involving precise sashing, complex layering, and the challenge of maneuvering a large, heavy quilt sandwich under your sewing machine. It’s a stage where enthusiasm can wane, leaving many beautiful block collections unfinished.
But what if there was a simpler, more intuitive way to bring your quilt blocks together? A method that not only streamlines the process but also elegantly eliminates the need for sashing, allowing your intricate block designs to take center stage without interruption? We’ve discovered an exceptional quilt block joining video tutorial by American Patchwork Quilting on YouTube that introduces just such a technique. This innovative approach simplifies the final assembly, transforming what can often be the most challenging part of quilting into an enjoyable and straightforward experience. It’s a game-changer for anyone looking to finish their quilt projects with confidence and a professional touch.
This particular ‘quilt-as-you-go’ method stands out because it cleverly integrates the backing fabric during the joining process. Instead of cutting and sewing separate sashing strips between blocks, you’ll utilize the very backing that will hold your entire quilt together. This innovative technique not only saves valuable time and fabric but also results in a clean, seamless finish that truly highlights the beauty of your patchwork. The method creates a neat, almost invisible join from the back, ensuring your quilt lays flat and drapes beautifully. Whether you’re a seasoned quilter looking for a fresh, efficient technique or a newcomer eager to tackle your first full-sized quilt, this comprehensive guide will walk you through the process, ensuring your finished project is both stunning and structurally sound.
Why Choose the No-Sashing Quilt-As-You-Go Method?
The ‘quilt-as-you-go’ technique, especially one that foregoes sashing, offers several distinct advantages that make it a favorite among many quilters. Its popularity stems from the practical benefits it brings to the quilting process, simplifying complex steps and enhancing the overall experience:
- Simplicity and Manageability: It breaks down the overwhelming task of quilting a large project into manageable, block-by-block steps. Instead of struggling with a cumbersome full-sized quilt sandwich, you quilt each block or small section individually, which is much easier to handle under your domestic sewing machine. This reduces physical strain and makes the process more approachable for all skill levels.
- No Sashing Required: This is perhaps the biggest draw for many. Sashing can be tricky to cut accurately and sew evenly, and inconsistent sashing can lead to wavy seams and a distorted quilt top. Furthermore, sashing can sometimes visually overpower or detract from the intricate beauty and individual character of your pieced blocks. By eliminating sashing, your beautiful patchwork designs become the undisputed star of the show, allowing for a cleaner, more modern, and unobstructed aesthetic.
- Lighter Load on Your Machine: Quilting an entire large quilt can put significant strain on your domestic sewing machine, not to mention your shoulders and back! With ‘quilt-as-you-go’, you’re only quilting smaller sections at a time. This dramatically reduces the bulk and weight you need to manipulate, making the quilting process much more feasible and comfortable, especially for those with limited space or less powerful machines.
- Seamless and Professional Finish: The joining method used in this technique cleverly integrates the backing, creating a secure and often virtually invisible join that looks incredibly professional. This thoughtful approach ensures your quilt lays flat, without bulkiness at the seams, and drapes beautifully, enhancing the overall quality and longevity of your finished piece.
- Design Flexibility: This technique is highly adaptable. It’s perfect for a wide variety of quilt sizes and designs, particularly those where you want to highlight individual blocks or motifs without the visual interruption of sashing. It opens up new possibilities for creative expression, allowing you to focus on the artistry of each block.
- Efficient Use of Time: While it involves a unique joining step, many quilters find that the ‘quilt-as-you-go’ method saves time in the long run by simplifying the handling of large projects and often eliminating the need for complex, separate layering and basting steps for the entire quilt.
Essential Materials For Joining Quilt Blocks:
Before you embark on assembling your magnificent quilt, gathering the right tools and materials is crucial. Having everything at hand will ensure a smooth, efficient, and enjoyable process, minimizing interruptions and allowing you to focus on the creative flow. Here’s a detailed look at what you’ll need for this specific ‘quilt-as-you-go’ method:
- A Reliable Sewing Machine: Your primary tool, a sewing machine capable of a straight stitch is essential. While most modern machines will suffice, one with a walking foot attachment can be a game-changer. A walking foot helps feed multiple layers of fabric evenly, preventing puckering, shifting, and stretching, which is particularly beneficial when working with quilt layers. Ensure your machine is clean, oiled, and has a fresh needle appropriate for quilting (e.g., a quilting or sharp needle, size 80/12 or 90/14).
- High-Quality Fabric for Backing: This is a key component of the no-sashing ‘quilt-as-you-go’ method. You’ll need enough fabric to back each of your individual quilt blocks, plus extra for the specific joining seams described in the directions. Choose a good quality quilting cotton that complements your quilt blocks in color and pattern. Consider its drape, how it will feel against your skin, and its durability, as it will be part of the finished quilt.
- Your Beautiful Quilt Blocks: Of course, you’ll need all the finished, trimmed quilt blocks you’ve meticulously pieced together. It is absolutely crucial that they are all squared up to the exact same size and neatly pressed flat. Precision at this stage prevents headaches later.
- Durable Thread: Select a high-quality, strong polyester or cotton quilting thread. Choose a color that matches or subtly contrasts with your backing fabric, or a neutral color that will blend well. Strong thread is essential for secure seams that will withstand years of use, washing, and wear.
- A Sharp Pair of Fabric Scissors: Keep these exclusively for fabric to maintain their sharpness. They are indispensable for snipping threads, making small precise cuts, and trimming fabric edges.
- A Quilter’s Acrylic Ruler: An indispensable tool for precise measuring, trimming, and squaring. A large rectangular ruler (e.g., 6″ x 24″) and/or a square ruler (e.g., 12.5″ x 12.5″ or 15″ x 15″) will be invaluable for squaring up blocks and ensuring accurate seam allowances.
- A Self-Healing Cutting Mat: Paired with your rotary cutter, a cutting mat protects your work surface and provides a stable, non-slip base for safe and accurate cuts. Choose a size that accommodates your largest blocks or cutting needs.
- A Rotary Cutter: This tool makes quick, clean, and incredibly precise cuts through multiple layers of fabric with ease. Ensure you have a sharp blade for the best results, as a dull blade can snag, fray, and distort fabric edges, leading to inaccurate cuts.
- Pins or Fabric Clips: Essential for holding multiple layers of fabric securely in place while sewing. Fabric clips (like Wonder Clips) can be particularly useful for thicker seams or when pins might distort the fabric.
- An Iron and Ironing Board: Absolutely essential for pressing seams flat throughout the entire process. Pressing helps to set stitches, remove bulk, square up your work, and is critical for achieving a professional, flat, and beautiful finish.
Step-by-Step Directions for Joining Quilt Blocks with No Sashing:
This method, inspired by the excellent tutorial from American Patchwork Quilting, significantly simplifies the quilt assembly process, allowing you to create a beautiful, finished quilt with remarkable ease. Follow these detailed steps to seamlessly join your blocks and achieve a stunning result:
Step 1: Prepare Your Quilt Blocks and Backing Fabric
Before you even think about sewing, ensure all your quilt blocks are accurately sized, neatly pressed, and trimmed to their final dimensions. For this ‘quilt-as-you-go’ method, each block requires its own piece of backing fabric. Cut your backing fabric pieces to be slightly larger than your finished quilt blocks – ideally, about 1 to 2 inches larger on all four sides. This generous sizing provides ample wiggle room for trimming later and ensures full coverage, accommodating any slight shifts during the process. Press your backing fabric smooth to remove any wrinkles or creases, ensuring a flat foundation.
Step 2: Create Your Quilt Sandwiches (Block-by-Block)
For each individual quilt block, you will create a small ‘quilt sandwich’ if you haven’t already pre-quilted them. Lay one piece of your cut backing fabric right side down on your work surface. Next, place a piece of batting (if you’re using it to pre-quilt individual blocks before joining, this method often focuses on joining the quilt top to backing directly) centered on top of the backing. Finally, place your pieced quilt block right side up, centered on top of the batting/backing layers. Secure these layers together using pins, basting spray, or fusible batting. This step effectively prepares each block as a mini-quilt unit. If you’ve already quilted your individual blocks with batting and backing, simply ensure they are flat and ready for joining.
Step 3: Trim and Square Up Blocks Precisely
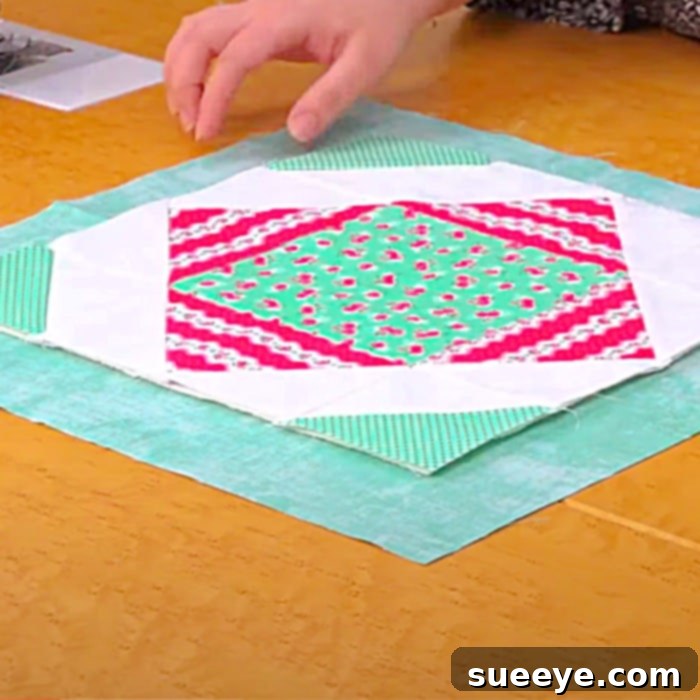
Once your quilt blocks are layered (and optionally quilted individually), it’s absolutely critical to carefully trim them to their final, desired size. Using your rotary cutter and quilter’s ruler, square up each block with utmost precision. All blocks must be exactly the same dimensions with perfectly square corners (90 degrees) to ensure a smooth, flat, and seamless join. This step cannot be rushed; accuracy here will prevent headaches and wonky seams later in the process.
Step 4: Layout and Initial Alignment for Joining
Lay out all your trimmed and squared blocks on a flat surface (your floor, a large table, or a design wall) in the desired arrangement for your quilt top. This visual planning helps you ensure the pattern flows correctly and prevents mistakes. Once you’re completely satisfied with the layout, select two adjacent blocks that you wish to join, for instance, two blocks that will form a horizontal seam. Carefully place them right sides together, ensuring their front fabric layers are touching perfectly along the edge you intend to seam. The backing fabrics will also be aligned on the underside, ready for their own separate join.
Step 5: The First Stitch: Joining the Front Quilt Layers
With the two blocks placed right sides together (fronts touching), align the edges perfectly. Use pins or fabric clips to secure the layers along the seam line, spacing them every few inches to prevent shifting. Stitch a standard 1/4-inch seam allowance along this edge. This seam will join the front fabric layers of your two quilt blocks, just as you would for traditional piecing. After stitching, carefully press the seam open or to one side, according to your preference and what helps the quilt lie flatter and reduces bulk at the seam intersection points. Pressing firmly at this stage is crucial for a crisp finish.
Step 6: The Second Stitch: Joining the Backs (The Invisible Join Technique)
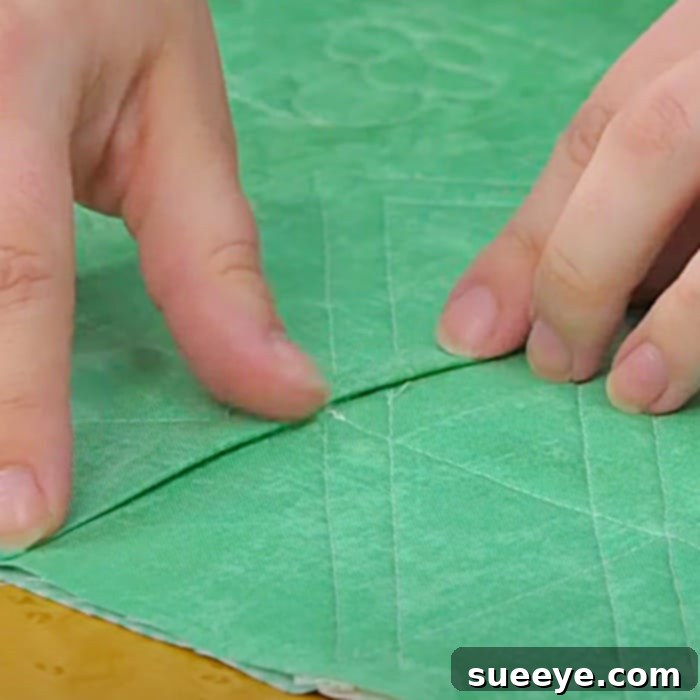
This is where the unique magic of the ‘no sashing’ quilt-as-you-go method truly shines. Flip your newly joined blocks over so you’re looking at the backing fabric. The backing fabric for each block will now be facing away from each other along the newly sewn front seam. Carefully fold back the raw edges of the backing fabric from both blocks, exposing the raw edges that run parallel to the front seam you just sewed. You want to bring these two folded edges together, aligning them precisely so that their folded edges meet and the raw edges are neatly tucked inside. Pin them meticulously in place. Now, stitch these two folded edges together, creating another 1/4-inch seam. This second seam neatly encloses the raw edges of the backing, creating a clean, secure, and virtually invisible join on the back of your quilt.
Step 7: Pressing for Ultimate Perfection
After each join – both the front and back seams – dedicate sufficient time to press thoroughly. Pressing is not just about flattening; it helps to set the stitches, remove any puckering, flatten the seams, and square up your work. Press the back seam open or to one side, ensuring it lies as flat and smoothly as possible. A well-pressed quilt looks much more professional, will hold its shape better, and will drape beautifully, showcasing all your hard work.
Step 8: Repeat for All Blocks and Rows
Continue this meticulous process, joining blocks into rows (horizontal joins), and then joining the completed rows together (vertical joins). Always remember to align carefully, use precise seam allowances, and press diligently after each and every step. Take your time; quilting is a craft that rewards patience and attention to detail. Don’t rush the process. Accuracy at each stage will culminate in a perfectly aligned, beautifully joined, and stunningly finished quilt that you’ll be proud to display and cherish.
Tips and Best Practices for Seamless Quilt Joining:
To ensure your quilt joining experience is as smooth and successful as possible, consider these invaluable tips and best practices:
- Accuracy is Paramount: The absolute key to a successful ‘quilt-as-you-go’ join is precision. Before you even start joining, ensure all your blocks are squared up perfectly to the exact same dimensions. Even a slight discrepancy of 1/8 inch can lead to wavy seams, uneven rows, and a distorted quilt. Measure twice, cut once!
- Press, Press, Press: This cannot be stressed enough. Pressing after each and every seam helps to set stitches, makes subsequent steps easier, and is fundamental to achieving a flat, professional finish. Avoid ironing back and forth, which can stretch fabric; instead, lift and press firmly.
- Utilize a Walking Foot: If your sewing machine has a walking foot attachment, use it! It is incredibly beneficial for feeding multiple layers of fabric (especially when dealing with the thickness of quilt blocks and backing) evenly through the machine, significantly preventing puckering, shifting, and stretching.
- Test Your Stitch Settings: Before working on your actual quilt blocks, always do a test run on scrap fabric using the same number of layers. This allows you to fine-tune your stitch length and tension, ensuring they are correct for the fabric and thread you are using.
- Quality Materials Matter: Invest in good quality quilting fabric, batting, and thread. High-quality materials will not only be easier to work with but will also hold up better over time, contributing to the overall beauty, durability, and longevity of your cherished quilt.
- Watch the Tutorial: While this guide provides detailed instructions, the American Patchwork Quilting video is an excellent visual aid. Watching someone demonstrate the technique can clarify any steps that might seem confusing in text and provide visual cues that enhance understanding.
- Take Your Time and Enjoy the Process: Quilting is a journey, not a race. Embrace the meditative aspect of sewing, take breaks when needed, and don’t be afraid to unpick and re-sew if a seam isn’t perfect. Enjoy the process of creating something beautiful and handmade.
- Label Your Blocks: If your quilt has a specific layout, consider labeling the back of your blocks with their row and column numbers after squaring them up. This helps maintain your desired arrangement during assembly.
Conclusion: Your Journey to a Finished Quilt
Joining quilt blocks doesn’t have to be a dreaded final step in your quilting adventure. With this ingenious ‘quilt-as-you-go’ method, beautifully demonstrated by American Patchwork Quilting, you can effortlessly transform your individual blocks into a magnificent, cohesive, and finished quilt. The ingenious absence of sashing not only simplifies the construction process by reducing bulk and eliminating an extra cutting and sewing step but also allows the intricate beauty and vibrant patterns of your patchwork to shine without any interruption.
This technique provides a clear, approachable path to creating stunning, professional-looking quilts with greater ease and unwavering confidence. No longer will you be intimidated by the final assembly; instead, you’ll look forward to seeing your project come to life. So, gather your essential tools, meticulously prepare your beautiful blocks, and wholeheartedly embark on this rewarding quilting journey. Soon, you’ll be proudly admiring a finished quilt that is not only a testament to your developing skill and artistic vision but also a cozy, cherished heirloom, ready to bring warmth and beauty into your home. Happy quilting!