
Craft Your Perfect Space: The Ultimate DIY Felt Organizer Guide
Are you constantly searching for stylish yet practical ways to keep your home tidy and organized? Do you dream of a clutter-free environment that reflects your personal style, rather than being dominated by generic plastic bins? Look no further! We’ve discovered a DIY project that masterfully blends modern aesthetics with unparalleled functionality: the handmade felt organizer. This isn’t just any storage solution; it’s a statement piece, a truly “handsome” addition that elevates any room it graces.
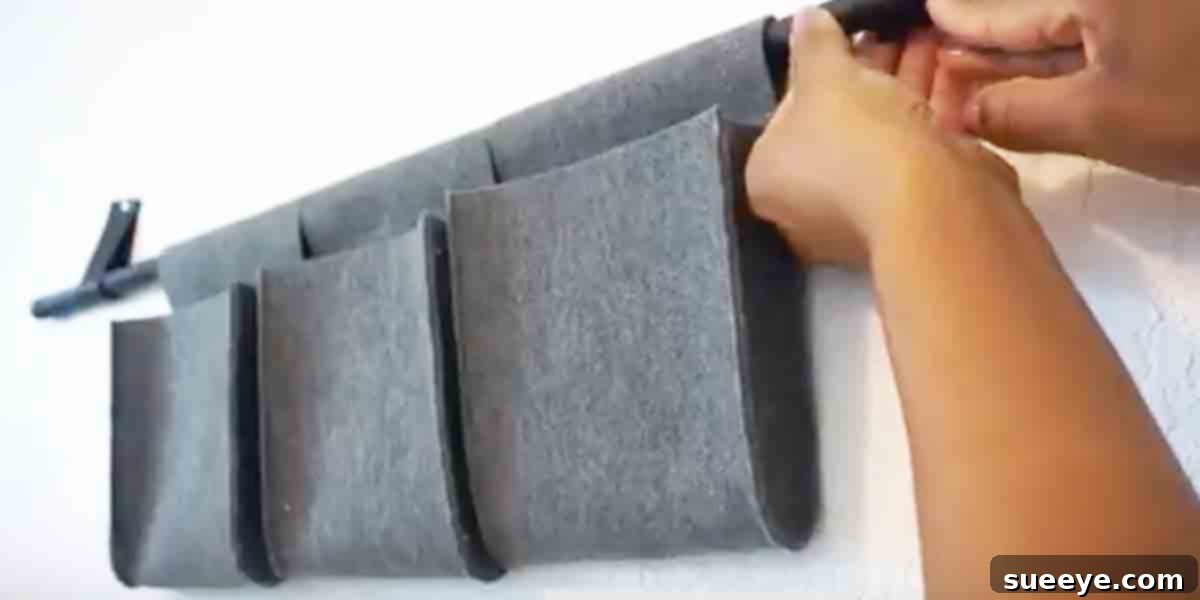
Imagine a sleek, sharp-looking organizer, perhaps hanging elegantly on a black rod iron barn door or adorning a minimalist wall. Its modern appeal is undeniable, drawing the eye while discreetly tackling your organizational challenges. From the moment we first encountered this ingenious design, we knew it was a must-share. The best part? It’s incredibly easy and quick to make, making it the perfect weekend project for anyone, regardless of their crafting experience.
For many of us, the quest for a perfectly organized home is a continuous journey. We devour articles on home decor, seeking inspiration, and then pivot to strategies for organization, often feeling like we’re fighting a losing battle against clutter. If you, like us, sometimes struggle to maintain order despite your best intentions, then this quick DIY felt organizer is precisely what you need. It’s a game-changer, designed to simplify your life with undeniable style.
The Allure of Felt: Why This Organizer Stands Out
What makes this particular organizer so special? It’s the unique combination of material and design. While most organizers prioritize function over form, often resulting in bland or bulky additions to our homes, this felt design flips the script. It brings a sophisticated, contemporary vibe that you’d be proud to display in any room. The clean lines, the tactile richness of the felt, and its inherent simplicity give it a distinct modern charm that is hard to replicate with off-the-shelf products.
The choice of felt isn’t just for looks; it’s a crucial element for durability and structure. To effectively hold papers, magazines, notebooks, or even light crafting supplies, you need a material that can stand up to the task without sagging or losing its shape. This is where thick felt truly shines. Its inherent stiffness provides the necessary support, ensuring your pockets remain open and accessible, ready to accommodate your items. Specifically, products like Kunin felt are celebrated in the crafting community for their quality, vibrant colors, and robust structure, making them an ideal choice for this project.
Beyond its practicality, crafting your own organizer injects a dose of personality into your living space. In a world saturated with mass-produced items, a handmade piece offers a unique touch, reflecting your effort and creativity. It’s not just an organizer; it’s a piece of art that you’ve brought to life, tailored precisely to your needs and aesthetic preferences. The satisfaction of creating something both beautiful and incredibly useful is immense, transforming a mundane task like decluttering into an enjoyable creative endeavor.
Decluttering for Clarity: The Mental Benefits of Organization
The impact of a tidy and organized environment extends far beyond aesthetics; it significantly influences our mental well-being. A cluttered space often leads to a cluttered mind, contributing to feelings of stress, anxiety, and diminished productivity. Conversely, a well-organized home can foster a sense of calm, improve focus, and reduce daily frustrations. When everything has its place, you spend less time searching for misplaced items and more time engaging in activities you enjoy.
Wall-mounted organizers, especially those designed with pockets, are particularly effective in combating surface clutter. Think of the stacks of magazines on your coffee table, the pile of mail on your entryway console, or the collection of papers that somehow accumulates on your desk. These everyday items, while seemingly small, can quickly overwhelm a space. A dedicated felt organizer provides a stylish home for these items, freeing up valuable surface area and contributing to an overall sense of order and tranquility.
By creating a specific, easily accessible spot for your papers, magazines, and other small items, you’re not just moving clutter around; you’re actively creating a system. This systematic approach reduces decision fatigue – that mental drain from constantly deciding where to put things. With a beautiful, functional felt organizer, the choice becomes simple and intuitive, making the habit of tidying up effortless and rewarding.
Unleashing Versatility: Where and How to Use Your Felt Organizer
While often envisioned for holding magazines and papers, the utility of these DIY felt organizers extends far beyond. Their adaptable design makes them suitable for nearly any room in your home, offering tailored storage solutions wherever they’re needed most:
- Home Office: Keep important documents, invoices, notebooks, pens, and even small tablets neatly tucked away but within arm’s reach. Design pockets of varying sizes for maximum efficiency.
- Living Room: A stylish home for remote controls, reading glasses, current books, and, of course, your favorite magazines. It keeps entertainment essentials organized without cluttering coffee tables.
- Bedroom: Perfect for bedside organization – hold your current read, e-reader, phone, glasses, or even small personal care items. It eliminates the need for bulky nightstand clutter.
- Kid’s Room: A fun and accessible way to store art supplies, small toys, picture books, or school assignments. The soft felt is safe and appealing for children’s spaces.
- Entryway/Mudroom: Create a drop zone for incoming and outgoing mail, keys, sunglasses, small wallets, or even leashes. It helps streamline your routines as you enter and exit your home.
- Craft Room: An invaluable asset for organizing fabric scraps, embroidery floss, patterns, small tools, or project instructions. Keep your creative chaos beautifully contained.
- Kitchen: Hold recipes, grocery lists, take-out menus, or even small kitchen utensils if hung strategically.
The beauty of a DIY project is the ability to customize. Consider making several organizers in different sizes and configurations. A single long organizer with multiple small pockets might be perfect for a craft room, while a wider organizer with fewer, larger pockets could serve a living room’s magazine needs. The possibilities are endless, limited only by your imagination and specific organizational requirements.
Gathering Your Creative Arsenal: Essential Supplies
Embarking on this rewarding DIY journey requires just a few key materials and tools. The good news is that most items are readily available at craft stores, making preparation a breeze:
- Thick Felt: This is the cornerstone of your project. As mentioned, thick felt is crucial for structure and durability. Look for high-quality craft felt, often sold by the yard or in large sheets. Brands like Kunin Felt are highly recommended for their stiffness and extensive color palette. Choose a color or combination of colors that complements your home decor.
- Sharp Scissors: Essential for clean, precise cuts through felt. Fabric shears are ideal, as they prevent fraying and ensure smooth edges.
- Ruler or Measuring Tape: Accuracy is key for a professional-looking finish.
- Fabric Marker or Chalk: For marking cut lines and pocket placements on your felt.
- Sewing Machine (or Strong Fabric Glue): While a sewing machine offers the most durable and polished finish, a high-quality fabric glue suitable for felt can be used for a “no-sew” option. If sewing, choose a thread color that matches or contrasts appealingly with your felt.
- Optional Embellishments: Consider decorative buttons, embroidery floss for hand-stitching accents, fabric paint, or stencils to add a personal touch.
- Hanging Mechanism: Depending on where you plan to hang your organizer and the desired aesthetic, you might need:
- Grommets and a dowel or curtain rod for a classic, sturdy hang.
- Fabric loops sewn into the top, which can then be slipped onto hooks or a rod.
- Adhesive hooks for a damage-free wall mounting solution (ensure they can support the weight of the organizer and its contents).
The Crafting Journey: A Step-by-Step Overview
Creating your felt organizer is a straightforward process that yields impressive results. While detailed visual tutorials (like Judi’s, which inspired this very project!) are invaluable for specific measurements and techniques, here’s a general outline of the steps involved:
- Design and Plan: Begin by sketching your desired organizer. Consider the dimensions of your wall space and the items you intend to store. Decide on the number, size, and configuration of your pockets.
- Cut the Main Body: Carefully measure and cut your large piece of thick felt to form the main back panel of the organizer. This will be the foundation.
- Prepare the Pockets: Measure and cut separate pieces of felt for each pocket. Remember to account for seam allowances if you’re sewing, or extra material for folding if gluing. You might want to experiment with different pocket depths and widths for varied storage needs.
- Form the Pockets: Fold the pocket pieces as desired and secure their edges. If sewing, hem the top edge of each pocket piece first for a neat finish.
- Attach Pockets to the Main Body: Carefully position each pocket onto the main felt panel. Pin them in place, ensuring they are evenly spaced and straight. Then, either sew them securely along the sides and bottom (leaving the top open) or use strong fabric glue to create durable bonds. Reinforce the top corners of the pockets for extra strength, especially if they’ll hold heavier items.
- Add a Hanging Mechanism: This is the final structural step. If using grommets, install them along the top edge of your main panel. If creating fabric loops, sew them securely. Alternatively, reinforce the top edge if you plan to use adhesive hooks directly on the felt.
- Personalize and Embellish: Now for the fun part! Add decorative stitching, a contrasting felt border, an embroidered monogram, or stenciled designs. Let your creativity shine and make the organizer truly yours.
The entire process is designed to be enjoyable and efficient. You’ll be amazed at how quickly your vision transforms into a tangible, functional piece of home decor. Don’t hesitate to make several at a time – once you get the hang of it, you’ll want one for every room!
Beyond the Basics: Customization and Personalization
One of the greatest joys of DIY is the ability to infuse your personal style into every creation. Your felt organizer is a blank canvas awaiting your unique touch:
- Color Play: Don’t limit yourself to a single color. Use contrasting colors for the main panel and pockets, or create a gradient effect. Vibrant hues can add a pop of color to a neutral room, while subtle tones can enhance a sophisticated aesthetic.
- Pocket Variety: Experiment with different pocket shapes and sizes. Some pockets can be narrow and tall for pens or rulers, while others can be wide and shallow for mail, or deep for books. You can even add small, buttoned flaps to some pockets for extra security.
- Textural Elements: Incorporate other fabric types into your design, such as small patches of patterned cotton or linen, to add visual interest. Felt itself comes in various textures, from smooth to heathered.
- Decorative Stitching: If using a sewing machine, explore decorative stitch settings. For a handmade touch, add visible hand-stitching in a contrasting embroidery floss around the pocket edges or as a design element on the main panel.
- Embellishments: Attach unique buttons, small decorative pins, fabric appliques, or even incorporate simple embroidery designs before assembling the pockets.
- Alternative Hanging Styles: Instead of a rod, consider a rustic branch for a bohemian look, or individual leather straps for an industrial touch.
Each customization makes your organizer not just a storage item, but a reflection of your creativity and a bespoke element of your home decor.
The Deeper Value of DIY: More Than Just a Project
Engaging in DIY projects like crafting a felt organizer offers benefits that extend beyond the finished product. It’s a journey of self-discovery and accomplishment:
- A Sense of Achievement: There’s immense satisfaction in looking at something you’ve created with your own hands. It’s a tangible representation of your effort and skill.
- Creative Outlet: In our busy lives, carving out time for creative expression can be incredibly therapeutic. Crafting allows you to step away from screens and engage in a hands-on activity that sparks joy.
- Tailored Solutions: Mass-produced items rarely fit perfectly. DIY allows you to design a solution that precisely matches your needs, space, and aesthetic preferences.
- Unique Home Decor: Your handmade organizer will be unique, adding character and warmth to your home that no store-bought item can replicate.
- Mindfulness and Stress Relief: Focusing on a creative task can be a form of mindfulness, helping to reduce stress and improve mental clarity.
So, as you watch inspiring tutorials and gather your supplies, remember that you’re not just making an organizer; you’re investing in your home, your well-being, and your creative spirit.
Maintaining Your Beautiful Felt Organizer
To ensure your handmade felt organizer remains a beloved and functional part of your home for years to come, proper care is essential. Felt is a durable material, but it benefits from gentle treatment:
- Spot Cleaning: For minor spills or marks, spot clean immediately with a damp cloth and a mild soap solution. Gently blot the area; do not rub vigorously, as this can damage the felt fibers.
- Dusting: Regularly dust your organizer with a soft brush or lint roller to prevent dust accumulation, which can dull its appearance.
- Avoid Overloading: While thick felt is sturdy, consistently overloading the pockets with excessively heavy items can cause stretching or sagging over time. Distribute weight evenly and respect its capacity.
- Gentle Washing (if necessary): If a deeper clean is required, hand washing in cool water with a mild detergent is recommended. Submerge, gently squeeze out water (do not wring), and lay flat to dry on a clean towel. Avoid machine washing, as it can cause significant shrinkage and damage.
- Reshaping: If your organizer loses some shape after washing or heavy use, gently reshape it while damp and allow it to air dry completely.
By following these simple care instructions, your stylish felt organizer will continue to enhance your home’s organization and aesthetic appeal.
Start Your DIY Journey Today!
The journey to a more organized and aesthetically pleasing home doesn’t have to be complicated or expensive. With this DIY felt organizer, you can transform clutter into charming order with minimal effort and maximum style. Its modern appeal, ease of creation, and incredible versatility make it a standout project for anyone passionate about home decor and effective organization.
Don’t just dream of a tidy space; create it! Gather your thick felt, choose your favorite colors, and get ready to craft a solution that is as beautiful as it is functional. Whether you’re inspired by a detailed tutorial or embark on your own design adventure, the satisfaction of creating these sharp-looking, indispensable organizers is truly unparalleled. Take the first step towards a more serene and stylish home today – you’ll be glad you did!