
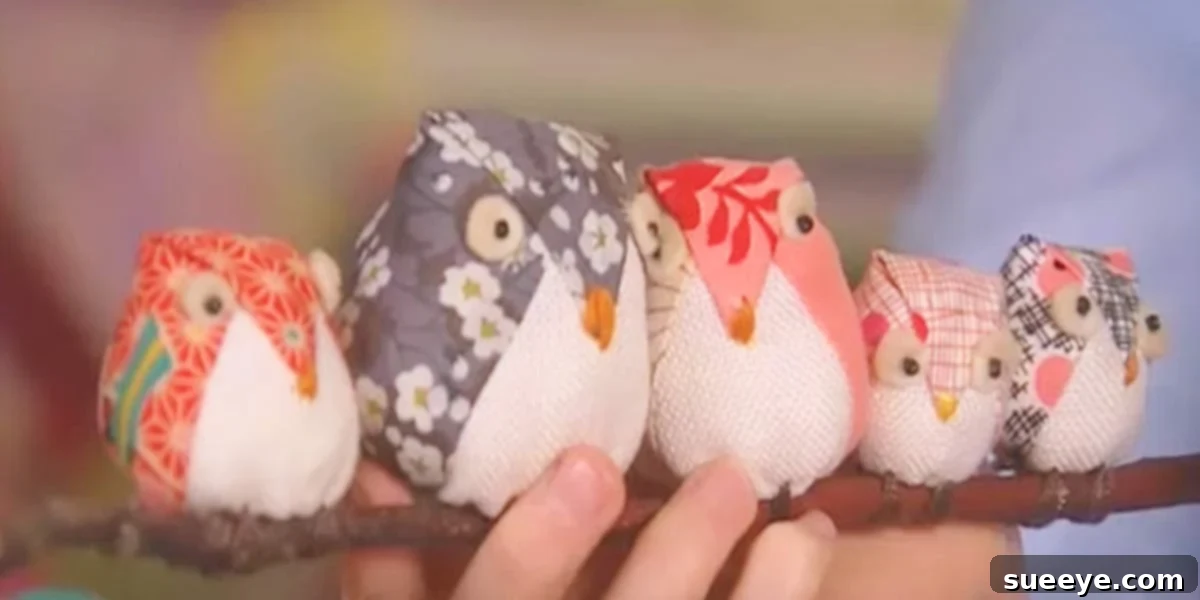
Craft Adorable DIY Fabric Owls: Your Complete Step-by-Step Sewing Tutorial
Have you ever stumbled upon a DIY project that instantly captures your heart? For many crafters, myself included, the delightful charm of handmade fabric owls holds an undeniable appeal. These adorable little creatures, with their wise eyes and cozy textures, are not just captivating to look at but also incredibly satisfying to create. Whether you’re a seasoned sewing enthusiast or a complete beginner eager to try a new craft, making your own fabric owls is a wonderfully rewarding experience that results in truly unique pieces.
Owls have always held a special place in folklore and nature. Their majestic presence and nocturnal mystery make them fascinating subjects. My own backyard is often graced by a family of owls, and watching them grow and thrive has only deepened my affection for these magnificent birds. This personal connection naturally drew me to the idea of crafting my own miniature, soft versions—little companions that bring a touch of woodland magic indoors. The process of bringing these fabric characters to life is surprisingly simple, yet the end result is profoundly endearing.
Imagine these precious little owls perched on a bookshelf, nestled among throw pillows, or acting as charming guardians on a mantelpiece. They effortlessly add character and warmth to any room, reflecting a handmade touch that mass-produced decor simply cannot replicate. Beyond personal enjoyment, these fabric owls make truly unforgettable gifts. I’ve crafted several sets for friends who immediately fell in love with their whimsical appeal, and the smiles they bring to recipients’ faces are priceless. They are thoughtful, personal, and a testament to the care you’ve put into making something special.
This tutorial will guide you through every step of creating your own parliament of fabric owls. You’ll discover just how easy and quick this project can be, transforming simple fabric scraps into enchanting decorative pieces. Get ready to embark on a creative journey that promises to fill your home with charming characters and your heart with the joy of making!
Why Fabric Owls? The Enduring Appeal of These Wise Creatures in Your Home
Owls are more than just birds; they are symbols of wisdom, mystery, and intuition. Incorporating owl motifs into home decor has become increasingly popular, offering a blend of natural charm and sophisticated whimsy. Fabric owls, in particular, bring a softness and handcrafted feel that synthetic decorations often lack. Each stitch, each chosen fabric, contributes to a unique personality for your owl, making it a truly one-of-a-kind piece of art.
One of the greatest advantages of DIY fabric owls is their incredible versatility. They can be designed to fit almost any aesthetic, from rustic farmhouse to modern minimalist, simply by selecting different fabrics and embellishments. Choose vibrant, playful patterns for a child’s room, or opt for muted, sophisticated tones for an elegant living space. Their compact size means they fit perfectly in small nooks, on shelves, or even as part of a larger decorative vignette. They also require minimal materials, often allowing you to use up fabric scraps you already have, making this an eco-friendly and budget-conscious crafting choice.
Moreover, the process of creating something with your own hands offers immense therapeutic benefits. The focused attention required for sewing can be a wonderful way to de-stress and engage in mindful activity. There’s a profound sense of accomplishment that comes from turning raw materials into a tangible, beautiful object. As you watch your fabric owl take shape, piece by piece, you’re not just crafting a decoration; you’re cultivating a sense of calm and creative satisfaction.
Gather Your Materials: What You’ll Need for Your Fabric Owl Project
Before diving into the sewing process, ensure you have all your materials neatly organized. Having everything at hand will make your crafting experience much smoother and more enjoyable. Here’s a detailed list of what you’ll need:
- Fabric Scraps: This is where the fun begins! You’ll need at least two complementary fabrics for each owl. One for the main body and another for the wings, belly, and facial features. Quilting cottons are excellent choices for beginners due to their ease of handling and wide variety of patterns. You can also experiment with felt, linen, or even soft flannels for different textures. Consider coordinating colors and patterns that appeal to your personal style or the recipient’s preferences.
- Stuffing/Poly-Fil: High-quality polyester fiberfill is ideal for giving your owls a soft, plush, and squeezable feel. Make sure to have enough on hand to create a firm, well-shaped owl without overstuffing.
- Buttons for Eyes: These add so much character! Choose two matching buttons for each owl’s eyes. Black or dark brown buttons offer a classic look, but feel free to experiment with colored or textured buttons for a more whimsical touch. If making owls for small children, consider embroidering the eyes for safety to avoid choking hazards.
- Embroidery Floss or Felt Scraps for Beak: A small triangle of felt or a few simple stitches of embroidery floss can form the beak. Yellow, orange, or brown are traditional choices.
- Sewing Machine (Optional, but Recommended): While these owls can be hand-sewn, a sewing machine will significantly speed up the process and result in more consistent seams.
- Thread: All-purpose sewing thread in a color that matches or complements your main fabric.
- Pins: Essential for holding your fabric pieces securely in place before sewing.
- Scissors: Sharp fabric scissors are a must for clean cuts.
- Fabric Marker or Chalk: For tracing your pattern pieces onto the fabric.
- Iron and Ironing Board: To press seams and ensure your fabric lies flat and crisp.
- Turning Tool or Chopstick: Helpful for pushing out corners and curves after sewing.
- Basic Sewing Kit: This includes a needle (for hand sewing and closing openings), seam ripper (just in case!), and thimble.
Having these items ready will ensure a smooth and enjoyable crafting experience as you bring your adorable fabric owls to life.
Step-by-Step Guide: How to Sew Your Own Adorable Fabric Owl
Now that you have all your materials, let’s dive into the creative process! This tutorial is broken down into easy-to-follow steps, perfect for crafters of all skill levels.
Step 1: Preparing Your Fabric and Pattern
The foundation of a great fabric owl lies in accurate cutting. Begin by printing out your owl pattern. You can easily find free patterns online by searching for “DIY fabric owl pattern” or “stuffed owl pattern,” or even sketch a simple owl shape yourself. A basic pattern will usually include pieces for the main body, wings, and a belly patch. If your pattern includes small ear tufts or feet, cut those out as well. Ensure your printer settings are correct so the pattern prints at the desired size.
Once you have your paper pattern pieces, carefully cut them out. Iron your chosen fabrics to remove any wrinkles, ensuring a smooth surface for tracing. Lay your main body fabric flat, right sides together (if it’s a symmetrical pattern). Place your body pattern piece on the fabric, aligning it with the grain if necessary. Pin the pattern piece securely to the fabric to prevent shifting. Using your fabric marker or chalk, carefully trace around the pattern piece. Repeat this to cut out two main body pieces. For the wings and belly, choose your accent fabric. Cut two wing pieces and one belly piece. If your pattern also includes small eye circles, cut those from felt or a contrasting fabric as well.

Step 2: Assembling the Owl Body
With all your fabric pieces cut, it’s time to start sewing! First, take your belly piece and place it onto the right side of one of your main body fabric pieces. Pin it in place. Using your sewing machine (or hand-sewing), carefully appliqué or stitch the belly piece onto the main body piece. You can use a straight stitch close to the edge or a decorative zigzag stitch. Repeat this process for the two wing pieces, attaching them to the upper sides of the same main body piece, overlapping slightly as desired. These are typically sewn with a simple straight stitch near the edges, ensuring they are securely attached.
Next, place the two main body pieces right sides together, ensuring all edges align perfectly. Pin generously around the entire perimeter of the owl. This is crucial for preventing fabric shifts while sewing. When pinning, mark a small opening (about 2-3 inches long) at the bottom or side of the owl’s body. This opening will be used for stuffing later. Using a 1/4-inch or 3/8-inch seam allowance (depending on your preference and pattern), stitch around the entire owl body, making sure to backstitch at the beginning and end of the opening to reinforce the seams. Carefully trim the seams, especially around curves, and clip any inward curves to ensure a smooth turn-out. Be careful not to cut through your stitches.

Step 3: Stuffing and Shaping Your Owl
Now comes the magical part where your owl starts to take on its three-dimensional form! Carefully turn your sewn owl body right side out through the opening you left. Use a turning tool, a chopstick, or even the eraser end of a pencil to gently push out all the seams and corners, especially the ear tufts and the bottom curves. Take your time with this step to ensure your owl has a crisp and defined shape.
Once turned, begin to stuff your owl with poly-fill. Start by pushing small handfuls of stuffing into the farthest points, such as the ears and corners, making sure they are firmly packed. Gradually work your way towards the center, filling the body evenly. The key is to stuff firmly but not so tightly that the fabric distorts. Use your fingers to mold and shape the owl as you go, ensuring there are no lumpy areas. A well-stuffed owl will have a pleasing, plump feel. Once you are happy with the firmness and shape, it’s time to close the opening. Fold in the raw edges of the opening and use a ladder stitch (or invisible stitch) by hand to neatly close it. This stitch is almost invisible and will give your owl a professional finish.

Step 4: Adding Facial Features and Embellishments
This is where your owl’s personality truly shines through! Take your two chosen buttons for the eyes. Position them on the owl’s face, usually above the belly patch, to find the most adorable placement. Once you’re satisfied, securely sew them in place using strong thread. You can sew them through to the back and tie off, or if you prefer a cleaner back, sew them on just through the top layer of fabric. Ensure they are firmly attached.
For the beak, cut a small triangle from felt or use embroidery floss. If using felt, hand-stitch the felt triangle below the eyes. If using embroidery floss, use a simple straight stitch or a satin stitch to create a small triangular beak shape. You can also add small circles of felt in a contrasting color under the buttons to create larger, more expressive eyes, or add small fabric eyebrows for a mischievous look. Consider adding details like small fabric feet, or even a tiny fabric bow tie or flower to personalize your owl further. Little details can transform a simple owl into a unique character.

Personalize Your Parliament: Creative Variations and Customization Ideas
The beauty of DIY projects lies in the ability to infuse them with your unique style. Once you’ve mastered the basic fabric owl, the possibilities for customization are endless. Here are some ideas to inspire your creativity and help you make each owl truly one-of-a-kind:
- Fabric Choices: Experiment with different types of fabrics. Soft minky or fleece can create extra cuddly owls, while burlap or linen can give a rustic, farmhouse aesthetic. Velvet or silk scraps can elevate your owls for a more luxurious look. Don’t be afraid to mix and match textures – a cotton body with felt wings, for example, adds visual interest.
- Size Variations: Adjust the size of your pattern to create owls of different dimensions. A collection of small, medium, and large owls clustered together makes for a charming display, a little parliament of owls!
- Embellishments Galore: Beyond buttons and felt, consider adding other embellishments. Small pieces of lace or ribbon can be used for bow ties or hair bows. Tiny beads or sequins can add a subtle sparkle. Embroider details like feathers on the wings or intricate patterns on the belly. You can even use fabric paint for more detailed designs on the body.
- Thematic Owls: Create owls for specific holidays or seasons. Use orange and black fabrics for Halloween owls, red and green for Christmas, or pastel colors for spring. A tiny Santa hat or a floral crown can instantly transform your basic owl into a festive or seasonal character.
- Scented Owls: For an extra touch, you can add a small sachet of dried lavender or cedar chips inside your owl before fully stuffing. This will give your handmade creation a subtle, pleasant aroma, making it a wonderful addition to a bedroom or a thoughtful gift.
- Weighted Owls: For a more substantial feel, you can add a small bag of poly pellets or rice (sealed securely in a separate bag) to the bottom of the owl before stuffing with fiberfill. This will give it a nice weight, allowing it to sit more firmly on a shelf.
Each of these variations offers a chance to explore new techniques and express your personal aesthetic, ensuring that no two owls you create will ever be exactly alike.
Beyond the Sewing Machine: Displaying and Gifting Your Handmade Owls
Once your adorable fabric owls are complete, the next exciting step is deciding how to showcase them. Their versatile nature means they can enhance various settings and serve multiple purposes, making them incredibly popular for both personal decor and heartfelt gifting.
For home decor, these owls are truly adaptable. Place them individually or in small groups on bookshelves, alongside your favorite books and curios. They can add a touch of whimsy to a fireplace mantel, bringing a soft, handcrafted element to the space. In a child’s nursery or bedroom, colorful fabric owls can sit on dressers, window sills, or even be incorporated into mobiles (ensure they are securely attached and safe for children). During festive seasons, dress them up with tiny accessories and integrate them into your holiday displays, adding a unique, personal touch that will surely spark conversation.
As gifts, handmade fabric owls are simply unparalleled. They embody a level of thought and effort that store-bought items rarely achieve. Consider them for baby shower gifts, new home celebrations, birthdays, or just as a ‘thinking of you’ token for a dear friend. Imagine presenting a new parent with a soft, custom-made owl for their baby’s crib, or gifting a nature lover a unique, fabric rendition of their favorite forest creature. They are perfect for teachers, colleagues, or anyone who appreciates the beauty of handcrafted items. Pair an owl with a good book, a cozy blanket, or a scented candle for a truly luxurious and thoughtful present. Their compact size also makes them ideal for tucking into gift baskets or sending as a cheerful surprise to brighten someone’s day.
The sentiment behind a handmade gift lasts far longer than the gift itself. It communicates care, creativity, and a personal investment that makes the recipient feel truly valued. Every time they look at their fabric owl, they’ll be reminded of your thoughtful gesture.
The Joy of Crafting: More Than Just a Project
Engaging in DIY projects like making fabric owls offers benefits that extend far beyond the finished product. Crafting is a powerful tool for well-being, providing a much-needed respite from the fast pace of modern life. The rhythmic motion of sewing, the tactile sensation of fabric, and the satisfaction of watching a creation come to life can be incredibly meditative and calming.
It’s an opportunity to unplug from digital screens and reconnect with a more fundamental, hands-on form of expression. As you focus on stitches and shapes, your mind finds a peaceful rhythm, helping to reduce stress and anxiety. The act of creating fosters patience, problem-solving skills, and a sense of accomplishment. Each small decision, from choosing fabric patterns to carefully placing a button, contributes to a larger, satisfying outcome. This creative process boosts self-esteem and provides a tangible representation of your capabilities.
Furthermore, sharing your handmade creations, whether as gifts or showcasing them in your home, connects you with others. It opens up conversations, inspires fellow crafters, and often leads to sharing tips and tricks within a community of like-minded individuals. There’s a beautiful reciprocity in the world of crafting, where inspiration flows freely, and appreciation for handmade goods is abundant. This simple owl project, therefore, isn’t just about sewing; it’s about nurturing your spirit, expressing your creativity, and contributing to a culture of thoughtful, personalized making.
Ready to Start? Your Next Favorite DIY Project Awaits!
You’ve now seen how charming and simple it is to create your own adorable fabric owls. From selecting your fabrics to adding the final, personalized touches, each step is an opportunity for creativity and joy. These little guys are more than just decorations; they are expressions of your craft, delightful companions, and heartwarming gifts that are sure to bring smiles wherever they go.
Don’t let the sewing machine intimidate you – the process is much easier than you might imagine, and the results are truly captivating. Whether you make one or a whole “parliament” of owls, you’ll undoubtedly fall in love with them and the rewarding experience of bringing them to life. So, gather your materials, pick your favorite fabrics, and get ready to stitch some magic. Your next cherished handmade project is just a few seams away!