
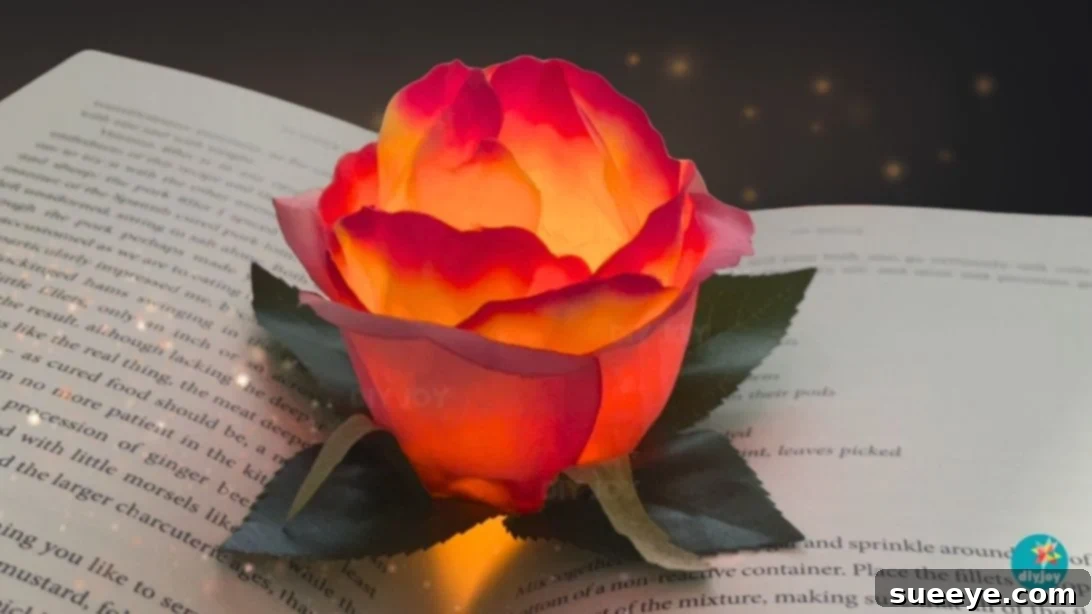
Transform your space with a touch of enchantment! This **DIY flower light** project is truly one of the most delightful and visually stunning crafts you can undertake. Imagine a soft, ambient glow emanating from a beautiful, realistic flower, creating an atmosphere that’s both pretty and undeniably magical. The best part? It’s incredibly straightforward, quick to assemble, and heaps of fun. Whether you’re looking to elevate your home decor, add a romantic touch to a wedding celebration, or create charming centerpieces for a party, these luminous floral pieces are perfectly versatile.
For many of us, the captivating imagery from Disney movies, where flowers often possess a vibrant, enchanting, and truly magical aura, sparks a deep desire to bring that wonder into our own lives. I’ve always been inspired to create a DIY flower decor piece that perfectly encapsulates this whimsical feeling. After some creative experimentation with high-quality faux flowers and a simple battery-operated tealight candle, I developed this stunning floral lamp. The result exceeded my expectations; it looks as if it’s been plucked straight from a fairytale scene! Place one on your bedside table or next to a comfy armchair with some additional fairy lights, and you instantly have the perfect cozy reading nook or a serene space for relaxation. This project isn’t just about crafting; it’s about infusing your surroundings with beauty and a sense of wonder.
One of the many appealing aspects of this project is that you don’t necessarily have to start entirely from scratch. The secret to achieving a genuinely realistic and beautiful finish lies in selecting a high-quality faux flower. While I sourced mine from DAISO, you’ll undoubtedly find excellent options at various craft stores, florists, or even online retailers. The key is to choose large, full blooms, as these will provide ample petals for a lush look and offer a better base for your light. If you’re feeling particularly adventurous and wish to add an extra layer of personalization, you can even craft your own petals from materials like crepe paper. This allows you to mimic the delicate, natural texture and varied hues of real flowers, giving your DIY flower light a unique and truly handcrafted feel. Regardless of your choice, the quality of your base flower will significantly impact the final aesthetic of your enchanting light.
How to Make a DIY Flower Light: A Step-by-Step Guide to Creating Enchanting Floral Decor
Unleash your inner crafter and create your very own luminous flower tealight candle. This comprehensive, easy-to-follow guide will walk you through each step, ensuring a beautiful result that you’ll be proud to display. Get ready to transform simple materials into a dazzling piece of floral art!
-
Prepare Your Petals: Disassemble and Cut
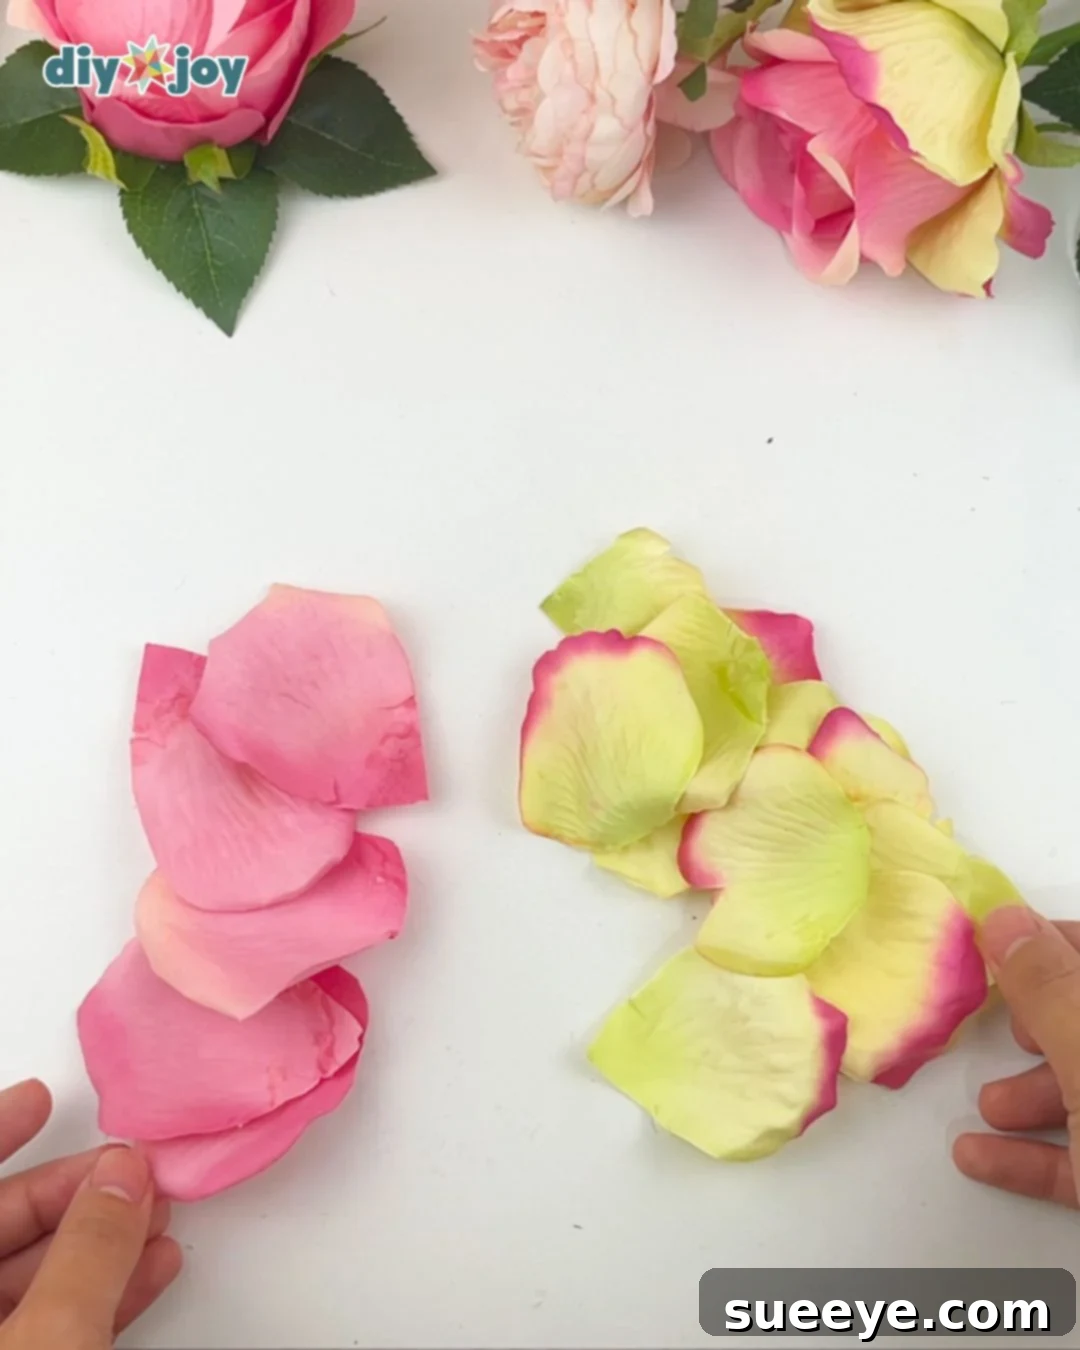
Begin by carefully disassembling your chosen faux flower. Gently remove each petal from its stem and base. For this particular project, I used a selection of 12 yellow petals in varying sizes—specifically, 8 larger petals for the main body and 4 smaller ones for layering—along with 4 large pink petals to add a beautiful contrasting accent. This variety in petal size helps create a more natural, full, and dynamic appearance for your finished flower light. Ensure you have a good mix to achieve a rich, layered effect.

-
Prepare the Spoons: Create Your Base Structure
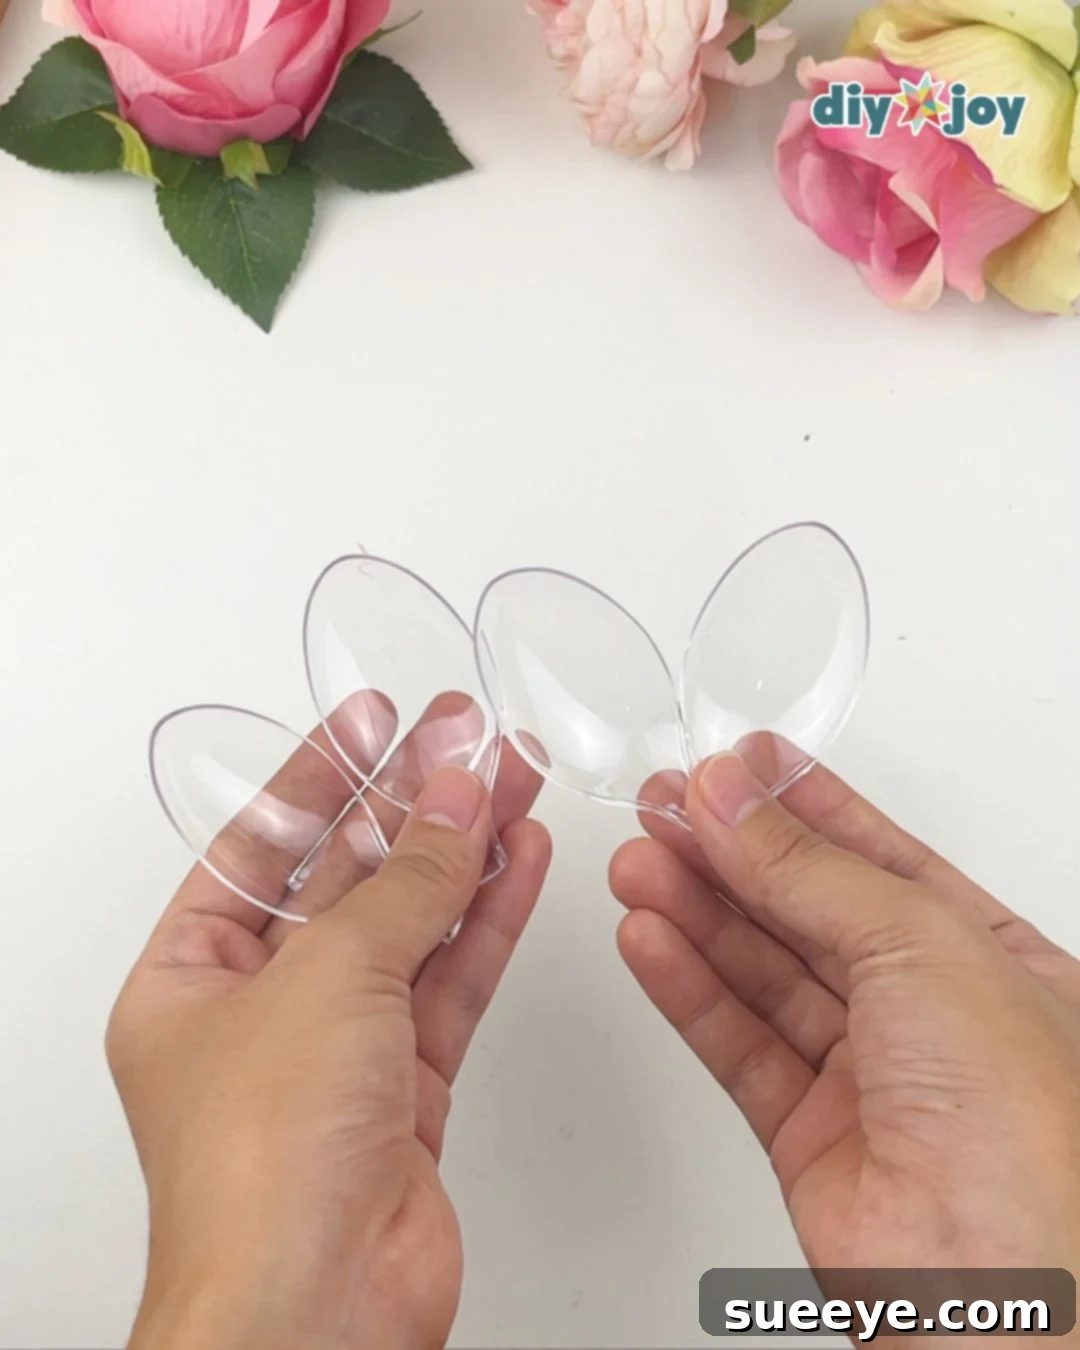
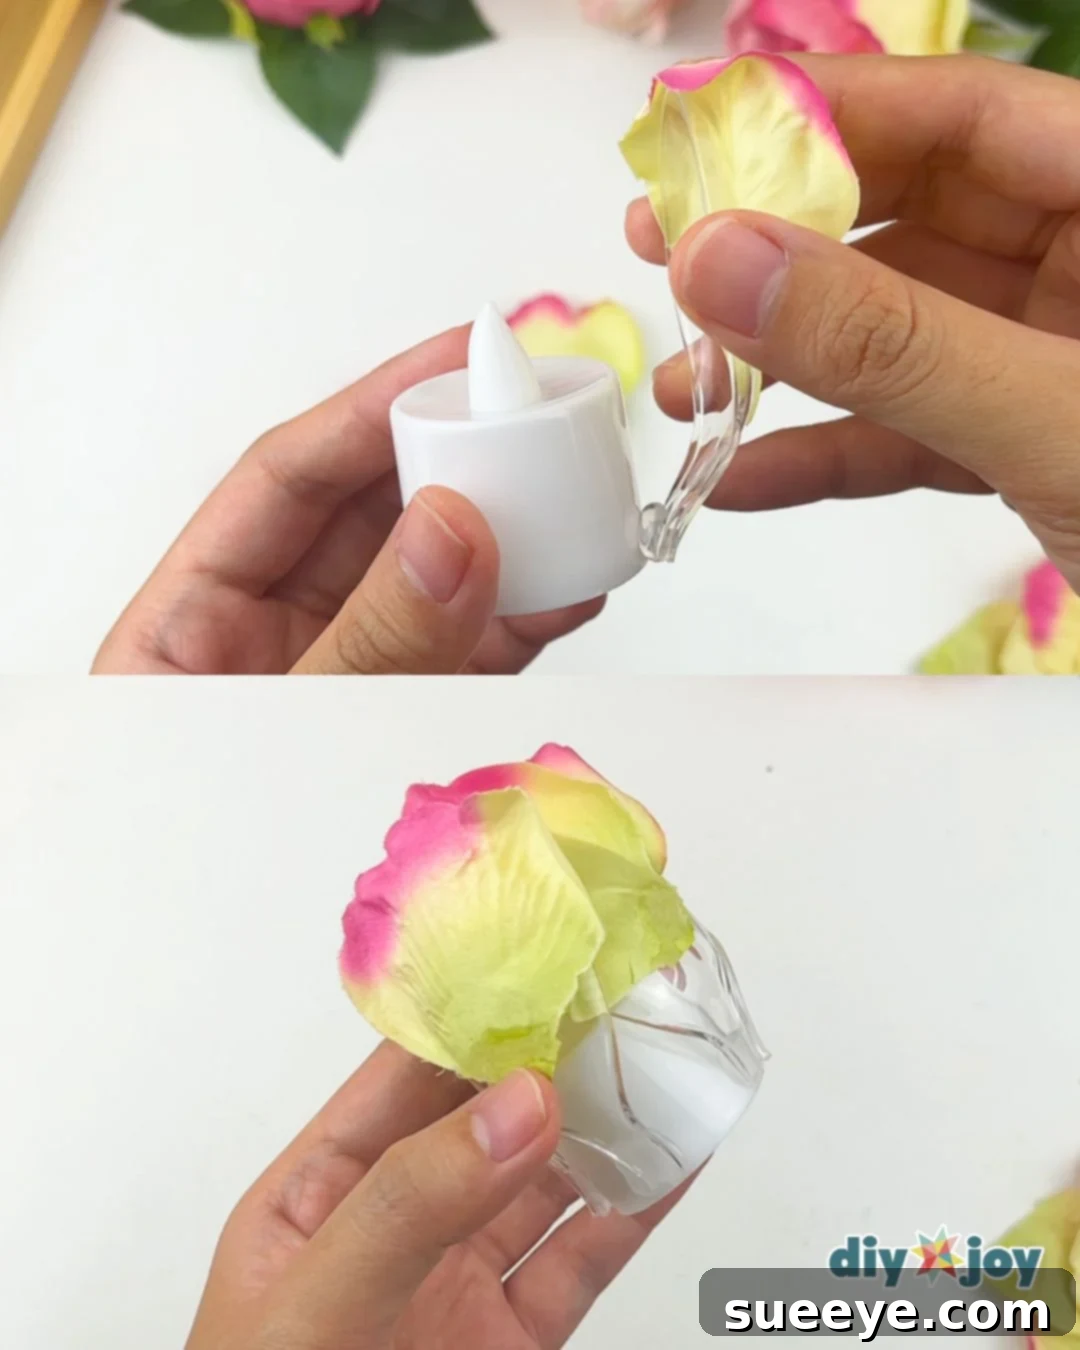
Take four clear plastic spoons and carefully cut off their handles, leaving only the bowl-shaped part. These spoon bowls will serve as a sturdy yet discreet base for your first layer of petals, providing structure and helping to create the rounded, blooming shape of the flower. Using clear spoons is ideal as they won’t detract from the floral aesthetic. Be precise with your cuts to ensure an even foundation for the petals.
-
Attach Petals to Spoons: Forming the First Layer
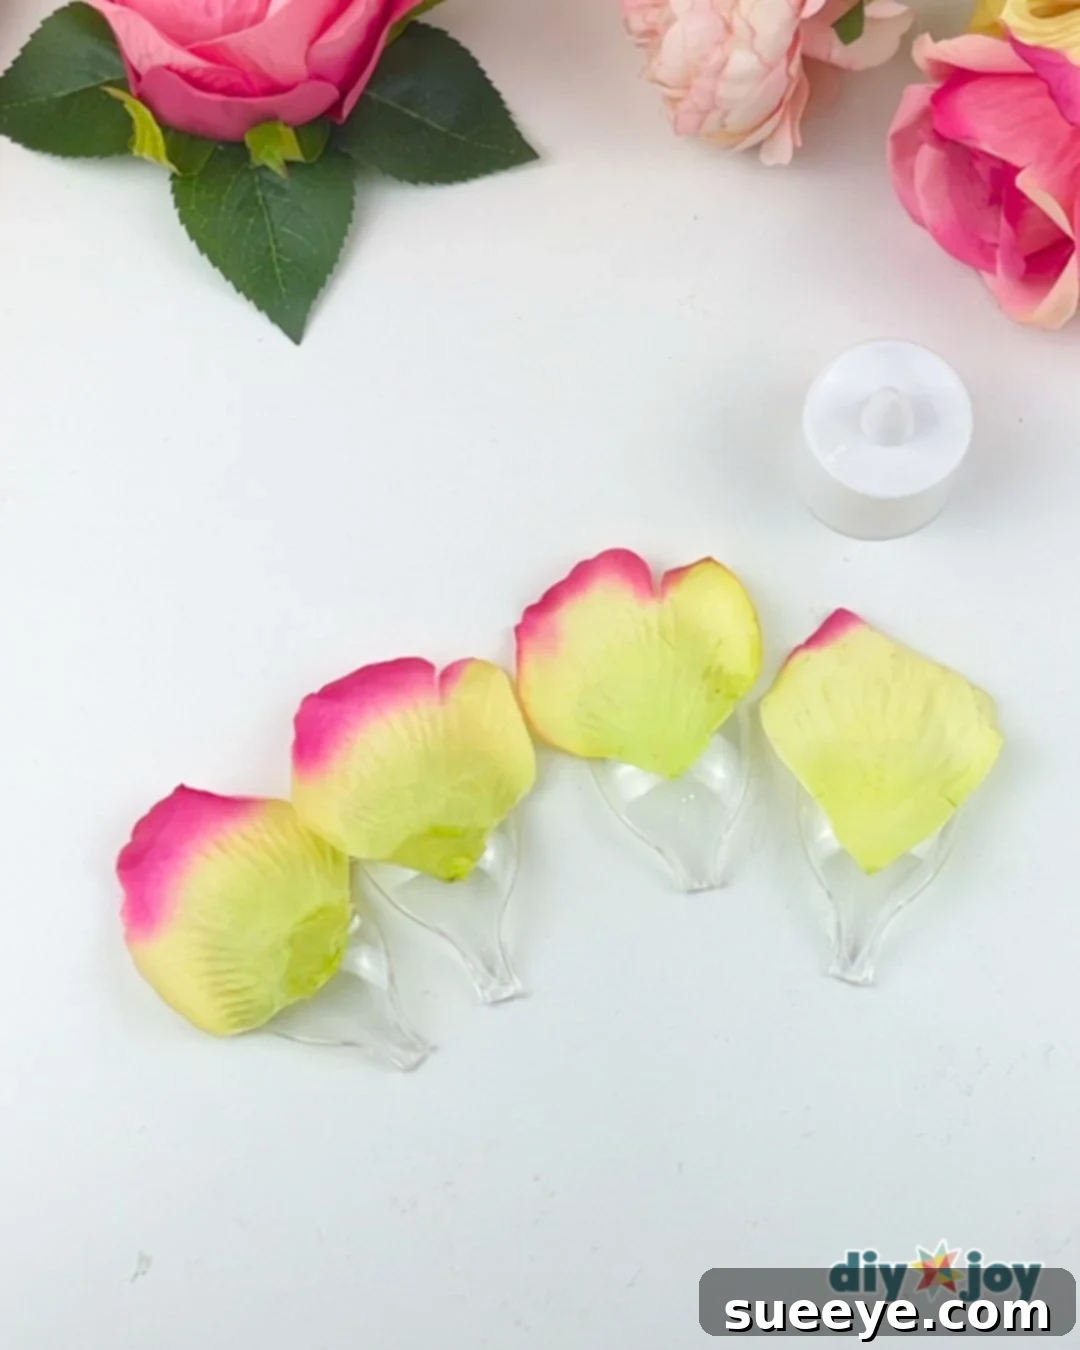
Using a hot glue gun, carefully attach one large yellow petal to the back of each spoon bowl. Position the petal so that it gently curves around the spoon, ensuring it doesn’t completely cover the entire spoon. The goal is to have the petal extend slightly beyond the spoon’s edge, creating a soft, natural curve. This initial layer of petals on the spoons will form the outer structure of your flower, setting the stage for its elegant bloom.
-
Assemble the Core: Attaching Spoons to the Tealight
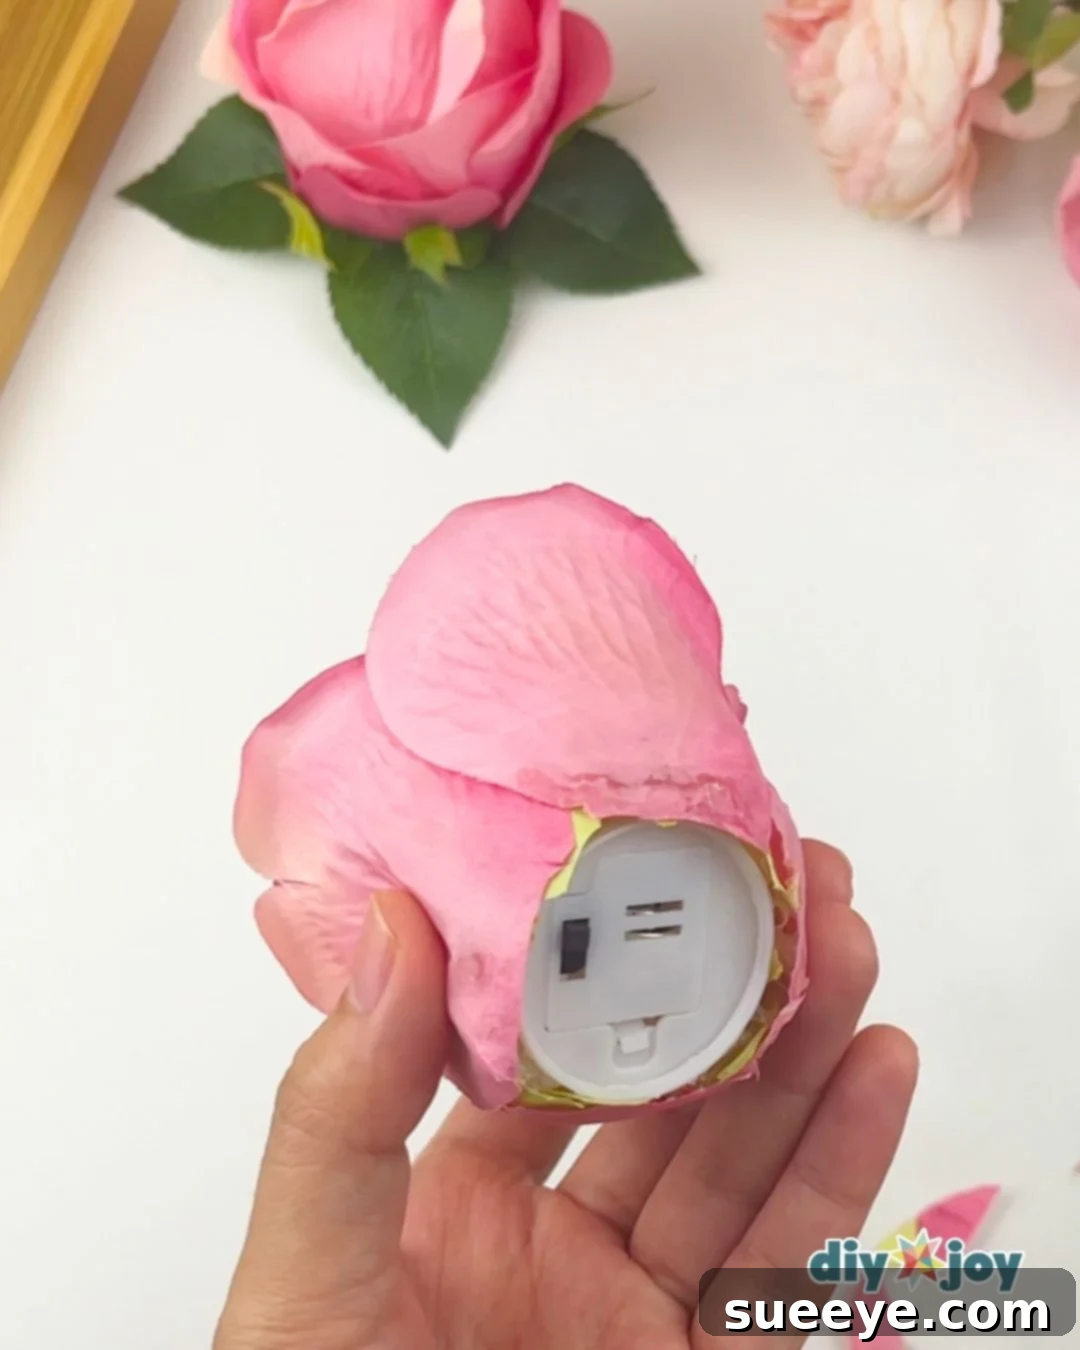
Now, it’s time to bring your flower to life around the light source. Apply a dab of hot glue to the front of each spoon (the side without the petal). Carefully glue these spoons, one by one, around the perimeter of your battery-operated tea light candle. Arrange them evenly to form a consistent circular pattern, ensuring that the switch of the tea light remains accessible for turning your flower light on and off. This step forms the central base of your illuminated bloom.
-
Fill the Base: Creating a Full, Layered Look
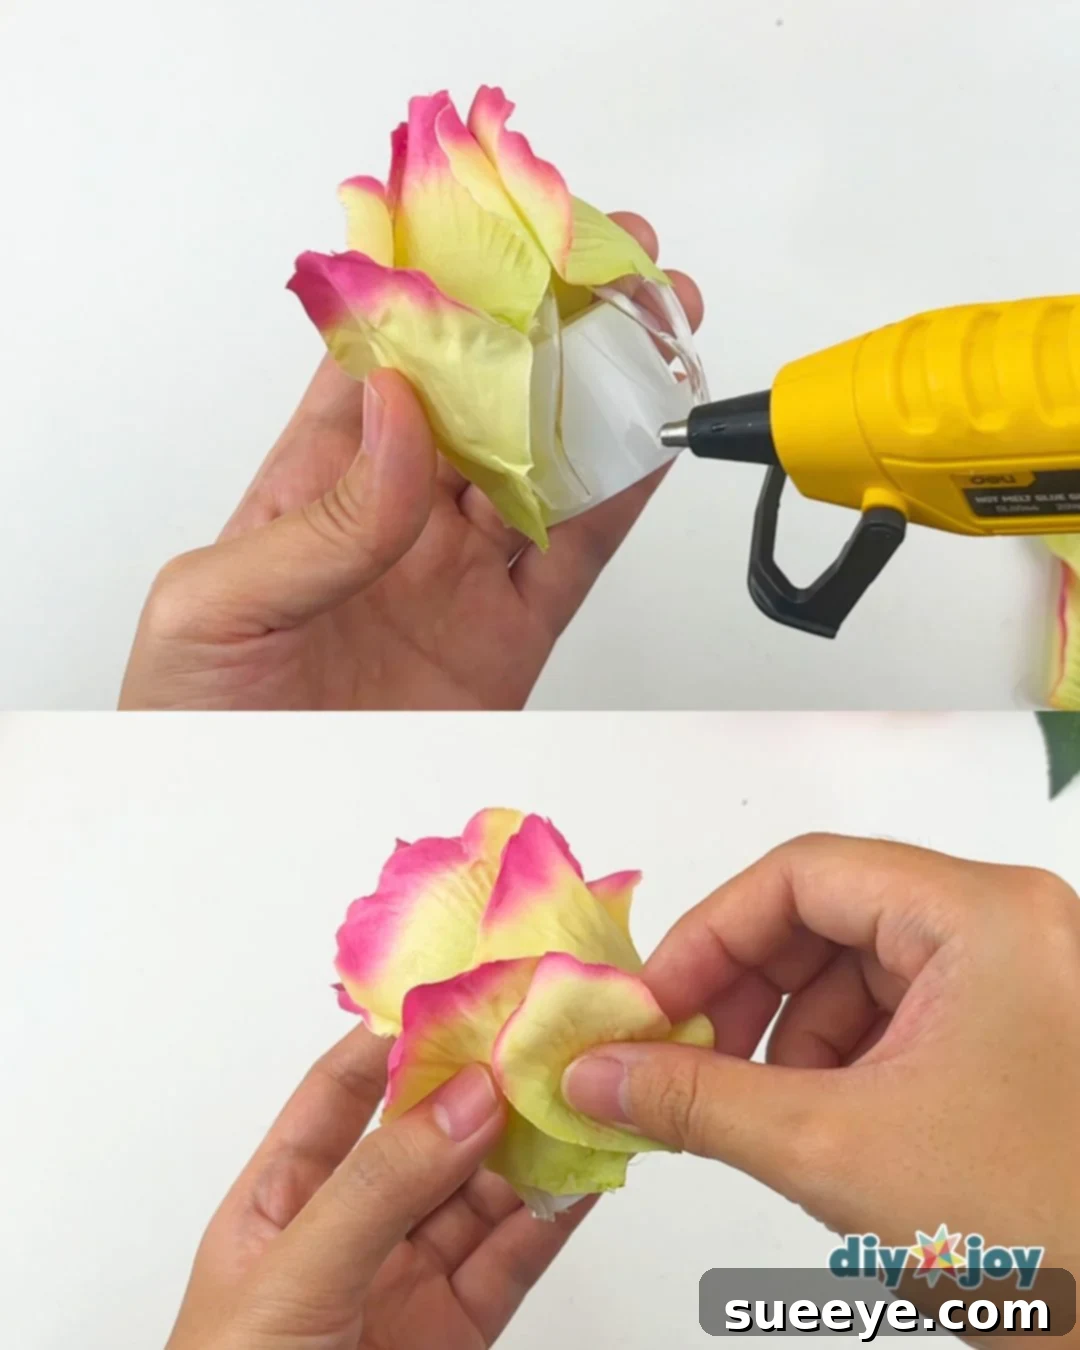
With the initial structure in place, use your remaining yellow petals to cover any visible gaps or the bottom part of the spoons. Glue these petals in layers, overlapping them slightly to create a fuller, more natural appearance. Think about how real flower petals are arranged – gently building up from the base. This step adds depth and ensures a seamless, beautiful transition from the core to the outer layers of your flower light.
-
Introduce Accent Colors: Adding Pink Petals
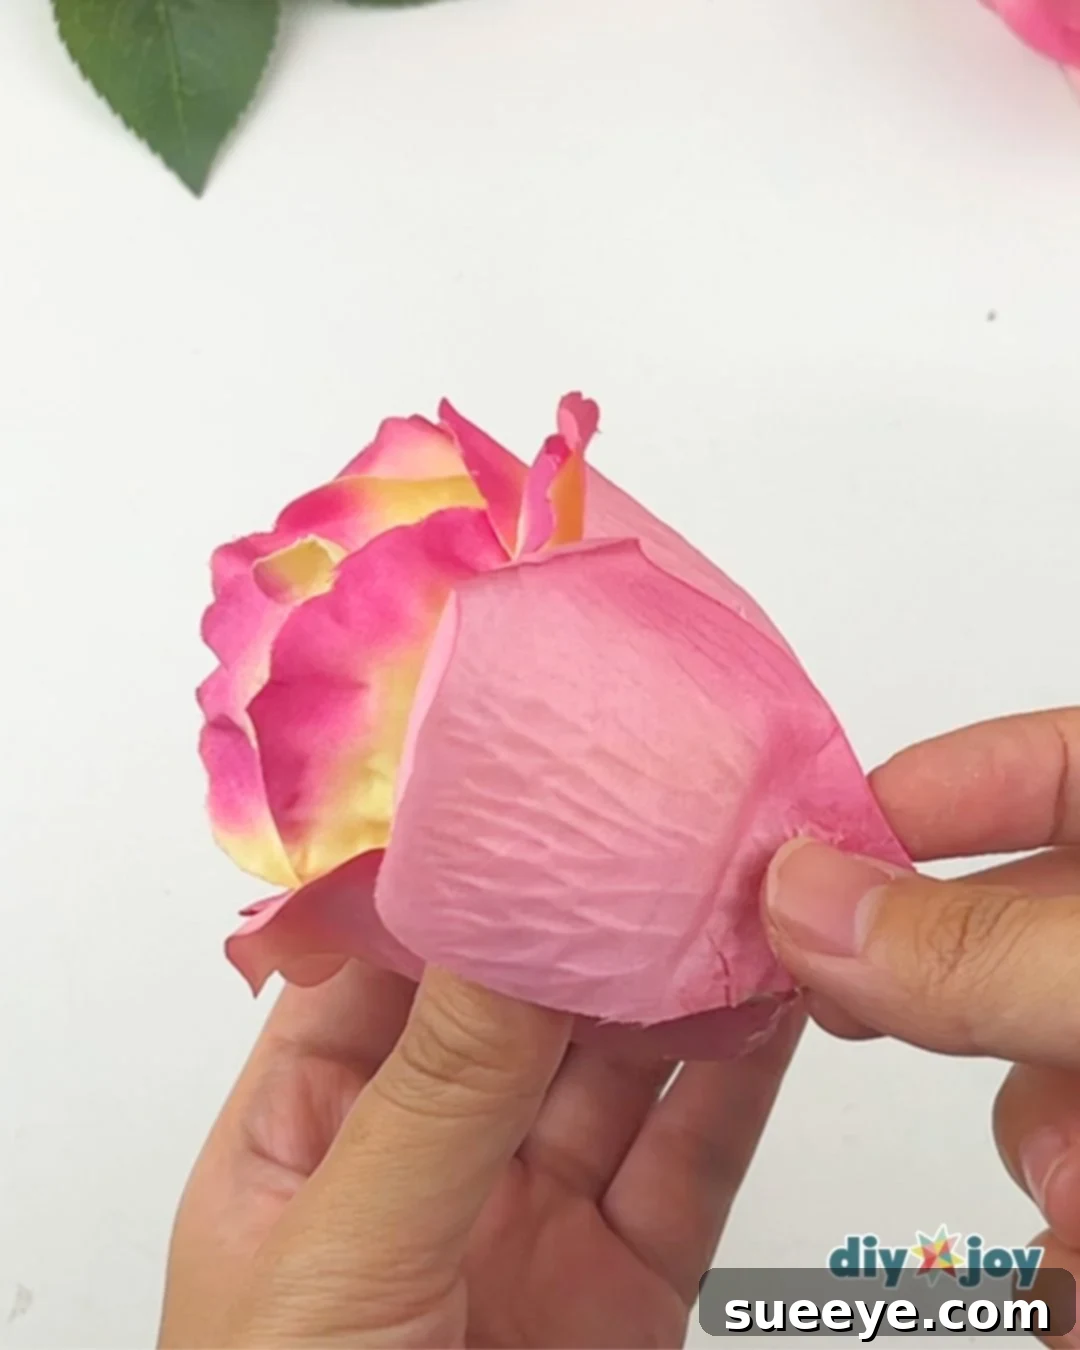
Once you’ve achieved a satisfying density with your yellow petals, it’s time to introduce your accent color. Carefully glue the pink petals among the yellow ones, focusing on areas where they can provide a beautiful contrast and enhance the flower’s overall appeal. Experiment with placement to create a harmonious blend of colors, adding visual interest and a unique touch to your floral design.
-
Refine the Shape: Trimming for Perfection
Carefully inspect the bottom of your assembled flower. If any excess material from the petals or spoons is visible or creates an uneven base, use your scissors to trim it neatly. The goal here is to create a clean, stable bottom that allows your flower light to sit flat and look polished from all angles. A tidy base contributes significantly to the overall professional finish of your craft.
-
Add Small Foliage: Attaching Sepals
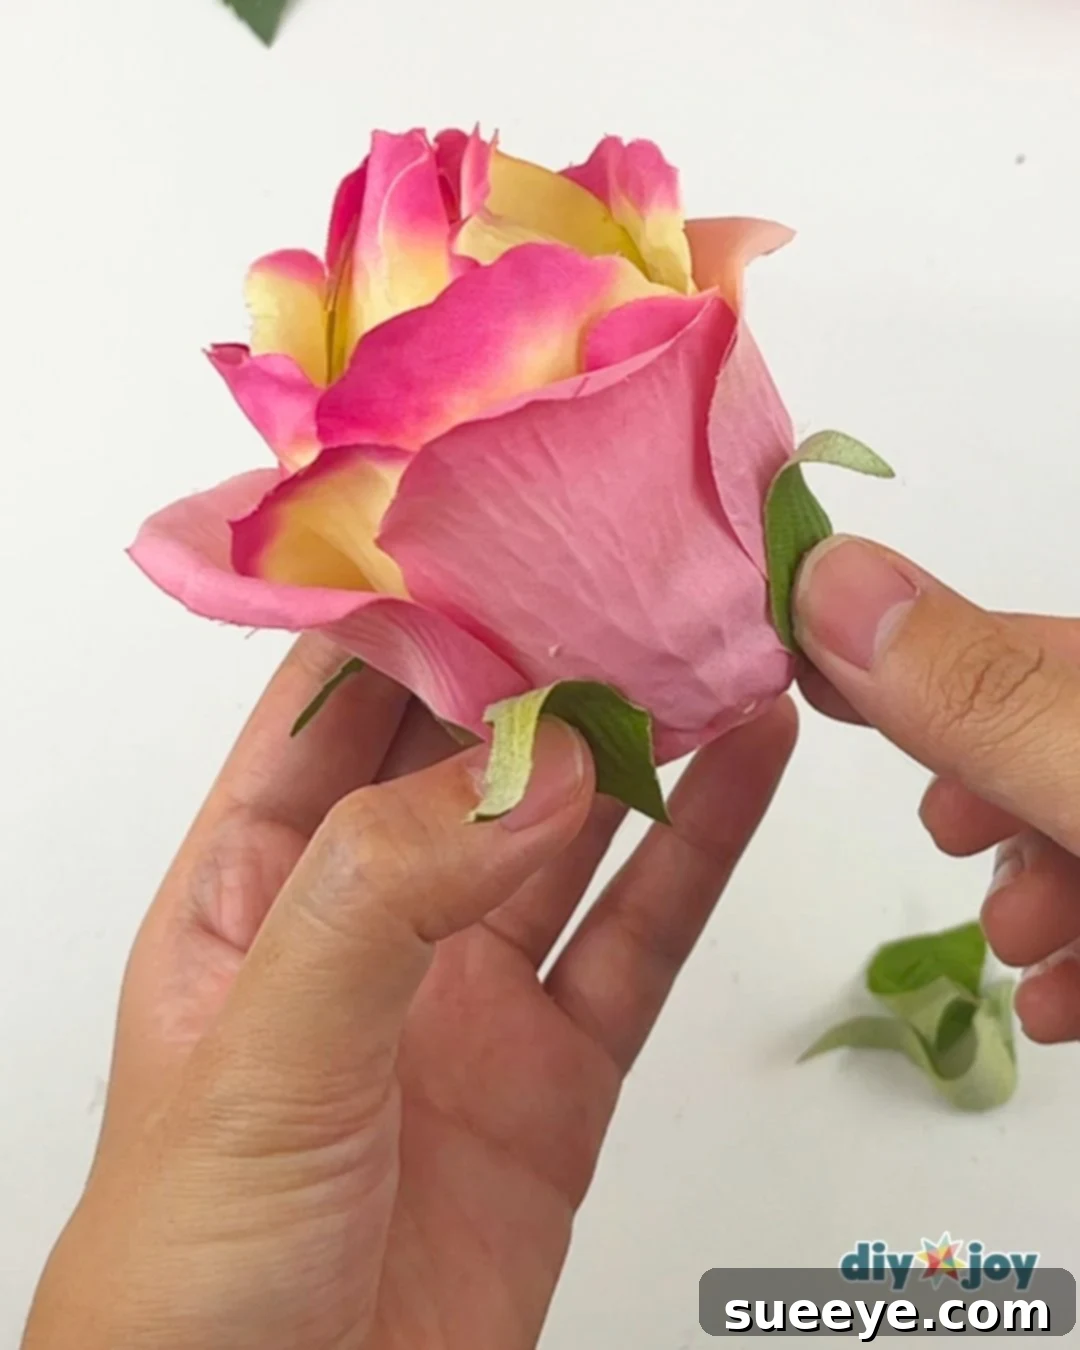
To enhance the realism of your flower, carefully cut the sepals – those small, leaf-like structures typically found at the base of a rose – into individual pieces. Using hot glue, attach these small sepals around the bottom of your newly formed rose. This step adds a natural transition from the petals to the base, making your faux flower light appear even more authentic and beautifully finished.
-
Complete with Leaves: Adding Greenery
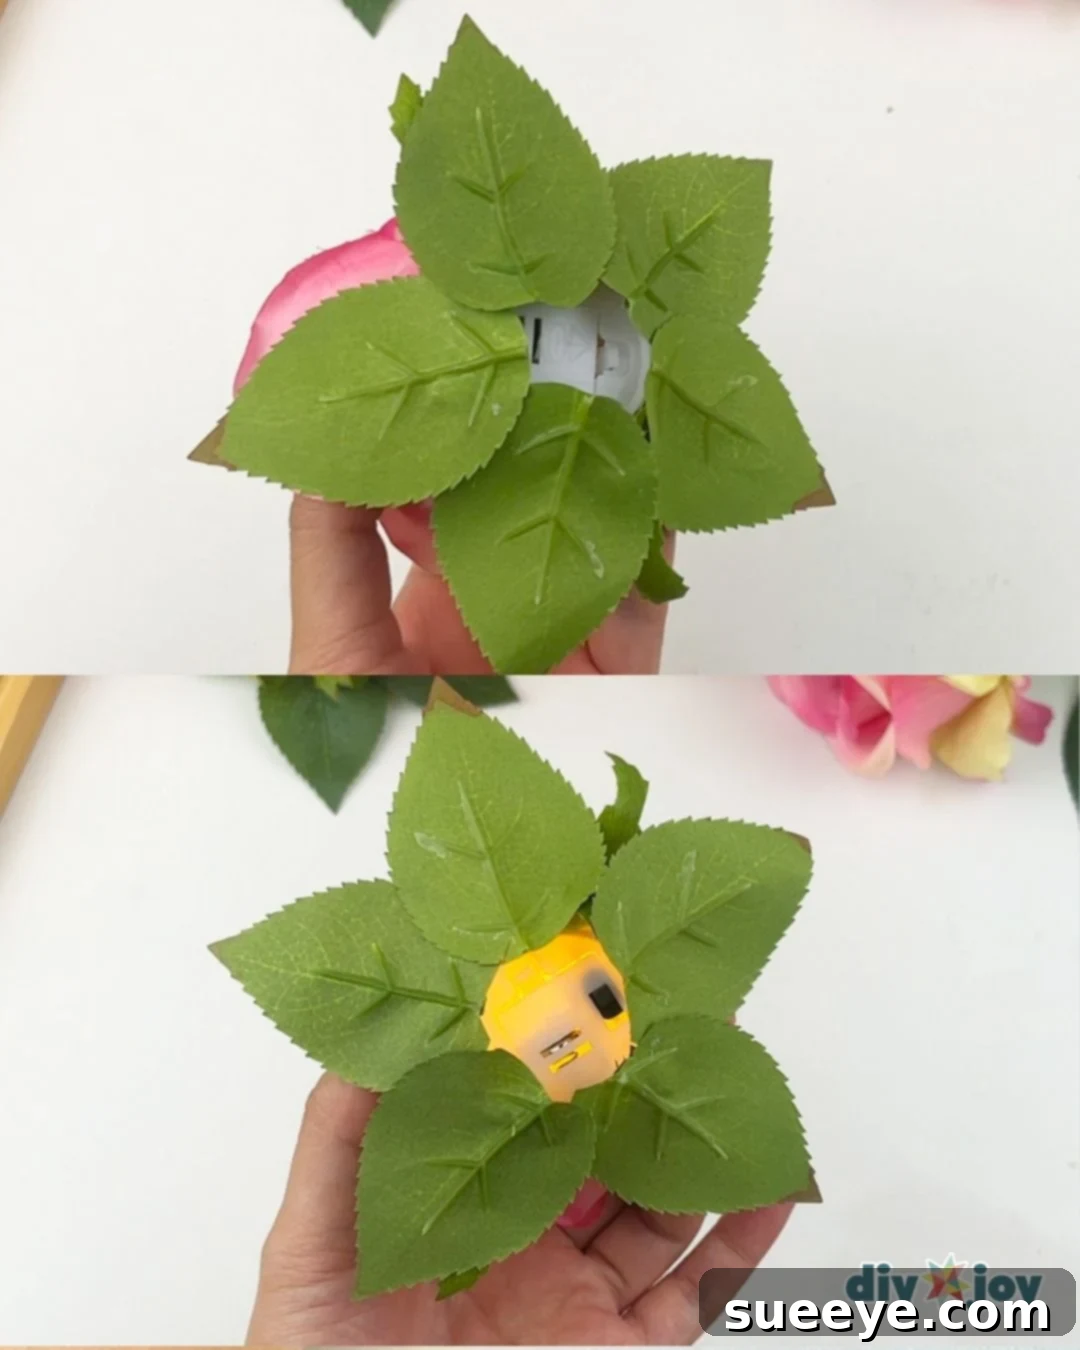
Finally, take the larger leaves from your faux flower and glue them strategically at the very base of the rose. These leaves provide a natural contrast and ground the entire floral piece, making it look fuller and more organic. Trim any excess leaf material as needed to ensure a balanced and aesthetically pleasing arrangement. This is the finishing touch that brings your flower light to life.
-
Illuminate Your Creation: The Magical Reveal
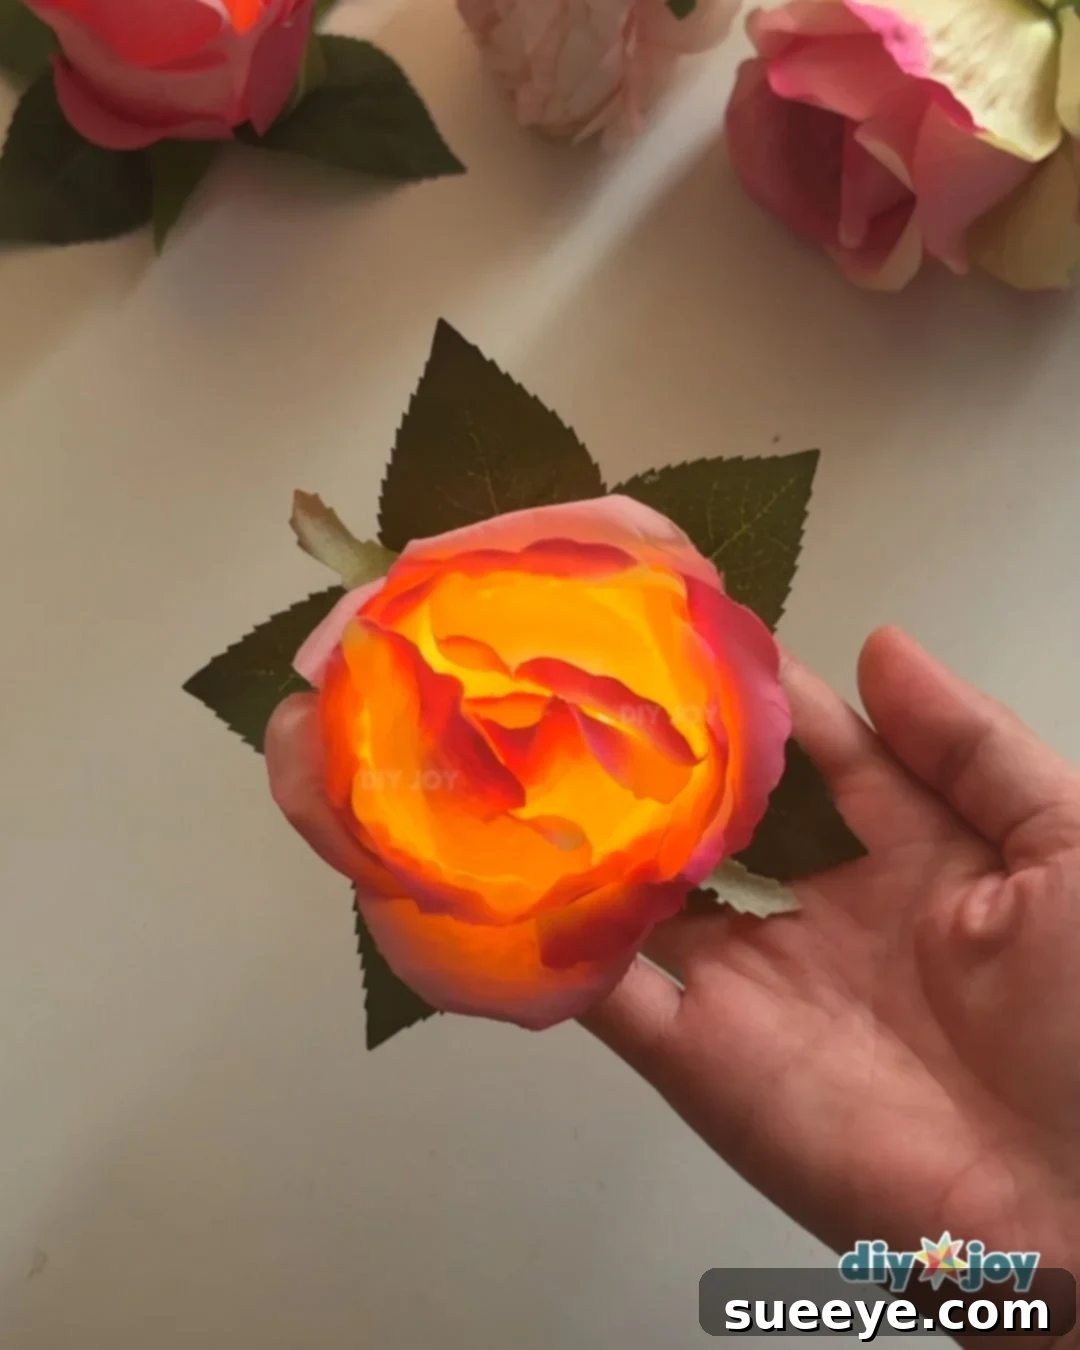
The moment of truth! With all the petals and foliage securely in place, simply flip the switch on your battery-operated tea light candle. Watch as your beautifully crafted flower lights up, casting a warm, magical glow that will instantly enhance any space. Enjoy the enchanting ambiance created by your very own handmade floral masterpiece.
Tools You’ll Need
- **Hot Glue Gun:** Essential for quick and strong adhesion of petals and spoons.
- **Sharp Scissors:** For precise cutting of petals, spoon handles, and trimming excess materials.
Materials for Your DIY Flower Light
- **High-Quality Faux Large Rose:** Choose a full, realistic-looking flower to ensure the best final appearance.
- **Battery-Operated Yellow Tea Light Candle:** The heart of your light, providing a safe and warm glow.
- **Clear Plastic Spoons (4 count):** Used to create a structural base for the petals.

Crafting Tip for a Flawless Finish
To achieve a truly professional and realistic look for your DIY flower light, pay close attention to the way you glue the petals. Aim to follow the natural layering pattern of an original flower, ensuring each petal overlaps neatly and flows seamlessly into the next. This meticulous approach will create a beautiful, organic bloom that looks as though it was professionally designed, rather than hastily assembled. Take your time, place each petal with care, and build up the layers for a truly stunning result.
Explore More Enchanting Flower Crafts
Paper Flowers
Delightful Tissue Paper Flowers Tutorial
Planters & Floral
How To Make Denim Roses – Upcycling Old Jeans into Beautiful Crafts
Paper Flowers
Effortless Easy Crepe Paper Flowers
Creative Ideas and Variations for Your DIY Flower Lights
Once you’ve mastered the basic technique, the possibilities for customizing your DIY flower lights are virtually endless. Here are some inspiring ideas to spark your creativity and help you personalize your floral masterpieces:
- **Themed Collections:** Don’t stop at just one! Try using flowers in a variety of complementary colors and make several pieces. Group them together for stunning centerpieces at weddings, baby showers, or elegant dinner parties. Consider seasonal themes – pastels for spring, vibrant hues for summer, rich tones for autumn, or icy whites for winter.
- **Switch Up the Light Color:** While a warm yellow glow is classic, experiment with different colored battery-operated tea lights. Soft pinks, cool blues, or even color-changing LED lights can dramatically alter the mood and aesthetic of your flower.
- **Add a Stem for Gifting:** To create a beautiful, standalone handmade gift, consider adding a sturdy floral wire stem wrapped in floral tape to the base of your flower light. This transforms it into a magical glowing rose that can be placed in a small vase, perfect for anniversaries, birthdays, or as a thoughtful “get well” present.
- **Enchanting Displays:** Elevate your home decor by placing your finished flower light in a clear glass box or under a delicate glass cloche dome. For an extra touch of magic, weave in some tiny fairy lights around the base or within the display. This creates a breathtaking centerpiece or a magical gift, ideal for Valentine’s Day, anniversaries, birthdays, or any special celebration. The contained environment also protects your beautiful creation from dust.
- **Vary Flower Types:** While a rose is classic, imagine the possibilities with other faux flowers! Try large peonies, dahlias, or lilies. Each flower type will present a unique challenge and a beautiful final aesthetic, allowing you to create a diverse collection.
- **Scented Experience:** For an extra sensory delight, you can carefully add a few drops of essential oil to the fabric petals (ensure the oil doesn’t come into direct contact with the LED light or cause any material degradation). Choose calming lavender, invigorating citrus, or romantic rose scents to enhance the ambiance.
- **Outdoor Elegance:** If you wish to use these lights outdoors for an evening garden party, consider using weather-resistant faux flowers and ensuring your tea lights are suitable for outdoor use. They can add a charming glow to patios, balconies, or pathways.
- **Kid-Friendly Crafting:** With adult supervision, this can be a wonderful project to do with older children. They can help choose petals, arrange colors, and learn basic crafting skills while creating their own magical room decor.
- **Custom Bases:** Instead of just sitting flat, consider gluing your flower light onto a small, decorative wooden coaster, a vintage teacup, or even a mini decorative pot for a more integrated look.
This DIY flower light is more than just a craft; it’s an invitation to bring beauty, light, and a touch of personal magic into your world. Experiment, enjoy the process, and let your creativity bloom!