
Authentic Philly Cheesesteak Sandwich: Your Ultimate Homemade Guide
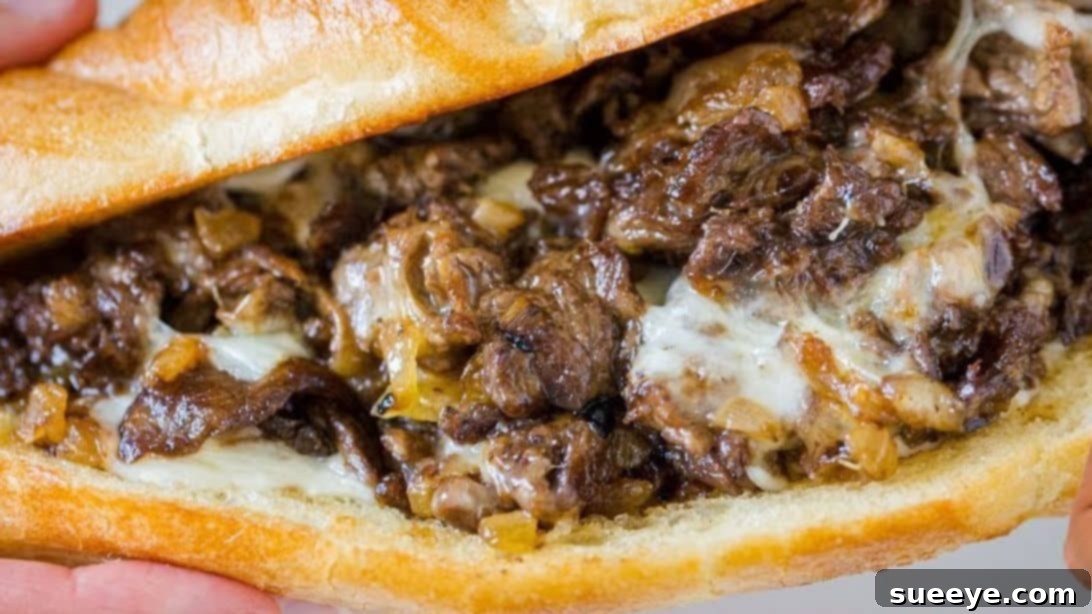
Prepare to impress with a true culinary icon: the classic Philly Cheesesteak sandwich. This beloved comfort food, originating from the bustling streets of Philadelphia, combines a symphony of flavors and textures that tantalize the taste buds. Imagine perfectly seared, thinly sliced steak, seasoned to perfection, mingling with sweet, caramelized onions. All of this is generously crowned with gooey, melted provolone cheese, then nestled within a butter-garlic toasted hoagie roll. It’s a culinary masterpiece that promises to satisfy even the most ardent meat lovers and sandwich enthusiasts alike.
While often enjoyed at a bustling diner or a street-side vendor, mastering the art of the Philly Cheesesteak at home is surprisingly achievable and incredibly rewarding. This comprehensive guide will walk you through every step, ensuring you create a sandwich that rivals the best, right in your own kitchen. We’ll delve into ingredient selection, precise cooking techniques, and essential tips to elevate your cheesesteak experience. Get ready to transform simple ingredients into an extraordinary meal that’s perfect for a hearty lunch, a satisfying dinner, or entertaining guests.
For those who prefer a visual learning experience, you can also find inspiration and additional tips from Natasha’s Kitchen. Whether you follow along with this detailed recipe or watch the video, you’re on your way to crafting an unforgettable classic Philly Cheesesteak.
Essential Ingredients for Your Philly Cheesesteak
Creating an authentic Philly Cheesesteak starts with selecting the right components. Quality ingredients are paramount for achieving that signature flavor and texture. Here’s what you’ll need to gather:
- 1 lb Ribeye Steak: The undisputed king of cheesesteak meats. Its rich marbling ensures tenderness and flavor when cooked quickly. Choose a well-marbled cut, trimmed of any excess fat, and ideally partially frozen before slicing for easier, ultra-thin cuts.
- 1/2 teaspoon Sea Salt: Essential for seasoning the steak and bringing out its natural flavors. Adjust to your personal preference.
- 1/2 teaspoon Black Pepper: Freshly ground black pepper adds a pungent warmth that complements the rich beef beautifully.
- 1 Large Sweet Onion: Diced finely, these onions will caramelize into a sweet, savory addition, providing a crucial layer of flavor. Vidalia or Walla Walla onions are excellent choices.
- 8 Slices Provolone Cheese: A classic choice for its mild, creamy flavor and excellent melting properties. You can opt for sharp provolone for a bolder taste or mild for a more subtle finish.
- 4 Hoagie Rolls: The foundation of your sandwich. Look for soft yet sturdy rolls that can absorb the juices without falling apart. Amoroso rolls are the traditional choice, but any good quality, fresh hoagie or sub roll will work.
- 2 tablespoons Unsalted Butter: Softened for easy mixing, this butter will be combined with garlic to toast your rolls to golden perfection.
- 1 Garlic Clove: Pressed or finely minced, it infuses the butter with aromatic flavor, elevating the simple hoagie roll.
- 2 to 4 tablespoons Mayonnaise: An optional but highly recommended spread for the toasted rolls, adding a creamy tang that balances the richness of the steak and cheese. Adjust the amount to your liking.
Kitchen Equipment You’ll Need
Before you dive into the cooking, ensure you have these basic kitchen tools on hand:
- Large Skillet or Griddle (cast iron works best for even heat)
- Serrated Knife
- Sharp Chef’s Knife
- Cutting Board
- Small Mixing Bowl
- Spatula or Tongs
- Measuring Spoons
Step-by-Step Instructions to Craft Your Classic Philly Cheesesteak
Follow these detailed steps to assemble your delicious homemade Philly Cheesesteak:
Step 1: Preparing Your Hoagie Rolls
Begin by preparing your hoagie rolls. Using a sharp serrated knife, carefully slice each hoagie roll approximately three-quarters of the way through, leaving a hinge on one side. This creates a pocket for your delicious filling while keeping the sandwich intact during assembly and eating. Set the sliced rolls aside.
Step 2: Crafting Garlic Butter and Toasting the Rolls
In a small bowl, combine the 2 tablespoons of softened unsalted butter with the pressed (or finely minced) garlic clove. Stir these ingredients together until they are thoroughly combined, creating an aromatic garlic butter spread. Evenly spread this fragrant garlic butter onto the cut sides of all four hoagie rolls. Place a large skillet or griddle over medium heat. Once hot, place the buttered sides of the rolls face down on the skillet and toast them for 1-2 minutes, or until they achieve a beautiful golden-brown color and become slightly crisp. This step is crucial for adding flavor and preventing the rolls from becoming soggy. Once toasted, remove the rolls from the skillet and set them aside. They are now ready to be filled.
Step 3: Caramelizing the Onions
Add 1 tablespoon of cooking oil (such as vegetable or canola oil) to your pan and place it over medium heat. Add the diced sweet onions to the pan. Sauté the onions slowly, stirring occasionally, for about 8-10 minutes. The key here is patience; you want them to soften and turn a beautiful golden-brown color, indicating they are sweet and caramelized, not just translucent or burnt. Once perfectly caramelized, transfer the onions to a clean bowl and set them aside. These onions will add a wonderful depth of flavor to your sandwich.
Step 4: Cooking the Ribeye Steak
Increase the heat of your skillet to high. Add another 1 tablespoon of oil to the hot pan. Once the oil shimmers, carefully spread the thinly sliced ribeye steak in a single layer across the bottom of the pan. Avoid overcrowding the pan; if necessary, cook the steak in batches to ensure a good sear. Let the steak brown undisturbed for a few minutes to develop a delicious crust. Then, using your spatula or tongs, flip the steak and break it up into smaller pieces. Season the meat generously with 1/2 teaspoon of sea salt and 1/2 teaspoon of black pepper. Continue to cook the steak, stirring occasionally, until it is fully cooked through and no pink remains, usually another 3-5 minutes. Once cooked, return the caramelized onions to the pan with the steak and toss everything together to combine, allowing the flavors to meld.
Step 5: Melting the Cheese to Perfection
After combining the steak and onions, divide the mixture into four even portions directly in the skillet. Place two slices of provolone cheese on top of each portion. Immediately turn off the heat. The residual heat from the skillet will be enough to gently melt the cheese, creating that signature gooey, luscious topping without burning the meat or cheese. Allow the cheese to melt for 1-2 minutes until it’s soft, shiny, and perfectly draped over the steak and onions.
Step 6: Assembling and Serving Your Cheesesteak
Retrieve your toasted hoagie rolls. If using, spread a generous amount of mayonnaise on the toasted inside of each roll. This adds a delightful creaminess and tang that complements the rich filling. Carefully place one of the toasted buns directly over one portion of the cheesy steak mixture in the skillet. Using a sturdy spatula, carefully scrape the meat with the melted cheese into your bun as you simultaneously flip it over. This technique ensures all the delicious filling stays intact within the roll. Repeat this process for the remaining three portions. Serve your homemade classic Philly Cheesesteak sandwiches immediately while they are still warm and the cheese is delightfully gooey. Enjoy every mouthwatering bite!
Tips for the Perfect Homemade Philly Cheesesteak
To ensure your Philly Cheesesteak turns out absolutely perfect every time, consider these expert tips:
- Slice Steak When Partially Frozen: This is the secret to achieving those ultra-thin slices of ribeye. Place the steak in the freezer for about 30-45 minutes before slicing.
- Don’t Overcrowd the Pan: Cooking the steak in batches, if necessary, allows it to sear properly rather than steam. This creates a better crust and flavor.
- High Heat for Steak, Low Heat for Onions: High heat quickly cooks the steak and creates a flavorful sear. Lower heat and patience are key for truly caramelized (sweet, not burnt) onions.
- Quality Rolls Matter: A good hoagie roll is paramount. It should be fresh, soft enough to bite through easily, but sturdy enough to hold the juicy filling without falling apart.
- Adjust Seasoning: Taste your steak and onions before adding the cheese. Adjust salt and pepper as needed.
- Serve Immediately: Cheesesteaks are best enjoyed fresh off the skillet when the cheese is at its peak meltiness and the rolls are still warm and slightly crisp.
Variations & Customizations
While the classic Philly Cheesesteak is perfect as is, feel free to customize it to your liking:
- Cheese Alternatives: Experiment with American cheese for a creamier texture or even Cheez Whiz for a truly authentic, albeit processed, Philly experience.
- Add More Veggies: Sauté sliced bell peppers (green are traditional) or mushrooms with your onions for added flavor and texture.
- Spicy Kick: A pinch of red pepper flakes with the steak, a dash of hot sauce, or a drizzle of sriracha mayo can add a welcome heat.
- Condiments: Ketchup is a popular choice for some, while others prefer mustard or a steak sauce.
- Chicken Cheesesteak: For a lighter option, thinly sliced chicken breast can be used instead of ribeye, cooked similarly.
Serving Suggestions
A classic Philly Cheesesteak is a meal in itself, but it pairs wonderfully with simple sides:
- Crispy French fries or onion rings
- A simple green salad with a vinaigrette
- Coleslaw
- Potato chips and a dill pickle spear
- A refreshing craft beer or a cold soda
Storage and Reheating
While best enjoyed fresh, if you happen to have leftovers, here’s how to store and reheat them:
- Storage: Store the leftover steak and onion mixture in an airtight container in the refrigerator for up to 3 days. It’s best to store the rolls separately to prevent them from getting soggy.
- Reheating: For the best results, reheat the meat mixture in a skillet over medium heat until warmed through. You can add a fresh slice of cheese during reheating. Toast a fresh hoagie roll or re-toast the old one slightly before assembling. Microwaving is an option but may result in a less desirable texture.
Frequently Asked Questions About Philly Cheesesteaks
Here are answers to some common questions about making this iconic sandwich:
- What is the best type of steak for a Philly Cheesesteak? Ribeye is widely considered the best due to its marbling and tenderness, which results in a rich, flavorful, and juicy sandwich.
- Can I use a different cheese if I don’t like provolone? Absolutely! While provolone is traditional, American cheese offers a very creamy melt, and some purists even insist on Cheez Whiz for a truly authentic (though controversial) Philly experience.
- How do I get my steak sliced thin enough? The trick is to partially freeze the steak for 30-45 minutes. This firms it up, making it much easier to slice against the grain into paper-thin pieces with a sharp knife.
- Is it okay to add bell peppers or mushrooms? While a “classic” cheesesteak typically only includes steak and onions, adding bell peppers (often referred to as a “Philly steak with peppers”) or mushrooms is a popular and delicious variation that many enjoy.
- What’s the difference between a Philly Cheesesteak and a regular steak sandwich? The key differences lie in the specific cut of beef (thinly sliced ribeye), the melting cheese (provolone, American, or Cheez Whiz), and the type of roll (hoagie roll), all cooked on a flat-top grill or skillet to achieve its unique texture and flavor profile.
Conclusion: Your Homemade Philly Cheesesteak Awaits!
Crafting your own authentic Philly Cheesesteak is more than just making a sandwich; it’s an experience that brings the vibrant flavors of Philadelphia right into your home. With this detailed guide, you have all the knowledge and tips necessary to create a masterpiece that will undoubtedly become a favorite. From the sizzling, perfectly seasoned ribeye and sweet caramelized onions to the gooey melted cheese and garlic-toasted hoagie roll, every element contributes to an unforgettable culinary journey.
So, gather your ingredients, fire up your skillet, and get ready to indulge in the rich, satisfying taste of a homemade classic. Don’t be shy to experiment with the variations, but always remember the core elements that make this sandwich so special. Share your cheesesteak creations with friends and family, and relish in the joy of creating a truly iconic comfort food from scratch. Happy cooking!