
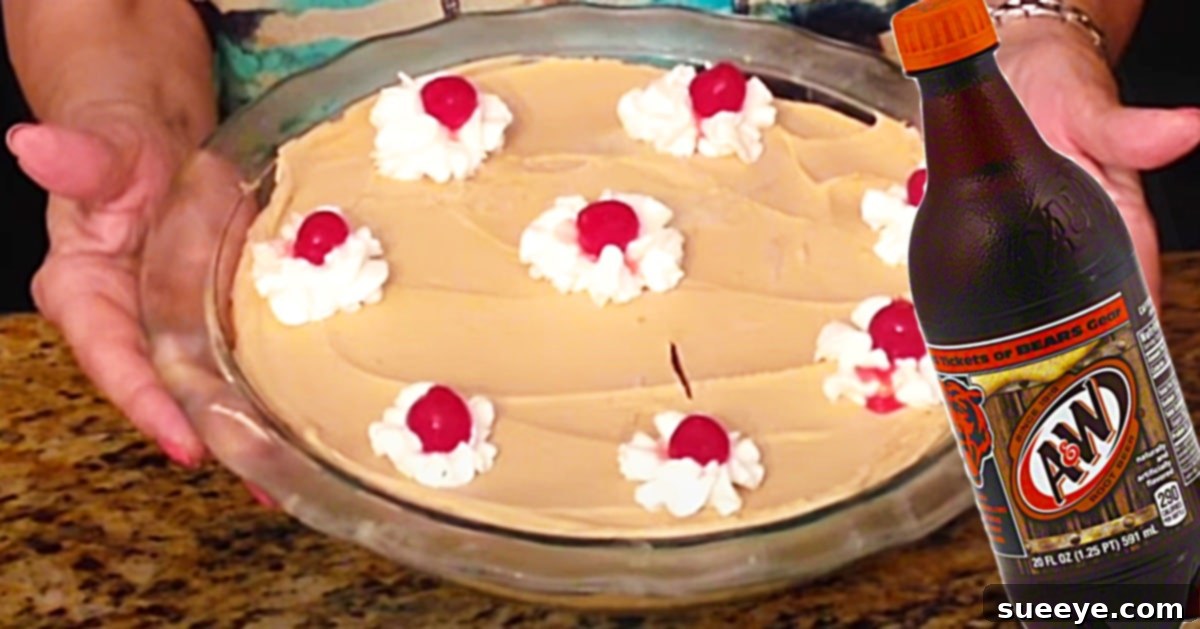
Irresistible No-Bake Root Beer Float Pie: A Taste of Nostalgia in Every Slice
There’s something uniquely American about the frosty, effervescent delight of a classic root beer float. It’s more than just a drink; it’s a cherished memory, a symbol of long summer days and carefree moments. For many, root beer isn’t just a soft drink; it’s a flavor that evokes warmth, a hint of spice, and pure, unadulterated refreshment that stands head and shoulders above other popular sodas. Imagine taking that iconic, beloved flavor and transforming it into an incredibly easy, no-bake dessert that will transport you straight back to your happiest childhood summers. That’s precisely what this Root Beer Float Pie does, and it’s an absolute game-changer.
I recently stumbled upon this captivating root beer float pie video recipe tutorial by The Baking Diva on YouTube, and I instantly knew it was a recipe I had to try. The very sight of this creamy, dreamy pie brought a flood of fond memories crashing back. I was instantly longing for a classic root beer float from the old hamburger stand or the charming malt shop in my hometown. Places like Roger’s Malt Shop in Dickinson, Texas, were our local haunts, where we’d cool off all summer long with their delicious, icy floats. This pie, even before I had the chance to bake (or rather, no-bake) it, held such a profound sense of nostalgia. It promises to deliver not just a dessert, but an experience – a journey back to those cherished, simpler times.
Why This Root Beer Float Pie Will Be Your New Favorite Dessert
This Root Beer Float Pie isn’t just another dessert recipe; it’s a brilliant culinary innovation that captures the essence of a beloved beverage in a delightfully creamy, sliceable form. Its “no-bake” nature makes it an absolute hero in the kitchen, especially during warm weather when turning on the oven feels like a monumental task. The simplicity of its preparation belies the complexity of its taste – a perfect harmony of sweet vanilla, distinct root beer flavor, and a satisfyingly crunchy crust. It’s the ideal treat for family gatherings, backyard barbecues, or simply a quiet evening when you crave a touch of comfort and nostalgia. Its unique flavor profile is a guaranteed conversation starter, and its impressive appearance makes it seem like you’ve spent hours in the kitchen, when in reality, it’s incredibly quick to assemble.
Ingredients For Your Dreamy Root Beer Float Pie
For the Golden Oreo Crust:
- 25 Golden Oreos (pulsed in a food processor to a fine crumb)
- 4 tablespoons unsalted butter (melted)
The choice of Golden Oreos for the crust is intentional and brilliant. Their delicate vanilla flavor provides a sweet, neutral base that allows the root beer filling to truly shine, without competing with chocolate notes. Pulsing them into a fine crumb ensures a smooth, uniform texture, which, when combined with melted unsalted butter, creates a firm yet tender crust that holds together beautifully. The butter not only binds the crumbs but also adds a rich, subtle flavor that elevates the entire pie.
For the Creamy Root Beer Filling:
- 1 (4 serving) package of instant vanilla pudding mix
- 1 cup of high-quality root beer soda
- 1/4 cup whole milk
- 2 tablespoons root beer concentrate (you can make this by gently boiling down root beer until it turns into a thick syrup)
- 8 ounces Cool Whip (or fresh whipped cream for garnish)
Each ingredient in this filling plays a crucial role in achieving the perfect root beer float experience. The instant vanilla pudding mix is the backbone, providing a quick-setting, creamy base. Using a good quality root beer soda is paramount; its distinct flavor is the star, so choose a brand you genuinely enjoy. The whole milk adds an extra layer of richness and creaminess, helping to create a luxurious texture. However, the secret weapon here is the root beer concentrate. This intensifies the root beer flavor, ensuring it doesn’t get lost within the creamy pudding, giving the pie that unmistakable, bold, and authentic root beer punch. If you can’t find concentrate, don’t worry – you can easily make your own by slowly reducing root beer on the stovetop until it thickens into a syrup. Finally, Cool Whip or fresh whipped cream not only adds a light, airy texture but also visually recreates the “float” aspect, making each slice a delightful homage to its inspiration.
Step-by-Step Directions to Craft Your Perfect Root Beer Float Pie
Get ready to create a dessert that will earn you rave reviews with minimal effort! This no-bake root beer float pie is incredibly simple to assemble, and following these detailed steps, inspired by The Baking Diva’s fantastic tutorial, will ensure a flawless result. Remember, the video tutorial is a great visual guide to complement these written instructions.
1. Prepare the Golden Oreo Crust:
Begin by taking your 25 Golden Oreos and placing them in a food processor. Pulse them until they are finely ground into an even, sandy crumb. While the Oreos are processing, gently melt 4 tablespoons of unsalted butter. Once the butter is fully melted, pour it over the Oreo crumbs in the food processor or transfer the crumbs to a mixing bowl. Pulse or mix thoroughly until the crumbs are evenly moistened and resemble wet sand. Press this mixture firmly and evenly into the bottom and up the sides of a standard 9-inch pie dish. Use the bottom of a glass or your knuckles to ensure a compact crust. Place the prepared crust in the refrigerator to chill while you prepare the filling, allowing it to firm up.
2. Create the Velvety Root Beer Filling:
In a large mixing bowl, combine the contents of one 4-serving package of instant vanilla pudding mix with 1/4 cup of whole milk and 1 cup of your chosen root beer soda. Whisk these ingredients together vigorously for about 2-3 minutes, or until the mixture begins to thicken and lumps are gone. It’s important to whisk well to ensure the pudding sets properly. Next, carefully stir in the 2 tablespoons of root beer concentrate. This step is crucial for boosting the root beer flavor to an intensely delicious level. Ensure it is fully incorporated into the pudding mixture. Finally, gently fold in 8 ounces of Cool Whip (or an equivalent amount of freshly whipped cream if you’re using it). Use a spatula to gently combine, retaining as much air as possible for a light, fluffy texture. Be careful not to overmix, as this can deflate the Cool Whip.
3. Assemble and Chill Your Pie:
Retrieve your chilled Golden Oreo crust from the refrigerator. Carefully pour the root beer float filling into the crust, spreading it evenly with a spatula. Once the filling is smooth, place the entire pie back into the refrigerator. This is a critical step for allowing the pie to set completely. Chill for a minimum of 4 hours, but ideally overnight, to ensure the filling is firm and slices beautifully.
4. Garnish and Serve:
Once your pie is thoroughly chilled and set, it’s time for the finishing touches. Before serving, you can optionally top the pie with additional Cool Whip or freshly whipped cream to enhance the “float” aesthetic. For an extra flourish, consider drizzling a little root beer concentrate on top, adding a maraschino cherry, or even a sprinkle of root beer candy crushed into pieces. Slice and serve your refreshing Root Beer Float Pie, watching as the smiles and nostalgic sighs fill the room.
Expert Tips for the Best Root Beer Float Pie
Achieving the perfect Root Beer Float Pie is easy, but a few expert tips can elevate your dessert from good to absolutely phenomenal.
Choosing Your Root Beer:
The quality of your root beer truly makes a difference. Opt for a brand you love and that has a robust, distinctive flavor. Many artisanal root beers offer complex notes that will shine through in your pie. Avoid “diet” or “zero sugar” versions, as the artificial sweeteners can impact the texture and taste of the pudding mixture.
The Magic of Concentrate:
Root beer concentrate is a secret weapon for an intense, authentic flavor. If you can’t find it readily available in stores, making your own is simple. Pour about 2-3 cups of regular root beer into a saucepan and gently simmer over low to medium heat. Allow it to reduce slowly, stirring occasionally, until it thickens into a syrup-like consistency and the volume significantly decreases to about 2-3 tablespoons. This process might take 20-30 minutes, but it’s well worth the effort for the concentrated flavor it provides.
Perfectly Chilled:
Patience is key with any no-bake pie. The minimum chilling time of 4 hours is essential for the pudding to set completely, ensuring your pie slices cleanly and holds its shape. For the best results and a truly firm, dessert-worthy pie, consider chilling it overnight. This also allows the flavors to meld beautifully.
Storage:
Store any leftover Root Beer Float Pie covered tightly with plastic wrap in the refrigerator. It will remain delicious for up to 3-4 days. While it might still be edible longer, the crust can soften over time, and the flavors are best enjoyed within this timeframe.
Beyond the Classic: Root Beer Float Pie Variations
While the classic Root Beer Float Pie is a masterpiece on its own, its versatile nature allows for delightful variations to suit different tastes or occasions.
Different Crusts:
Experiment with other cookie crusts! A classic graham cracker crust offers a buttery, slightly nutty base that complements the root beer wonderfully. For a richer, deeper flavor, consider a chocolate sandwich cookie crust (like regular Oreos), which adds an interesting contrast to the vanilla and root beer. Shortbread cookies or even vanilla wafers can also create unique crust foundations.
Other Soda Flavors:
The “float pie” concept isn’t limited to root beer! This recipe framework can be adapted for other beloved soda flavors. Imagine an Orange Crush Float Pie using orange soda and orange extract, or a Grape Soda Float Pie with grape soda and a touch of grape flavoring. Even a classic Cola Float Pie could be a fun, nostalgic experiment. Just ensure the soda is carbonated and not diet for the best results.
Adult Version:
For an adult-friendly twist, consider adding a splash of your favorite liqueur to the filling. A hint of vanilla vodka, spiced rum, or even a coffee liqueur could add an intriguing layer of complexity, transforming this nostalgic treat into a sophisticated dessert for grown-ups.
Conclusion: A Slice of Sweet Nostalgia Awaits
This Root Beer Float Pie is more than just a recipe; it’s a celebration of simple pleasures and cherished memories. With its effortless no-bake preparation, vibrant root beer flavor, and creamy texture, it’s destined to become a staple in your dessert rotation. It captures the very essence of a summertime classic in every delicious, comforting slice, bringing a touch of old-fashioned malt shop magic right into your home. Whether you’re making it for a special occasion or simply to indulge your own cravings for nostalgia, this pie is sure to delight. So, gather your ingredients, follow these easy steps, and prepare to create a truly irresistible dessert that tastes like pure joy. Go ahead, give this Root Beer Float Pie a try – your taste buds, and your memories, will thank you!