
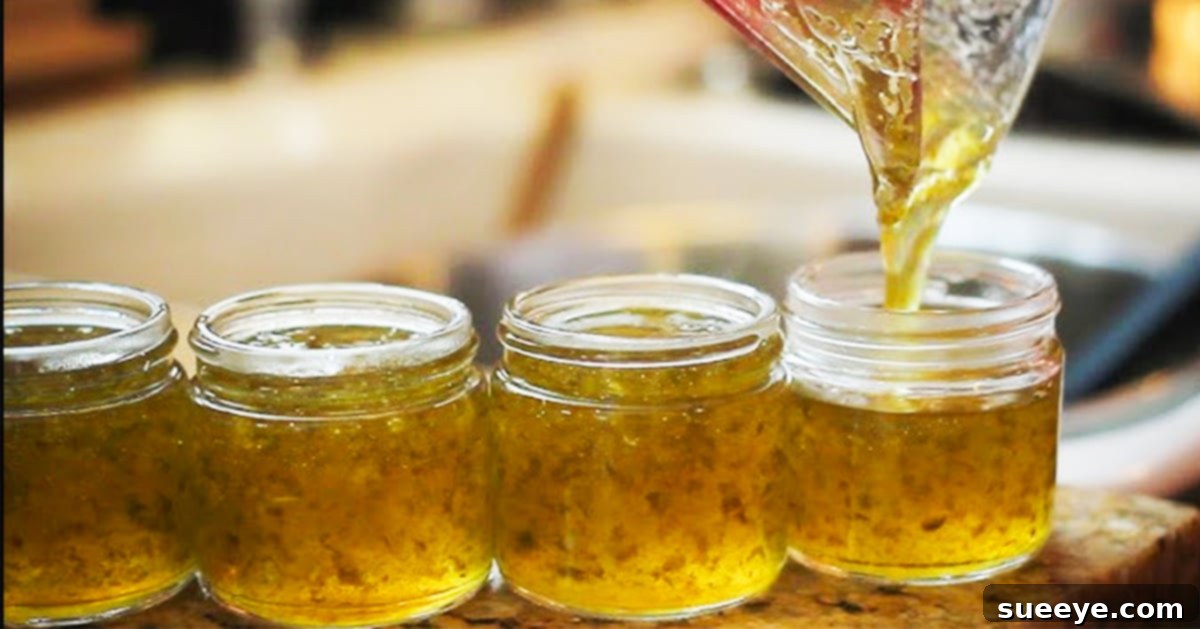
There’s a certain magic that happens when the vibrant sweetness of green bell peppers meets the subtle warmth of fresh jalapeños, creating a condiment that’s both familiar and exhilarating. This delightful fusion is precisely what makes homemade pepper jelly an absolute culinary gem. Far from being just another spread, pepper jelly offers a unique creamy sweetness followed by a delightful, gentle kick that lingers pleasantly on the palate. It’s an indispensable addition to any discerning pantry, promising to elevate everything from a simple cracker and cream cheese snack to an elaborate charcuterie board.
While the exact measurements for a truly exceptional pepper jelly often remain closely guarded family secrets, the fundamental principles are universally applicable. If you’re seeking guidance to embark on your own pepper jelly adventure, the Grey Goose Gourmet tutorial on YouTube offers invaluable insights. This video provides a fantastic visual guide, allowing you to “eyeball” the proportions and master the techniques necessary to create a batch that’s perfectly tailored to your taste. Even without precise figures, the tutorial breaks down the essential steps, empowering you to craft a jelly that boasts the perfect balance of flavors and a captivating texture.
What Makes Pepper Jelly Irresistible?
At its heart, pepper jelly is a symphony of contrasting flavors. The green bell peppers contribute a foundational sweetness and a fresh, vegetal note, providing the bulk and body of the jelly. This sweetness is then beautifully complemented by the jalapeños, which introduce a nuanced heat that builds gradually, leaving a satisfying warmth without overwhelming the taste buds. It’s this delicate balance between sweet and spicy that makes pepper jelly so addictive and incredibly versatile. The pectin acts as the magical gelling agent, transforming the pepper puree into a glistening, spreadable jelly, while sugar not only sweetens but also plays a crucial role in the preservation and gelling process.
Beyond its intriguing flavor profile, pepper jelly’s appeal lies in its adaptability. It’s not just a spread for breakfast toast – though it could certainly be! Its true calling shines when paired with savory elements. Imagine slathering it over a block of cream cheese for an instant appetizer, or artfully arranging it on a charcuterie board alongside artisanal cheeses, cured meats, and fresh fruit. The visual appeal alone is enough to entice, but the burst of flavor it provides makes it a standout component. This condiment is a testament to how simple ingredients, when combined thoughtfully, can create something truly extraordinary.
Why Embrace Homemade Pepper Jelly?
Choosing to make your own pepper jelly rather than buying it from a store offers a multitude of benefits. Firstly, you gain complete control over the ingredients, ensuring that only the freshest and highest-quality peppers, vinegar, and sugars make it into your pot. This often translates to a richer, more authentic flavor profile that simply can’t be replicated by mass-produced varieties, which might contain artificial flavors or excessive preservatives.
Secondly, homemade pepper jelly allows for unparalleled customization. Do you prefer a milder kick? Reduce the number of jalapeños or remove more of their seeds and membranes. Craving more heat? Incorporate a spicier pepper or keep more of those fiery elements in. You can adjust the sweetness level to your liking, creating a jelly that perfectly suits your personal preferences or the dietary needs of your family. This level of personalized craftsmanship is deeply satisfying and results in a product that feels uniquely yours.
Furthermore, the process of making jelly is a rewarding culinary experience in itself. From preparing the fresh produce to watching the mixture transform into a glistening, wobbly jelly, there’s a sense of accomplishment that comes with creating something delicious from scratch. And let’s not forget the joy of sharing. A jar of homemade pepper jelly, tied with a simple ribbon, makes for a thoughtful and much-appreciated gift, perfect for holidays, housewarmings, or as a token of appreciation for friends and family. It’s a gift that speaks volumes about care and effort.
Essential Ingredients for Your Pepper Jelly:
Crafting the perfect pepper jelly starts with understanding the role each ingredient plays. While precise measurements might be a family secret, the components themselves are standard and foundational to the jelly’s success:
- Green Bell Peppers: These form the sweet, foundational bulk of your jelly. They provide a fresh, slightly grassy flavor and contribute to the vibrant green hue. Ensure they are firm and blemish-free for the best results.
- Jalapeños: The star of the “kick,” jalapeños introduce the signature warmth. Their heat level can vary, so taste a small piece if you’re unsure. To control the spice, you can remove some or all of the seeds and internal membranes (where most of the capsaicin resides). Always wear gloves when handling hot peppers to avoid skin irritation.
- Lemons/Lemon Juice: While not always explicitly listed in every recipe, fresh lemon juice provides crucial acidity. This acidity is vital for two reasons: it brightens the overall flavor profile of the jelly, and more importantly, it helps activate the pectin, ensuring a proper set and preventing a runny jelly.
- Apple Cider Vinegar: Another key acidic component, apple cider vinegar adds a tangy depth that balances the sweetness of the peppers and sugar. Like lemon juice, its acidity is instrumental in activating the pectin and contributes to the jelly’s shelf stability, especially if you plan to can it.
- Pectin: This natural gelling agent, derived from fruits, is what gives your jelly its distinctive firm-yet-spreadable texture. Without pectin, your mixture would remain a sauce. You’ll typically find powdered or liquid pectin, and it’s important to use the type specified in the recipe or adjust according to package instructions, as they behave differently.
- Sugar: More than just a sweetener, sugar plays multiple critical roles. It balances the heat and acidity, acts as a preservative (especially in larger quantities), and, crucially, works in conjunction with pectin and acid to facilitate the gelling process. The quantity of sugar significantly impacts both the flavor and the final set of your jelly.
Directions: Crafting Your Homemade Delight
The journey from fresh peppers to a shimmering jar of jelly is a satisfying one. While the Grey Goose Gourmet tutorial offers invaluable visual guidance, here’s an expanded look at the steps involved:
Step 1: Preparation and Pureeing
Begin by meticulously washing your green bell peppers and jalapeños under cold running water. It’s paramount to ensure they are clean. For the bell peppers, remove the stems, cores, and any seeds. For the jalapeños, decide on your desired heat level: remove all seeds and membranes for a milder jelly, or leave some in for a more pronounced kick. Remember to wear gloves when handling jalapeños to protect your skin from capsaicin, which can cause irritation.
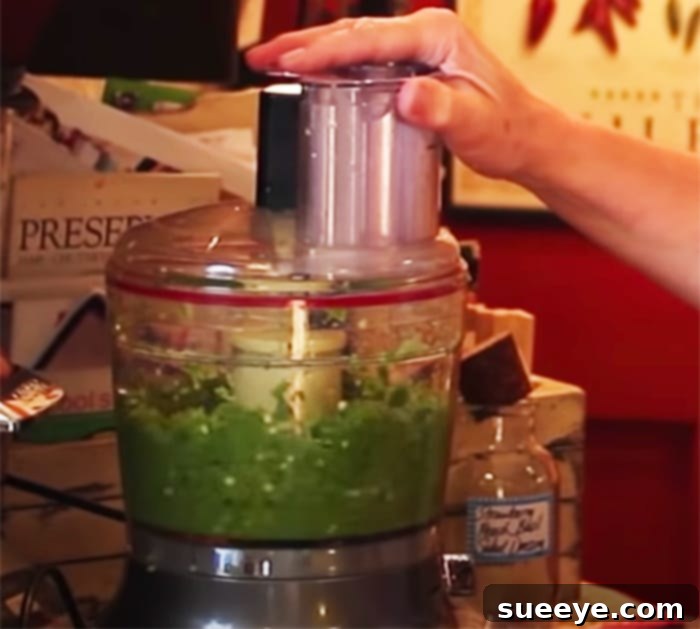
Once prepped, chop the peppers into smaller, manageable pieces suitable for your food processor. Place them into the food processor and pulse until a smooth, uniform puree is achieved. The goal is to eliminate any large chunks, ensuring a silky-smooth jelly. After pureeing, transfer the mixture to a large pot. Allow the puree to sit for a little while – typically 15-30 minutes – to let any foam that has formed on the surface dissipate. This step helps create a clearer, more appealing finished jelly and prevents excess air from being incorporated.
Step 2: Cooking and Gelling
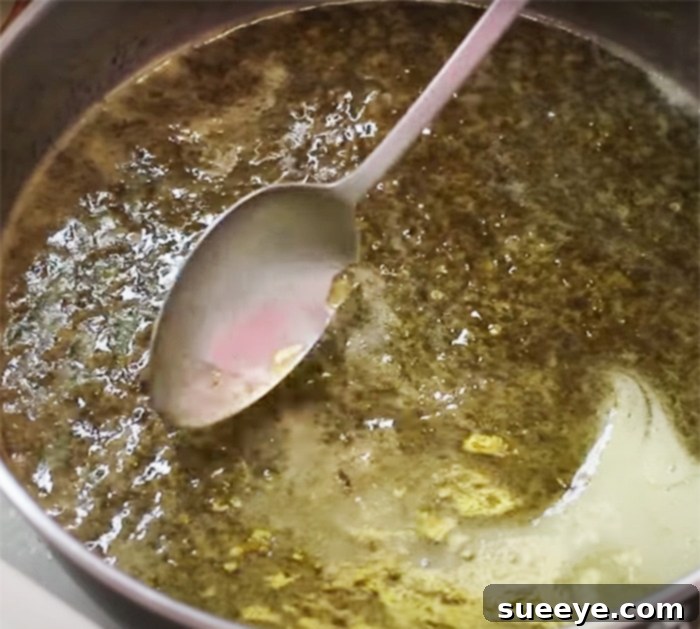
This is where the magic truly unfolds, and watching the Grey Goose Gourmet tutorial on YouTube will offer invaluable full instructions and details for this crucial phase. Combine your pepper puree with the apple cider vinegar, lemon juice, and pectin in a large, heavy-bottomed pot. Stir everything thoroughly to ensure the pectin dissolves completely. This is a critical step, as undissolved pectin can lead to a lumpy or improperly set jelly.
Bring the mixture to a rolling boil over high heat, stirring constantly to prevent scorching. A rolling boil is one that cannot be stirred down. Once this vigorous boil is achieved, it’s time to add the sugar. Pour in the sugar all at once and continue to stir vigorously until it is fully dissolved. Return the mixture to a strong, rolling boil. This is the stage where the pectin, acid, and sugar undergo a chemical reaction, binding together to form the characteristic gel. Maintain this rolling boil for precisely one minute, stirring continuously. This ensures that the pectin is fully activated and the gelling process is initiated.
Step 3: Jarring and Setting
Once the minute of rolling boil is complete, carefully remove the pot from the heat. Skim off any remaining foam from the surface of the jelly using a clean spoon – this will contribute to a clearer, more attractive final product. Ladle the hot jelly into sterilized canning jars, leaving about a quarter-inch of headspace at the top. This headspace is important for proper sealing.
Wipe the rims of the jars clean with a damp cloth, then place lids and rings on securely. For immediate use and short-term storage in the refrigerator, simply allow the jars to cool completely at room temperature, then refrigerate. For longer shelf stability and true canning, process the filled jars in a boiling water bath canner for the recommended time (usually 5-10 minutes, adjusted for altitude), according to established canning guidelines. This ensures a vacuum seal, making the jelly safe for pantry storage. After processing, let the jars cool undisturbed for 12-24 hours. You’ll hear the satisfying “ping” as the lids seal, indicating a successful seal. Check seals by pressing on the center of the lid; if it doesn’t flex, it’s sealed.
Tips and Tricks for a Perfect Pepper Jelly
The Grey Goose Gourmet tutorial, as highlighted, offers fantastic tips and tricks for making your own pepper jelly without skipping any crucial steps. Beyond that invaluable resource, consider these additional insights for a truly flawless batch:
- Don’t Skimp on Pectin: Pectin is essential. Ensure you’re using the correct type (liquid or powdered) and follow its package instructions carefully, as different brands can have varying requirements.
- Acidity is Key: Don’t reduce the vinegar or lemon juice. They are crucial for both flavor balance and, more importantly, for helping the pectin activate and set properly.
- Accurate Boil Times: The one-minute rolling boil after adding sugar is vital. Too short, and your jelly might not set; too long, and it can become overly stiff or lose flavor.
- Test for Set: Before jarring, perform a cold plate test. Place a small spoon of hot jelly on a chilled plate, wait 30 seconds, then push it with your finger. If it wrinkles, it’s ready. If not, boil for another minute and retest.
- Sterilize Everything: For safe, long-term storage, ensure all jars, lids, and utensils that come into contact with the hot jelly are thoroughly sterilized.
- Small Batches are Best: For beginners, making smaller batches (as indicated by your pectin’s instructions) is often easier to manage and ensures a better set, as large quantities can be harder to bring to a proper boil.
Serving Suggestions and Culinary Uses
Pepper jelly is a wonderfully versatile condiment that transcends simple spreads. Its unique sweet-spicy profile makes it a fantastic accompaniment to a wide array of dishes:
- Classic Appetizer: The quintessential pairing is with cream cheese and crackers. The creamy, mild cheese perfectly balances the jelly’s vibrant flavors and heat. Goat cheese or brie are also excellent choices.
- Elevate Your Charcuterie Board: A dollop of pepper jelly adds a pop of color and a burst of flavor to any charcuterie board. It pairs beautifully with salty cured meats, sharp cheeses, and crusty bread.
- Savory Glaze: Use it as a glaze for roasted meats. It’s particularly outstanding on pork chops, chicken wings, or even baked ham, providing a glossy finish and an irresistible sweet-heat caramelization.
- Sandwich and Wrap Enhancer: Spread a thin layer on turkey, ham, or chicken sandwiches and wraps for an unexpected flavor boost.
- Marinade Base: Whisk it into marinades for grilled chicken or shrimp, infusing them with a complex sweet and spicy character.
- Dip Ingredient: Swirl a spoon or two into cream cheese or sour cream-based dips for an added layer of flavor.
- Breakfast Booster: For the adventurous, a small amount on toast, bagels, or even stirred into oatmeal can add an exciting twist to your morning routine.
Final Thoughts on Your Pepper Jelly Journey
My own experience watching the Grey Goose Gourmet video was truly inspiring. Having not had much pepper jelly before, it was fascinating to witness the entire process come together, step by step, illustrating how simple ingredients can yield such a complex and delightful product. This journey from raw peppers to a perfectly gelled condiment is not just about making food; it’s about engaging in a culinary tradition that brings joy and flavor to any table.
Whether you’re making it for your own enjoyment, to impress guests with a gourmet charcuterie board, or to create thoughtful homemade gifts, crafting your own pepper jelly is a deeply satisfying endeavor. It’s a testament to the fact that some of the most memorable flavors come from the simplest, most honest ingredients, transformed with a little care and knowledge. So, gather your ingredients, fire up your food processor, and prepare to be captivated by the sweet, spicy magic of homemade pepper jelly!