
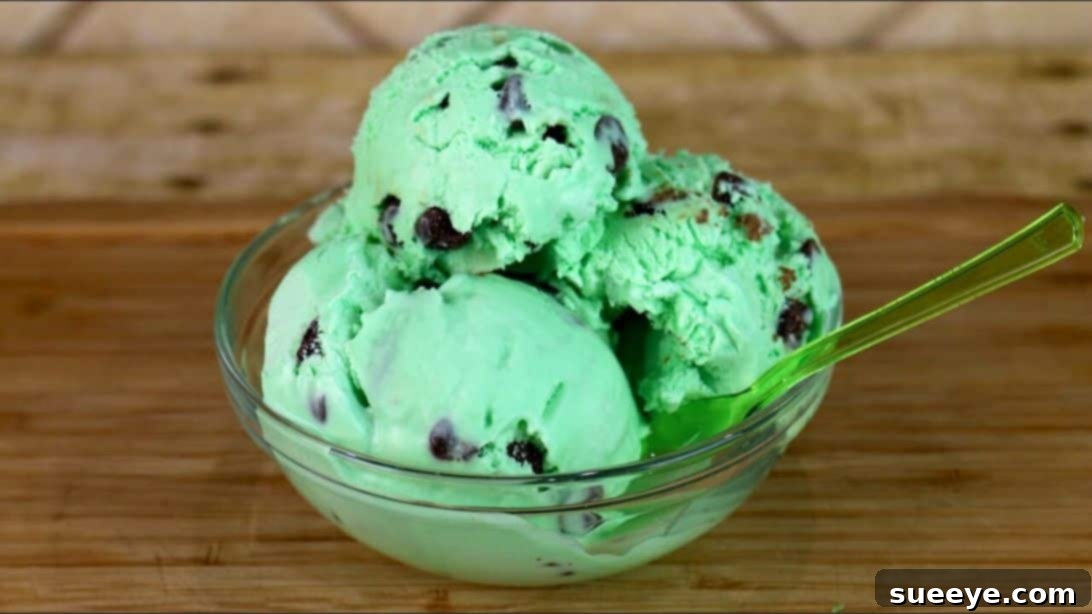
Are you a devoted fan of the exhilarating blend of cool mint and rich chocolate? If the answer is a resounding yes, then prepare to embark on a delightful culinary adventure with the ultimate no-churn mint chocolate chip ice cream recipe. Forget the fuss and complexity of traditional ice cream making; this incredible recipe, inspired by the simplicity of FunFoods, proves that luxurious homemade ice cream can be effortlessly crafted right in your kitchen, no special machine required! The harmonious combination of vibrant mint and decadent chocolate chips creates a treat that is both refreshing and incredibly satisfying, easily earning its spot as the “best” in your dessert repertoire.
Imagine a velvety smooth, intensely minty base studded with generous chunks of rich, dark chocolate – each spoonful a perfect balance of cool and sweet. This isn’t just an ice cream; it’s an experience. What’s even better? You don’t need any fancy equipment or prior ice cream making expertise. This method relies on just a few common ingredients and a bit of patience while it freezes, making it accessible to everyone. Say goodbye to store-bought versions that often fall short, and hello to a personalized mint chocolate chip masterpiece that truly shines.
RELATED: Craving more easy frozen treats? Try this 3-Ingredient Watermelon Sorbet (Without Ice Cream Machine)
The beauty of this homemade mint chocolate chip ice cream lies in its straightforward approach. With a minimal list of 5 core ingredients – heavy whipping cream, sweetened condensed milk, mint extract, green food coloring (optional but fun!), and chocolate chips – you’re well on your way to creating a dessert that tastes gourmet. The optional green food coloring serves a practical purpose beyond aesthetics; it instantly signals the refreshing mint flavor, ensuring no one mistakes your delightful creation for a plain vanilla or chocolate chip variety. It’s a small touch that enhances the entire experience, both visually and gastronomically.
Making your own ice cream at home offers unparalleled benefits. You gain complete control over the quality of ingredients, allowing you to choose organic, dairy-free, or specific types of chocolate that cater to your taste and dietary preferences. It’s also incredibly cost-effective compared to premium store-bought brands, and the sheer satisfaction of serving a dessert you crafted with your own hands is truly priceless. This recipe is a gateway to a world of endless customization and delicious possibilities, proving that the best frozen treats are often those made with love at home.
For those eager to explore a wider range of frozen delights, check out these inspiring collections: 35 Homemade Ice Cream Recipes to Cool You Down This Summer
Essential Ingredients for Your Easy Mint Chocolate Chip Ice Cream
Crafting the perfect no-churn mint chocolate chip ice cream begins with selecting high-quality ingredients. Each component plays a crucial role in achieving that creamy texture and vibrant flavor profile. Here’s what you’ll need for this incredibly simple yet rewarding recipe:
- 2 cups of heavy whipping cream: This is the backbone of our no-churn ice cream, providing the necessary aeration and rich, creamy body when whipped to stiff peaks. Ensure it’s very cold for optimal whipping.
- One 14 oz can of sweetened condensed milk: The magic ingredient that delivers both sweetness and a silky smooth consistency without the need for an ice cream maker. It helps prevent ice crystal formation, resulting in a perfectly scoopable treat.
- 1 1/2 teaspoons of mint extract: The star flavor! Start with this amount, but feel free to adjust to your personal preference for mint intensity. Pure mint extract offers the most authentic flavor.
- Green food coloring (optional): While purely for aesthetics, a few drops of green food coloring give the ice cream that classic mint chocolate chip look, making it instantly recognizable and visually appealing.
- 1/2 to 1 cup of chocolate chips: The delightful crunch and rich chocolatey burst in every bite. You can use semi-sweet, dark, or milk chocolate chips, depending on your preference. Chopping them into smaller shards can enhance their distribution and mouthfeel.
These five simple ingredients are all it takes to create a truly unforgettable frozen dessert. The beauty of this recipe lies in its flexibility; you can always tweak the amounts to perfectly match your taste, whether you prefer a milder mint or an extra generous helping of chocolate.
Step-by-Step Guide: How to Make Mint Chocolate Chip Ice Cream
Making this incredible no-churn mint chocolate chip ice cream is surprisingly easy. Follow these simple steps, and you’ll have a delightful dessert chilling in your freezer in no time. Precision and gentle handling are key to achieving the perfect creamy texture.
Step 1: Whip the Heavy Cream to Stiff Peaks
Begin by pouring 2 cups of very cold heavy whipping cream into a large, chilled mixing bowl. Using an electric mixer (handheld or stand mixer with a whisk attachment), whisk the cream on medium-high speed until it forms stiff peaks. This means when you lift the whisk, the cream holds its shape firmly. Be careful not to over-whisk, as it can turn into butter. The cold temperature of the cream and bowl significantly helps in achieving perfect stiff peaks.
Step 2: Gently Fold in the Sweetened Condensed Milk
Once your whipping cream is perfectly aerated and firm, carefully add the entire can of sweetened condensed milk to the whipped cream. Using a spatula, gently fold the condensed milk into the whipped cream. The goal here is to combine the two ingredients without deflating the air from the whipped cream. Use a light hand, making sure to scrape the bottom and sides of the bowl until just combined and streak-free. This ensures a uniform base for your ice cream.
Step 3: Infuse with Mint Flavor and Color
Now it’s time to introduce the signature mint flavor. Add 1 1/2 teaspoons of mint extract to the mixture. If you’re opting for the classic green hue, add a few drops of green food coloring at this stage as well. Mix gently until the mint extract is fully incorporated and the color is evenly distributed throughout the mixture. Taste a small amount and adjust the mint extract to your liking; some prefer a bolder mint flavor, while others enjoy a more subtle hint. Remember, a little goes a long way with extracts.
Step 4: Incorporate the Delicious Chocolate Chips
With your minty base ready, it’s time for the chocolate chips! Add 1/2 to 1 cup of your preferred chocolate chips into the ice cream mixture. Again, gently fold them in using your spatula until they are evenly distributed. Be mindful not to overmix, as this can affect the texture of the ice cream. If you like a lot of chocolate, feel free to add more than 1 cup; this is your ice cream, so customize it to your heart’s content! Small, finely chopped chocolate pieces or mini chips often work best for even distribution and a pleasant texture in every spoonful.
Step 5: Prepare for Freezing and Achieve Perfect Consistency
Carefully transfer the entire ice cream mixture into a freezer-safe dish or loaf pan. Gently tap the container a few times on your counter to help release any trapped air bubbles, which can lead to a less smooth texture. Next, cover the surface of the ice cream directly with plastic wrap, pressing it down so it touches the entire surface. This crucial step prevents ice crystals from forming on top, ensuring a smooth, creamy finish. Finally, place the lid on your container (if it has one) and place it in the freezer. Freeze for at least four hours, or ideally overnight, to achieve the perfect firm, scoopable consistency that rivals any premium store-bought ice cream.
Step 6: Scoop, Serve, and Savor!
Once your no-churn mint chocolate chip ice cream has fully frozen, it’s time for the best part! Remove it from the freezer and let it sit at room temperature for a few minutes (about 5-10 minutes) to soften slightly, making it easier to scoop. Scoop generous portions into your favorite bowls. For an extra touch of indulgence, you can top it with a sprinkle of extra chocolate chips, a drizzle of chocolate syrup, or even a fresh mint leaf. Serve immediately and delight in the refreshing, creamy, and wonderfully minty chocolate goodness you created yourself. Enjoy every single bite of this homemade masterpiece!
Mint Chocolate Chip Ice Cream: The No-Machine Magic Explained
The concept of “no-churn” ice cream has revolutionized homemade frozen desserts, making them accessible to anyone, regardless of whether they own an expensive ice cream maker. This method hinges on a simple yet brilliant principle: combining whipped heavy cream with sweetened condensed milk. The heavy cream, when whipped, incorporates a significant amount of air, providing the light, fluffy texture traditionally achieved by churning. The sweetened condensed milk, on the other hand, is a master multi-tasker. Its high sugar content acts as an anti-freeze, preventing the formation of large, unappetizing ice crystals that often plague homemade ice creams made without a machine. It also adds a rich, creamy base that perfectly emulsifies with the whipped cream.
This ingenious combination results in an ice cream that’s remarkably smooth, incredibly creamy, and wonderfully scoopable, mimicking the texture of churned ice cream without any of the extra effort or equipment. For mint chocolate chip ice cream, this means you can enjoy that classic refreshing flavor and satisfying chocolate crunch with unprecedented ease. It’s an ideal solution for busy families, students, or anyone who simply wants delicious, customizable ice cream without the fuss. Plus, the minimal cleanup is an added bonus!
Tips for Perfect No-Churn Mint Chocolate Chip Ice Cream
- Keep it Cold: Always use very cold heavy cream and chill your mixing bowl and whisk for 10-15 minutes before whipping. Cold temperatures help the cream whip up faster and hold its volume better.
- Don’t Overmix: After folding in the condensed milk and other ingredients, mix just until combined. Overmixing can deflate the whipped cream, leading to a denser, less airy ice cream.
- Quality Matters: While the recipe is simple, the quality of your ingredients makes a difference. Use a good quality mint extract for a natural flavor and your favorite brand of chocolate chips.
- Direct Contact Plastic Wrap: Don’t skip placing plastic wrap directly onto the surface of the ice cream before freezing. This prevents ice crystal formation on top and freezer burn, keeping your ice cream smooth and fresh.
- Patience is Key: Allow adequate freezing time. While 4 hours is a minimum, overnight freezing yields the best, firmest consistency.
- Customization Galore: This recipe is a fantastic base for experimentation. Consider adding a swirl of hot fudge, a sprinkle of crushed peppermint candies, or even finely chopped Oreos for a cookies and cream twist.
Unleash Your Creativity: Variations and Customizations
One of the greatest joys of making homemade ice cream is the ability to customize it to your heart’s content. While classic mint chocolate chip is undeniably delicious, don’t hesitate to experiment!
- Double Chocolate Mint: Add a tablespoon or two of unsweetened cocoa powder to the whipped cream and condensed milk mixture for a darker, richer chocolate base to complement the mint and chips.
- Peppermint Patty Power: Instead of just chocolate chips, chop up some mini peppermint patties and fold them into the mixture for an extra layer of minty-chocolatey goodness.
- Cookie Crunch: Crumble your favorite chocolate cookies (like Oreos or chocolate wafers) and mix them in for added texture and flavor.
- Nutty Twist: For those who love a bit of crunch, toasted chopped pecans or walnuts can add an interesting textural contrast and depth of flavor.
- Natural Green: If you prefer to avoid artificial food coloring, a tiny amount of spirulina powder or even matcha green tea powder can impart a subtle green hue, though they might add a faint earthy note.
- Mint Swirl: Instead of mixing chocolate chips throughout, you could melt some chocolate, allow it to cool slightly, and then drizzle it into the pan just before freezing, creating beautiful chocolate swirls.
Frequently Asked Questions About No-Churn Ice Cream
Got questions about this magical dessert? Here are some common queries and their answers:
- Why doesn’t this recipe need an ice cream machine? The combination of whipped heavy cream and sweetened condensed milk naturally creates the texture of churned ice cream. The air whipped into the cream and the sugar in the condensed milk prevent large ice crystals from forming, eliminating the need for constant churning.
- How long does homemade no-churn ice cream last? When stored properly in an airtight, freezer-safe container with plastic wrap directly on the surface, it can last for up to 2-3 weeks in the freezer. After that, the texture might start to degrade.
- Can I use light cream or half-and-half instead of heavy whipping cream? Unfortunately, no. Heavy whipping cream has a high fat content (at least 36%) which is essential for whipping up to form the airy, stable base required for no-churn ice cream. Lighter creams won’t achieve the necessary volume or texture.
- How can I prevent ice crystals? The key steps are using sweetened condensed milk, covering the ice cream directly with plastic wrap before freezing, and ensuring your freezer maintains a consistent cold temperature.
- Can I make a larger batch? Absolutely! Simply double or triple the ingredients, ensuring you have a large enough bowl for whipping and a freezer-safe container to hold the increased volume.
So, there you have it – the definitive guide to creating luscious, vibrant no-churn mint chocolate chip ice cream right in your own home. This recipe isn’t just about making a dessert; it’s about discovering the simple joy of creating something truly delicious and impressive without any fuss. The rich flavor, the creamy texture, and the satisfying crunch of chocolate chips make this a treat that will undoubtedly become a household favorite. Don’t wait any longer; gather your ingredients and embark on this delightful journey. Share your delicious creations with friends and family, and prepare for rave reviews. Happy scooping!