
Effortless Crockpot Bread: Bake Delicious Homemade Loaves Without an Oven
Imagine the delightful aroma of freshly baked bread filling your home, even if you don’t have an oven or prefer not to use it. The solution? Your trusty crockpot! Baking bread in a slow cooker is a revelation for many, offering a wonderfully easy and accessible way to create soft, delicious loaves. This innovative method, brilliantly showcased by channels like In The Kitchen With Matt on YouTube, simplifies the bread-making process, making it approachable for novice bakers and seasoned enthusiasts alike. Forget the complexities of traditional baking; with just a few basic ingredients and your slow cooker, you’re on your way to homemade bread nirvana.
This guide will walk you through crafting a perfect loaf of crockpot bread, from mixing the dough to the final delicious result. It’s an ideal recipe for anyone living in a small apartment, during hot summer months when turning on the oven is unthinkable, or simply for those who appreciate ingenious kitchen hacks. Prepare to be amazed at how simple it is to transform humble ingredients into two beautiful, edible works of art that will have you reconsidering store-bought bread forever.
Why Choose Crockpot Bread? The Ultimate Convenience and More
Baking bread in a crockpot isn’t just a quirky alternative; it offers several compelling advantages that make it a fantastic option for any home baker:
- No Oven Required: This is the most obvious benefit. If you lack an oven, live in a dorm, or are simply facing a broken appliance, your slow cooker can step up to the challenge.
- Energy Efficiency: Crockpots generally consume less electricity than a full-sized oven, making this an eco-friendlier and more economical choice for baking.
- Keeps Your Kitchen Cool: During warmer months, cranking up the oven heats your entire kitchen. A crockpot, however, emits minimal heat, keeping your living space comfortable.
- Consistent Heat: Slow cookers provide a consistent, gentle heat environment, which is excellent for baking, helping the bread cook evenly without scorching.
- Hands-Off Approach: Once the dough is in the crockpot, you can set it and largely forget it until it’s time to check for doneness. This frees up your time for other tasks.
- Moist Loaves: The sealed environment of a crockpot helps to trap steam, resulting in incredibly moist and tender bread with a softer crust, different from the crispy crust achieved in an oven.
Embracing the crockpot for bread baking is about more than just a recipe; it’s about discovering a versatile and convenient method that expands your culinary possibilities.
Essential Ingredients for Your Homemade Crockpot Bread
One of the beauties of this recipe is its simplicity. You don’t need a pantry full of exotic ingredients; just a few kitchen staples are enough to create a delightful loaf. Here’s what you’ll need, along with a brief explanation of each ingredient’s role:
- 1 cup of warm water: Essential for activating the yeast. The water should be warm (around 105-115°F or 40-46°C) but not too hot, which can kill the yeast.
- 2 1/4 tsp. of active dry yeast: The leavening agent that makes your bread rise, giving it a light and airy texture. Ensure your yeast is fresh and active for best results.
- 1/3 cup of granulated sugar: Provides food for the yeast, helping it activate and produce carbon dioxide, which causes the dough to rise. It also contributes to the bread’s flavor and helps with browning.
- 2 Tbsp. of Canola or Vegetable oil: Adds moisture and richness to the dough, contributing to a softer crumb and helping to keep the bread fresh longer.
- 3 cups of Bread Flour (all-purpose flour can be substituted): Bread flour has a higher protein content than all-purpose, which helps develop stronger gluten. This gives the bread a chewier texture and better structure. All-purpose flour will still work, yielding a slightly softer loaf.
- 3/4 tsp. of salt: Crucial for flavor balance and also plays a role in controlling yeast activity and strengthening the gluten structure. Don’t skip the salt!
Step-by-Step Guide: Crafting Your Perfect Crockpot Bread
Follow these detailed instructions to create two beautiful loaves of homemade bread in your slow cooker. The process is broken down into manageable phases, ensuring success for even first-time bakers.
Phase 1: Preparing the Dough – The Heart of Your Loaf
The journey to delicious homemade bread begins with the dough. This initial stage is crucial for ensuring your yeast is active and your ingredients are well-combined.
- Activate the Yeast: In a small bowl, combine the warm water, active dry yeast, and granulated sugar. Stir gently to dissolve the sugar and mix the yeast. Let this mixture sit for 5-10 minutes. You’ll know the yeast is active when it becomes foamy and bubbly on the surface, indicating it’s alive and ready to work its magic. If no foam appears, your water might have been too hot or too cold, or your yeast may be expired; it’s best to start over with fresh yeast.
- Combine Wet Ingredients: Once your yeast is activated, transfer the foamy mixture into a large mixing bowl. Add the canola or vegetable oil to this liquid base.
- Incorporate Dry Ingredients: In a separate bowl, whisk together the bread flour and salt. Gradually add this dry mixture to the wet ingredients in the large bowl, mixing with a wooden spoon or a stand mixer with a dough hook attachment. Mix until the ingredients are just combined and form a shaggy dough.
- Knead the Dough: Turn the dough out onto a lightly floured surface. Knead the dough for approximately 8 minutes. Kneading develops the gluten in the flour, which is essential for the bread’s structure and texture. You’ll notice the dough becoming smoother and more elastic as you knead. It should be slightly tacky but not overly sticky.
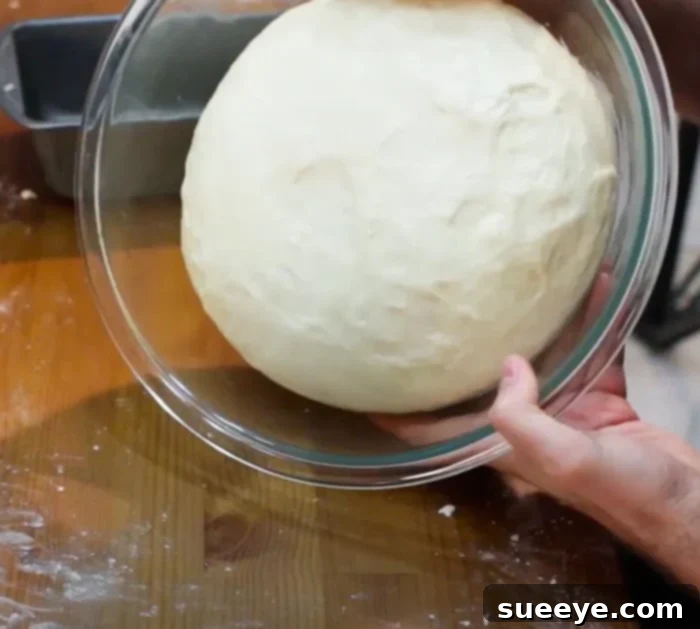
- First Rise (Proofing): Lightly grease the large mixing bowl you used earlier. Place the kneaded dough into the bowl, turning it once to coat all sides with a thin layer of oil. Cover the bowl with a clean kitchen towel or plastic wrap. Allow the dough to rise in a warm, draft-free place for 1 to 2 hours, or until it has doubled in size. This process, known as proofing, allows the yeast to ferment and create air pockets, giving the bread its characteristic light texture.
Phase 2: Shaping and Second Proofing – Giving Your Bread Form
After its first rise, your dough is ready to be shaped into loaves and prepared for its final ascent before baking.
- Divide and Punch Down: Once the dough has doubled, gently punch it down to release the air. Turn the dough out onto a lightly floured surface and divide it into two equal portions. This recipe makes two loaves, perfect for sharing or enjoying later.
- Shape the Loaves: Take one portion of dough and gently shape it into a loaf. You can form a classic oval shape or a round boule, depending on your preference and the shape of your pan. Aim for a compact shape that will fit comfortably inside your baking pans. Repeat with the second portion of dough.
- Prepare Pans: Line two small, oven-safe loaf pans (or any pan that fits inside your crockpot) with parchment paper, leaving an overhang on the sides to easily lift the bread out later. Lightly grease the parchment paper.
- Second Rise (Proofing in Pans): Place each shaped dough portion into its prepared pan. Cover the pans loosely with plastic wrap or a clean kitchen towel. Allow the loaves to rise again in a warm, draft-free place for another 30-45 minutes, or until visibly puffy and almost doubled in size. This second rise is crucial for a light and airy texture.
Phase 3: Baking in the Crockpot – The No-Oven Miracle
Now for the exciting part – transforming your dough into baked bread using your slow cooker.
- Prepare the Crockpot: Place a trivet or a crumpled piece of aluminum foil at the bottom of your large crockpot. This elevates the bread pan slightly, preventing direct contact with the heating element. Pour 1 cup of hot water into the bottom of the crockpot, around the trivet. This water will create a steamy environment, crucial for the bread’s texture and preventing it from drying out.
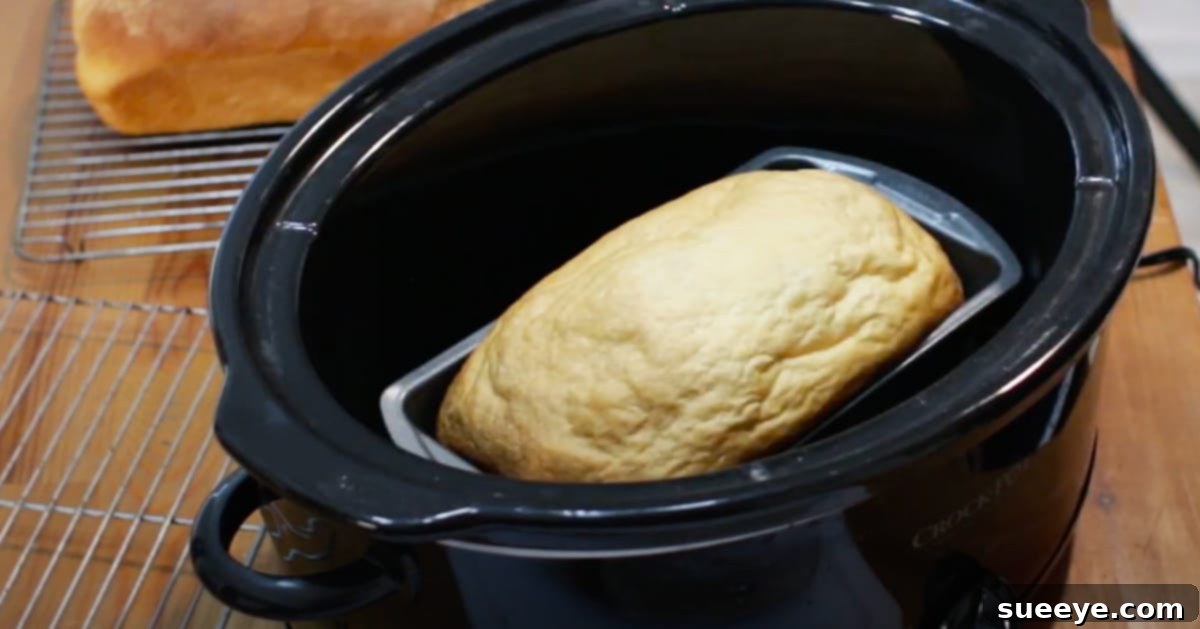
- Place Loaf in Crockpot: Carefully lower one of your prepared bread pans with the risen dough onto the trivet inside the crockpot. Ensure there’s a little space around the pan for even heat circulation.
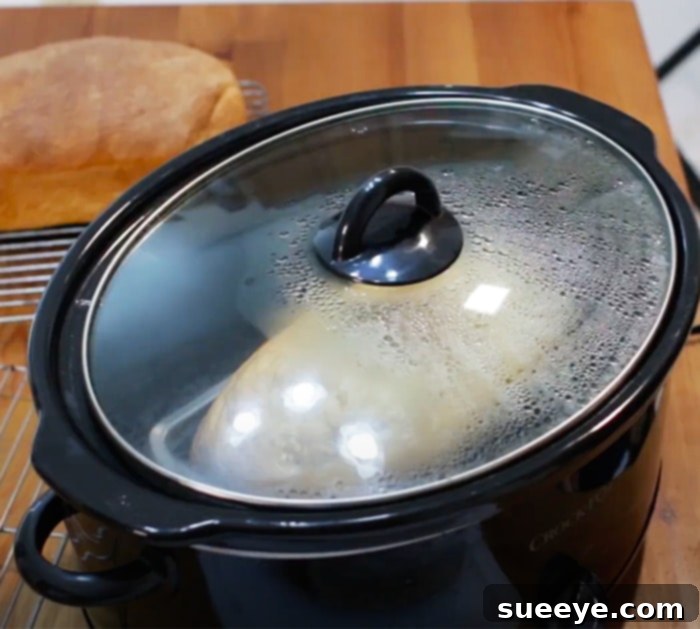
- Bake on High: Place the lid on the crockpot and set it to the HIGH setting. Allow the bread to bake for approximately 2 to 2 1/2 hours.
- Check for Doneness: After 2 hours, carefully remove the lid and check the bread. The top will likely be pale, but the sides should be firm and the bread should sound hollow when tapped on the bottom. An internal temperature of 190-200°F (88-93°C) indicates it’s fully baked. If it needs more time, replace the lid and continue baking, checking every 15-30 minutes.
- Cool Completely: Once baked, carefully lift the bread pan out of the crockpot using the parchment paper overhangs. Remove the loaf from the pan and place it on a wire cooling rack. Allow the bread to cool completely before slicing. This step is vital, as it allows the internal structure of the bread to set and prevents a gummy texture.
- Repeat for Second Loaf: Repeat steps 10-14 for your second loaf of bread.
Tips for Crockpot Bread Success: Achieve Bakery-Quality Loaves
To ensure your crockpot bread turns out perfectly every time, keep these helpful tips in mind:
- Use Fresh Yeast: Old or inactive yeast is the most common reason bread doesn’t rise. Always check the expiration date and ensure your yeast foams up during activation.
- Accurate Measurements: Baking is a science. Use proper measuring cups and spoons, especially for flour and liquid. A kitchen scale is even better for precise flour measurements.
- Don’t Over-Knead or Under-Knead: Follow the 8-minute kneading guideline. Over-kneading can make the dough tough, while under-kneading won’t develop enough gluten for a good rise.
- Warm Environment for Rising: Dough loves warmth. Find a cozy spot in your kitchen, like near a sunny window or in a slightly warmed (but turned off) oven, for optimal rising.
- Resist the Urge to Peek: Opening the crockpot lid frequently releases heat and steam, which can disrupt the baking process and extend cooking time. Try to wait until near the end of the baking time before checking.
- Cool Completely: This cannot be stressed enough. Cutting into hot bread will result in a gummy texture. Patience is key for the best crumb.
- Parchment Paper is Your Friend: It prevents sticking and makes lifting the baked loaf out of the crockpot incredibly easy.
Customizing Your Crockpot Bread: Endless Flavor Possibilities
Once you’ve mastered the basic crockpot bread, feel free to get creative with additions and variations:
- Herbs and Spices: Incorporate dried rosemary, thyme, garlic powder, or Italian seasoning into the dough for a savory loaf.
- Cheese: Add shredded cheddar, Parmesan, or a blend of cheeses during the kneading stage for a cheesy bread that’s perfect with soup.
- Seeds and Grains: Mix in poppy seeds, sesame seeds, sunflower seeds, or even a small amount of cooked oats for added texture and nutrition.
- Sweet Varieties: For a slightly sweet bread, consider adding a tablespoon of cinnamon and some raisins or dried cranberries to the dough. You might need to adjust sugar slightly.
- Different Flours: While bread flour is recommended, you can experiment with a portion of whole wheat flour for a heartier loaf. Start by replacing only a quarter to a third of the white flour with whole wheat.
The crockpot method opens up a world of possibilities for customized homemade bread that perfectly suits your taste.
Crockpot vs. Oven Baked Bread: A Comparative Look
The original recipe creator, In The Kitchen With Matt, highlights an interesting comparison between oven-baked and crockpot-baked loaves from the same dough. While both methods yield delicious homemade bread, there are distinct differences worth noting:
- Crust: Oven-baked bread typically boasts a crisp, golden-brown crust due to the dry heat and higher temperatures. Crockpot bread, baked in a steamy, enclosed environment, will have a much softer, paler crust. It won’t develop the same deep browning or crunch.
- Texture: The internal texture (crumb) of crockpot bread tends to be incredibly moist and tender, often softer than its oven-baked counterpart, precisely because of that trapped steam.
- Appearance: As mentioned, the most noticeable difference is the exterior. Crockpot bread will look less “bakery-perfect” in terms of crust color and texture, but what it lacks in visual crispness, it makes up for in internal softness.
- Convenience and Energy: The crockpot clearly wins for hands-off baking and energy efficiency, especially when avoiding heating up the kitchen.
Ultimately, the choice between crockpot and oven bread depends on your desired outcome and available resources. The crockpot offers an unparalleled level of convenience and a uniquely soft loaf, perfect for sandwiches or simply slathered with butter. For a classic crispy crust, an oven is still king, but the crockpot proves to be a fantastic alternative that shouldn’t be overlooked.
Conclusion: Embrace the Simplicity of Crockpot Bread Baking
Making homemade bread doesn’t have to be an intimidating task reserved for professional bakers or those with state-of-the-art kitchens. This crockpot bread recipe breaks down those barriers, offering an incredibly straightforward and rewarding way to enjoy fresh, soft loaves right from your slow cooker. It’s a testament to how simple kitchen tools can unlock amazing culinary experiences, providing a delightful alternative for anyone who loves the idea of homemade bread but prefers to skip the oven.
Whether you’re new to baking, looking for an energy-efficient method, or simply curious about new kitchen techniques, this recipe is a fantastic starting point. The satisfaction of pulling a warm, fragrant loaf from your crockpot is truly unmatched. So gather your ingredients, follow these steps, and prepare to impress yourself and your loved ones with your newfound bread-making skills!
For a complete visual walkthrough and additional insights, be sure to watch the full tutorial from In The Kitchen With Matt on YouTube, which served as the inspiration for this incredibly easy and delicious recipe.