
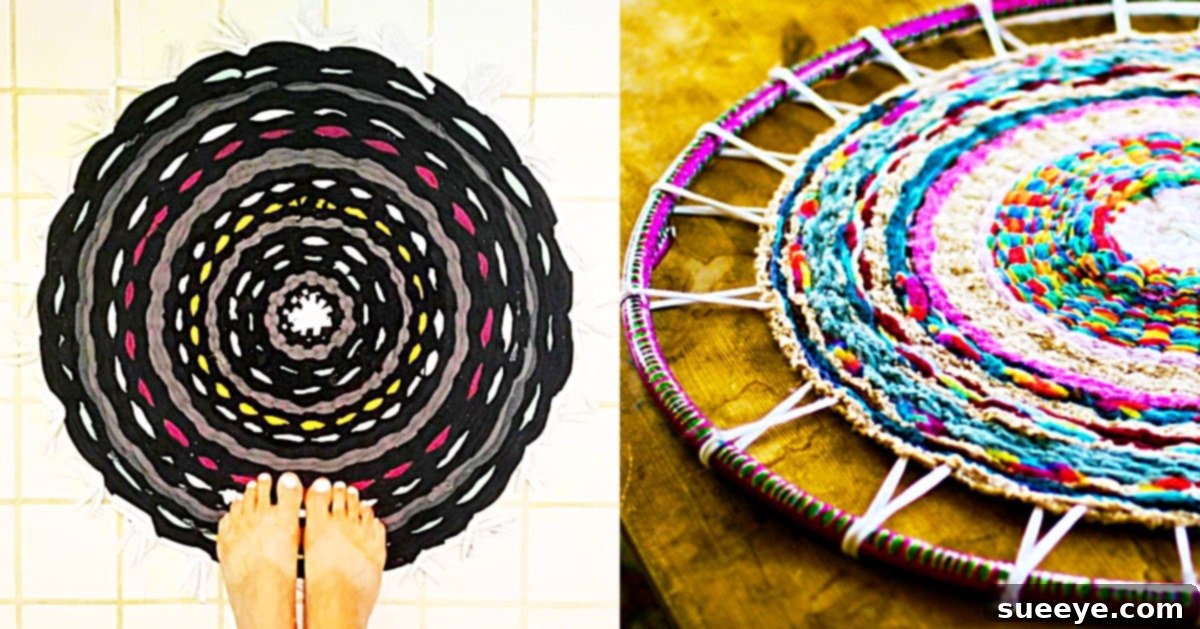
DIY Hula Hoop Rug: Transform Old T-Shirts into Stunning Boho Decor
Are you searching for a creative, budget-friendly, and eco-conscious way to refresh your home decor? Look no further than the delightful world of DIY hula hoop rugs! This charming craft project allows you to transform forgotten old t-shirts into beautiful, unique, and functional pieces for your living space. Whether you’re aiming for a relaxed boho vibe, a rustic farmhouse feel, or simply a touch of handmade warmth, a recycled rag rug made with a hula hoop loom is an incredibly rewarding endeavor.
Homemade rugs, especially those crafted from upcycled materials, bring a unique character and a story to any room. They’re not just floor coverings; they’re conversation starters, tangible expressions of your creativity, and a testament to sustainable living. Imagine a cozy, colorful rug beneath your feet, knowing it was once a collection of old t-shirts, given a new lease on life by your own hands. This guide will walk you through everything you need to know to create your very own hula hoop rug, from preparing your materials to mastering the weaving technique.
Beyond the satisfaction of crafting a beautiful item, this project offers practical benefits. It’s an excellent way to declutter your wardrobe, preventing textiles from ending up in landfills. Plus, the materials are often free or very inexpensive, making it a fantastic alternative to pricey store-bought rugs. While the primary focus here is on creating a larger rug suitable for a living room or bedroom, the same fundamental technique can be scaled down dramatically using an embroidery hoop to create smaller, equally charming items like pot holders, trivets, or decorative coasters for your kitchen or dining table. The possibilities are truly endless!
Why Craft a Hula Hoop Rug? Embrace Sustainability and Style
The allure of making a hula hoop rug extends far beyond simple aesthetics. It’s a craft that aligns perfectly with modern values of sustainability, personalization, and mindful living. Here’s why this DIY project is gaining immense popularity:
- Eco-Friendly Upcycling: One of the most significant benefits is its environmental impact. Instead of discarding old t-shirts, you’re diverting textile waste from landfills and giving these garments a beautiful new purpose. This commitment to recycling and upcycling reduces your carbon footprint and promotes a circular economy.
- Cost-Effective Decor: High-quality rugs can be expensive. By utilizing materials you already own (or can acquire cheaply from thrift stores), you can create stunning decor without breaking the bank. This makes personalized home styling accessible to everyone, regardless of budget.
- Unleash Your Creativity: With an endless palette of t-shirt colors and patterns, you have complete control over the design of your rug. You can create vibrant, multicolored masterpieces, elegant monochromatic pieces, or even intricate patterns by strategically planning your fabric strips. Each rug becomes a unique reflection of your personal style.
- Therapeutic and Rewarding: The rhythmic process of cutting fabric strips and weaving them together can be incredibly meditative and relaxing. It’s a wonderful way to de-stress, engage your hands, and enjoy the satisfaction of seeing a project come to life from start to finish. The sense of accomplishment upon completing your rug is truly unparalleled.
- Durable and Washable: Rag rugs, especially those made from sturdy cotton t-shirts, are surprisingly durable. They can withstand everyday wear and tear and are generally easy to clean, making them practical for high-traffic areas or homes with pets and children.
- Versatile Home Accent: These rugs seamlessly integrate into various decor styles. They are a natural fit for boho, rustic, eclectic, or farmhouse themes, adding warmth, texture, and a cozy feel. They can also provide a contrasting, artisanal touch in more modern or minimalist settings.
- Beginner-Friendly: You don’t need any prior weaving experience to make a hula hoop rug. The technique is straightforward and easy to grasp, making it an ideal project for crafters of all skill levels, even absolute beginners.
Materials You’ll Need for Your DIY Rug Project
Gathering your materials is the first exciting step towards your beautiful new rug. The beauty of this project lies in its simplicity and the accessibility of its components. Here’s a detailed look at what you’ll need:
- Old T-shirts: This is the star of your project!
- Quantity: The exact number depends on the size of your hula hoop and the thickness of your t-shirt material, but generally, a large rug (30-36 inches diameter) can require anywhere from 15 to 30 adult-sized t-shirts. Start collecting!
- Fabric Type: 100% cotton t-shirts work best. They are soft, easy to cut, stretch nicely, and create a plush rug. Avoid overly stiff fabrics or those with high synthetic content, as they can be harder to work with and less comfortable.
- Preparation: Ensure all t-shirts are clean and dry before cutting. You might want to wash them on a gentle cycle if they’ve been stored for a long time.
- Color & Pattern: This is where your creativity shines! Mix and match colors for a vibrant, eclectic look, or stick to a specific color palette for a more cohesive design. Consider striped or patterned t-shirts for added visual interest.
- A Pair of Sharp Scissors: Good quality fabric scissors will make the cutting process much smoother and less tiring. A rotary cutter and mat can also be incredibly efficient if you have them.
- A Hula Hoop (or Embroidery Hoop for Smaller Mats): This will serve as your loom.
- Hula Hoop: The standard size hula hoop (around 30-36 inches in diameter) is perfect for creating a medium to large rug. The bigger the hoop, the bigger your finished rug. Look for a sturdy plastic hoop.
- Embroidery Hoop: If you want to make smaller items like trivets, pot holders, or coasters, an embroidery hoop (6-12 inches in diameter) is the ideal frame.
- Optional but Recommended:
- Ruler or Measuring Tape: Useful for ensuring consistent strip width.
- Fabric Clips or Safety Pins: Can help secure initial warp strips on the hoop.
- Yarn Needle or Crochet Hook: Handy for weaving in loose ends at the finishing stage.
Step-by-Step Guide: Crafting Your Hula Hoop Rug
Now that you have your materials, let’s dive into the weaving process. This method, popularized by tutorials like the one from How To Make Simple on YouTube, is surprisingly straightforward and incredibly satisfying.
Step 1: Preparing Your T-Shirt Yarn Strips
This is the most time-consuming part, but also the most crucial for a successful rug.
- Lay Flat and Smooth: Lay a t-shirt flat and smooth it out.
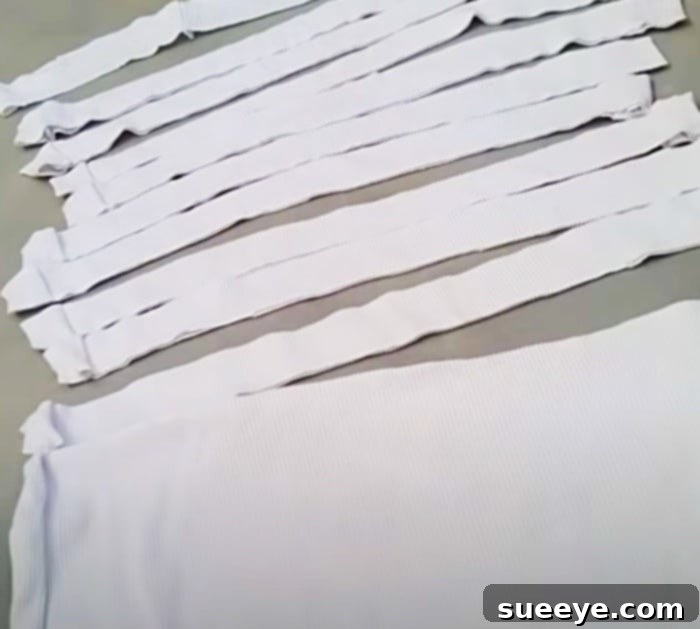
- Remove Seams: Cut off the bottom hem and the top part of the t-shirt, including the sleeves and neckline. You should be left with a rectangular “tube” of fabric.
- Cut Continuous Strips: Start cutting horizontal strips about 1 to 1.5 inches wide, moving from one side to the other. To create a continuous “yarn,” don’t cut all the way through at one end. Leave about half an inch uncut. Then, you can make diagonal cuts to connect the strips into one long, continuous strand. Alternatively, you can cut individual loops and then snip them open to create long strips.
- Stretch and Curl: Gently pull and stretch each strip. This causes the edges to curl inward, forming a soft, spaghetti-like “t-shirt yarn.” This step is essential for creating a consistent texture in your rug.
- Join Strips (if needed): When one strip ends, you’ll need to join it to a new one. The simplest way is to make a small slit at the end of each strip, thread one strip through the other’s slit, and then pull the tail of the first strip through its own slit to create a loop knot. Pull tight. You can also sew them together for a flatter join, but knots are common and often invisible in the finished rug.
- Repeat: Continue this process until you have a large pile of t-shirt yarn. It’s better to have too much than too little.
Step 2: Setting Up Your Hula Hoop Loom (The Warp)
This creates the foundation for your circular rug.
- Divide the Hoop: You need an even number of “warp” lines that stretch across the hoop through the center. A good starting point is 12, 16, or 24 lines, depending on the size of your hoop and how dense you want the weave. Use a marker or tape to mark evenly spaced points around the hula hoop. For example, if you want 12 warp lines, mark 24 points.
- Attach First Warp Strip: Take a long strip of t-shirt yarn (or join several to make one very long one). Tie one end securely to one of your marked points on the hula hoop.
- Create the First Diameter: Stretch the strip directly across the center of the hoop to the exact opposite marked point. Wrap the strip around the hoop at that point and bring it back across the center to a point adjacent to your starting point. You are essentially making a figure-eight pattern.
- Continue Warping: Keep stretching the strip across the hoop, always passing through the center. Each pass should connect two opposite points on the hoop. The key is to ensure all warp lines pass through the exact center and are taut. Use clips or tape to temporarily secure the strips to the hoop as you go, ensuring even tension.
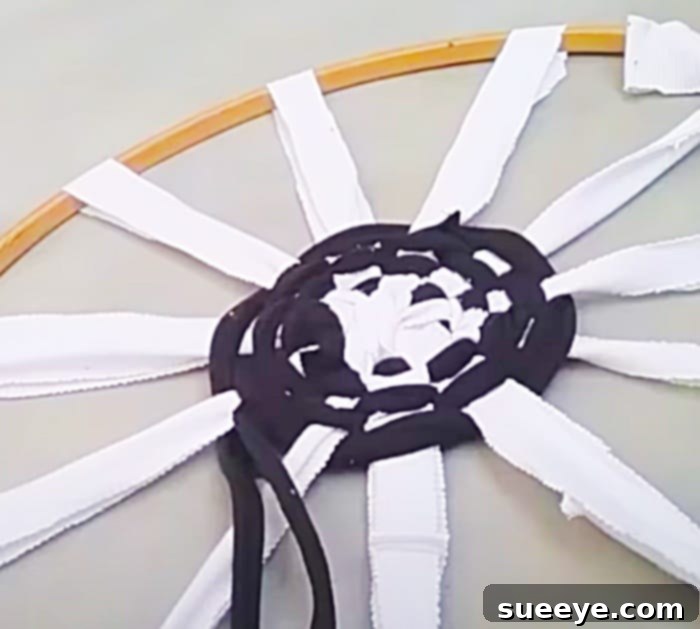
- Secure the Warp: Once all your warp lines are in place, make sure they are evenly spaced and tightly stretched across the hoop. Tie off the final end securely to the hoop. You should now have a “spoked wheel” pattern on your hula hoop, ready for weaving.
Step 3: Beginning the Weaving Process (The Weft)
This is where your rug starts to take shape.
- Start in the Center: Take a new, long strip of t-shirt yarn. Tie it securely to one of the warp lines near the very center of your hula hoop loom. This will be your starting “weft” thread.
- Weave ‘Over and Under’: Begin weaving this strip over and under the warp lines, working your way around the center. For the first round, you might just go over one, under one, or experiment with skipping more. The classic plain weave is always over one, under one.
- Tighten and Push Down: As you complete each circle of weaving, gently push the woven yarn towards the center. You want the weave to be tight and compact, but not so tight that it distorts the warp lines.
- Adding New Strips: When your weft strip runs out, simply join a new t-shirt yarn strip using the knotting method described in Step 1. Try to make the knots on the underside of the rug for a cleaner look.
- Maintain Consistency: Continue weaving, always going over one warp line, then under the next, alternating each round. For example, if you went over a warp line in the previous round, you should go under it in the current round. This creates a solid, interlocking fabric.
Step 4: Continuing the Weave and Expanding Your Rug
As you weave outwards, your rug will grow.
- Keep Going: Continue weaving in the over-under pattern, pushing the rows tightly together as you work outwards from the center. This helps prevent gaps and ensures a dense, durable rug.
- Maintain Tension: Try to maintain an even tension throughout your weaving. Too loose, and the rug will be flimsy; too tight, and it might buckle or pull in at the edges.
- Color Changes: This is an excellent opportunity to introduce new colors. Simply knot on a new color strip when you want to make a change. You can create concentric rings of color, or random bursts of different hues for a truly bohemian look.
- Troubleshooting: If your rug starts to look uneven, take a moment to gently pull and adjust the woven rows. Sometimes, pushing the weft closer to the center can help even out the shape. Don’t be afraid to unravel a few rows if needed to correct a mistake.
Step 5: Finishing Your Hula Hoop Rug
The final steps to complete your masterpiece.
- Weave to the Edge: Continue weaving until you are about 1-2 inches from the edge of the hula hoop, or until you are happy with the size of your rug and can no longer comfortably weave around the hoop. The rug will be slightly smaller than the hoop once removed.
- Secure the Final Weft: Weave the final end of your t-shirt yarn into the last few rows to secure it, tucking it neatly into the weave. You can use a yarn needle or crochet hook for this.
- Remove from Hoop: Carefully cut each of the warp loops from the hula hoop. Cut them close to the hoop, leaving enough length on the warp strips.
- Tie Off Warp Ends: Now you have a fringe of warp ends around your rug. Take two adjacent warp ends and tie them together in a secure double knot, close to the edge of the woven part. Work your way around the entire rug, tying off all the warp ends in pairs. You can trim these fringes to an even length if desired, or leave them long for a shaggy look.
- Final Touches: Inspect your rug for any loose ends and weave them in. Give your rug a gentle shake and flatten it out. Your beautiful, handmade hula hoop rag rug is complete!
Creative Variations and Tips for Your Rag Rug
Once you’ve mastered the basic hula hoop rug, a world of creative possibilities opens up. Don’t be afraid to experiment!
Beyond the Floor: Smaller Projects with Embroidery Hoops
The same weaving technique can be applied to smaller frames, offering practical and adorable results:
- Pot Holders & Trivets: Use an embroidery hoop (6-10 inches) to create charming, heat-resistant mats for your kitchen. They make fantastic handmade gifts!
- Coasters: Even smaller hoops (4-6 inches) can yield colorful coasters, adding a personalized touch to your coffee table.
- Wall Hangings: Weave a smaller piece and incorporate beads, feathers, or other embellishments before hanging it as unique wall art.
Material Alternatives
While old t-shirts are ideal, don’t limit yourself:
- Bed Sheets: Old cotton sheets can be cut into strips for a softer, lighter rug, perfect for a bedroom.
- Denim: For a more durable and textured rug, consider cutting strips from old jeans. Be aware that denim is thicker and harder to cut, but results in a very robust rug.
- Fabric Scraps: A mix of various cotton fabric scraps can create a truly eclectic and colorful piece.
- Yarn: For a different texture, you can also use bulky yarn as your weft, though it’s less about recycling clothes then.
Pattern and Color Play
Your rug is your canvas!
- Concentric Circles: Plan your colors in advance to create distinct rings of color, moving from the center outwards.
- Stripes & Blocks: Introduce new colors at specific intervals to create horizontal stripes or blocks of color.
- Random & Bohemian: Embrace the “scrappy” look by using random colors as you go, creating an organic and vibrant pattern.
- Textural Contrast: Mix strips of different widths or even incorporate small sections of braided t-shirt yarn for added texture.
Care and Maintenance
Rag rugs are generally quite resilient:
- Washing: Most t-shirt rag rugs can be machine washed on a gentle cycle with cold water. Place them in a large mesh laundry bag to prevent tangling or excessive stretching.
- Drying: Air dry flat or tumble dry on low heat. Be aware that large rugs can be quite heavy when wet.
- Non-Slip Backing: For safety, especially on hard floors, consider adding a non-slip rug pad underneath your finished rug.
The Joy of DIY: A Sustainable Statement for Your Home
The DIY hula hoop rug project is more than just a craft; it’s an opportunity to engage in mindful creation, contribute to a more sustainable lifestyle, and infuse your home with unparalleled personality. In a world saturated with mass-produced items, a handmade rug stands out as a unique piece of art, carrying the energy and care you poured into its making. It’s a physical representation of recycling, creativity, and resourcefulness.
Every time you step on your hula hoop rug, you’ll be reminded of the journey it took – from old t-shirts destined for discard to a beautiful, functional addition to your home. This project offers a profound sense of accomplishment and a tangible connection to the items in your living space. So, gather your old clothes, find a hula hoop, and embark on this wonderful journey of textile transformation. You’ll not only create a stunning piece of decor but also discover the immense satisfaction that comes with making something truly special with your own hands. Happy weaving!