
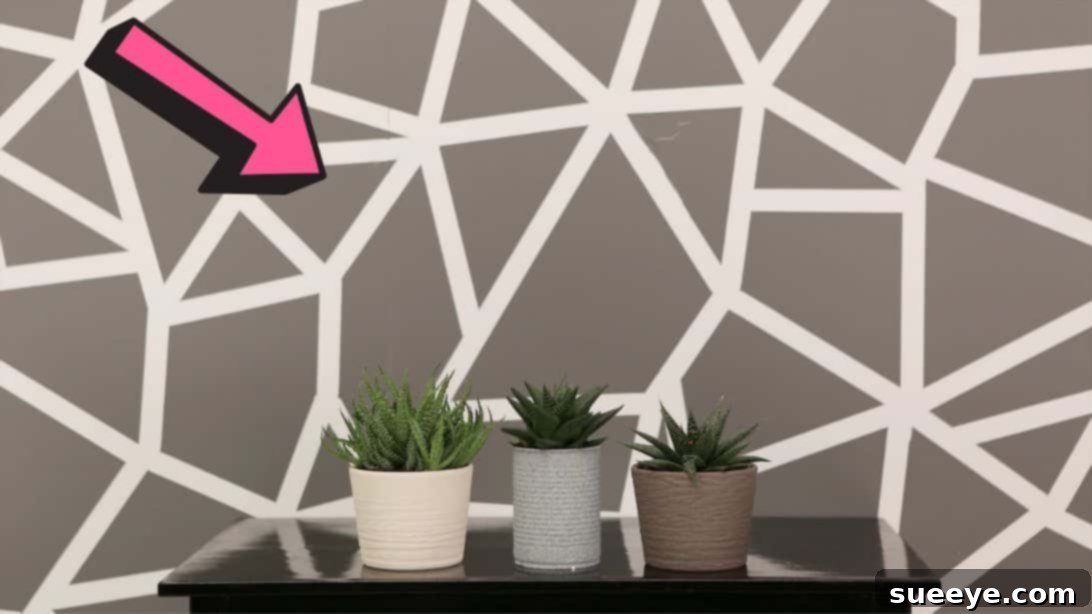
Are your walls feeling a bit bland, perhaps a single color that no longer sparks joy? It’s time to infuse some personality and artistic flair into your living space without breaking the bank or hiring a professional. Imagine transforming a plain wall into a captivating focal point, a masterpiece of modern design that you created yourself! The secret weapon? Simple painter’s tape. You heard that right – this unassuming tool, combined with a little paint and creativity, can work wonders, turning your bedroom, living room, or even a hallway into a vibrant, stylish statement. If you’ve ever considered adding a unique touch to your home decor but felt intimidated by complex projects, this easy DIY geometric wall art tutorial is your perfect starting point. It’s incredibly straightforward and can be completed in just one go, making it ideal for beginners and seasoned DIY enthusiasts alike. Get ready to unleash your inner artist and give your walls the stunning makeover they deserve.
Why Choose a DIY Geometric Accent Wall?
Geometric accent walls have surged in popularity for good reason. They offer a dynamic visual interest that elevates a room’s aesthetic, adding depth, texture, and a contemporary vibe. Opting for a DIY approach provides numerous benefits:
- Cost-Effective Transformation: Compared to wallpaper or professional art installations, using paint and tape is incredibly budget-friendly, allowing for a significant impact with minimal investment.
- Personalized Style: You have complete control over the pattern, colors, and scale, ensuring the final result perfectly matches your unique taste and existing decor.
- Creative Expression: It’s a fantastic outlet for creativity, allowing you to experiment with different designs, angles, and color combinations.
- Instant Impact: A geometric accent wall can instantly refresh a room, making it feel more modern, stylish, and inviting. It creates a focal point that draws the eye and defines the space.
- Renter-Friendly Potential: While this guide uses paint, the principles of geometric design can also be adapted with removable vinyl decals or washi tape for those living in rented properties, offering temporary yet stylish solutions.
This project is not just about painting; it’s about crafting an environment that reflects your individuality and makes your house feel more like a home. So, let’s gather our supplies and dive into creating your very own stunning geometric wall.
Materials You’ll Need:
Before embarking on your creative journey, ensure you have all the necessary tools at hand. Quality materials make a significant difference in achieving a professional-looking finish and a stress-free experience.
- Paint Roller: A good quality roller will ensure even paint application and a smooth finish. Consider a small roller for tighter spaces within your design.
- Painter’s Tape (FrogTape Recommended): This is your primary tool for creating crisp, clean lines. FrogTape is highly recommended due to its PaintBlock® Technology, which seals the tape edges to prevent paint bleed.
- Paint Tray: Essential for holding your paint and allowing easy loading of the roller.
- Interior Wall Paint: Choose your desired color(s). Consider paint finishes – matte for a sophisticated, subtle look, eggshell or satin for durability and a slight sheen, or even a metallic paint for a touch of glamour.
- Scissors or Utility Knife: For cutting the painter’s tape precisely.
- Drop Cloths or Old Sheets: To protect your floors and furniture from paint drips.
- Sponge or Damp Cloth: For cleaning up any small spills immediately.
- Pencil and Ruler/Level (Optional but Recommended): For planning and ensuring straight lines, especially for complex patterns.
Step-by-Step Guide to Your Geometric Wall Art:
Preparation is Key: Setting the Stage for Success
Even the simplest DIY projects benefit immensely from thorough preparation. Taking a few extra minutes now will save you headaches later and ensure a professional-quality finish.
- Clear the Area: Move all furniture away from the wall you intend to paint. If furniture cannot be moved, cover it completely with plastic sheeting or old sheets.
- Protect Your Floors: Lay down drop cloths or old newspapers along the base of the wall to catch any spills or drips.
- Clean the Wall: Wipe down the wall surface with a damp cloth to remove any dust, dirt, or cobwebs. For stubborn grime, use a mild soap solution and ensure the wall is completely dry before proceeding. A clean surface helps the paint adhere better and prevents peeling.
- Base Coat Options:
- Existing Wall Color: If you’re happy with your current wall color serving as the background for your geometric lines, simply ensure it’s clean and in good condition, free from chips or peeling paint.
- New Base Color: For a fresh start or if you want a specific background color for your design, apply a fresh coat of your chosen base paint color to the entire wall. Allow it to dry completely according to the manufacturer’s instructions (usually 2-4 hours, or overnight for best results) before applying any tape. This ensures the base coat is fully cured and won’t lift when the tape is removed.
Step 1: Designing Your Geometric Pattern with Tape
This is where your creativity truly comes alive! The beauty of geometric design lies in its versatility. While the tutorial suggests zigzags, consider how different patterns might transform your space. Before you start sticking tape, it can be helpful to visualize your design. You might sketch a few ideas on paper, or even lightly mark your wall with a pencil to plan your lines. Remember, precise planning leads to crisp, clean lines in your final artwork.
Begin by taking your painter’s tape (FrogTape is highly recommended for its clean-edge performance). If you’re creating a zigzag pattern as suggested, start by applying vertical zigzag lines. Don’t be afraid to experiment with the angle and width of your zigzags – subtle variations can add character. For sharp, defined angles, use a ruler or level to guide your lines, especially if you desire a perfectly symmetrical or architectural look. Once you’ve created your vertical pattern, you’ll then introduce horizontal zigzag lines. These horizontal lines should connect or intersect with your existing vertical lines, forming a captivating grid of geometric shapes. The interplay between the vertical and horizontal elements will create a dynamic and visually interesting pattern. Ensure that each piece of tape is firmly pressed down onto the wall. Use your finger or a credit card to run along the edges of the tape, sealing it securely to prevent any paint from bleeding underneath. This step is crucial for achieving those sought-after crisp lines.
Consider the density of your pattern: closely spaced lines will create a busier, more intricate look, while wider gaps will result in a more minimalist and open feel. You can also vary the thickness of your tape if you want lines of different widths. This stage allows for immense personalization, so take your time, experiment with different layouts, and don’t hesitate to reposition tape until you’re completely satisfied with your design.
Step 2: Painting and the Grand Reveal
With your geometric design meticulously taped onto the wall, it’s time for the exciting part – adding color! Pour your chosen paint into the tray, ensuring there’s enough to easily load your roller. Dip your paint roller into the paint, rolling it a few times in the tray to evenly saturate it and remove any excess paint. This prevents drips and ensures a smooth application.
Start painting the wall, gently rolling over the taped areas. Apply the paint in thin, even coats. It’s always better to apply two thin coats than one thick coat, as thick coats are more prone to dripping, unevenness, and taking longer to dry, which can also increase the risk of paint bleeding under the tape. After applying your first coat, allow it to dry to the touch, usually about 1-2 hours, depending on humidity and paint type. Once dry, apply a second coat of paint to achieve full color saturation and an opaque finish. Again, ensure this coat is also applied evenly. After the second coat, leave the paint to dry completely. This is a critical waiting period, typically 2 to 4 hours, or even longer in humid conditions. The key is for the paint to be dry enough to not smudge, but not so dry that it forms a hard seal over the tape, which could lead to paint peeling off with the tape.
Once you’ve confirmed the paint has dried nicely on the wall and is dry to the touch, it’s time for the big reveal! Begin peeling the tape carefully. For the cleanest lines, pull the tape off slowly, at a 45-degree angle, pulling it back on itself. Avoid pulling straight up or outwards, as this can cause the paint to lift or tear. If you notice any minor bleeding or imperfections, don’t panic! Small touch-ups can be done carefully with a small artist’s brush and your base wall color. Step back and admire your handiwork – a beautiful, custom geometric accent wall created entirely by you!
Tips for a Flawless Geometric Finish:
To ensure your geometric wall art looks professionally done, keep these additional tips in mind:
- Choose the Right Tape: As mentioned, FrogTape is excellent, but any good quality painter’s tape designed for crisp lines will work. Avoid masking tape, as it’s not designed to prevent paint bleed.
- Light Coats are Best: Always opt for multiple thin coats of paint rather than one thick one. This reduces drips and improves adherence.
- Timely Tape Removal: The exact timing for tape removal is crucial. If you wait too long, the paint can fully cure and bond to the tape, leading to chipping when you pull it off. If you pull too soon, the paint might be too wet and smudge. Aim for when the paint is dry to the touch but still slightly flexible.
- Sharp Tools: Use sharp scissors or a utility knife to cut your tape. Clean cuts mean cleaner lines on the wall.
- Practice on Scrap: If you’re nervous, try a small practice design on a piece of cardboard or an inconspicuous wall section first.
- Consider Your Colors: Choose colors that complement your existing decor. High contrast colors will make your geometric pattern pop, while subtle variations will create a more understated, textural effect.
Unleash More Creativity: Variations and Beyond Zigzags
While zigzags offer a fantastic starting point, don’t limit your imagination! The beauty of tape painting is its versatility:
- Straight Lines and Stripes: Create bold vertical or horizontal stripes for a classic, clean look. Vary the width and spacing for interest.
- Chevrons and Herringbone: These V-shaped patterns add sophisticated movement.
- Diamonds and Triangles: Use a ruler and level to create precise repeating diamond or triangle patterns for a modern, architectural feel.
- Abstract Designs: Forget symmetry! Randomly place tape lines to create an abstract, mosaic-like pattern.
- Multiple Colors: Introduce a third or even fourth color for a more complex and vibrant design. You’d paint sections of your geometric shapes in different colors, taping off areas as needed.
- Metallic Accents: Use a metallic paint (gold, silver, copper) for some of your lines to add a touch of glamour and reflective quality.
- Ombre Effect: Blend colors within your geometric shapes for a subtle gradient effect.
Experiment with different design complexities and color palettes to find what truly resonates with your personal style. Each variation offers a unique way to enhance your home’s aesthetic.
A huge thank you to B&Q via YouTube for inspiring this fantastic project and providing the imagery. If you enjoyed this creative endeavor, we highly recommend visiting their YouTube channel for more innovative DIY ideas and subscribing to stay updated on their latest tutorials!
Your New Easy DIY Geometric Accent Wall Awaits!
There you have it – a comprehensive guide to creating a stunning DIY geometric accent wall that will undoubtedly become a conversation starter. This project is a testament to how simple tools and a little ingenuity can lead to dramatic home transformations. It’s an accessible, budget-friendly way to inject your personality into your living space, making it uniquely yours. Whether you choose classic zigzags, intricate diamonds, or a custom abstract design, the process is incredibly rewarding. So, what are you waiting for? Grab your tape, pick your favorite paint colors, and get ready to add some serious style to your walls. Embrace the fun of DIY and enjoy the beautiful results!