
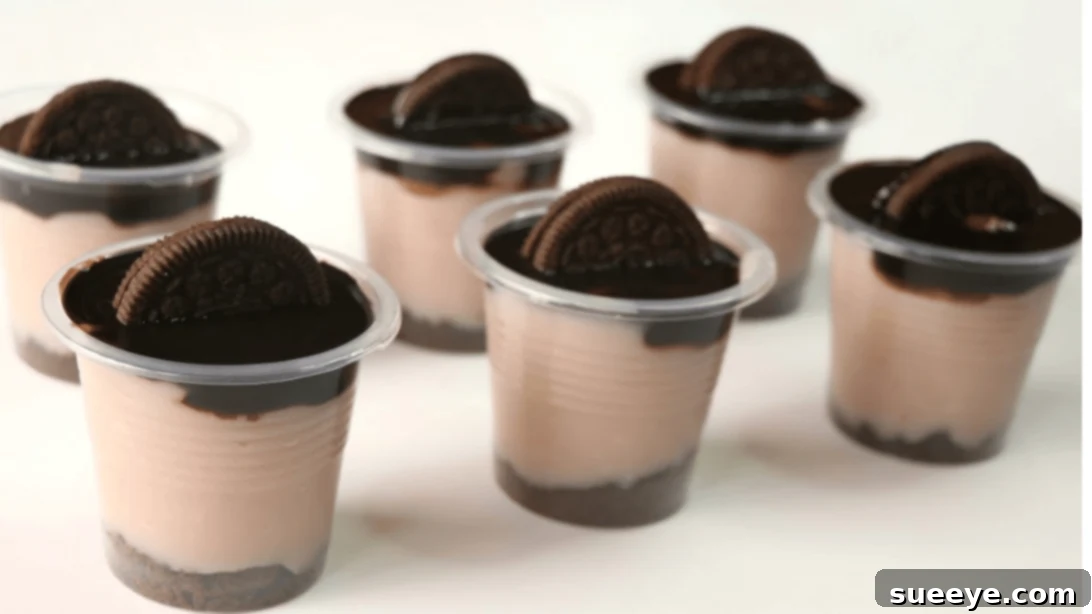
There’s an undeniable joy that comes from indulging in a delightful dessert, especially when it’s homemade. As someone who truly loves baking and creating sweet treats, I always strive to have a delicious option readily available in the fridge, ready to satisfy any sudden craving. I find immense pleasure in exploring new recipes, particularly those perfect for special occasions, casual gatherings, or even as thoughtful edible gifts. The satisfaction of crafting something delightful from scratch is truly unmatched, and sharing these creations with loved ones makes the experience even more rewarding.
RELATED: Viral Oreo Mug Cake Hack!
Among the countless recipes I’ve experimented with, a recent discovery from Cooking.Fusion on YouTube has quickly become a new favorite. This particular dessert stands out not only for its incredible ease of preparation but also because it requires absolutely no baking! It’s a game-changer for those who prefer to keep their ovens off, especially during warmer months, or for anyone looking for a quick and simple solution to their dessert dilemmas. What truly elevates this recipe is its reliance on just a few incredibly simple, readily available ingredients, transforming them into a surprisingly elegant and utterly delicious treat. If you’re searching for a fuss-free dessert that delivers maximum flavor with minimal effort, you’ve found your next go-to recipe. Let’s dive in and learn how to create this irresistible Oreo pudding dessert that’s sure to impress everyone who tastes it.
Essential Ingredients for Your No-Bake Oreo Pudding Dessert
Crafting this heavenly Oreo pudding dessert requires only a handful of common ingredients, most of which you likely already have in your pantry. The beauty of this recipe lies in its simplicity, proving that you don’t need exotic items to create something truly spectacular. Here’s everything you’ll need to get started:
- Oreo Cookies: One standard package (about 36-40 cookies) for both the crust and garnish. These iconic cookies provide a delightful chocolatey crunch and their signature creamy filling.
- 2 cups + 2 tablespoons Milk: Whole milk is recommended for a richer, creamier pudding, but 2% milk can also be used. This forms the base of your luscious pudding.
- ½ cup Granulated Sugar: For the perfect balance of sweetness in your pudding. Adjust to your personal preference.
- ¼ cup Cornstarch: The secret to a thick, smooth, and perfectly set pudding without any gelatin. It’s crucial for achieving that delightful consistency.
- ½ cup Chocolate (for Ganache): High-quality semi-sweet or dark chocolate chips, or finely chopped chocolate bar, work best for the rich ganache layer. This adds another dimension of chocolatey goodness.
- 2 tablespoons Milk (for Ganache): A small amount of milk is used to melt with the chocolate, creating a silky-smooth ganache.
Each ingredient plays a vital role in building the layers of flavor and texture in this dessert. From the crunchy Oreo base to the creamy pudding and the decadent chocolate ganache, every component contributes to an unforgettable culinary experience.
Step-by-Step Guide: How to Craft Your Dreamy Oreo Pudding Dessert
Get ready to transform simple ingredients into a show-stopping dessert with these easy-to-follow instructions. This no-bake wonder is perfect for beginners and seasoned dessert enthusiasts alike.
Step 1: Preparing the Oreo Base and Pudding Foundation
The first step sets the stage for our incredible dessert by preparing the star ingredient: Oreo cookies. Carefully separate the chocolate cookie wafers from their creamy white filling. Place the creamy filling into a small bowl and set it aside; it will be incorporated into our pudding later, adding a distinctive Oreo flavor. Take the separated cookie wafers and place them into a sturdy Ziploc bag. Using a rolling pin or a meat tenderizer, crush the cookies thoroughly until they transform into fine crumbs, resembling a coarse powder. The finer the crumbs, the smoother your dessert base will be. Once crushed, set these aside as well.
Next, we’ll start on the luscious pudding. Grab a medium-sized saucepan and place it on your stove over medium heat. Pour in the specified amount of milk (2 cups + 2 tablespoons). Follow this by adding the granulated sugar and cornstarch. Whisk these ingredients together until they are fully combined and the cornstarch has dissolved, preventing any lumps from forming later. It’s crucial to ensure a smooth mixture at this stage.
Step 2: Cooking the Pudding and Creating the Ganache
Continue cooking the milk mixture over medium heat, stirring constantly and consistently. This continuous stirring is key to preventing the pudding from sticking to the bottom of the pan and ensuring an even, lump-free consistency. As the mixture heats, you’ll notice it gradually thickening. Once it reaches a smooth, custard-like texture, carefully add the reserved Oreo cookie filling to the saucepan. Keep mixing vigorously until the filling has completely melted and is fully incorporated into the pudding, infusing it with that unmistakable Oreo essence. As soon as the pudding reaches your desired thickness and the filling is mixed in, turn off the heat and remove the saucepan from the burner. Allow the pudding mixture to cool down for a bit; this helps it set properly and prepares it for layering. For a quicker cool-down, you can transfer it to a separate bowl.
While your pudding cools, prepare the decadent chocolate ganache. In a small, microwave-safe bowl, combine the ½ cup of chocolate chips (or chopped chocolate) with the 2 tablespoons of milk. Heat this mixture in the microwave for short 10-second intervals. After each interval, stir the mixture well. Continue this process until the chocolate is fully melted and you have a smooth, glossy ganache. Be careful not to overheat the chocolate, as this can cause it to seize. A gentle, gradual melting is best.
Step 3: Assembling and Garnish for a Picture-Perfect Dessert
With all your components ready, it’s time for the exciting part: assembly! Select your desired serving cups or glasses. Clear glasses work wonderfully as they allow the beautiful layers of your dessert to shine through. Begin by spooning a generous layer of the crushed Oreo cookie crumbs at the bottom of each cup. This will form the delightful crunchy base of your dessert. Next, carefully pour or spoon a layer of the prepared, slightly cooled pudding over the Oreo crumbs. Ensure an even distribution for a balanced bite.
Finally, gently spoon a luscious layer of the chocolate ganache on top of the pudding. This adds a rich, glossy finish and an intense burst of chocolate flavor. For an extra touch of elegance and visual appeal, place a whole Oreo cookie or a few additional crumbs in the center of the topmost ganache layer as a garnish. Your masterpiece is now complete! Serve immediately if you prefer it slightly warm, or for the best taste and set, refrigerate for at least 2-3 hours before serving. Enjoy every delightful spoonful of this homemade wonder!
*All these images are credited to Cooking.Fusion via YouTube. Give her channel a visit and subscribe for more amazing and easy recipes!
Tips for Perfecting Your No-Bake Oreo Pudding Dessert
Achieving a consistently perfect no-bake Oreo pudding dessert is simple with a few insider tips:
- Crush Cookies Finely: For the best base texture, ensure your Oreo crumbs are as fine as possible. A food processor can achieve this quickly and efficiently.
- Constant Stirring is Key: While making the pudding, continuous stirring prevents lumps and ensures the cornstarch thickens evenly. Don’t step away from the stove!
- Preventing Skin Formation: As the pudding cools, a skin can form on top. To prevent this, place a piece of plastic wrap directly onto the surface of the warm pudding.
- Chill Thoroughly: This dessert relies on chilling to set properly. Allow at least 2-3 hours in the refrigerator for the best consistency, but overnight is ideal for a truly firm and flavorful result.
- High-Quality Chocolate for Ganache: The better the chocolate, the richer and smoother your ganache will be. Semi-sweet or dark chocolate chips work wonderfully.
- Serving Suggestion: While delicious on its own, a dollop of whipped cream or a sprinkle of chocolate shavings can elevate this dessert even further.
- Make Ahead: This dessert is perfect for making in advance! Prepare it a day before your event, and it will be perfectly set and ready to serve.
Creative Variations & Customizations for Your Oreo Dessert
While the classic Oreo pudding dessert is undeniably delicious, don’t hesitate to get creative and customize it to your taste. Here are a few ideas to inspire you:
- Different Cookies: Experiment with other cookie varieties! Graham crackers, Nilla wafers, chocolate chip cookies, or even gluten-free alternatives can create unique flavor profiles.
- Add Fruit: Layer in fresh berries like strawberries or raspberries for a burst of freshness and color. Sliced bananas also pair wonderfully with chocolate and cream.
- Nutty Twist: Sprinkle chopped nuts like pecans, walnuts, or almonds between layers for added crunch and flavor.
- Minty Fresh: Use mint-flavored Oreos or add a drop of mint extract to the pudding for a refreshing twist.
- Espresso Kick: Dissolve a teaspoon of instant espresso powder into the milk while making the pudding to enhance the chocolate flavor and add a subtle coffee note.
- Cream Cheese Layer: For a richer, tangier version, consider adding a thin layer of sweetened cream cheese frosting between the pudding and ganache.
- Alcoholic Indulgence: A splash of Kahlúa, Baileys Irish Cream, or a chocolate liqueur can be mixed into the pudding for an adult-friendly version.
The Irresistible Appeal of No-Bake Desserts
No-bake desserts, like this delightful Oreo pudding, have gained immense popularity for a multitude of reasons. They offer a fantastic alternative to traditional baked goods, especially when time is of the essence or when you want to avoid heating up your kitchen. Their simplicity makes them incredibly accessible for home cooks of all skill levels, ensuring a successful and delicious outcome every time. Beyond the convenience, the texture of no-bake treats is often uniquely smooth, creamy, and wonderfully refreshing, providing a delightful contrast to their baked counterparts. They are also highly adaptable, allowing for easy customization with various ingredients and flavors, making each creation a unique experience. This particular Oreo pudding dessert perfectly embodies these qualities, proving that sophistication and flavor don’t always require an oven.
Frequently Asked Questions (FAQs) About Oreo Pudding Dessert
- Can I make this dessert ahead of time? Absolutely! This dessert is ideal for making ahead. In fact, chilling it overnight often enhances the flavors and ensures a perfectly set consistency. Just cover it tightly with plastic wrap to prevent it from absorbing refrigerator odors.
- How long does this dessert last in the fridge? When stored properly in an airtight container or covered with plastic wrap, this Oreo pudding dessert will stay fresh in the refrigerator for up to 3-4 days.
- Can I use skim milk? While whole milk provides the creamiest texture, you can use 2% or even skim milk. However, be aware that the pudding might be slightly less rich and creamy.
- My pudding is lumpy, what went wrong? Lumps usually occur if the cornstarch wasn’t fully dissolved at the beginning or if the mixture wasn’t stirred constantly while heating. To fix this, you can pass the warm pudding through a fine-mesh sieve before chilling.
- Can I freeze this dessert? Freezing is generally not recommended for this type of pudding, as it can alter the texture and make it watery upon thawing. It’s best enjoyed chilled from the refrigerator.
- What if I don’t have a microwave for the ganache? No problem! You can melt the chocolate and milk for the ganache using a double boiler method. Place a heat-proof bowl over a saucepan of simmering water, ensuring the bowl doesn’t touch the water. Stir until melted and smooth.
Indulge in the Simplicity and Richness of This Oreo Pudding Dessert
There you have it – a wonderfully simple, utterly delicious, and incredibly satisfying no-bake Oreo pudding dessert that’s perfect for any occasion. Whether you’re a seasoned dessert maker or just starting your culinary journey, this recipe offers a foolproof path to a treat that’s both impressive and easy to prepare. The harmonious blend of crunchy Oreo crumbs, smooth creamy pudding, and rich chocolate ganache creates a symphony of textures and flavors that will undoubtedly leave everyone asking for more. So, gather your ingredients, follow these steps, and prepare to delight your taste buds and those of your loved ones with this irresistible creation. Don’t wait – dive into the delightful world of no-bake desserts and make this Oreo pudding your next sweet success!