
Sew Your Own Comfortable & Contoured DIY Elastic Face Mask: A Beginner-Friendly Guide
Are you searching for a more comfortable and secure face covering? Many people experience the frustration of traditional scarves or poorly fitting masks that constantly slip, ride up, or create uncomfortable pressure points. If you’ve been grappling with a scarf that refuses to stay put or a mask that leaves gaps, you’re in the right place. We understand the dilemma of needing effective coverage that also feels good to wear for extended periods.
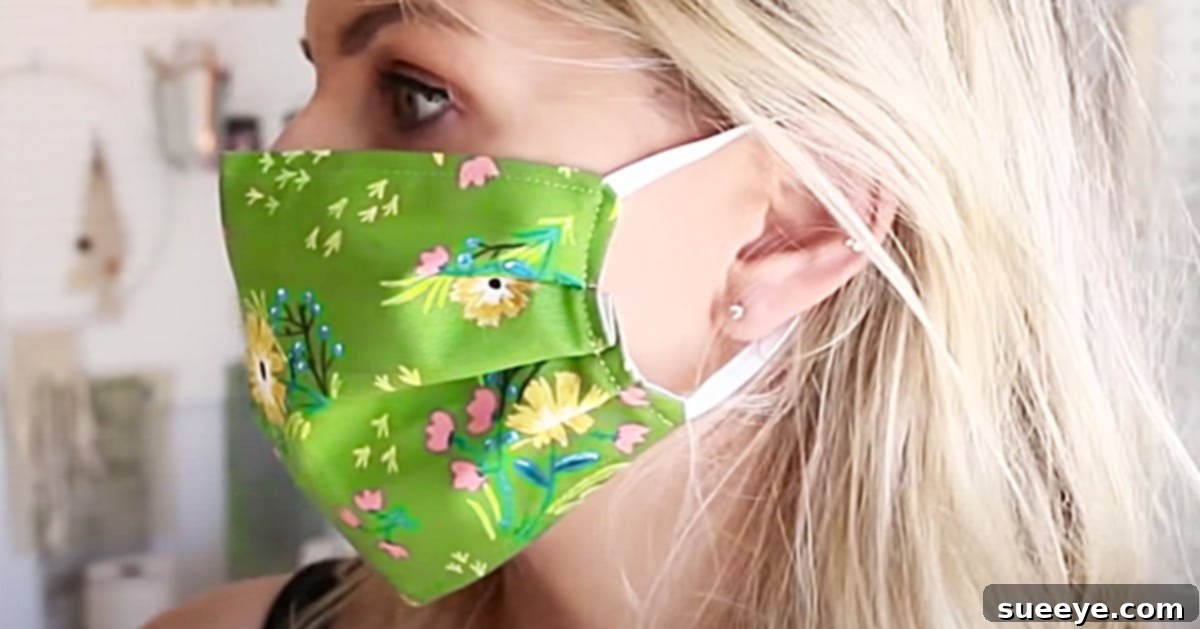
My own quest for a better solution led me to an invaluable resource: the elastic-eared face mask tutorial by Melanie Ham on YouTube. From the moment I discovered this detailed guide, I knew I had found the answer to my face mask woes. What makes this particular tutorial stand out is its exceptional design, blending simplicity with incredible effectiveness. It’s so well-structured and straightforward that even those new to sewing will find themselves creating a beautifully fitted mask with ease. The best feature of this elastic mask is its cleverly designed pleats, which create a natural, contoured shape. This ensures the mask drapes correctly and comfortably over your face, providing excellent coverage without feeling restrictive.
This DIY project offers a fantastic way to create custom face coverings tailored to your preferences. However, it is crucial to understand that **masks made at home are not proven to protect against COVID-19 to the same extent as medical-grade respirators.** I have primarily made and used these masks in conjunction with a disposable mask for added protection, or as a basic face covering when a medical-grade option was not required or available. For comprehensive and up-to-date information regarding how to protect yourself against COVID-19, including guidelines on face masks and other safe practices during the outbreak, please consult the CDC Website.
Why Choose a DIY Elastic Face Mask?
There are numerous benefits to crafting your own face mask, especially using a well-designed pattern like Melanie Ham’s:
- Superior Comfort: Elastic ear loops are often more comfortable than ties, and the contoured shape prevents the mask from digging into your face or slipping down.
- Excellent Fit: The ingenious pleats allow the mask to conform naturally to the curves of your face, minimizing gaps and enhancing coverage.
- Breathability: By choosing natural cotton fabrics, you can ensure your mask is breathable and comfortable, even during longer periods of wear.
- Cost-Effective: Making your own masks can be significantly cheaper in the long run compared to purchasing disposable or ready-made fabric masks.
- Reusable & Washable: Homemade fabric masks are environmentally friendly. Simply toss them in the wash, and they’re ready to wear again.
- Customizable Style: Express your personality! You have complete freedom to choose fabrics with patterns, colors, or textures that reflect your individual style.
- Beginner-Friendly: Melanie Ham’s tutorial is specifically designed to be accessible, making it an ideal project for those new to sewing.
Essential Materials for Your Elastic Face Mask Project
Gathering your materials before you begin will make the sewing process smooth and enjoyable. Here’s what you’ll need:
- Fabric (100% Cotton is Best): Opt for tightly woven cotton fabrics, such as quilting cotton or broadcloth. Cotton is highly recommended due to its breathability, comfort against the skin, and ease of washing. Avoid stretchy knits as they can lose their shape and offer less filtration. You’ll need two pieces of fabric for the main body of the mask, so consider contrasting patterns for a fun touch, or use the same for a cohesive look.
- All-Purpose Polyester Thread: Choose a high-quality thread that matches or complements your fabric. Polyester thread is durable and strong, making it ideal for a mask that will be washed frequently.
- Sharp Fabric Scissors: Invest in a good pair of fabric shears. Using separate scissors for fabric and paper prevents dulling, ensuring clean, precise cuts every time.
- A Sewing Machine: Any basic sewing machine capable of a straight stitch will work perfectly. Ensure your machine is threaded correctly and has a fresh needle suitable for cotton fabric.
- Pins (or Fabric Clips): These are essential for holding fabric layers together securely while you sew. Fabric clips are an excellent alternative to pins, especially for thicker fabrics or if you want to avoid pinholes.
- Elastic (1/4 inch wide is ideal): You’ll need thin elastic for the ear loops. Flat elastic is generally more comfortable than round cord elastic. Measure around your ears or use existing masks for reference to determine the right length, keeping in mind it will be sewn into channels.
- Iron and Ironing Board: While not listed in the original, an iron is indispensable for pressing seams flat and creating crisp, professional-looking pleats. This step makes a significant difference in the final appearance and ease of sewing.
- Measuring Tape or Ruler: For accurate fabric cutting, even if pleats don’t require measuring, initial fabric pieces will.
Preparation Steps Before You Sew
A little preparation goes a long way in ensuring a successful sewing project:
- Pre-Wash Your Fabric: Always pre-wash and dry your cotton fabric before cutting. This prevents any potential shrinkage after your mask is made, ensuring it retains its size and shape.
- Press Your Fabric: Iron your fabric thoroughly after washing to remove any wrinkles. A smooth, flat surface is much easier to cut and sew accurately.
- Gather All Tools: Lay out all your materials and tools on a clean, well-lit workspace. This helps keep you organized and prevents interruptions during sewing.
- Set Up Your Sewing Machine: Thread your sewing machine with your chosen thread, wind a bobbin, and ensure your machine is in good working order. Test your stitch on a scrap piece of fabric to check tension.
- Watch the Tutorial: If you haven’t already, watch Melanie Ham’s full elastic-eared face mask tutorial once or twice. This will give you a complete overview of the process and help you visualize each step.
Detailed Directions: Crafting Your Comfortable Elastic Face Mask
This comprehensive guide will walk you through creating a comfortable, elastic-eared face mask, based on Melanie Ham’s excellent tutorial. The beauty of this design lies in its simplicity and the clever way it achieves a contoured fit without complex patterns or extensive measuring for the pleats.
Step 1: Cutting and Preparing Your Fabric Rectangles
Begin by cutting your chosen cotton fabric into the required rectangles. Melanie Ham’s tutorial specifies precise dimensions, so refer to her video for exact measurements. You will typically cut two main pieces for the outer and inner layers of your mask. Once cut, take one piece of fabric and hem the shorter sides. This involves folding the edge over twice (e.g., 1/4 inch, then another 1/4 inch) and pressing it firmly with an iron. Then, stitch these hems down with your sewing machine. These finished edges will form the top and bottom of your mask.
Step 2: Sewing the Main Mask Body and Creating Channels
With your two fabric rectangles (one with hemmed short sides, the other unhemmed), place them right sides together. Sew along the two longer edges, leaving the short, now-hemmed sides open. Clip your corners if necessary and turn the fabric right side out. Press the seams flat. Now, focusing on the unhemmed short sides, you’ll create channels for your elastic. Fold the raw edge inwards, press, and then fold again to enclose the raw edge completely, creating a channel wide enough for your elastic. Pin these channels in place and stitch them down, making sure to leave the ends open so you can insert the elastic later. These channels will form the sides of your mask where the elastic loops will reside.
Step 3: Forming the Signature Pleats (No Measuring Required!)
This is where the magic of Melanie Ham’s design truly shines. Instead of complicated calculations, her method for creating pleats is intuitive and beginner-friendly. Lay your mask flat. Starting from the top, you’ll create three even pleats that fold downwards. The key is to simply eyeball these folds, aiming for three relatively equal pleats across the mask’s width. Each pleat should be folded towards the bottom of the mask. Press each pleat firmly with an iron as you form it. This pressing is crucial for holding the pleats in place before you stitch them down, giving your mask its signature contoured shape and ensuring a snug fit over your nose and chin.
Step 4: Securing and Sewing Down the Pleats
Once you’ve carefully formed and pressed your three pleats, it’s time to secure them permanently. With the pleats still neatly folded and pressed, you will sew across the side edges of the mask, essentially stitching through all layers of the fabric where the pleats are. Use pins or fabric clips to hold the pleats firmly in place as you sew. Stitch close to the raw edge of the side channels, ensuring that your stitches catch all layers of the pleats. Repeat this on both sides of the mask. This step locks the contoured shape into place, giving your mask its ergonomic design that fits beautifully over the face.
Step 5: Inserting and Securing the Elastic Ear Loops
Now that your mask body is shaped, it’s time to add the elastic ear loops. Cut two pieces of elastic to the desired length. A good starting point is usually 6-7 inches per piece, but this can vary depending on individual face size. Using a safety pin or a bodkin, thread one piece of elastic through each of the side channels you created in Step 2. Once the elastic is threaded through, tie the ends of each elastic piece together securely with a knot. Pull the elastic gently so the knot tucks inside the channel, hiding it from view and creating a neat finish. This ensures comfortable and adjustable ear loops.
Step 6: Final Touches and Inspection
Trim any loose threads from your mask. Give your finished mask a final press with the iron to ensure all seams are crisp and the pleats are well-defined. Inspect your stitching to make sure all seams are secure and there are no gaps. Try on your new mask to check for fit and comfort. If the elastic is too loose, you can gently pull it out of the channel and re-tie the knot to make it tighter. If it’s too tight, you may need to replace the elastic with a slightly longer piece.
And just like that, you’ve created a comfortable, contoured elastic face mask!
Care and Maintenance for Your Homemade Mask
To ensure your DIY mask remains effective and hygienic, proper care is essential:
- Washing: Machine wash your mask regularly after each use. Use warm or hot water with your regular laundry detergent.
- Drying: Tumble dry on a high setting or air dry in direct sunlight. High heat helps to sanitize the fabric. Avoid using a dryer if the elastic is very delicate, as repeated high heat can degrade it faster.
- Storage: Store your clean masks in a clean, breathable bag or container to protect them from dust and contaminants.
- Inspection: Periodically inspect your mask for any signs of wear and tear, such as frayed fabric, loose stitching, or stretched elastic. Replace your mask if it shows significant damage.
Personalize Your Mask: Customization Ideas
One of the joys of DIY is customization! Here are a few ideas to make your mask uniquely yours:
- Fabric Choices: Experiment with different patterns, colors, and textures of cotton fabric. Match your mask to your outfits or express your mood!
- Adjustable Ear Loops: Instead of tying a fixed knot, you could thread the elastic and add small silicone cord stoppers (toggle beads) to make the ear loops easily adjustable on the go.
- Nose Wire Addition: For an even more secure fit and to prevent glasses from fogging, you can add a flexible nose wire (such as a pipe cleaner or a specialized craft wire) into a small channel sewn along the top edge of the mask.
- Filter Pocket: While Melanie Ham’s design doesn’t include one by default, experienced sewers could adapt the pattern to include an inner pocket for inserting an additional filter layer.
Important Safety Notice: Understanding Mask Limitations
We want to reiterate a critical message regarding homemade face masks: **While these DIY fabric masks can help reduce the spread of respiratory droplets from the wearer, they are NOT medical-grade personal protective equipment (PPE). They do not offer the same level of protection as N95 respirators or surgical masks.** This mask is intended for general public use as a face covering and should not be used in medical settings or where exposure to infectious agents is high. Please continue to practice social distancing, frequent hand washing, and other recommended public health measures. For the most accurate and current information on COVID-19 prevention and mask guidelines, always refer to reputable health organizations. You can find essential information on how to protect yourself and your community on the CDC Website.
Start Sewing Your Own Comfortable Mask Today!
Say goodbye to uncomfortable, ill-fitting face coverings and hello to a custom-made solution that truly fits. This DIY elastic face mask project is not only easy to tackle for beginners but also yields a remarkably comfortable and effective result. The contoured shape and soft elastic loops make a significant difference in wearability, making it much easier to comply with face-covering recommendations.
I genuinely love this mask design, and I’m confident you will too. It’s a rewarding project that combines practicality with the satisfaction of creating something useful with your own hands. Ready to give it a try? Dive into the full video tutorial by Melanie Ham, where she provides step-by-step visual instructions that complement this guide perfectly. Happy sewing!