
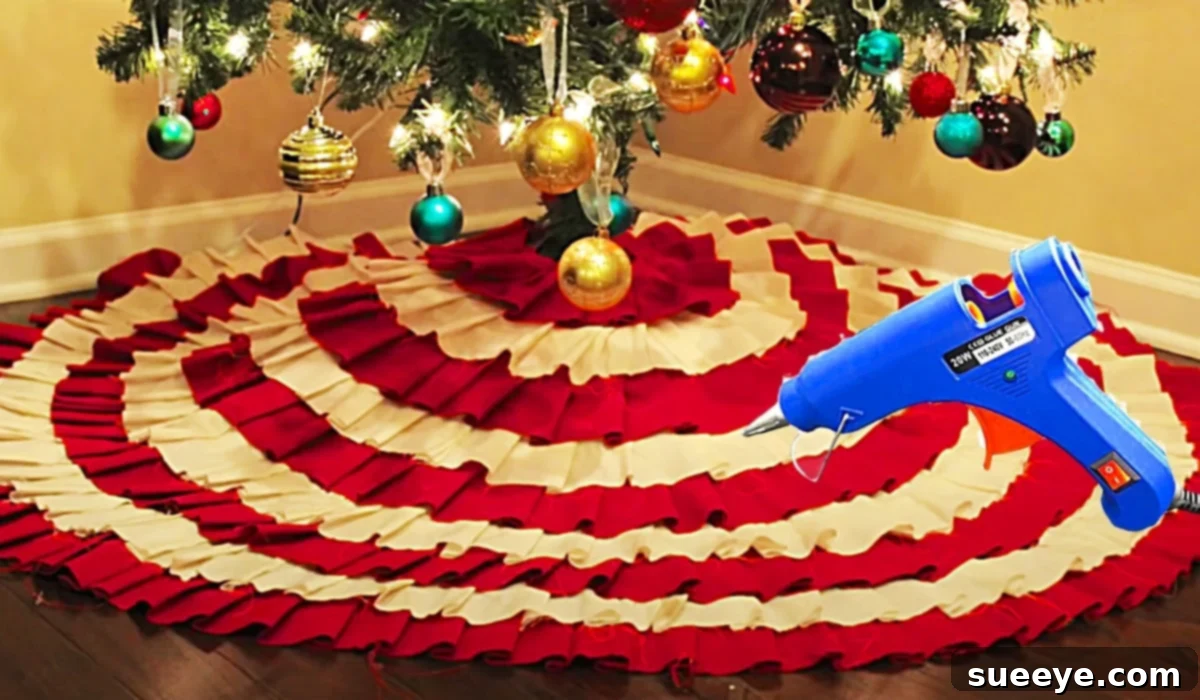
DIY No-Sew Ruffled Christmas Tree Skirt: Enhance Your Holiday Decor with Rustic Charm
Are you searching for a way to add a unique, personalized touch to your Christmas tree this holiday season? Look no further than this delightful DIY no-sew ruffled Christmas tree skirt. This project is a fantastic blend of rustic farmhouse charm and elegant femininity, designed to beautifully complement almost any holiday theme. Best of all, it requires no sewing, making it an accessible and enjoyable craft for everyone, regardless of their crafting skill level. With just a trusty hot glue gun and a few readily available materials, you can create a stunning tree skirt that will be the envy of your holiday guests.
Inspired by an incredible video tutorial by Rachel Elliot on YouTube, this project transforms simple materials into a luxurious, custom piece of decor. Imagine your beautifully decorated tree standing proudly atop a soft, ruffled skirt that you made with your own hands. It adds a layer of warmth, texture, and handmade love that store-bought skirts often lack. Whether your home embraces a cozy farmhouse aesthetic, a classic traditional style, or a modern rustic vibe, this ruffled tree skirt will seamlessly integrate and elevate your festive space.
Forget the stress of intricate patterns and threading needles. This innovative no-sew method utilizes the power of hot glue to secure beautiful ruffles, ensuring a durable and beautiful finish. It’s a project that promises not only a gorgeous end product but also a fun and rewarding crafting experience. Let’s gather our supplies and dive into creating this stunning focal point for your Christmas tree!
Essential Materials for Your No-Sew Ruffled Tree Skirt
One of the most appealing aspects of this DIY project is its simplicity in terms of materials. You won’t need an extensive craft store haul; rather, a few key items will get you started. Opting for quality materials will ensure your tree skirt lasts for many holiday seasons to come.
- A Spool of Burlap Ribbon (or Burlap Fabric): This is the star of the show for achieving that rustic, farmhouse look. You’ll need a significant amount, so consider buying a large spool or yardage of burlap fabric that you can cut into strips. Natural burlap offers an earthy appeal, but colored burlap (e.g., red, green, cream) can also be used for a different aesthetic. The width of your ribbon will determine the height of your ruffles.
- Base Fabric (e.g., Felt, Canvas, or an Old Sheet): This will form the foundation of your tree skirt. Choose a sturdy fabric that holds its shape well. Felt is an excellent choice as it doesn’t fray, making it ideal for a no-sew project. Canvas or even a thick old sheet can also work. The color should ideally be neutral or complement your burlap, as small peeks of it might show between ruffles.
- A Rotary Cutter: While scissors can work, a rotary cutter is a game-changer for cutting long, straight, and consistent strips of fabric quickly and efficiently. It ensures clean edges and saves a lot of time and effort.
- A Cutting Mat: Essential for protecting your work surface and providing a self-healing base for your rotary cutter. Look for one with grid lines to help with precise measurements.
- A Quilter’s Ruler (or a Reliable Yardstick/Measuring Tape): Crucial for accurate measuring and guiding your rotary cutter to achieve uniform strips for your ruffles.
- A Hot Glue Gun: The magic tool for this no-sew project! A good quality hot glue gun, preferably with a high-temperature setting, will provide strong adhesion. Ensure it’s in good working order before you begin.
- Plenty of Glue Sticks: You’ll go through more than you think! Stock up on extra glue sticks to avoid interruptions during your crafting session. Choose good quality, strong-bonding glue.
- A Large Circle to Trace (or string and pencil method): You’ll need something large and round to trace the perimeter of your tree skirt base. Think laundry baskets, hula hoops, large serving platters, or even a piece of string anchored to a central point with a pencil at the other end.
- Optional: Fabric Scissors: Handy for initial rough cuts or for trimming small pieces.
- Optional: Pins or Fabric Clips: Can be useful for temporarily holding ruffles in place before gluing, especially if you want to preview the layout.
Step-by-Step Directions: Crafting Your Ruffled Tree Skirt
Creating this stunning ruffled Christmas tree skirt is a straightforward process when broken down into manageable steps. Follow these detailed instructions to bring your beautiful holiday vision to life, just as demonstrated in Rachel Elliot’s insightful video tutorial.
Step 1: Prepare Your Base Fabric
- Determine Skirt Size: First, decide on the desired diameter of your finished tree skirt. A common size is 48-60 inches, but this can vary depending on the size of your tree and personal preference.
- Cut the Large Circle: Lay your chosen base fabric (felt, canvas, etc.) flat and smooth. Use your large circular object (or the string-and-pencil method for a perfect circle) to trace the desired diameter. Carefully cut out this large circle using your rotary cutter or fabric scissors.
- Create the Center Opening: Find the exact center of your large fabric circle. From this center point, measure and cut a smaller circle, typically 4-6 inches in diameter, to accommodate the tree trunk.
- Make the Back Slit: To allow the skirt to wrap around the tree, cut a straight line from the outer edge of the large circle to the edge of the smaller center circle. This will create an opening. You can choose where this opening will be placed (e.g., at the back of the tree).
Step 2: Prepare Your Ruffle Strips
- Cut Burlap Strips: This is where your rotary cutter, cutting mat, and quilter’s ruler will shine. If using burlap fabric by the yard, you’ll need to cut it into strips. If using burlap ribbon, you’re already halfway there! The width of your strips will dictate the fullness and size of your ruffles. For a standard tree skirt, strips between 3 to 6 inches wide work well. The length will depend on how many ruffles you want and the circumference of your skirt. It’s often easier to cut long strips and then join them as you go.
- Estimate Quantity: You will need many strips! A good rule of thumb is to have strips that, when laid flat, are 1.5 to 2 times the circumference of each ruffle row to achieve a nice, full ruffle. It’s better to cut more than you think you’ll need, as you can always trim excess.
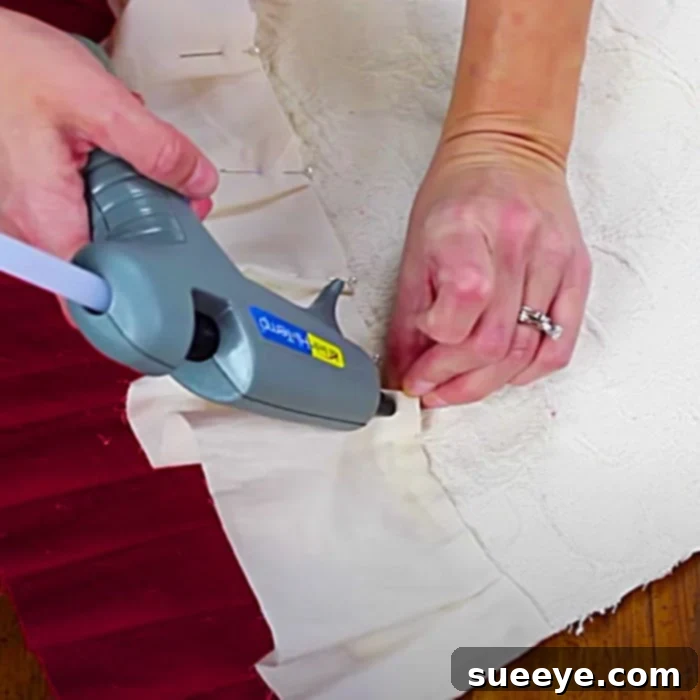
Step 3: Create and Attach the Ruffles
This is the core of the project and where the magic happens. You will be working from the outermost edge of your tree skirt towards the center.
- Start at the Outer Edge: Begin by taking one of your burlap strips. Lay it along the outer edge of your base fabric, just inside the raw edge, or slightly overlapping if you want to hide the base fabric entirely.
- Forming the Ruffles: To create the ruffle effect, you’ll need to gather or pleat the fabric. Pinch small sections of the burlap strip and fold them over to create a pleat, or gently gather the fabric into soft folds. The closer together your pleats or gathers, the fuller and more defined your ruffles will be. Experiment with a scrap piece first to find your preferred fullness.
- Hot Glue Application: Apply a small dab of hot glue to the base fabric where you want to secure the ruffle. Press the gathered portion of the burlap strip firmly into the glue. Hold for a few seconds until the glue sets. Work in small sections, applying glue and pressing down the ruffle as you go. This allows for precision and prevents the glue from drying before you can position the ruffle.
- Working Around the Circle: Continue this process, meticulously gluing your ruffled burlap strip all the way around the circumference of your tree skirt. When you reach the end of a strip, simply overlap it slightly with the beginning of a new strip and continue gluing to create a seamless look.
- Layering the Ruffles: Once your first row of ruffles is complete, start your second row. This row should be placed slightly above and overlapping the first row. The amount of overlap is key to achieving a full, layered look. You want enough overlap so that the raw edge of the previous ruffle and any visible base fabric are hidden.
- Concentric Circles: Continue adding rows of ruffles in concentric circles, working your way inwards towards the center opening. Maintain consistent spacing and overlap between rows for a uniform and beautiful appearance. Take your time, and don’t be afraid to adjust a ruffle before the glue fully sets.
Step 4: Finishing Touches
- The Center Opening: Once you reach the inner circle, you might want to finish the edge of the last ruffle row for a clean look. You can fold under the raw edge of the burlap before gluing, or add a thin strip of ribbon or lace around the inner circle to cover any exposed base fabric or raw edges.
- The Slit Opening: To make the slit opening neat, you can fold under the raw edges of the base fabric along the slit and secure them with hot glue. Then, for functionality and aesthetics, you can add ties. Cut two or three short lengths of burlap ribbon (or decorative ribbon) and hot glue one end of each piece to one side of the slit, and the corresponding piece to the other side. This allows you to tie the skirt closed once it’s around your tree.
- Inspect and Refine: Once all ruffles are glued, carefully inspect your tree skirt. Trim any loose threads, remove any visible hot glue strings, and ensure all ruffles are securely attached.
Tips for a Perfect No-Sew Ruffled Tree Skirt
- Safety First: Hot glue guns can get very hot. Always exercise caution and keep your fingers away from the hot nozzle and molten glue. Using finger protectors can be helpful.
- Work in Sections: Don’t try to glue a long strip all at once. Work in smaller sections (6-12 inches at a time) to ensure the glue remains hot and pliable for accurate placement.
- Consistent Ruffles: The key to a professional-looking skirt is consistency. Try to make your pleats or gathers uniform in size and spacing for each row.
- Overlap is Key: Ensure sufficient overlap between ruffle rows to completely cover the base fabric and the previous ruffle’s glued seam.
- Test Before You Commit: If using a new type of fabric or glue, test on a scrap piece first to ensure good adhesion and that the fabric doesn’t react negatively to the hot glue.
- Customize Your Look: While burlap gives a rustic feel, don’t be afraid to experiment with other fabrics! Cotton, linen, or even velvet can create different textures and aesthetics. You can also mix colors, adding a different color for every other ruffle row.
- Add Embellishments: Once your skirt is complete, consider adding small embellishments like jingle bells, small wooden buttons, lace trim, or even a few sprigs of faux greenery for extra festive flair.
- Cleaning: Due to the hot glue construction, spot cleaning with a damp cloth is recommended. Avoid machine washing or harsh chemicals, which could loosen the glue.
Why Choose a No-Sew Tree Skirt?
This DIY no-sew ruffled Christmas tree skirt is more than just a craft project; it’s an opportunity to infuse your home with personal style and warmth during the holidays. The no-sew method makes it incredibly accessible, allowing anyone to achieve beautiful results without the need for specialized equipment or advanced skills. It’s a fantastic way to save money on expensive store-bought decor, repurpose materials, and create a truly unique piece that reflects your taste.
The rustic charm of burlap combined with the delicate femininity of ruffles creates a versatile aesthetic that can complement a wide range of Christmas decorations, from traditional reds and greens to more modern metallics and whites. Imagine the delight of friends and family when they learn you crafted such a beautiful item yourself!
Conclusion
This charming no-sew ruffled Christmas tree skirt project is an absolute delight to make and a fantastic addition to any holiday setup. It’s simple, elegant, and embodies the spirit of handmade holiday decor. The farmhouse rustic appeal, coupled with its undeniable feminine touch, makes it a truly special piece. Once complete, you’ll find yourself admiring its unique beauty and the personal touch it adds to your Christmas tree for years to come. So, gather your materials, fire up your hot glue gun, and get ready to create a festive masterpiece that’s truly a keeper!