
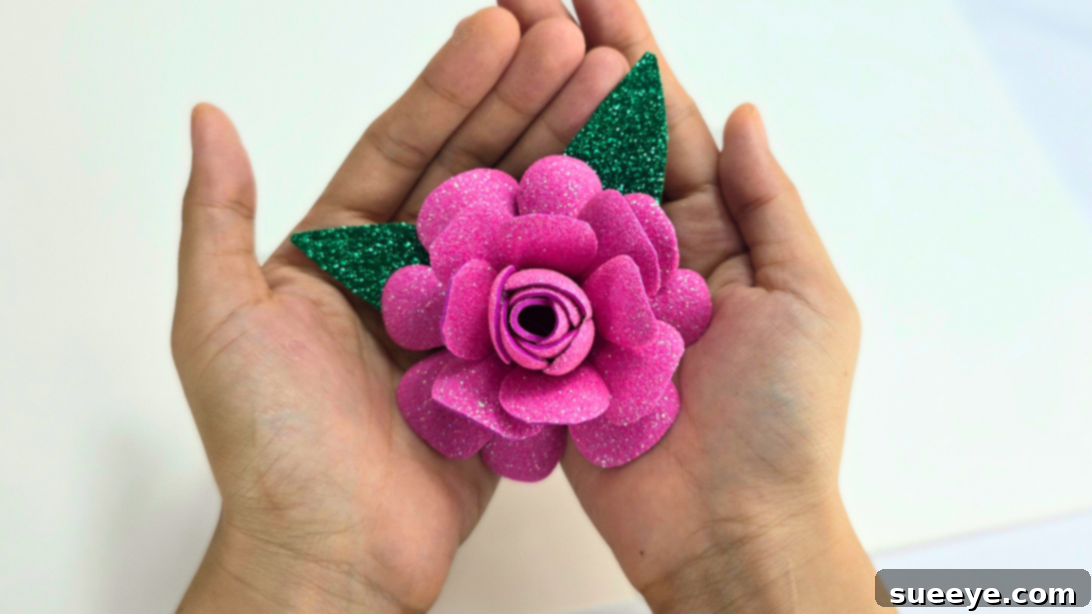
Do you have a stash of leftover glitter foam sheets waiting for their moment to shine? This delightful DIY project is tailor-made for you! Get ready to transform those sparkly foam pieces into charming, vibrant flowers that add a touch of handmade elegance to any setting. This craft is incredibly beginner-friendly, requiring no specialized tools or intricate techniques, making it the perfect activity for a relaxed afternoon. Whether you’re passionate about scrapbooking, adding a personal flourish to gifts, or simply enjoy the satisfaction of creating something beautiful with your own hands, this glitter foam flower tutorial is an absolute must-try. It’s an accessible and rewarding way to unleash your creativity and bring a little extra sparkle into your life.
One of the most appealing aspects of these DIY glitter foam flowers is their incredible versatility. Once crafted, these charming blossoms can be incorporated into a myriad of creative projects, making them a fantastic addition to your crafting repertoire. Envision them as whimsical party decor, bringing a festive sparkle to any celebration, or imagine them adorning hair clips, creating unique and personalized accessories. They can also be transformed into fun pencil toppers, adding a playful touch to stationery, or glued onto gift bags and boxes for a truly personal and thoughtful presentation that will surely delight the recipient. Unlike delicate paper flowers, these foam creations are remarkably lightweight yet exceptionally durable, meaning they won’t easily get crushed or lose their shape. This makes them ideal for long-lasting decor and gifts. Furthermore, you have complete artistic freedom to mix and match foam colors to perfectly complement your chosen theme or mood. Go for soft pastels for a gentle aesthetic, vibrant neon shades for a bold statement, or classic red and gold for a timeless, elegant appeal. The possibilities are truly endless, allowing each flower to be a unique reflection of your style.
RELATED: DIY Pipe Cleaner Lilies
Say goodbye to complicated sewing patterns, messy paints, or stressful techniques – this craft is all about pure, unadulterated fun with simple cutting, effortless layering, and secure gluing. It’s an ideal project for crafters of all ages, from kids exploring their creativity to teens looking for a cool, handmade accessory, and adults who appreciate a rewarding yet low-effort activity. This is truly one of those projects you can enjoy while catching up on your favorite show, listening to music, or simply hanging out with friends, making it a wonderful way to unwind and de-stress. The process is meditative and enjoyable, offering a creative outlet without demanding intense concentration. Ready to dive into the sparkling world of glitter foam flowers? Gather your foam sheets, a trusty pair of scissors, and your reliable glue gun. Let’s embark on this creative journey together and make something truly adorable and unique!
Essential Supplies for Crafting Glitter Foam Flowers
To create your own dazzling glitter foam flowers, you’ll only need a few basic supplies that are likely already in your craft stash or easily obtainable from any craft store. Having all your materials ready before you begin will ensure a smooth and enjoyable crafting experience.
- Glitter Foam Sheets: The star of our project! Choose a variety of colors to create a vibrant bouquet or stick to a specific palette for a themed arrangement. Ensure they are pliable enough to cut and shape easily.
- Hot Glue Gun and Glue Sticks: Essential for quickly and securely assembling your flower layers. A low-temperature glue gun is recommended, especially if crafting with children, to minimize the risk of burns.
- Sharp Scissors: A good pair of craft scissors will make cutting the foam much easier and result in cleaner, more precise petal shapes.
- Round Object for Tracing: This could be a cup, a small bowl, a jar lid, or even a stencil. You’ll need it to trace perfect circles onto your foam sheets, forming the base of your flowers.
- Pencil or Pen: For tracing your circular shapes and drawing the petal lines on the foam. A light-colored pencil works well on darker foam, while a dark pen stands out on lighter sheets.
- Iron (Optional but Recommended): A standard household iron (set to warm, no steam) is used to gently heat and shape the foam, giving your petals a realistic curl and dimension. Always use with caution and adult supervision.
- Baby Powder (Optional): If using adhesive-backed glitter foam, a light dusting of baby powder helps reduce stickiness, making it easier to handle without unwanted adhesion.
- Rubbing Alcohol & Cotton Pad (Optional): For gently wiping away any excess baby powder from your foam, ensuring a clean finish.
How to Craft Beautiful Glitter Foam Flowers: A Step-by-Step Guide
Follow these simple instructions to create your own stunning glitter foam flowers. Remember, practice makes perfect, and each flower will be a unique work of art!
-
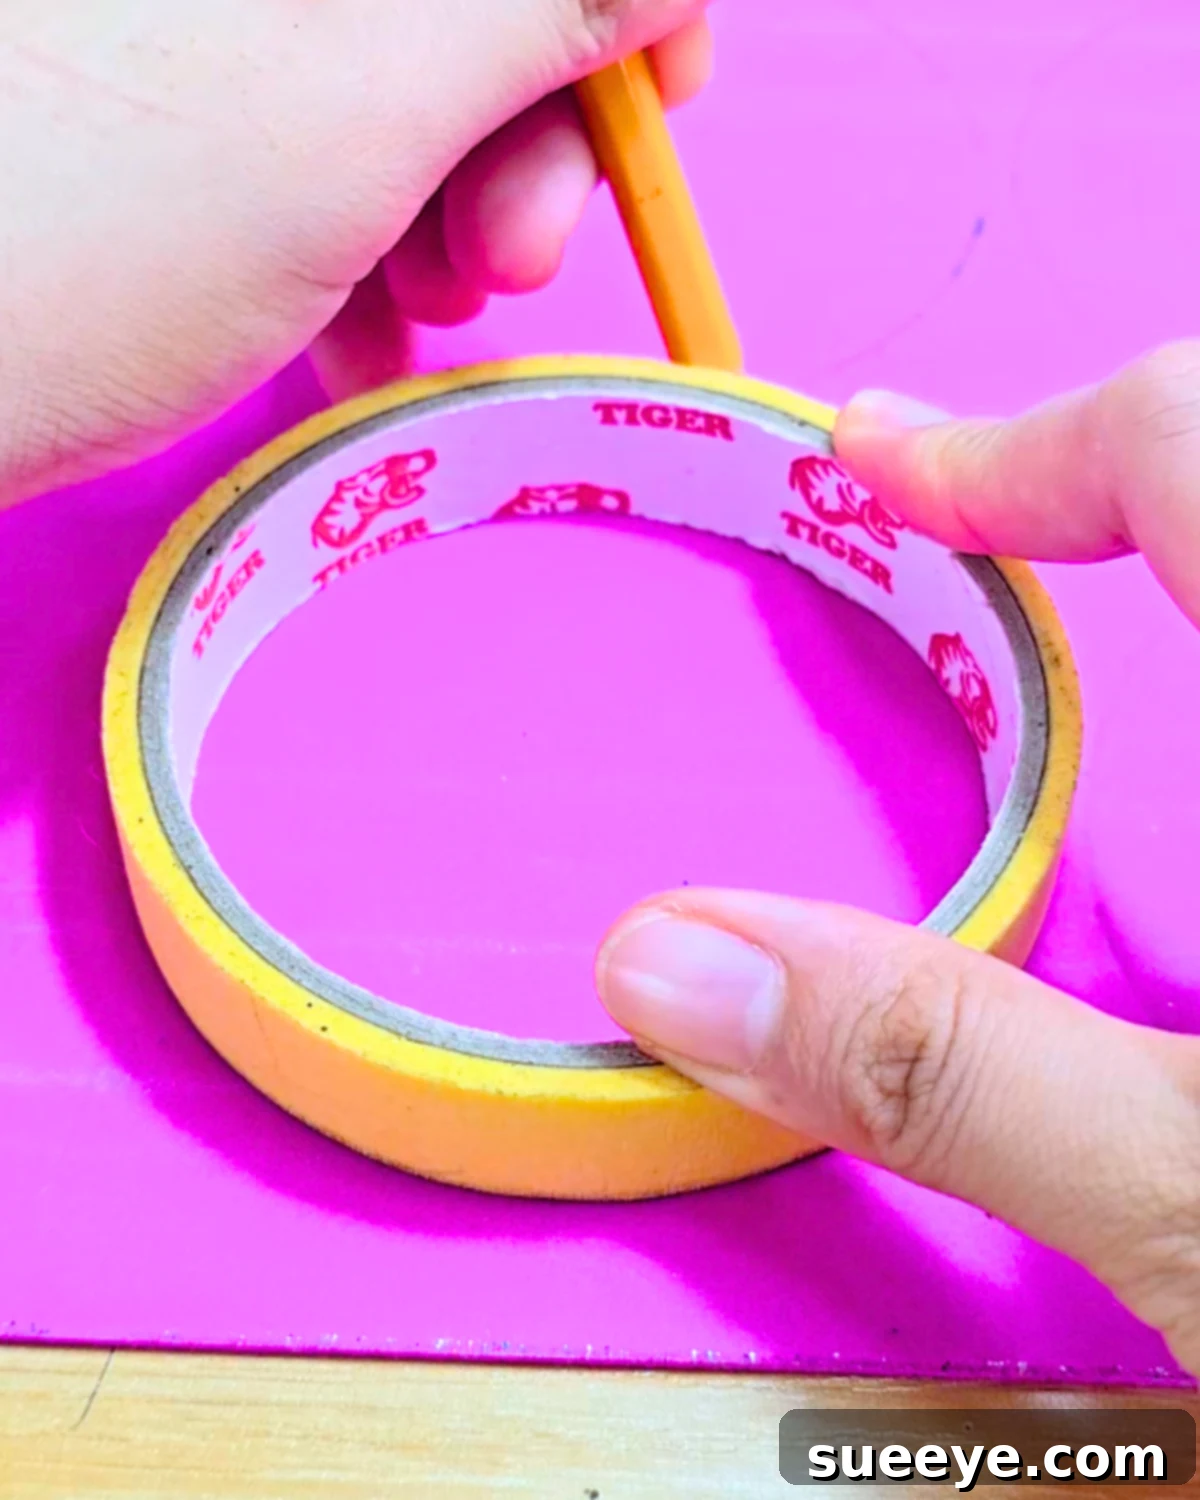
Step 1: Tracing Your Circular Bases on Glitter Foam

Begin by selecting your desired glitter foam sheet. Place a round object, such as a cup, jar lid, or a cookie cutter, onto the back (non-glittered side) of the foam. Using a pencil or pen, carefully trace around the object to create a perfect circle. The size of your chosen object will determine the overall diameter of your finished flower, so choose wisely based on your project needs. For each flower, you will need to trace and cut out three identical circles. Take your time to make clear, neat lines, as this will aid in precise cutting. -
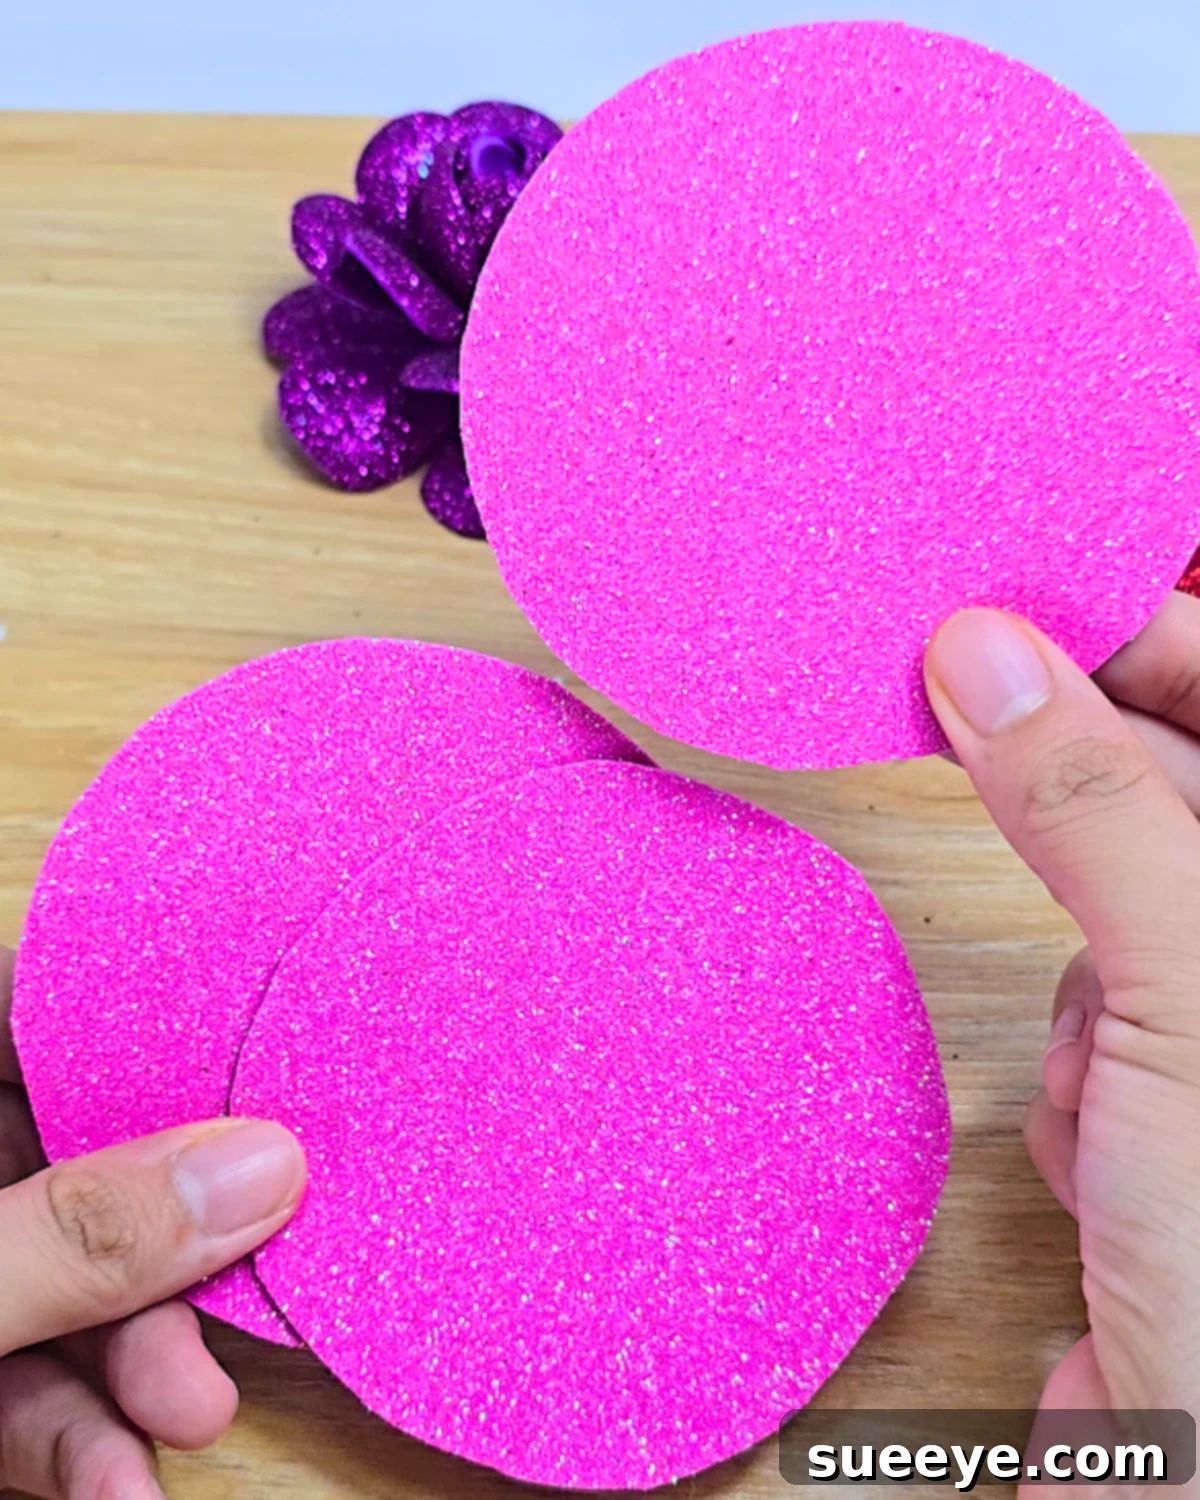
Step 2: Precisely Cutting Out the Glitter Foam Circles
Once your circles are traced, it’s time to cut them out. Using a pair of sharp craft scissors, carefully cut along the traced lines. Aim for smooth, clean edges, as this will contribute to the neat appearance of your finished flowers. Repeat this process until you have a total of three perfectly cut foam circles for each flower you intend to create. Consistency in size and shape at this stage will ensure your layered flower pieces fit together beautifully. -
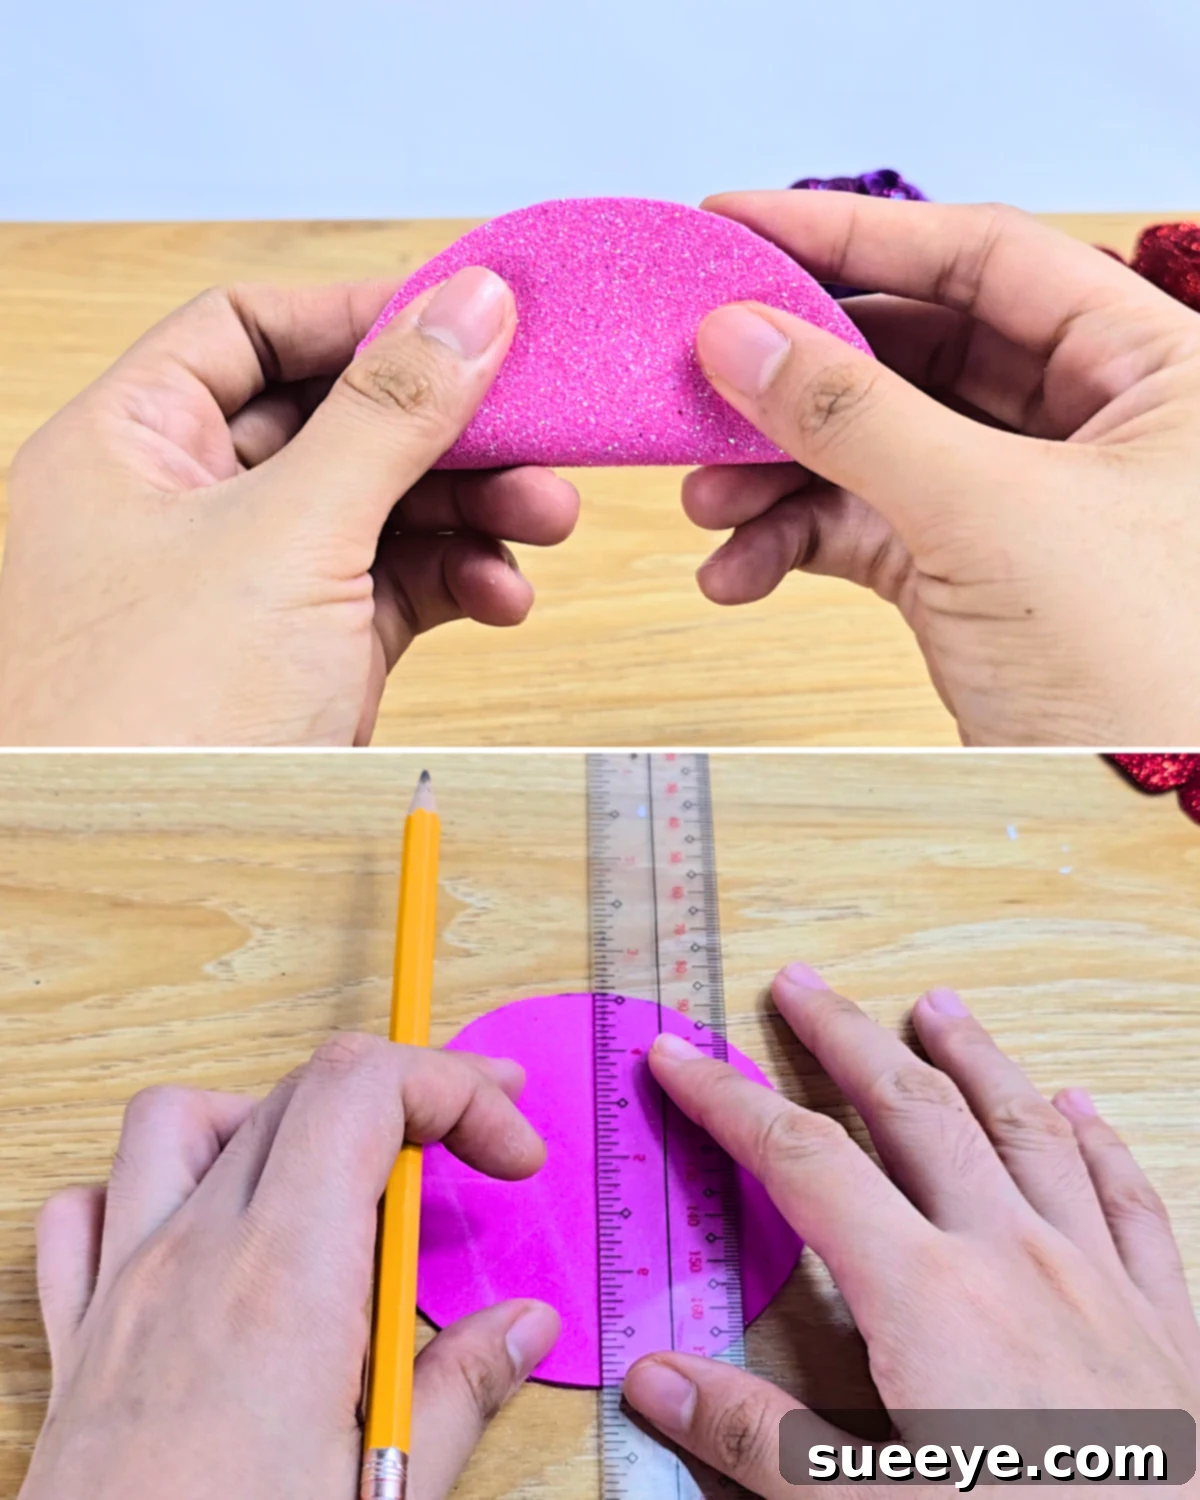
Step 3: Drawing Petal Guidelines on the Foam
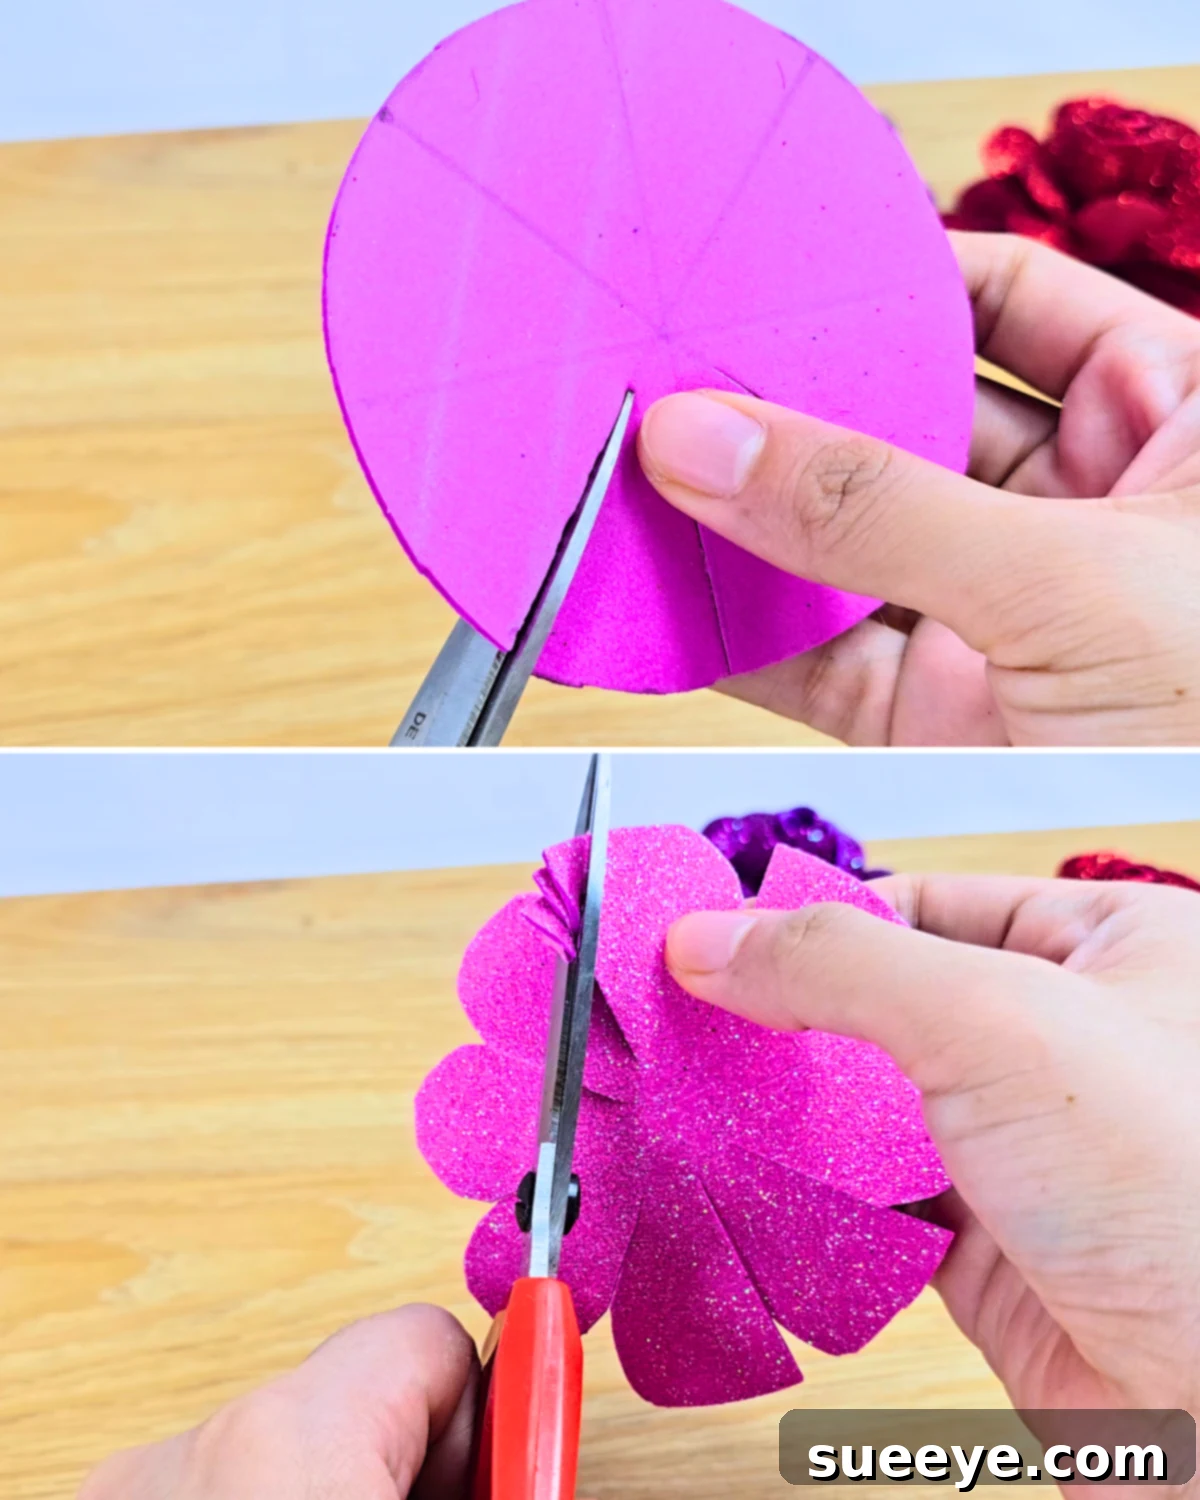
Now, take one of your foam circles and, on the back (non-glittered side), draw four distinct lines. Start by drawing a straight line vertically through the center, then another horizontally through the center, forming a “plus” sign. Next, draw two diagonal lines, intersecting at the center, creating an “X” shape. When combined, these lines should resemble a star or a cross with diagonal lines, dividing the circle into eight equal sections. These lines will serve as guides for cutting your petals, ensuring they are evenly spaced and symmetrical. -
Step 4: Cutting and Shaping the Glitter Foam Petals
With your petal guidelines drawn, carefully cut along each of the eight lines from the outer edge of the circle inwards. It is crucial to stop cutting before you reach the absolute center of the circle, leaving a small, uncut central point. This central point will hold all the petals together. After making your cuts, gently trim the outer edges of each of the eight sections into soft, rounded curves. This shaping process will transform the angular sections into natural-looking flower petals, giving your foam flower a more organic and delicate appearance. Repeat this step for all three of your foam circles. -
Step 5: Shaping Petals with Warm Iron for Dimension
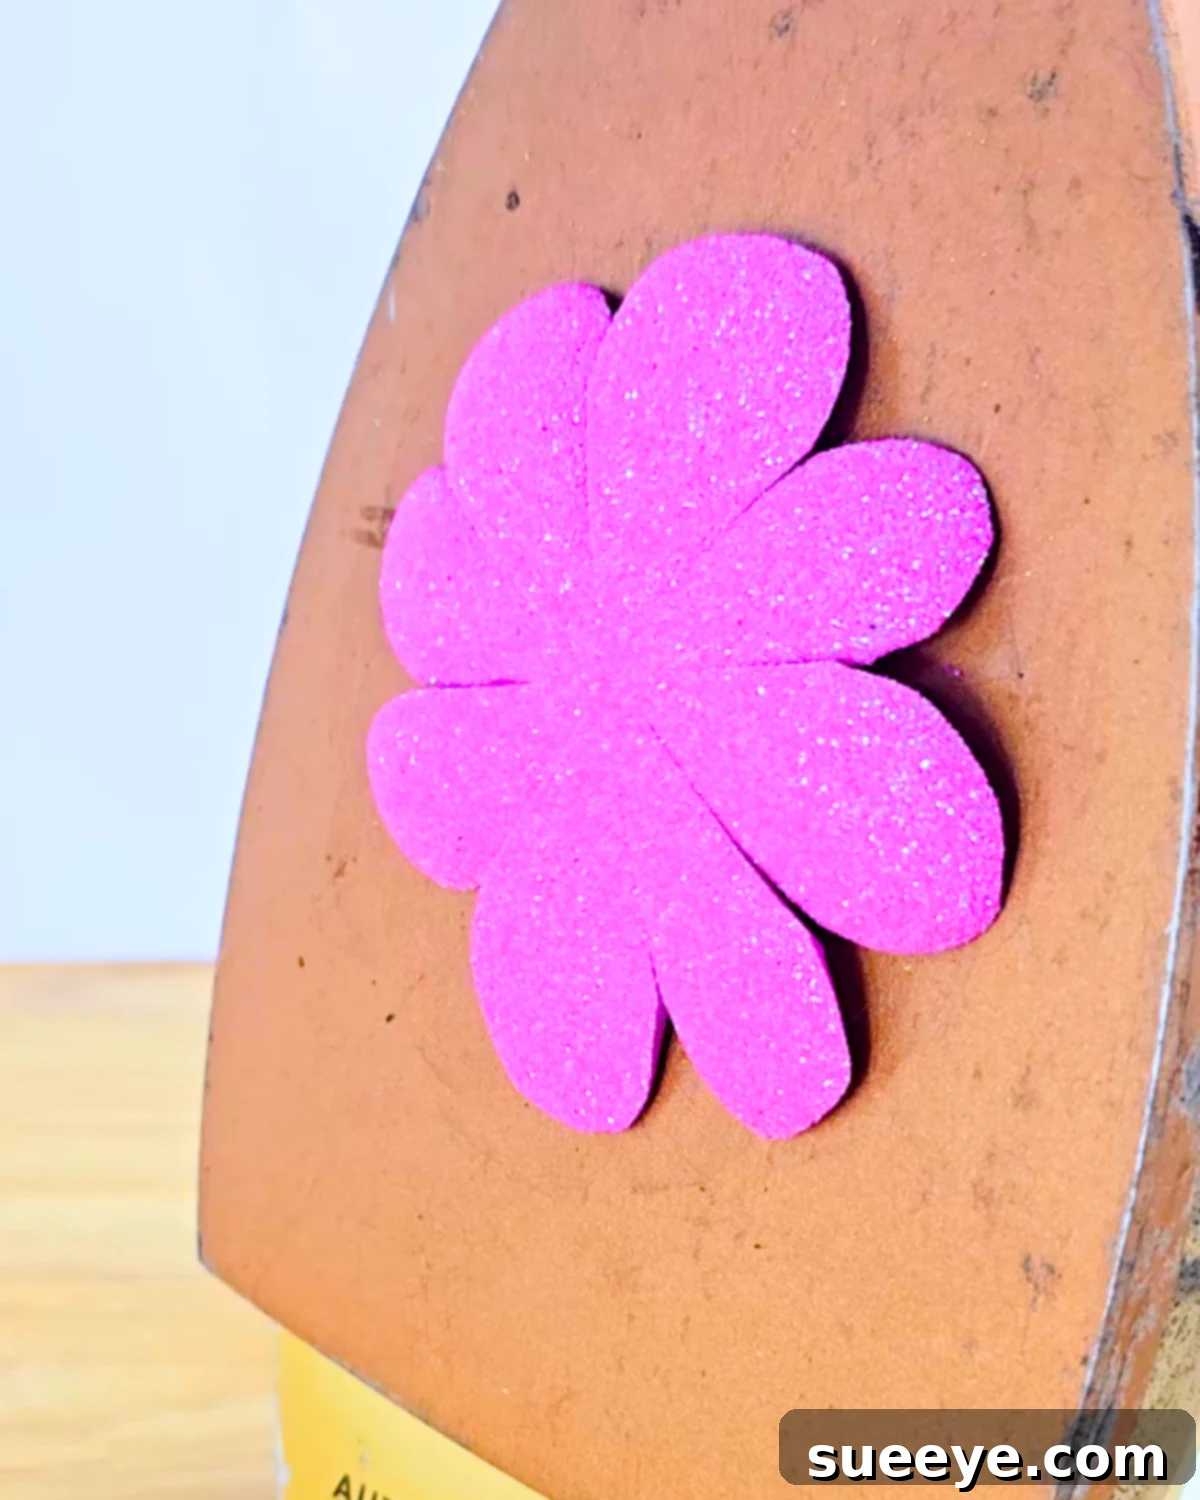
This step is key to giving your glitter foam flowers a beautiful, lifelike dimension. Carefully place one of your cut flower pieces flat against the bottom of a warm iron (ensure the iron is set to a low-to-medium heat with no steam). As the foam heats up, you will observe it beginning to shrink slightly, curl, and lift off the iron’s surface on its own. This natural curling action creates a realistic, soft petal shape. Remove the foam as soon as it begins to curl; do not overheat. Repeat this gentle heating and curling process for the other two flower pieces. Always exercise caution when using a hot iron. -
Step 6: Constructing the Flower’s Central Bud
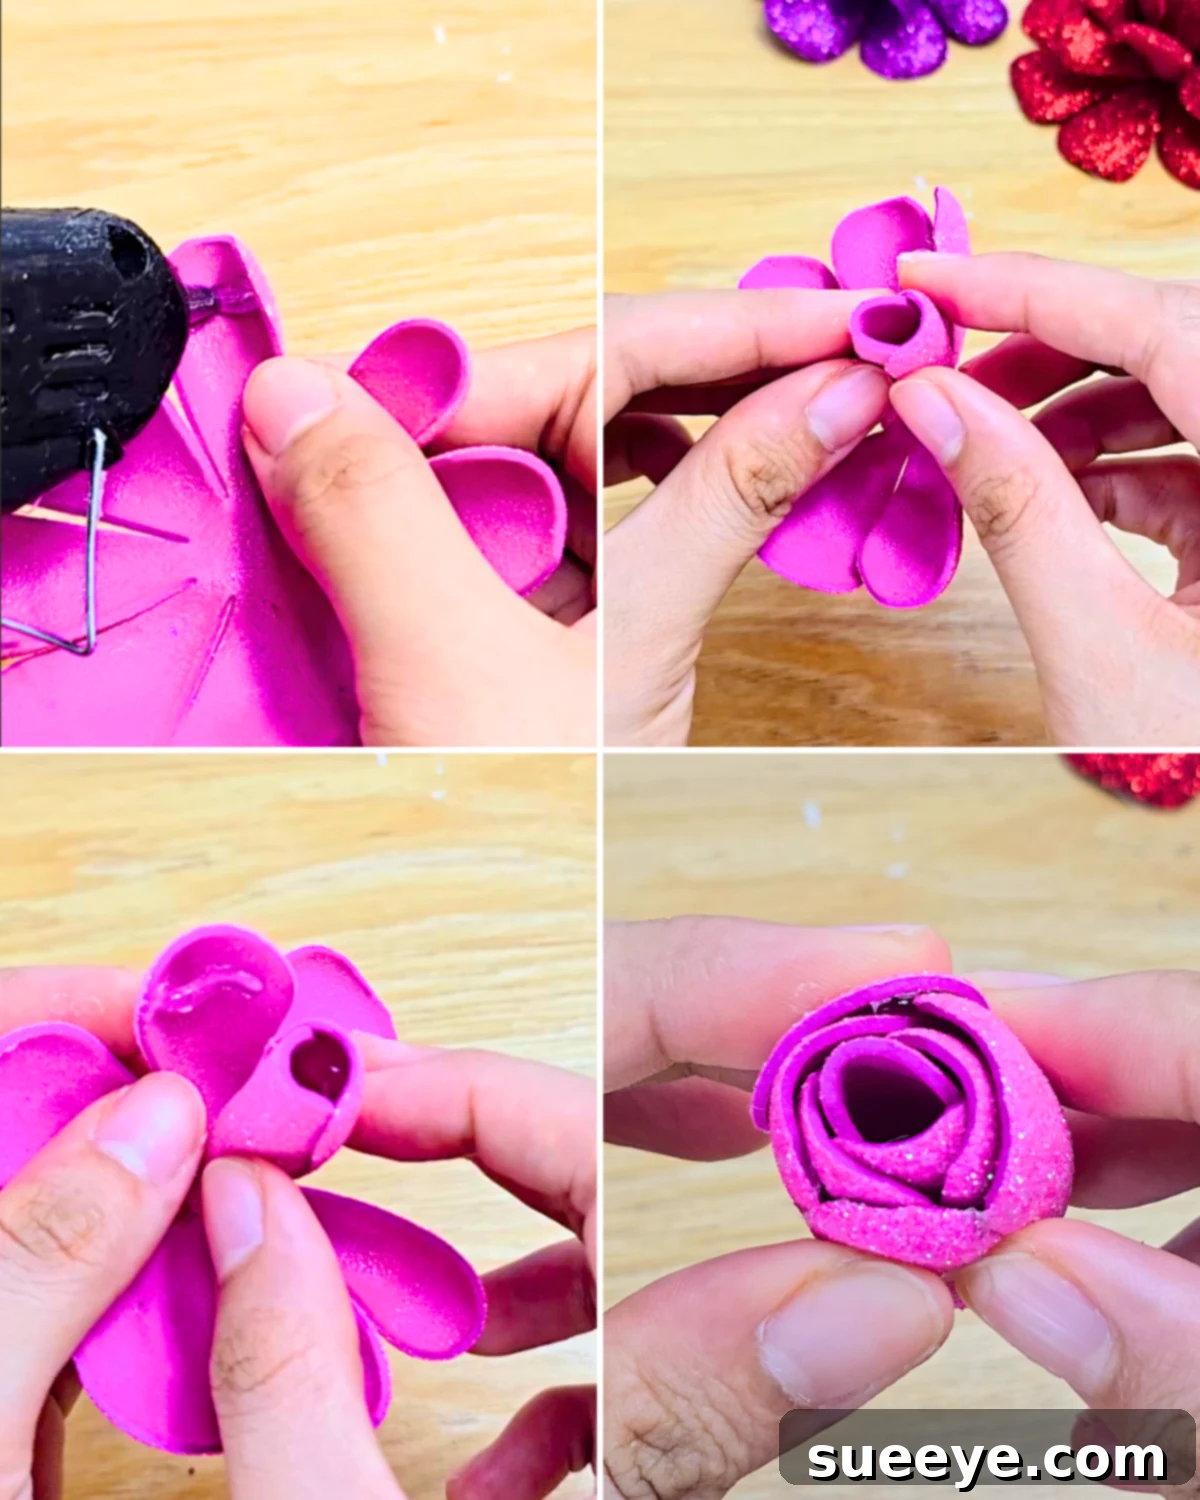
Take one of your heat-shaped flower pieces – this will form the tight center of your flower. Apply a small dot of hot glue to the top inside edge of one petal. Immediately press this petal firmly against the petal directly across from it, creating a snug closure. Continue this process, gluing opposite petals together, working your way around the flower until all petals are securely joined, forming a tight, closed bud. This technique creates a beautiful, dense center, giving your flower depth and realism. -
Step 7: Layering and Assembling the Second and Third Flower Pieces
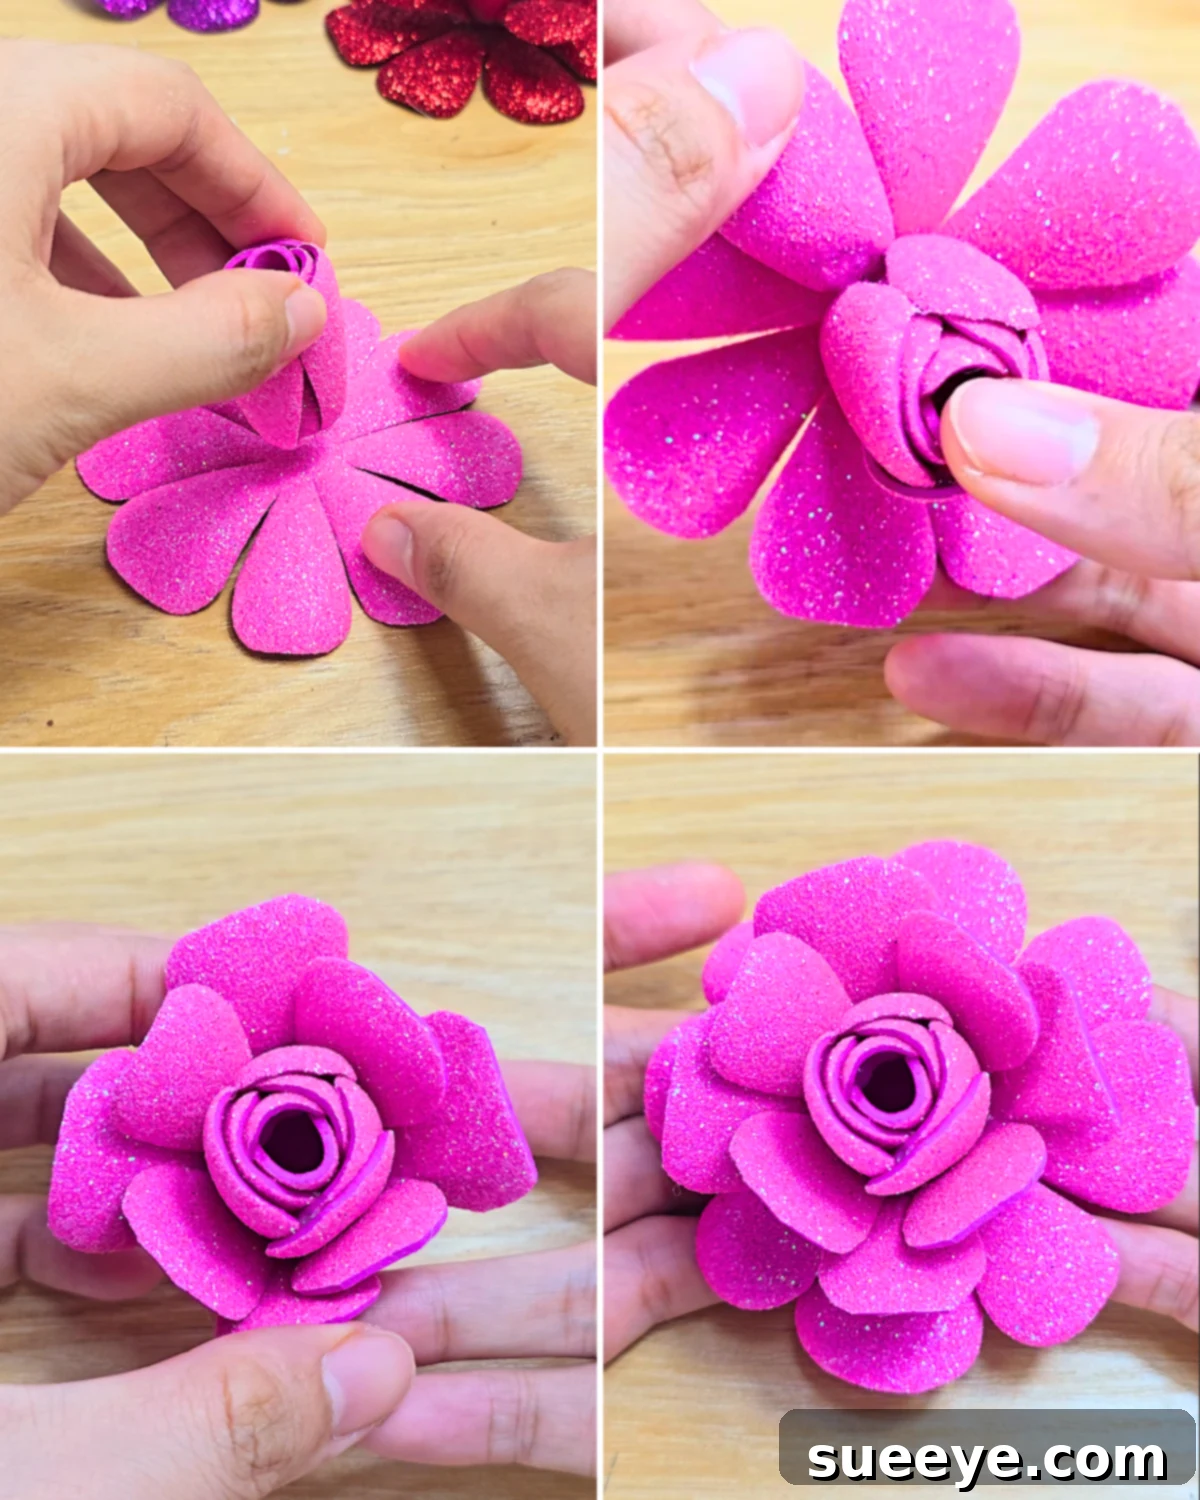
Now, let’s build out your flower! Apply a generous dab of hot glue to the very bottom center of the flower bud you just created. Carefully place and firmly press this bud onto the center of your second, unglued flower piece. Once secured, add a small bead of hot glue near the base of each petal on this second layer and gently press them upwards around the central bud. Work in an alternating pattern, ensuring the petals of this layer nestle between the petals of the bud, creating a full and layered effect. Finally, take your third and final flower piece. Apply hot glue to its center and carefully attach the entire layered flower structure you’ve built onto it. This last layer provides a sturdy base and adds a final touch of fullness and elegance to your beautiful glitter foam flower. Allow all glue to dry completely before handling extensively.
Materials
- Glitter Foam Sheets
- Hot Glue Gun
- Glue Sticks
- Sharp Scissors
- Round Object (for tracing)
- Pencil or Pen
- Iron (optional, for shaping)

Pro Tips 💡 for Perfect Glitter Foam Flowers
Elevate your glitter foam flower crafting with these smart tips and tricks, ensuring a smoother process and a more polished final product.
- Managing Adhesive-Backed Glitter Foam: If you’re working with glitter foam sheets that have an adhesive backing, they can sometimes be tricky to handle due to their stickiness. To make them significantly easier to manage and prevent them from accidentally sticking to surfaces (or themselves!) before you’re ready, lightly dust the sticky side with a thin layer of baby powder. This simple trick neutralizes the adhesive temporarily, giving you more control during cutting and shaping.
- Cleaning Up Excess Powder: After dusting with baby powder, you might find some residue on the foam’s surface, particularly if you’re using darker colors. To easily and safely remove any unwanted powder without damaging the glitter or foam, simply dab a bit of rubbing alcohol onto a cotton pad. Gently wipe the affected areas; the alcohol will lift the powder cleanly away, leaving your foam sparkling and residue-free. This ensures your finished flowers maintain their vibrant, clean look.
- Iron Temperature Control: When using an iron to shape your petals, start with the lowest heat setting and gradually increase if needed. Foam can melt or deform if the iron is too hot. Test a small scrap piece first to find the ideal temperature.
- Safety with Hot Glue: Always exercise caution when using a hot glue gun. Consider using finger protectors or a low-temperature glue gun, especially if crafting with children, to avoid burns.
- Creative Centers: Don’t limit yourself to just foam for the flower centers. Consider adding a small bead, a button, a rhinestone, or even a tiny pom-pom to the very middle of your finished flower for an extra touch of flair and uniqueness.
Incorporating these small steps can make your entire crafting process smoother, more enjoyable, and significantly less frustrating, leading to beautifully crafted glitter foam flowers every time.
Explore More Recent Popular Crafts and DIY Ideas
Loved creating these glitter foam flowers? Dive into more exciting and popular craft projects to inspire your next creative endeavor. From seasonal decorations to everyday DIYs, there’s always something new to discover!
Seasonal
DIY Honeycomb Paper Christmas Tree Ornament
Crafts
3D Origami Christmas Tree Tutorial
Sewing Ideas
Easy Christmas Sweater Embroidery Hack
Seasonal
DIY Christmas Tree With Pipe Cleaners
Congratulations on crafting your beautiful glitter foam flowers! These versatile, sparkling creations are a testament to the fun and simplicity of DIY. We hope this step-by-step guide has inspired you to explore more crafting adventures and add a touch of handmade charm to your life.
*If you’ve enjoyed this craft and are eager for more creative inspiration, be sure to visit our official website for a treasure trove of DIY projects. Don’t forget to follow our Facebook page for daily updates, tips, and community engagement, and subscribe to our YouTube channel for engaging video tutorials that bring our crafts to life. Happy crafting!