

DIY Upcycled Denim Bag: Craft Your Own Stylish & Sustainable Purse (No-Sew Options!)
Are you looking for a fun, creative, and eco-conscious project that results in a truly unique accessory? Look no further! This comprehensive guide will walk you through creating your very own upcycled denim bag from an old pair of jeans. Whether you’re a seasoned crafter or just starting, this project is designed to be accessible, offering minimal sewing and plenty of no-sew alternatives using fabric glue. Imagine transforming forgotten denim into a chic, personalized bag – it’s not just a craft, it’s a statement of sustainable style!
The beauty of this DIY upcycled denim bag lies in its simplicity and versatility. You can tailor it to your exact preferences, making it the perfect gift or a lovely addition to your own collection. For instance, I recently crafted one as a special 12th birthday gift for my niece, and her excitement was truly priceless! This project proves that with a little creativity, discarded items can find new life and purpose. Let’s dive into the world of denim repurposing and create something wonderful together.
Why Upcycle Your Old Jeans? The Benefits of DIY Denim Bags
Before we jump into the steps, let’s appreciate why upcycling denim is such a fantastic idea:
- Eco-Friendly: By reusing old jeans, you divert textile waste from landfills, reducing your environmental footprint. It’s a small step towards a more sustainable lifestyle.
- Cost-Effective: You’re transforming something you already own (or can find cheaply at thrift stores) into a brand-new item, saving money on new bags.
- Unique & Personalized: No two upcycled denim bags are exactly alike. You can customize yours with different jean washes, embellishments, and lining fabrics, ensuring you have a one-of-a-kind accessory.
- Skill Development: This project is perfect for honing your crafting skills, whether it’s basic sewing, precise cutting, or mastering fabric adhesives.
- Sentimental Value: Turning a pair of jeans with memories into a functional bag adds a special touch of sentimentality.
Gather Your Tools & Materials: What You’ll Need
One of the best things about this upcycled denim bag project is that it requires only a few basic supplies, many of which you might already have around the house. Here’s a detailed list to get you started:
- An Old Pair of Jeans: The star of our show! Choose a pair that’s clean and relatively free of large holes (unless you want that distressed look). The size of the jeans will influence the final size of your bag.
- Fabric Glue: This is your best friend for a no-sew or minimal-sew project. Options include:
- Hot Glue Gun & Glue Sticks: Excellent for quick, strong bonds, especially on thicker denim.
- Fabri-Tac: A popular fabric adhesive known for its durable and flexible hold.
- Liquid Stitch: Another strong fabric glue that creates a lasting bond without the need for needles and thread.
- Sharp Fabric Scissors: Essential for clean, precise cuts through denim.
- Sewing Machine (Optional): If you prefer to sew, or want to add extra durability, a sewing machine will make certain steps faster.
- Thread (Optional, matching denim color recommended): For machine or hand sewing.
- Pins or Fabric Clips: To hold fabric in place while gluing or sewing.
- Lining Fabric: Choose a complementary cotton fabric for the bag’s interior. This adds a professional finish, durability, and can introduce a pop of color or pattern.
- Bag Handles: You can use store-bought fabric, leather, or faux leather handles. Alternatively, you can create handles from extra denim scraps for a fully cohesive look.
- Zipper (Optional): For a secure bag closure at the top. Choose a zipper that’s slightly longer than the width of your bag opening.
- Paper for Pattern: For tracing and creating your lining template. Butcher paper or old newspaper works well.
- Pencil or Fabric Marker: For marking cuts and lines.
- Ruler or Measuring Tape: For accurate measurements.
Step-by-Step Guide: Crafting Your Upcycled Denim Bag
1. Preparing Your Denim: The Foundation
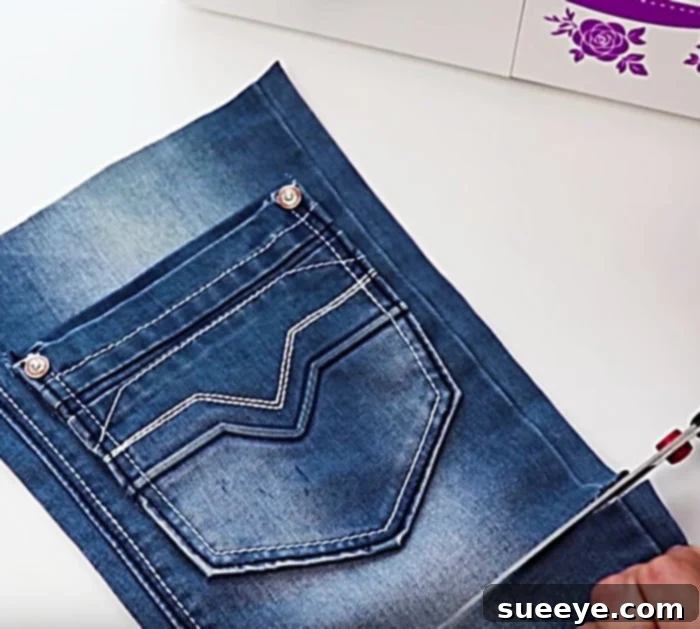
Start by laying out your chosen pair of jeans on a flat surface. For this project, we’ll be utilizing the back pocket and a section of the jean’s thigh. This method is unique because it keeps the leg section attached, simplifying the overall process compared to many other denim bag tutorials. Take a moment to visualize the final shape and size of your bag. Remember, there’s no single “wrong” way to approach this; creativity and experimentation are encouraged!
2. Cutting Your Main Bag Piece
Carefully cut out one of the back pockets from the jeans. Don’t worry about perfect precision just yet; you’ll refine its placement later. Next, identify the thigh area you wish to use for the main body of the bag. Cut a generous section from the thigh, ensuring you keep it *attached* to the remaining fabric from which you cut the pocket. This integrated design is key to the bag’s structure and ease of assembly. Use the detached pocket as a visual guide to help you decide where to make your cuts for the main bag body. It’s there to assist in visualizing the size and proportion, but it won’t be permanently attached at this stage.
3. Forming the Bag’s Base
With your main denim piece cut and the pocket removed, turn the denim section inside out. This is where you’ll create the bottom seam of your bag. Align the raw edges at the bottom of your chosen denim section. You have two excellent options here: you can either sew these edges together using your sewing machine (for a robust finish) or use a strong fabric glue. For a no-sew approach, apply a generous bead of Fabri-Tac or Liquid Stitch along the raw edges, press firmly together, and allow ample time to dry completely. Even without sewing, the right fabric glue will create a surprisingly durable base for your bag.
4. Finishing the Top Edge
Once the bottom seam is secure, turn your bag right side out. Now, focus on the top opening of your bag. To give it a clean, finished look and prevent fraying, you’ll need to secure the raw edges. Fold down about half an inch to an inch of the raw edge towards the inside of the bag. Use pins or fabric clips to hold this fold in place. You can then either sew this hem down using your machine or by hand, or once again, opt for the no-sew method by applying fabric glue along the folded edge and pressing it firmly. A neat top edge is crucial for the overall appearance and durability of your upcycled denim bag.
5. Crafting the Lining Pattern and Fabric
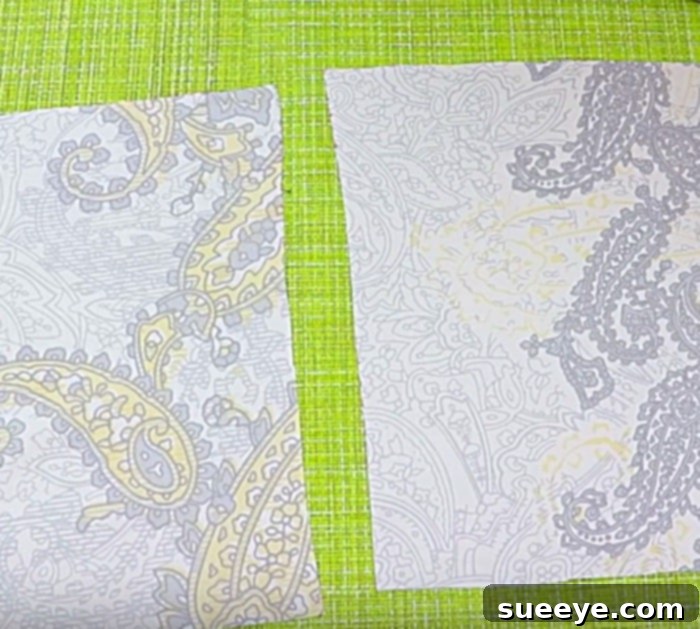
A lining significantly elevates the look and feel of your bag, providing a clean interior, added structure, and often an extra pop of personality. To create your lining pattern, lay your denim bag flat on a piece of paper. Trace carefully around the entire shape of your bag. Once traced, cut out this paper pattern. This will be your precise template for cutting your lining fabric. Choose a fabric that complements your denim and reflects your style – a bright pattern can add a fun surprise every time you open your bag!
6. Assembling the Lining
With your lining fabric cut using the paper pattern, it’s time to assemble it. Fold your lining fabric in half, right sides together, and sew or glue the side seams and the bottom seam, just as you did with the denim outer shell. Remember to leave the top edge open. Once complete, turn your lining right side out. At this stage, you might consider adding an optional interior pocket to your lining for small items like keys or lip balm. Simply cut a small rectangle of lining fabric, hem its top edge, fold and press the other three edges under, then sew or glue it to the inside of your lining before inserting it into the bag.
7. Attaching the Bag Handles
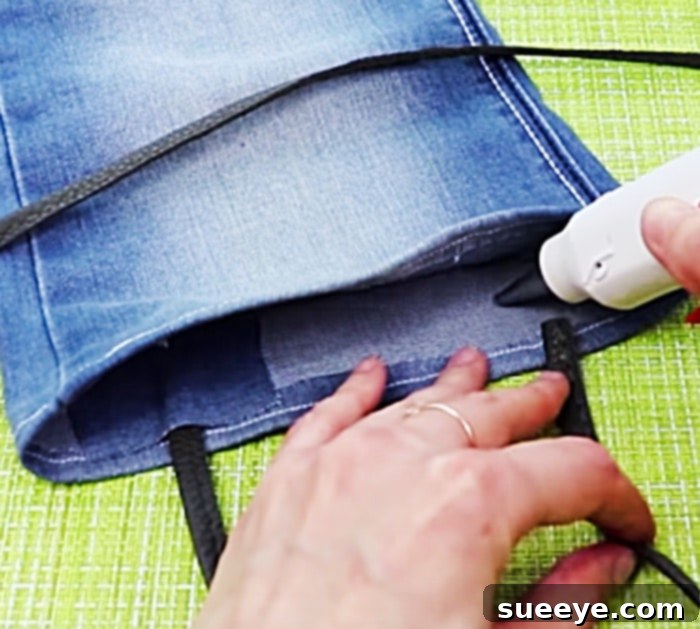
Now that your bag’s body is taking shape, it’s time to add the handles. Position your chosen handles on the inside of the bag’s top edge, making sure they are evenly spaced and secure. Apply a strong fabric glue to the ends of the handles and firmly press them onto the denim. For extra reinforcement and a stylish touch, cut two small rectangular pieces from your leftover denim scraps. Glue these denim pieces over the handle attachment points on the inside of the bag. This not only secures the handles but also adds a professional, reinforced look that screams “designer bag.”
8. Adding the Optional Zipper and Lining
For added security and a more polished finish, you can now glue in a zipper at the top opening of your bag. Carefully position the zipper, ensuring it opens and closes smoothly, then apply fabric glue along its edges and press it firmly to the inside of the top hem of your denim bag. Once the zipper is secure, it’s time to integrate your lining. Insert the finished lining into the denim shell, aligning the top edges. Fold the raw top edge of the lining inwards, creating a clean hem. Glue this folded edge to the top inside edge of your denim bag, neatly concealing the zipper’s attachment and all raw edges for a seamless finish.
9. Attaching the Exterior Pocket
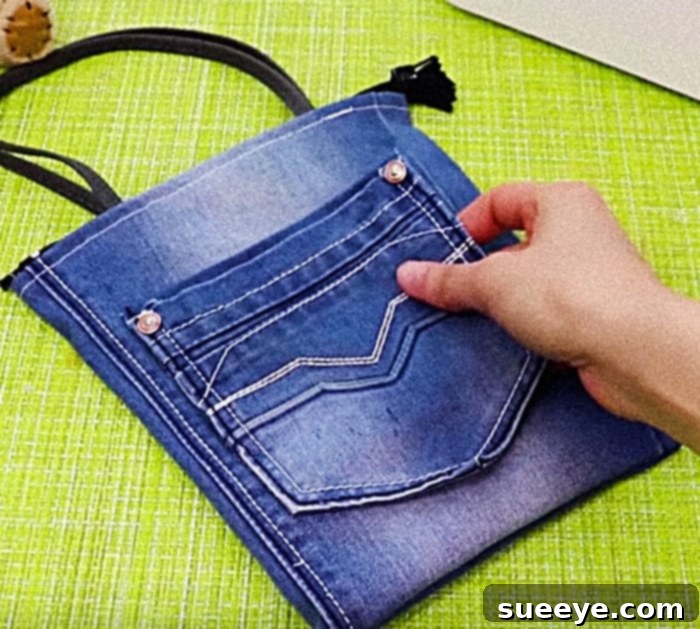
The original back pocket you cut out earlier now gets its moment to shine! This pocket not only adds functionality but also maintains the authentic denim aesthetic. Decide on its desired placement on the face of your bag. Once you’re happy with the positioning, apply a generous amount of fabric glue to the back edges of the pocket and firmly press it onto the denim. Hold it in place until the glue sets, ensuring a strong, lasting bond. This iconic detail instantly signals that your bag is indeed an upcycled masterpiece.
Finishing Touches & Customization Ideas
Your upcycled denim bag is almost complete! Now is the time to add any final embellishments to truly make it your own:
- Patches & Pins: Iron-on patches or enamel pins can instantly add personality and a touch of grunge or whimsy.
- Embroidery: Hand-embroider initials, a simple design, or even intricate patterns for a truly bespoke look.
- Fabric Paint: Use fabric paints to stencil designs, freehand draw, or add colorful accents.
- Studs & Rivets: For an edgy vibe, apply metal studs or rivets to the bag’s exterior or handles.
- Fringe: Cut small slits along the bottom hem of the bag to create a stylish fringe.
Tips for Success with Your DIY Denim Bag
To ensure your upcycled denim bag project goes smoothly and yields the best results, keep these tips in mind:
- Wash Your Jeans First: Always start with clean jeans to ensure the glue adheres properly and to prevent any future shrinking or color bleeding.
- Test Your Glue: If you’re using fabric glue, test a small amount on a denim scrap to check its adhesion and drying time.
- Allow Ample Drying Time: Patience is key, especially with fabric glues. Allow each glued section to dry completely before moving to the next step to ensure a strong, lasting bond.
- Use Sharp Scissors: Dull scissors can make cutting denim a frustrating and messy experience. Invest in a good pair of fabric scissors.
- Press Seams: If you are sewing, iron open your seams for a flatter, more professional finish.
- Experiment with Denim Types: Different washes and weights of denim will create different looks and feels. Try dark wash for a sophisticated look or distressed denim for a casual vibe.
Frequently Asked Questions About Upcycled Denim Bags
Here are some common questions you might have as you embark on your DIY denim bag journey:
Can I make this bag entirely without sewing?
Absolutely! This tutorial is specifically designed with no-sew options in mind. By using high-quality fabric glues like Fabri-Tac, Liquid Stitch, or a hot glue gun, you can achieve a durable and beautiful bag without touching a needle and thread. Just ensure you apply sufficient glue and allow generous drying time for each step.
What is the best type of fabric glue for denim?
For denim, you need a strong, flexible, and permanent fabric adhesive. Fabri-Tac and Liquid Stitch are excellent choices as they are designed for fabric, dry clear, and withstand washing (though hand-washing your finished bag is recommended). A hot glue gun offers quick adhesion but may not be as flexible or durable for all seams long-term compared to fabric-specific glues.
How can I make my upcycled denim bag more durable?
To enhance durability, consider these points: use sturdy, good-quality denim; reinforce all seams with either double stitching or a robust application of fabric glue; use strong, well-attached handles; and incorporate a full lining to protect the interior and add structure.
Can I use different types of fabric for the lining?
Yes! While cotton is often recommended for its durability and ease of use, you can experiment with other fabrics for your lining. Quilting cottons offer endless patterns, while canvas or duck cloth can provide extra stiffness and structure. Silky fabrics might be used for a luxurious feel, but they can be more challenging to work with.
What if I don’t have old jeans?
No problem! Thrift stores are a treasure trove for inexpensive denim. Look for men’s jeans in larger sizes for more fabric to work with. You can also ask friends or family if they have any old jeans they’re willing to part with. Remember, even jeans with minor flaws can be perfect for upcycling, as you’ll be cutting them up anyway!
Conclusion: Your New Favorite Upcycled Accessory Awaits!
Creating this upcycled denim bag is not just a craft project; it’s an opportunity to transform, personalize, and contribute to a more sustainable world. From the initial cut of old jeans to the final flourish of a secured pocket, each step brings you closer to a unique, handmade accessory. The joy of giving a personalized item, or carrying a bag you crafted yourself, is truly unmatched. I thoroughly enjoyed making this bag for my niece, and her delighted reaction was the best reward!
Now it’s your turn to unleash your creativity. Gather your materials, follow these steps, and don’t be afraid to add your personal touch. We hope you find as much satisfaction in this project as we did. Happy crafting, and enjoy your fantastic new upcycled denim bag!