
DIY Heart Tie Dye Shirt: Craft Your Own Wearable Art!
Are you looking for a fun, creative, and inexpensive way to refresh your wardrobe? Or perhaps searching for the perfect personalized gift that truly comes from the heart? Look no further than the iconic tie-dye heart shirt! This classic design is not only super stylish but also surprisingly simple to create, even if you’re a beginner in the world of fabric dyeing.
Many of us, myself included, have been captivated by the vibrant beauty of tie-dye, especially the charming heart pattern. The moment I saw a beautifully tie-dyed heart shirt, I knew I had to learn how to make one. What started as an exciting experiment quickly turned into a rewarding experience, proving that with a little guidance, anyone can achieve fantastic results. My own tie-dye heart t-shirt turned out absolutely awesome, bursting with the perfect blend of colors, and now it’s one of my favorite pieces to pair with white pants, a cute skirt, or classic jeans.
One of the biggest surprises for me was how much easier this craft was than I initially anticipated. I had my doubts about whether the heart shape would truly materialize, fearing it might just look like a blob of color. But with careful folding and tying, the heart emerged perfectly, a testament to the simplicity and effectiveness of the technique. If you’re ready to infuse some new life into an old tee or simply want to try your hand at a rewarding DIY project, now is the perfect time to dive into making your very own custom tie-dye heart shirt!
Why Choose a Tie-Dye Heart Shirt?
Beyond being a fantastic creative outlet, making a tie-dye heart shirt offers a multitude of benefits, making it an ideal project for crafters of all ages and skill levels:
Unleash Your Personal Style
In a world of mass-produced fashion, a handmade tie-dye shirt stands out. It’s a true expression of your unique personality and creativity. You get to choose your colors, experiment with their placement, and create a garment that is truly one-of-a-kind. No two tie-dye shirts are ever exactly alike, ensuring your piece is as individual as you are.
Budget-Friendly Wardrobe Refresh
Tired of your old, plain t-shirts? Don’t toss them! Tie-dyeing is an incredibly cost-effective way to upcycle existing garments and give them a vibrant new life. With just a few basic supplies, you can transform a collection of dull tees into an exciting array of colorful, fashionable tops, saving you money and contributing to sustainable fashion practices.
The Magic of the Double-Sided Heart
One of the coolest features of this particular tie-dye technique is that the beautiful heart pattern appears on both the front and back of the shirt! This creates a cohesive and striking design from every angle, elevating your craft from a simple front-facing design to a truly immersive piece of wearable art. It’s a clever trick that always impresses!
Perfect for Thoughtful, Handmade Gifts
Who doesn’t appreciate a handmade gift? A custom tie-dye heart shirt is a wonderfully thoughtful present for friends, family, or loved ones. It shows effort, creativity, and a personal touch that store-bought items simply can’t replicate. Imagine the delight on someone’s face receiving a vibrant, unique shirt made just for them!
A Fun and Engaging Activity
Tie-dyeing is more than just a craft; it’s an experience. It’s a fantastic activity for solo creative time, a fun project with kids, or a memorable group event. The process is tactile, visual, and provides a wonderful sense of accomplishment when you reveal your finished masterpiece. It’s messy, joyful, and incredibly satisfying!
Gather Your Essentials: Materials You’ll Need
Before you begin your colorful adventure, make sure you have all the necessary supplies on hand. Having everything ready will make the process smooth and enjoyable.
- 100% Cotton T-Shirt: A pre-washed, light-colored (white works best for vibrant results) cotton t-shirt is ideal. Natural fibers absorb dye best.
- Fabric Dyes: Choose your favorite colors! Liquid dyes are often easier for beginners, but powdered dyes also work. Look for kits that include dye, soda ash, and gloves.
- Soda Ash (Sodium Carbonate): This is crucial for pre-soaking your shirt to help the dye bond to the fabric and produce brighter, more vibrant colors. Often included in dye kits.
- Rubber Bands or String: Essential for tying your shirt into the heart shape. Have a variety of sizes.
- Plastic Squeeze Bottles: For applying liquid dye precisely.
- Plastic Wrap or Ziploc Bags: To wrap your dyed shirt while it cures.
- Rubber Gloves: To protect your hands from dye.
- Plastic Tablecloth or Drop Cloth: To protect your workspace from spills.
- Plastic Bucket or Tub: For pre-soaking the shirt in soda ash solution.
- Measuring Spoons and Cups: For mixing soda ash and dye solutions.
- Old Towels: For cleanup.
- A designated “Dyeing Area”: Outdoors or in a well-ventilated space is best.
Crafting Your Heart: A Step-by-Step Guide to Tie Dyeing
Now that you have all your supplies, let’s dive into the exciting process of creating your beautiful heart tie-dye shirt. Follow these steps carefully for the best results!
-
Step 1: Prepare Your Workspace
Lay down your plastic tablecloth or drop cloth in a well-ventilated area, preferably outdoors. This will protect your surfaces from dye splatters. Keep old towels handy for any spills. Wear old clothes that you don’t mind getting stained.
-
Step 2: Pre-Soak Your Shirt (Soda Ash Treatment)
Mix 1 cup of soda ash with 1 gallon of warm water in your plastic bucket. Stir until dissolved. Submerge your pre-washed (and still damp) t-shirt completely into the soda ash solution. Let it soak for at least 20 minutes to an hour. This step is vital for vibrant colors. After soaking, wring out the shirt thoroughly so it’s damp but not dripping. Do not rinse the soda ash out!
-
Step 3: Folding for the Heart Shape
Lay your damp shirt flat on your protected surface. Smooth out any wrinkles. Fold the shirt in half vertically, from one shoulder seam to the other. Make sure the sleeves and bottom hem are aligned. Now, starting from the folded edge, use a washable marker or chalk to draw half of a heart shape. The top curve of the heart should be near the armpit area, and the bottom point should extend towards the bottom hem. Don’t worry about perfection; a slightly imperfect heart adds character!
-
Step 4: Securing the Shape with Rubber Bands
Carefully gather the fabric along the line you drew for the half-heart shape. Pinch the fabric firmly and begin to wrap rubber bands tightly around this gathered line. Start from the top curve of the heart and work your way down to the point, placing rubber bands closely together. The tighter the bands, the crisper your heart outline will be. Ensure no loose fabric is sticking out from the rubber-banded section, as this will prevent a clean heart shape. Once the heart outline is secured, you can add more rubber bands to other sections of the shirt if you wish to create additional patterns or leave areas undyed.
-
Step 5: Mixing Your Dyes
Follow the instructions on your dye kit for mixing. Generally, you’ll add warm water to the powdered dye in squeeze bottles and shake well until dissolved. If using liquid dyes, they may be ready to use. Prepare each color in a separate squeeze bottle. Make sure to wear your rubber gloves during this and subsequent steps.
-
Step 6: Applying the Dye
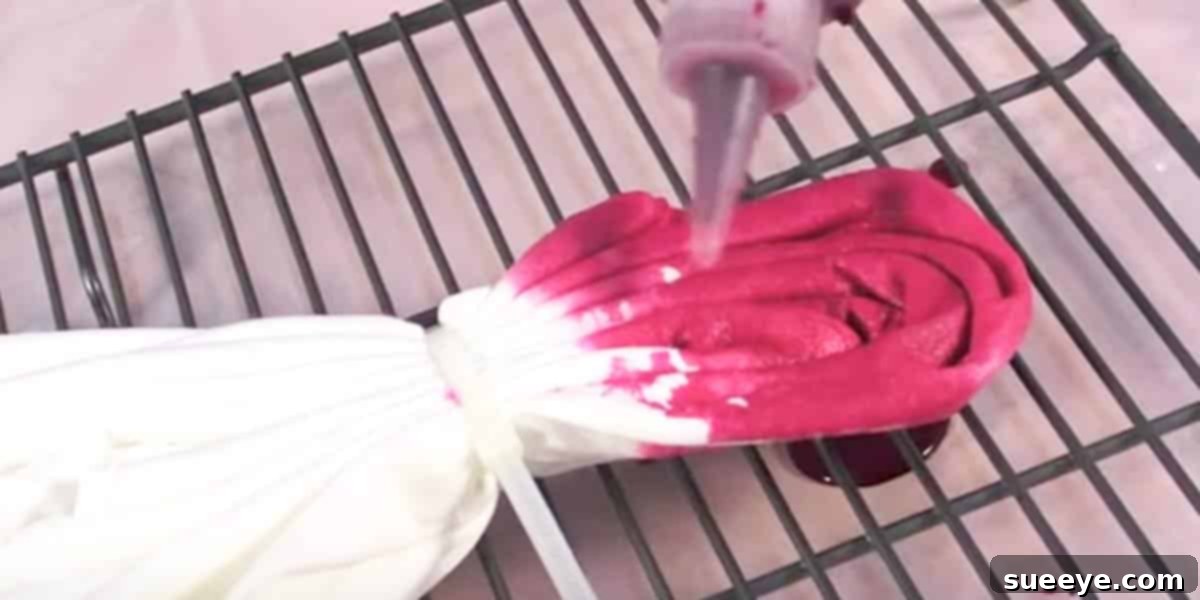
With your rubber-banded shirt ready, it’s time for the fun part! Apply your chosen dyes to the different sections of the shirt. For the heart, you’ll want to apply dye along the outside of the rubber-banded heart shape. For example, if you want a red heart, apply red dye to the fabric *inside* the banded area. Then, apply different colors to the surrounding sections of the shirt. Squeeze the dye deeply into the fabric, ensuring good saturation. Flip the shirt over and apply dye to the corresponding areas on the other side for an even, double-sided design. Be creative with your color placement, but try not to over-saturate to the point where colors bleed excessively before curing.
-
Step 7: Let it Set (Cure Time)
Once you’ve applied all your dyes, carefully place the entire dyed shirt into a plastic bag or wrap it tightly in plastic wrap. This creates a humid environment that allows the dye to fully set into the fabric. Let it cure for at least 6-24 hours. For more vibrant colors, you can leave it for up to 24 hours. Keep it in a warm place, away from direct sunlight.
-
Step 8: Rinse and Wash
After the curing time, put on your gloves and take the shirt out of the plastic. Go to a utility sink or an outdoor hose. Begin rinsing the shirt under cool running water while the rubber bands are still on. Continue rinsing until the water runs mostly clear. Then, carefully cut and remove all the rubber bands. Continue rinsing under cool water until absolutely no more dye is visible in the runoff. Finally, wash the shirt in a washing machine with a small amount of laundry detergent on a cold cycle, by itself, for the first wash to prevent dye transfer.
-
Step 9: Dry and Reveal
You can air dry your shirt or tumble dry it on a low setting. Once dry, admire your beautiful, handmade tie-dye heart shirt! It’s now ready to wear and show off.
Mastering the Art: Expert Tips for Flawless Hearts
To ensure your tie-dye heart shirt turns out spectacular every time, consider these helpful tips:
- Pre-Wash Your Shirt: Always wash new shirts before dyeing to remove any sizing or chemicals that might repel the dye.
- Damp vs. Dry: For most tie-dye techniques, a damp (but not wet) shirt pre-soaked in soda ash yields the best results. It allows the dye to spread and penetrate evenly.
- Quality Dyes Matter: Invest in good quality fiber-reactive dyes. They produce brighter, longer-lasting colors that won’t fade quickly.
- Color Theory Basics: If using multiple colors, consider a color wheel. Complementary colors (like blue and orange) can create muddy browns if they bleed together, while analogous colors (like blue, green, and yellow) often blend beautifully.
- Tight Ties for Crisp Lines: The tighter you wrap your rubber bands around the drawn heart shape, the more defined and crisp your heart outline will be. Loose ties lead to blurrier patterns.
- Don’t Be Afraid to Saturate: Ensure the dye fully penetrates the fabric. Squeeze the bottle firmly and apply dye to both sides of the shirt, especially around the tied areas.
- Patience During Curing: Don’t rush the curing process. The longer the dye has to react with the fabric (within the recommended timeframe), the more vibrant and permanent your colors will be.
- Rinse Until Clear: This is a crucial step to prevent excess dye from bleeding onto other clothes in future washes. Be thorough!
- Safety First: Always work in a well-ventilated area, wear gloves, and protect your surfaces. Dye can permanently stain.
- Embrace Imperfection: Part of the charm of tie-dye is its organic nature. Don’t stress if your heart isn’t perfectly symmetrical; it adds to its unique handmade appeal!
Beyond the Heart: Expanding Your Tie-Dye Horizons
Once you’ve mastered the heart pattern, a whole world of tie-dye possibilities opens up! The techniques you learned here can be adapted to create a myriad of other stunning designs. Experiment with classic spiral patterns, the mesmerizing bullseye, crumple techniques for an organic look, or even simple stripes. Don’t limit yourself to just t-shirts; tie-dye socks, tote bags, hoodies, bandanas, bedsheets, or even curtains! Pinterest is an excellent resource for endless inspiration and instructions for new techniques. Soon, you’ll be a pro at transforming ordinary textiles into extraordinary works of art.
Conclusion: Wear Your Heart on Your Sleeve!
Creating your own tie-dye heart shirt is a wonderfully rewarding journey into the world of DIY fashion. It’s an accessible craft that allows you to express your creativity, refresh your wardrobe, and even create heartfelt gifts, all while having a fantastic time. The satisfaction of taking a plain t-shirt and transforming it into a vibrant, personalized masterpiece is truly unparalleled. So, gather your supplies, follow these steps, and get ready to proudly wear your heart on your sleeve – literally! Your unique, handmade tie-dye creation is waiting to be unveiled.