
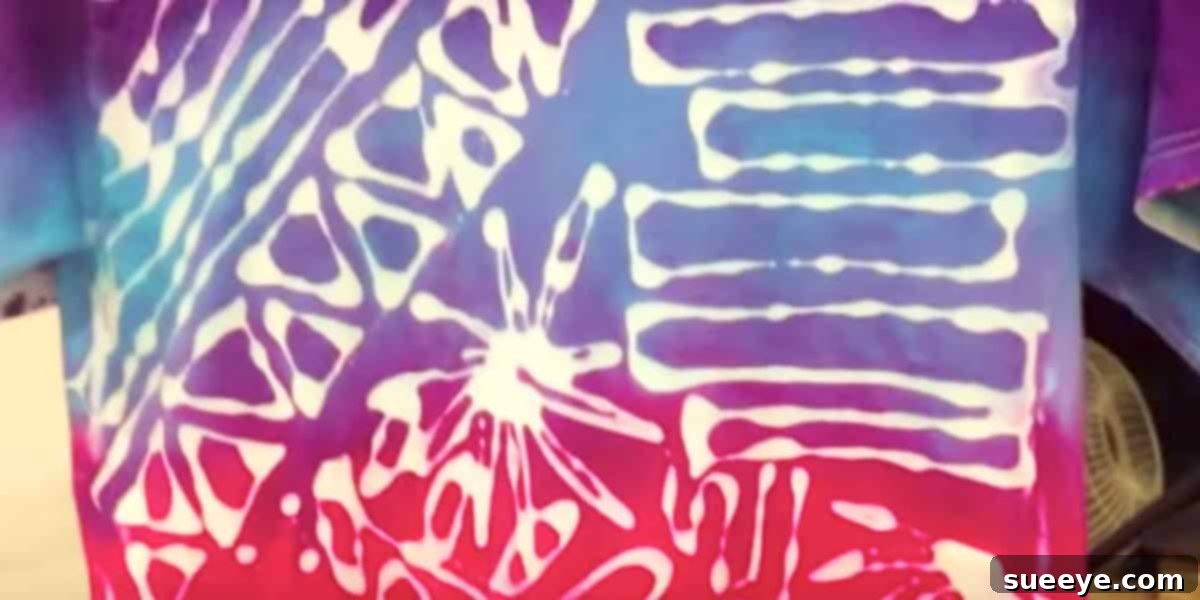
Mastering Glue Batik: Unleash Your Creativity with Fabric Art
Embark on a vibrant journey into the world of fabric art with glue batik, a modern and accessible take on the ancient craft of textile dyeing. Inspired by the rich traditions of Indonesian batik, this innovative technique allows you to create stunning, personalized designs on various fabrics without the need for hot wax. Whether you’re a seasoned crafter or a curious beginner, glue batik offers a safe, fun, and incredibly rewarding way to express your unique style and transform ordinary items into extraordinary pieces of wearable or decorative art.
The Roots of Inspiration: Understanding Traditional Batik
To truly appreciate glue batik, it’s helpful to understand its origins. Traditional batik, a highly revered textile art form, hails primarily from Indonesia, where it boasts a history stretching back centuries. Artisans meticulously craft these fabrics by hand, employing a resist-dyeing process that utilizes wax. A design is carefully drawn or stamped onto a cloth with molten wax, which then acts as a barrier, preventing vegetable dyes from penetrating the covered areas. Once the dyeing process is complete, the wax is removed, revealing intricate patterns and vibrant colors.
Beyond its aesthetic appeal, traditional batik carries profound symbolic meanings embedded within its colors, motifs, and patterns. These designs often reflect elements of nature, folklore, spirituality, and cultural narratives, serving as a powerful medium for personal expression and a visual language connecting people to their heritage. From ceremonial garments to everyday attire, batik has always been more than just fabric; it’s a canvas for stories, beliefs, and artistic creativity. Its cultural significance is immense, often passed down through generations, making each piece a testament to skill, patience, and tradition.
Introducing Glue Batik: A Safe and Simple Alternative
Recognizing the beauty and potential of batik, modern crafters have devised a brilliant adaptation: glue batik. This ingenious method substitutes hot wax with readily available, washable craft glues, making the technique significantly safer, especially for projects involving children or those new to fabric dyeing. The core principle remains the same – using a resist to create patterns – but the medium has changed, opening up a world of possibilities for DIY enthusiasts seeking a less intimidating approach to textile design.
Instead of the specialized tools and careful handling required for hot wax, glue batik leverages products like Aleene’s Tacky Glue or blue Elmer’s gel glue. These glues possess the perfect consistency to be applied to fabric, create clear lines, and, crucially, wash out completely once your project is dry and heat-set. This accessibility makes glue batik an ideal entry point for anyone wishing to explore textile design without the intimidation factor of traditional methods, offering a straightforward path to achieving similar captivating resist effects with minimal fuss.
Essential Materials for Your Glue Batik Project
Before diving into creation, gathering the right materials is key. The beauty of glue batik lies in its simplicity and the affordability of its components. Here’s a comprehensive list to get you started on your next creative endeavor:
- Fabric: Natural fibers work best for absorbing paint and dyes effectively. Think plain, light-colored items such as 100% cotton t-shirts, canvas tote bags, linen pillowcases, aprons, summer dresses, or bandanas. You can also purchase cotton fabric by the yard and cut it into desired sizes – a small piece can later be framed as unique artwork, or a larger sheet can be sewn into banners, flags, or even a custom tablecloth. Always pre-wash and dry new fabric to remove any sizing agents that might resist paint absorption.
- Washable Craft Glue: This is your primary resist medium. Aleene’s Tacky Glue is highly recommended for its excellent consistency, strong adhesion while wet, and complete washability once dry. Blue Elmer’s gel glue is another fantastic option, offering good visibility as you apply it, which can be helpful for intricate designs. Most good quality, washable school glues can also work, but ensure they are thick enough to hold their shape and create a clear barrier on the fabric.
- Fabric Paints or Dyes: Choose high-quality fabric paints specifically designed for textiles. Acrylic fabric paints are often easier for beginners as they are applied directly and dry quickly. If you’re aiming for a more traditional “batik” look with softer blends, cold-water fabric dyes can be used, though their application process (often involving soaking or sponging) differs from paints. Select a palette of colors that truly reflects your personality and the design vision for your project.
- Paint Brushes or Applicators: A variety of brush sizes can be useful for different levels of detail and coverage. Small, fine-tipped brushes are great for intricate areas, while larger flat brushes or foam brushes can cover broader sections efficiently. Sponges can also create interesting textural effects when applying paint.
- Cardboard or Plastic Insert: Absolutely essential when working on items with multiple fabric layers like t-shirts, pillowcases, or bags. Placing a barrier inside prevents the glue and fabric paint from bleeding through to the back side of the fabric, ensuring a clean finish.
- Protective Surface Cover: Lay down old newspapers, a plastic tablecloth, or a dedicated craft mat to protect your work area from any accidental spills or drips of glue or paint.
- Pencil/Fabric Marker: For lightly sketching your design onto the fabric before you begin applying the glue. A washable fabric marker is ideal as any remaining marks will disappear.
- Iron: Many fabric paints require heat-setting to become permanent and washable. Check the instructions on your specific fabric paint to confirm if this step is necessary.
- Washing Machine or Sink: For washing out the dried glue once your project is complete and the paint is set.
Your Step-by-Step Guide to Creating Glue Batik Art
Ready to transform your fabric? Follow these easy, step-by-step instructions to create your own unique glue batik masterpiece. Patience is a virtue in this craft, especially during drying times, but the results are incredibly rewarding.
Step 1: Prepare Your Fabric
Always begin with clean, dry fabric. If you’re using new fabric or a new item of clothing, pre-wash and dry it to remove any sizing or factory finishes. These finishes can sometimes prevent the glue or paint from adhering properly, leading to uneven results. Lay your fabric flat and smooth on your protected work surface. If you’re working on a t-shirt, pillowcase, or bag, remember to insert a piece of cardboard or plastic between the layers to prevent any glue or paint from seeping through to the other side.
Step 2: Design Your Pattern
This is where your creativity truly shines! You have several options for creating your design. You can lightly sketch your desired pattern directly onto the fabric using a pencil or a washable fabric marker. Consider geometric patterns, abstract shapes, intricate floral motifs, animal silhouettes, or even meaningful text and quotes. Alternatively, you can work freehand, allowing your artistic instincts to guide you, or use stencils for more complex or repetitive designs. Remember, the glue will define the areas that remain the original fabric color, so think carefully about the positive and negative spaces in your design.
Step 3: Apply the Glue Resist
Carefully apply your chosen washable craft glue along your sketched lines or freehand design. Squeeze the glue bottle gently and steadily to create consistent lines. The thickness of the glue line is important: a line that is too thin might allow the paint to seep underneath, while a line that is too thick will take considerably longer to dry. Aim for a medium, raised line that forms a clear barrier. Ensure all areas you want to remain the original fabric color are completely covered by the glue. Once your design is complete, allow the glue to dry completely. This is a critical step that cannot be rushed; depending on the thickness of the glue application and the humidity, it can take anywhere from 12 to 24 hours, or even longer. The glue must be fully dry and transparent/solid before proceeding to the next step.
Step 4: Apply Fabric Paint or Dye
Once the glue is completely dry and cured, it’s time to introduce color! If you’re using fabric paints, carefully paint the areas within your glue lines. You can use multiple colors, blend them, or create beautiful gradients. Be mindful not to paint directly over the dried glue lines themselves, as this can make the glue harder to wash out later. If you’re working with fabric dyes, you might submerge portions of the fabric into dye baths or apply the dye with sponges, allowing it to wick into the unglued areas. Let your painted or dyed fabric dry completely according to the paint or dye manufacturer’s instructions. This usually takes several hours, and rushing it can compromise the final result.
Step 5: Heat Set Your Design (If Required)
Many fabric paints require heat setting to become permanent, durable, and washable. Once the paint is thoroughly dry, carefully remove the cardboard insert from your item. Place a thin cloth or a piece of parchment paper over your design to protect it, then iron the design on the recommended heat setting (usually medium to high, without steam) for the duration specified by your paint’s instructions. This crucial step ensures your beautiful colors won’t fade or wash out with subsequent laundering.
Step 6: Wash Out the Glue
Now for the most exciting part – the magic reveal! After heat setting (if applicable) and allowing the fabric to cool completely, it’s time to remove the dried glue. Gently place your fabric item into a washing machine. Use cold water on a gentle cycle. For best results, avoid overloading the machine. You might need to run it through a rinse cycle once or twice to ensure all glue residue is completely gone. Alternatively, you can hand-wash the item in a sink with cold water, gently rubbing the areas where the glue was applied until it dissolves and washes away. Hang or lay flat to air dry, or tumble dry on low heat. As the glue washes away, the areas it covered will miraculously reveal the original fabric color, creating the striking resist effect you envisioned. Witnessing this transformation is truly satisfying!
Unleashing Creativity: Endless Possibilities with Glue Batik
The versatility of glue batik extends far beyond just t-shirts, offering a fantastic way to personalize a wide array of items and transform various types of fabric into unique artistic expressions. Here are just a few ideas to spark your imagination and help you explore the boundless potential of this captivating technique:
- Wearable Art: Go beyond basic t-shirts. Imagine customizing plain canvas shoes, denim jackets, everyday aprons, light summer dresses, baby onesies for a unique gift, or even lightweight cotton scarves. This method allows you to create matching outfits for family events, personalized team wear, or custom gifts that truly stand out.
- Home Decor: Elevate your living space with custom-made items. Craft unique pillowcases that match your interior design, design placemats for a special dining experience, create a vibrant table runner, or transform a simple piece of fabric into a stunning wall hanging. You can cut canvas or cotton fabric into any desired size; a small piece can be framed as captivating artwork, while a larger sheet can be sewn into personalized banners, decorative flags, or a truly distinct tablecloth that reflects your personal style.
- Accessories: Design your own personalized tote bags for shopping or daily use, create small pouches for organizing essentials, craft stylish bandanas, or even create custom fabric for sewing into unique scrunchies or headbands. These make excellent personalized gifts or items for craft fairs.
- Gifts and Special Occasions: Hand-crafted glue batik items make exceptionally thoughtful and memorable gifts for birthdays, holidays, anniversaries, or special achievements. Customize a baby blanket with unique motifs, personalize a school bag for a child, or create a unique piece of apparel that truly reflects the recipient’s personality and passions.
- Thematic Projects: Explore specific themes that resonate with you. This could include nature-inspired designs (leaves, flowers, animals, landscapes), abstract art (swirls, geometric shapes, splashes of color), intricate mandalas, meaningful quotes, or symbols that hold personal significance. The resist technique lends itself beautifully to both bold, graphic designs and intricate detailing.
Tips for Achieving the Best Glue Batik Results
To ensure your glue batik projects turn out beautifully every time and to minimize potential challenges, keep these expert tips in mind. A little extra care and attention to detail can make a significant difference in the final outcome:
- Choose the Right Fabric: Natural fibers like 100% cotton, linen, rayon, or blends with a high percentage of natural fibers absorb paint and dyes most effectively, yielding vibrant and consistent results. Avoid pure synthetics like polyester, which often repel water-based paints and glues, leading to patchy or less defined designs.
- Practice Makes Perfect: If you’re new to applying glue in a precise manner, it’s highly recommended to practice on a scrap piece of fabric first. This will help you get a feel for the pressure needed to create consistent lines and master the flow of the glue, ensuring more confident application on your main project.
- Patience with Drying: This is perhaps the most crucial tip. Resist the urge to rush the drying process for both the glue and the paint. Incomplete drying can lead to several problems: the glue might smudge, bleed under the paint, or fail to wash out properly, leaving sticky residue. Allow ample time for each layer to dry thoroughly.
- Color Planning: Plan your color scheme beforehand. Consider how different colors will interact with each other and how they will appear against the original fabric color that is revealed by the glue. Experimenting with color swatches on a scrap piece of fabric can be very helpful.
- Work in a Well-Ventilated Area: Especially when using certain fabric paints or dyes, ensure you are working in a space with good airflow. This helps with drying and disperses any fumes that might be present.
- Clean Up Spills Quickly: If you accidentally get glue or paint where you don’t want it, try to gently dab it off with a damp cloth immediately, before it has a chance to dry and set into the fabric.
- Embrace Imperfection: Part of the unique charm of handmade crafts, especially a resist-dyeing technique like batik, is the slight variations, “happy accidents,” and unique character that naturally emerges. Don’t strive for absolute factory perfection; instead, enjoy the creative process and celebrate the individuality of your hand-crafted piece!
The Benefits of Embracing Glue Batik
Beyond creating stunning fabric art, engaging in glue batik offers a multitude of personal and creative benefits. It’s more than just a craft; it’s an experience that enriches your life in various ways:
- Accessible for All Ages: Its non-toxic nature and avoidance of hot wax make glue batik a fantastic, safe craft for children, families, and individuals of all skill levels. It’s an excellent activity for school projects, family craft nights, or senior crafting groups.
- Fosters Creativity and Self-Expression: Glue batik provides an open-ended canvas for personal style, allowing you to translate your unique ideas, passions, and personality into tangible, wearable, or decorative art. It encourages innovative thinking and artistic exploration.
- Cost-Effective Hobby: With readily available and affordable glues and fabric paints, it’s an inexpensive way to explore textile design without investing in expensive specialized equipment or materials often associated with traditional batik.
- Develops Fine Motor Skills: The precise application of glue and paint helps improve hand-eye coordination, dexterity, and control, making it beneficial for both children and adults.
- Sustainable Crafting: Glue batik offers a wonderful opportunity to repurpose old t-shirts, worn denim, or fabric scraps, giving them a new lease on life and contributing to a more sustainable, eco-friendly approach to crafting by reducing waste.
- Creates Unique Personalized Items: The handmade nature of glue batik means every item you create is truly one-of-a-kind. These unique pieces cannot be replicated by mass production, making them perfect for personalized gifts or adding a distinctive touch to your wardrobe and home decor.
Caring for Your Glue Batik Creations
Once your glue batik item is complete and thoroughly dry, proper care will ensure its longevity and preserve its vibrant appearance. Always refer to the specific care instructions for the fabric paints or dyes you used, as recommendations can vary. Generally, however, following these guidelines will help maintain your beautiful creations:
- Washing: For the first few washes, it’s often advisable to wash your glue batik item separately or with similar colors to prevent any potential slight color bleeding, especially if you used dyes. Always use cold water and a gentle cycle to protect the painted design and the integrity of the fabric.
- Detergent: Opt for a mild detergent. Avoid harsh chemicals, strong stain removers, or bleach, as these can strip colors, fade your design, and potentially damage the fabric fibers.
- Drying: For best results and to minimize fading, air dry your glue batik items by laying them flat on a clean surface or hanging them. If you must use a dryer, choose a low heat setting and remove the item as soon as it is dry to minimize exposure to heat, which can sometimes affect fabric paints over time.
- Ironing: If ironing is necessary, turn the item inside out or place a pressing cloth (a thin piece of cotton fabric or parchment paper) over the design to protect it from direct heat. Use a medium-low iron setting and avoid prolonged contact with the design area.
Start Your Glue Batik Adventure Today!
Glue batik is more than just a craft; it’s an invitation to explore textile design in an easy, enjoyable, and safe manner. From transforming a simple t-shirt into a unique statement piece to creating distinctive home decor accents, the possibilities are limited only by your imagination. The accessibility of materials and the straightforward process make it an ideal hobby for anyone looking to infuse their world with more color and personal flair. So gather your materials, choose a design that speaks to you, and immerse yourself in the delightful process of creating personalized fabric art. The satisfaction of wearing, using, or displaying your own hand-crafted glue batik masterpiece is an experience you won’t soon forget. Happy crafting!