
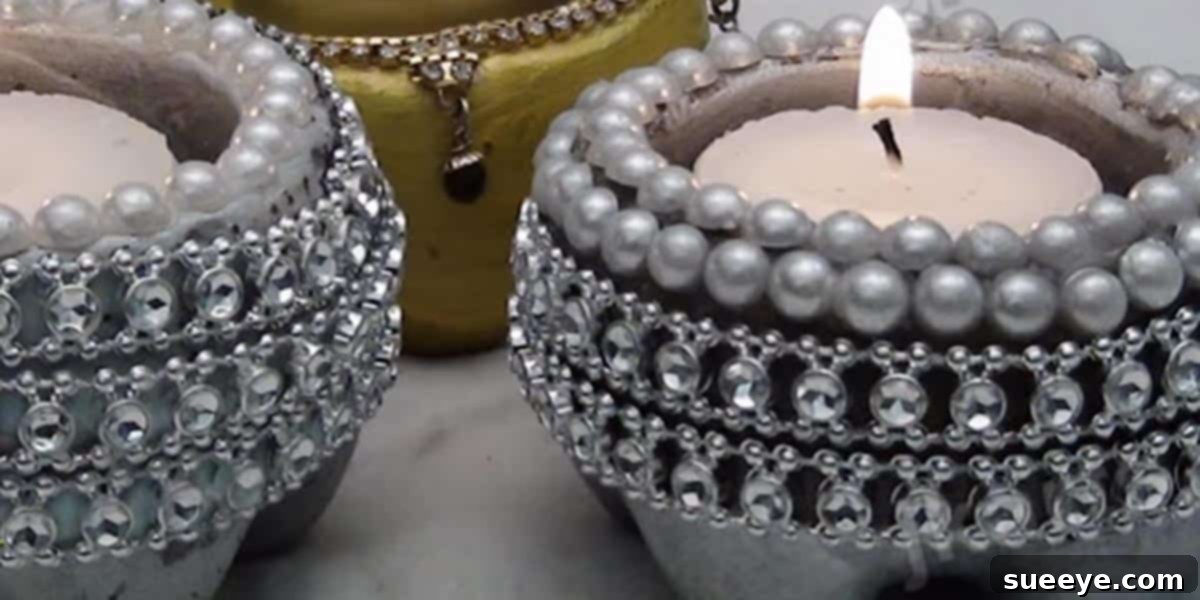
DIY Concrete Tea Light Candle Holders: Your Guide to Modern Industrial Decor
Have you ever considered the versatile potential of concrete beyond its traditional outdoor applications? What was once solely reserved for driveways and patios is now making a profound statement in interior design. The distinctive, sleek, and robust industrial aesthetic of concrete projects has seamlessly transitioned indoors, transforming mundane spaces into captivating showcases of modern artistry. If you’re captivated by this trend and eager to infuse your home with unique, handcrafted elements, you’ve landed in the perfect spot. These DIY concrete tea light candle holders are not just a craft project; they’re an entry point into the exciting world of concrete decor, ideal for anyone looking to add a touch of minimalist elegance to their living space.
The allure of concrete lies in its raw, unfiltered beauty and its surprising adaptability. It offers an unparalleled blend of durability and understated sophistication that complements a wide array of interior styles, from contemporary minimalist to rustic chic. Crafting your own concrete pieces allows for endless customization, ensuring that your decor is truly one-of-a-kind. These tea light holders, in particular, serve as an excellent beginner project, providing a hands-on introduction to working with concrete without the need for complex tools or extensive prior experience. Imagine the satisfaction of creating beautiful, functional decor pieces with your own hands, pieces that are guaranteed to spark conversation among your guests.
Why Choose DIY Concrete Candle Holders? The Benefits of Cement Crafts
Opting to craft your own concrete tea light candle holders comes with a plethora of advantages that extend far beyond simple cost savings. Here’s why this DIY project is an absolute must for anyone keen on enhancing their home decor:
- Unmatched Uniqueness: Unlike mass-produced items, your handmade concrete candle holders will possess an inherent individuality. Each pour, each subtle imperfection, contributes to a distinct character that cannot be replicated, ensuring your decor stands out.
- Cost-Effective Decor: High-end concrete decor often comes with a hefty price tag. By going the DIY route, you can achieve a similar sophisticated look for a fraction of the cost, making stylish living accessible on any budget.
- Customization at Your Fingertips: From the initial mold shape to the final decorative touches, you have complete creative control. You can tailor these candle holders to perfectly match your existing decor, desired color scheme, or personal aesthetic.
- Durability and Longevity: Concrete is renowned for its incredible strength and resilience. These candle holders are built to last, offering enduring beauty and functionality for years to come.
- A Sense of Accomplishment: There’s immense satisfaction in creating something beautiful and functional with your own hands. This project offers a rewarding experience, boosting your confidence in DIY endeavors.
- Modern Industrial Appeal: Concrete effortlessly delivers that coveted industrial-chic vibe, adding a contemporary edge and textural interest to any room. It’s a bold statement that speaks volumes about your refined taste.
Gathering Your Materials: What You’ll Need for Your Concrete Project
Embarking on your DIY concrete journey requires a few essential supplies. Most of these can be easily found at your local hardware store or craft shop. Preparing everything in advance will ensure a smooth and enjoyable crafting process:
- Quick-Setting Cement or Concrete Mix: For small projects like candle holders, a fine-grain, quick-setting cement mix is ideal. This type of mix often includes sand and aggregates, making it suitable for molding. Look for options specifically labeled for crafts or patching.
- Water: Essential for mixing with the cement to create a workable paste.
- Disposable Mixing Container: An old plastic bucket, a sturdy disposable bowl, or a similar container will work perfectly for mixing your concrete.
- Mixing Tool: A trowel, a sturdy stick, or even an old spoon can be used to thoroughly mix the cement and water.
- Molds: This is where your creativity truly shines! You’ll need two types of molds:
- Outer Molds: These determine the overall shape of your candle holder. Think small plastic containers, silicone molds (for baking or resin), empty yogurt cups, plastic drink bottles cut to size, or even small cartons.
- Inner M Molds: These create the recess for the tea light candle. Votive candle glass inserts, small shot glasses, or even small plastic condiment cups can serve this purpose. Ensure they are slightly larger than a standard tea light.
- Release Agent: This is crucial for easy demolding. WD-40, cooking oil spray, petroleum jelly, or a dedicated mold release agent will prevent the concrete from sticking to your molds.
- Safety Gear: Always prioritize safety when working with concrete. This includes gloves (to protect your skin from the alkaline nature of cement) and a dust mask (to avoid inhaling cement dust).
- Sandpaper: Various grits (e.g., 100-grit, 220-grit) for sanding and smoothing edges once the concrete has cured.
- Optional: Sealant: A concrete sealer can protect your finished candle holders from moisture and enhance their appearance.
- Optional: Decorative Elements: Paints, metallic sprays, stencils, glitter, or other embellishments for personalizing your finished pieces.
Step-by-Step Tutorial: Crafting Your Concrete Tea Light Holders
Now that you have all your materials, let’s dive into the exciting process of creating your very own concrete tea light candle holders. Follow these steps carefully for the best results:
Step 1: Prepare Your Workspace and Molds
Before you begin mixing, set up a well-ventilated workspace, preferably outdoors or in a garage, and lay down some old newspapers or a drop cloth to protect surfaces. Don your safety gloves and dust mask. Next, prepare your molds. Lightly spray the inside of your outer mold and the outside of your inner mold with WD-40 or your chosen release agent. Ensure an even coating, as this step is vital for easy removal once the concrete has dried. This simple step, as recommended by crafters like JK Arts, significantly reduces the effort required for demolding.
Step 2: Mix the Concrete
In your disposable mixing container, carefully combine the concrete mix with water according to the manufacturer’s instructions. This is a critical step; too much water will weaken the concrete, and too little will make it unworkable. Aim for a consistency similar to thick pancake batter or peanut butter – smooth, but not runny. Mix thoroughly to eliminate any lumps, ensuring all the dry powder is incorporated. A consistent mix is key to achieving a strong, uniform finish.
Step 3: Pour the Concrete into the Outer Mold
Once your concrete is perfectly mixed, carefully pour it into your prepared outer mold. Fill the mold about halfway, then gently tap the mold on your work surface a few times. This helps to release any trapped air bubbles, resulting in a denser and smoother finish. After tapping, fill the mold nearly to the top, leaving enough space for the inner mold.
Step 4: Insert the Inner Mold
Gently press your prepared inner mold (the one creating the tea light recess) into the center of the wet concrete. Push it down until it reaches the desired depth, ensuring there’s a good amount of concrete beneath it. Be careful not to press it all the way to the bottom, as you need a solid base for your candle holder. The concrete will likely rise around the sides of the inner mold. Adjust its position to ensure it’s centered and level. You can use a weight inside the inner mold (like pebbles or coins) to prevent it from floating up as the concrete sets.
Step 5: Cure the Concrete
Now comes the waiting game. Allow the concrete to cure for the time recommended on your specific concrete mix packaging, which can range from a few hours to 24-48 hours. During this period, keep the molds in a stable, temperate environment away from direct sunlight or extreme temperatures. For optimal strength, some concrete types benefit from being kept slightly damp during the initial curing phase, so you might lightly mist them with water occasionally, though for small crafts, this isn’t always strictly necessary.
Step 6: Demold Your Candle Holders
Once the curing time has passed, it’s time for the exciting reveal! Carefully remove the inner mold first. Twist it gently and pull it straight up. Then, carefully demold the outer concrete piece. If you used WD-40, this step should be relatively easy. If it’s a bit stubborn, you can try gently prying the edges or flexing the mold. Be patient and avoid forcing it, which could damage your newly formed candle holder.
Step 7: Finishing Touches and Decoration
After demolding, your concrete candle holders might have some rough edges or small imperfections. Use sandpaper (starting with a coarser grit and moving to a finer one) to smooth out any sharp edges or bumps. Dust off any concrete residue. At this stage, your candle holders are ready for personalization. You could leave them in their natural grey state for a minimalist look, or explore a myriad of decoration options to make them truly yours.
Unleashing Your Creativity: Endless Decorating Possibilities
The beauty of these concrete candle holders lies not only in their raw form but also in the vast potential for embellishment. Once the concrete is fully dry and sanded, your decorating options are virtually limitless. Here are some inspiring ideas to transform your creations:
- Paint Power: A simple coat of acrylic or spray paint can dramatically change the look. Consider matte black for a sophisticated edge, crisp white for a modern minimalist vibe, or vibrant colors for a pop of personality. Metallic paints (gold, copper, silver) can add a luxurious touch.
- Geometric Patterns: Use painter’s tape to create sharp, geometric designs. Paint different sections in contrasting colors or metallics for a contemporary abstract look.
- Sealing for Shine and Protection: Applying a concrete sealer can deepen the color of the concrete, add a subtle sheen, and protect it from stains and moisture, especially if you plan to use them outdoors.
- Natural Elements: Adhere small pebbles, dried flowers, or even small pieces of driftwood to the exterior for an organic, earthy feel.
- Glitter and Glam: For a festive or whimsical touch, apply a layer of craft glue and sprinkle with fine glitter.
- Stenciling: Use stencils to add intricate patterns, monograms, or inspiring words to your candle holders.
- Marbling Effect: If you’re feeling adventurous, experiment with mixing different colored concrete pigments into your mix for a marbled or speckled finish.
- Etching or Carving: For more advanced crafters, a Dremel tool can be used to etch patterns or names into the cured concrete, adding a truly personalized touch.
I was truly impressed, just like the original inspiration from JK Arts, with how versatile and unique these candle holders are once adorned. You are truly guaranteed to have a guest comment on them, admiring your craftsmanship and eye for design. The options for personalizing your creations are so varied, ensuring that your final pieces perfectly reflect your individual style and complement your home’s aesthetic.
Tips for Success and Troubleshooting Common Issues
To ensure your concrete candle holder project goes smoothly, keep these helpful tips in mind:
- Work in Batches: If you’re making multiple holders, mix smaller batches of concrete. Quick-setting mixes can become unworkable quickly.
- Ventilation is Key: Always work in a well-ventilated area to avoid inhaling cement dust.
- Clean Tools Immediately: Wash your mixing container and tools with water immediately after use, before the concrete has a chance to harden.
- Be Patient with Curing: Rushing the demolding process can lead to broken or damaged pieces. Allow ample curing time.
- Don’t Over-Water: A common mistake is adding too much water, which weakens the concrete and can lead to a crumbly finish. Always follow the manufacturer’s guidelines for water-to-mix ratio.
- Air Bubbles: Tapping the mold on the work surface is effective, but for really smooth finishes, a vibrating table (or improvising one with a sander) can help eliminate more air bubbles.
- If a Mold Sticks: If a piece is difficult to demold, try placing it in the freezer for a short while (20-30 minutes). The concrete and plastic will contract at different rates, sometimes helping with release.
Beyond Tea Lights: Expanding Your Concrete Crafting Skills
Once you’ve mastered the art of making concrete tea light holders, you’ll likely find yourself inspired to explore more complex concrete projects. The principles learned here – mixing, molding, curing, and finishing – are transferable to a wide range of DIY concrete decor items. Consider making larger planters, coasters, small decorative bowls, bookends, or even tabletops. Concrete’s raw elegance lends itself beautifully to almost any home accessory, offering endless opportunities to express your creativity and enhance your living space with truly distinctive pieces.
Conclusion: Embrace the Industrial Chic with DIY Concrete
The journey from a bag of concrete mix to a stunning, personalized tea light candle holder is incredibly rewarding. These DIY concrete projects are more than just crafts; they are an invitation to embrace modern industrial aesthetics and inject your home with a unique character that only handmade items can provide. With a few simple materials, a dash of creativity, and the step-by-step guidance provided here, you can effortlessly create beautiful and durable decor that reflects your personal style. So, gather your materials, put on your crafting hat, and get ready to transform humble cement into captivating pieces of art. Your home, and your guests, will surely thank you for it!